This the multi-page printable view of this section. Click here to print.
Plugins
- 1: About Plugin
- 2: Developer Guide
- 2.1: Plugin Interface
- 2.2: Plugin Register
- 2.3: Plugin Deployment
- 2.4: Plugin Debugging
- 3: Plugin Designs
- 4: Collector
1 - About Plugin
About Plugin
A plugin is a software add-on that is installed on a program, enhancing its capabilities.
The Plugin interface pattern consists of two types of architecture components: a core system and plug-in modules. Application logic is divided between independent plug-in modules and the basic core system, providing extensibility, flexibility, and isolation of application features and custom processing logic
Why Cloudforet use a Plugin Interface
- Cloudforet wants to accommodate various clouds on one platform. : Multi-Cloud / Hybrid Cloud / Anything
- We want to be with Cloudforet not only in the cloud, but also in various IT solutions.
- We want to become a platform that can contain various infrastructure technologies.
- It is difficult to predict the future direction of technology, but we want to be a flexible platform that can coexist in any direction.
Integration Endpoints
| Micro Service | Resource | Description |
|---|---|---|
| Identity | Auth | Support Single Sign-On for each specific domain ex) OAuth2, ActiveDirectory, Okta, Onelogin |
| Inventory | Collector | Any Resource Objects for Inventory ex) AWS inventory collector |
| Monitoring | DataSource | Metric or Log information related with Inventory Objects ex) CloudWatrch, StackDriver ... |
| Monitoring | Webhook | Any Event from Monitoring Solutions ex) CPU, Memory alert ... |
| Notification | Protocol | Specific Event notification ex) Slack, Email, Jira ... |
2 - Developer Guide
Plugin can be developed in any language using Protobuf.
This is because both Micro Service and Plugin communication use Protobuf by default. The basic structure is the same as the server development process using the gRPC interface.
When developing plugins, it is possible to develop in any language (all languages that gRPC interface can use), but
If you use the Python Framework we provide, you can develop more easily.
All of the currently provided plugins were developed based on the Python-based self-developed framework.
For the basic usage method for Framework, refer to the following.
The following are the development requirements to check basically when developing a plugin, and you can check the detailed step-by-step details on each page.
2.1 - Plugin Interface
First, check the interface between the plugin to be developed and the core service. The interface structure is different for each service. You can check the gRPC interface information about this in the API document. (SpaceONE API)
For example, suppose we are developing an Auth Plugin for authentication of Identity.
At this time, if you check the interface information of the Auth Plugin, it is as follows. (SpaceONE API - Identity Auth)
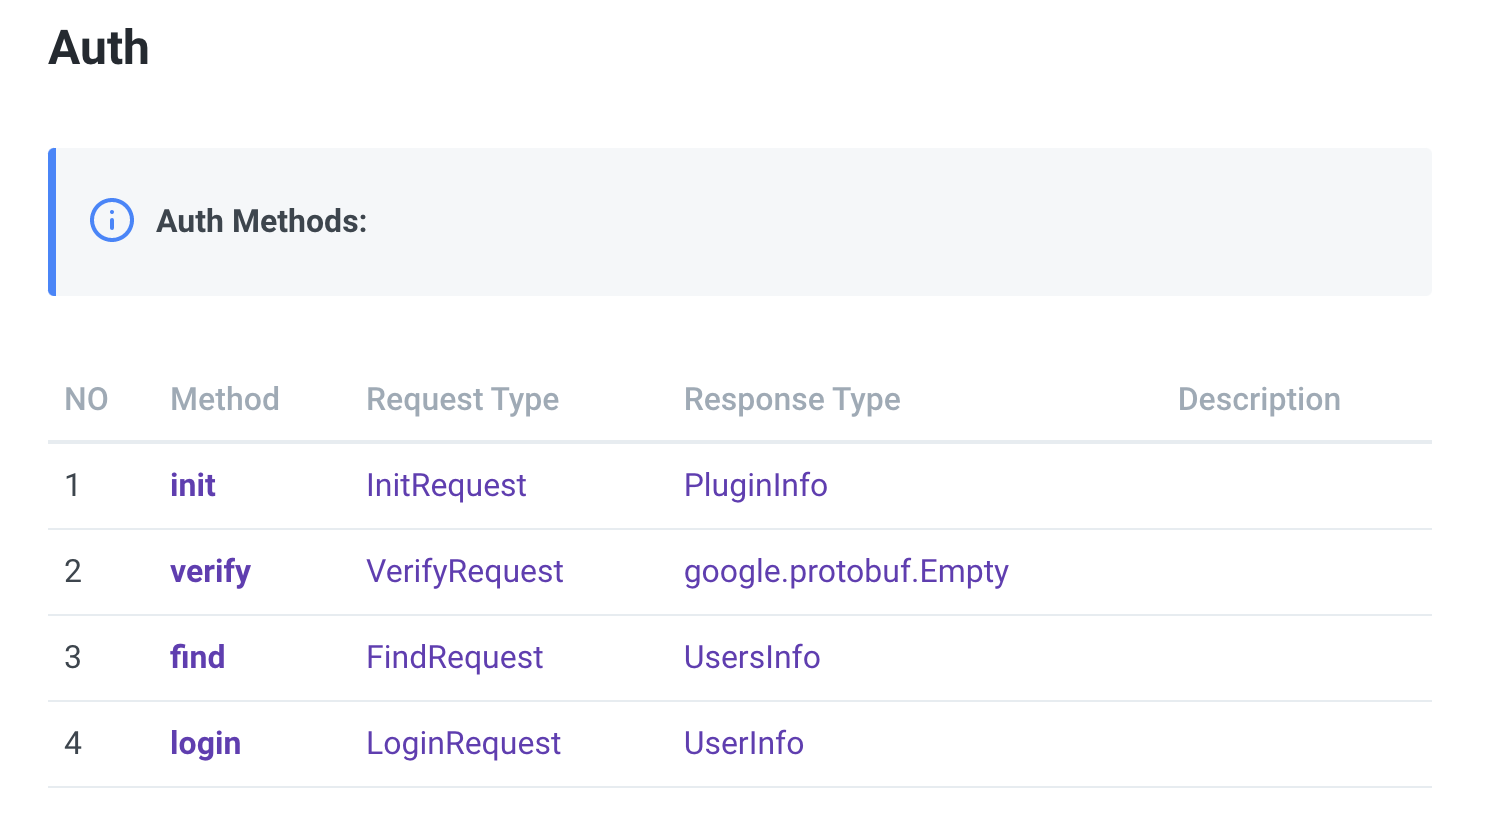
In order to develop Identity Auth Plugin, a total of 4 API interfaces must be implemented.
Of these, init and verify are intefaces that all plugins need equally,
The rest depends on the characteristics of each plugin.
Among them, let's take a closer look at init and verify, which are required to be implemented in common.
1. init
Plugin initialization.
In the case of Identity, when creating a domain, it is necessary to decide which authentication to use, and the related Auth Plugin is distributed.
When deploying the first plugin (or updating the plugin version), after the plugin container is created, the Core service calls the init API to the plugin.
At this time, the plugin returns metadata information required when the core service communicates with the plugin.
Information on metadata is different for each Core service.
Below is an example of python code for init implementation of Google oAuth2 plugin.
Metadata is returned as a return value, and at this time, various information required by identity is added and returned.
    @transaction
    @check_required(['options'])
    def init(self, params):
        """ verify options
        Args:
            params
              - options
        Returns:
            - metadata
        Raises:
            ERROR_NOT_FOUND:
        """

        manager = self.locator.get_manager('AuthManager')
        options = params['options']
        options['auth_type'] = 'keycloak'
        endpoints = manager.get_endpoint(options)
        capability= endpoints
        return {'metadata': capability}
2. verify
Check the plugin's normal operation.
After the plugin is deployed, after the init API is called, it goes through a check procedure to see if the plugin is ready to run, and the API called at this time is verify.
In the verify step, the procedure to check whether the plugin is ready to perform normal operation is checked.
Below is an example of python code for verify implementation of Google oAuth2 plugin.
The verify action is performed through the value required for Google oAuth2 operation.
The preparation stage for actual logic execution requires verification-level code for normal operation.
    def verify(self, options):
        # This is connection check for Google Authorization Server
        # URL: https://www.googleapis.com/oauth2/v4/token
        # After connection without param.
        # It should return 404
        r = requests.get(self.auth_server)
        if r.status_code == 404:
            return "ACTIVE"
        else:
            raise ERROR_NOT_FOUND(key='auth_server', value=self.auth_server)
2.2 - Plugin Register
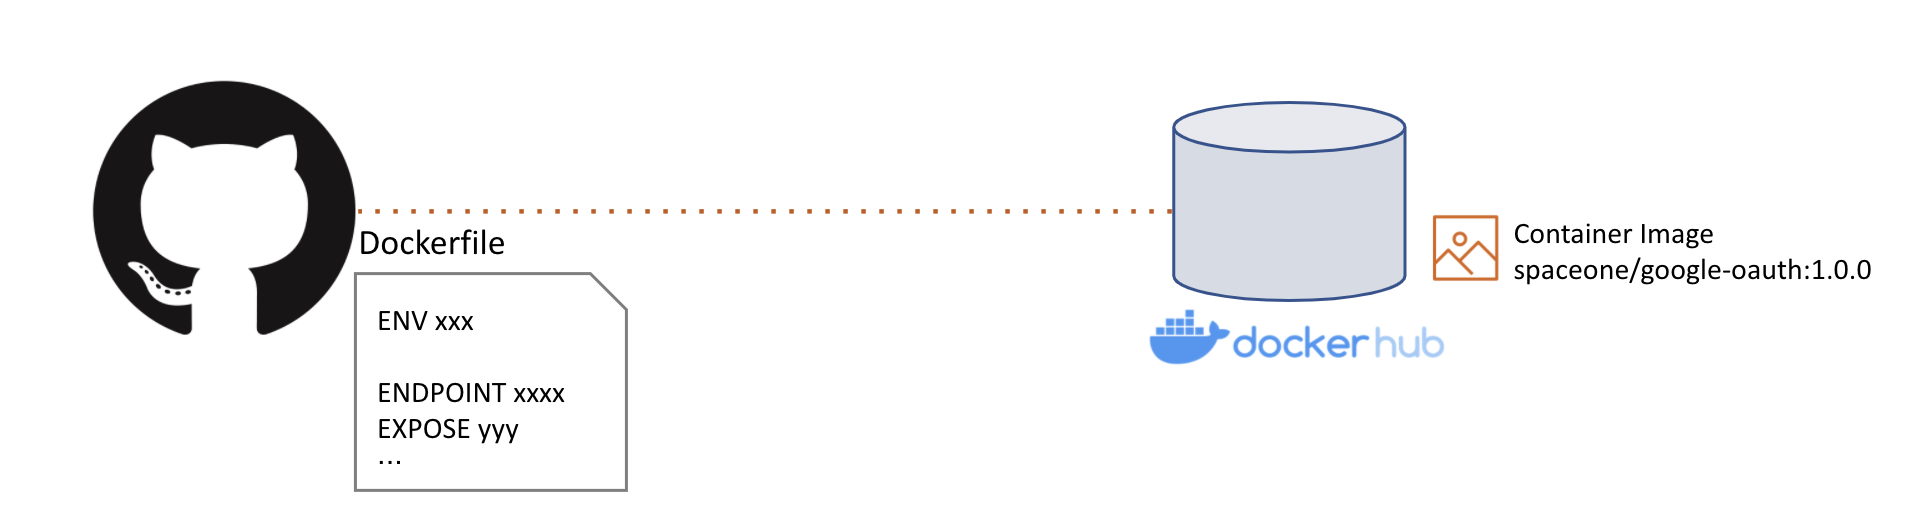
If plugin development is completed, you need to prepare plugin distribution. Since all plugins of SpaceONE are distributed as containers, the plugin code that has been developed must be built as an image for container distribution. Container build is done after docker build using Dockerfile, The resulting Image is uploaded to an image repository such as Docker hub. At this time, the image storage is uploaded to the storage managed by the Repository service, which is a microservice of SpaceONE.
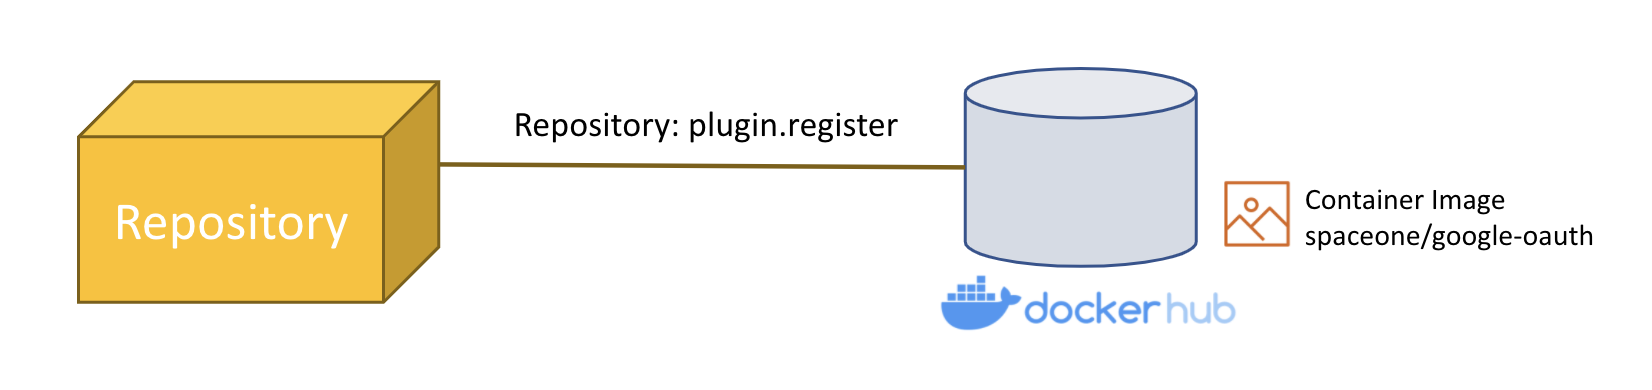
If you have uploaded an image to the repository, you need to register the image in the Repository service among Microservices. Registration API uses Repository.plugin.register. (SpaceONE API - (Repository) Plugin.Register)
The example below is the parameter content delivered when registering the Notification Protocol Plugin. The image value contains the address of the previously built image.
name: Slack Notification Protocol
service_type: notification.Protocol
image: pyengine/plugin-slack-notification-protocol_settings
capability:
  supported_schema:
  - slack_webhook
  data_type: SECRET
tags:
  description: Slack
  "spaceone:plugin_name": Slack
  icon: 'https://spaceone-custom-assets.s3.ap-northeast-2.amazonaws.com/console-assets/icons/slack.svg'
provider: slack
template: {}
In the case of image registration, directly use gRPC API or use spacectl because it is not yet supported in Web Console. After creating the yaml file as above, you can register the image with the spacectl command as shown below.
> spacectl exec register repository.Plugin -f plugin_slack_notification_protocol.yml
When the image is registered in the Repository, you can check it as follows.
> spacectl list repository.Plugin -p repository_id=<REPOSITORY_ID>  -c plugin_id,name
plugin_id                              | name
----------------------------------------+------------------------------------------
 plugin-aws-sns-monitoring-webhook      | AWS SNS Webhook
 plugin-amorepacific-monitoring-webhook | Amore Pacific Webhook
 plugin-email-notification-protocol_settings     | Email Notification Protocol
 plugin-grafana-monitoring-webhook      | Grafana Webhook
 plugin-keycloak-oidc                   | Keycloak OIDC Auth Plugin
 plugin-sms-notification-protocol_settings       | SMS Notification Protocol
 plugin-voicecall-notification-protocol_settings | Voicecall Notification Protocol
 plugin-slack-notification-protocol_settings     | Slack Notification Protocol
 plugin-telegram-notification-protocol_settings  | Telegram Notification Protocol

 Count: 9 / 9
Detailed usage of spacectl can be found on this page. Spacectl CLI Tool
2.3 - Plugin Deployment
To actually deploy and use the registered plugin, you need to deploy a pod in the Kubernetes environment based on the plugin image.
At this time, plugin distribution is automatically performed in the service that wants to use the plugin.
For example, in the case of Notification, an object called Protocol is used to deliver the generated Alert to the user.
At that time, Protocol.create action (Protocol.create) triggers installing Notification automatically.
The example below is an example of the Protocol.create command parameter for creating a Slack Protocol to send an alarm to Slack in Notification.
---
name: Slack Protocol
plugin_info:
  plugin_id: plugin-slack-notification-protocol_settings
  version: "1.0"
  options: {}
  schema: slack_webhook
tags:
  description: Slack Protocol
In plugin_id, put the ID value of the plugin registered in the Repository,
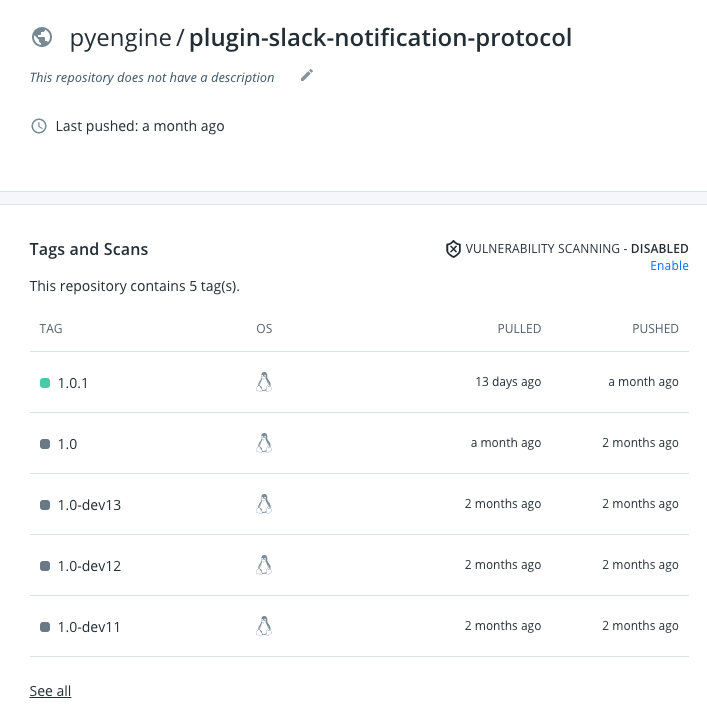
In version, put the image tag information written when uploading the actual image to an image repository such as Dockerhub.
If there are multiple tags in the image repository, the plugin is distributed with the image of the specified tag version.
In the above case, because the version was specified as "1.0"
It is distributed as a "1.0" tag image among the tag information below.
In the case of the API, it takes some time to respond because it goes through the steps of creating and deploying a Service and a Pod in the Kubernetes environment.
If you check the pod deployment in the actual Kubernetes environment, you can check it as follows.
> k get po
NAME                                                              READY   STATUS    RESTARTS   AGE
plugin-slack-notification-protocol_settings-zljrhvigwujiqfmn-bf6kgtqz   1/1     Running   0          1m
2.4 - Plugin Debugging
Using Pycharm
It is recommand to using pycharm(The most popular python IDE) to develop & testing plugins. Overall setting processes are as below.
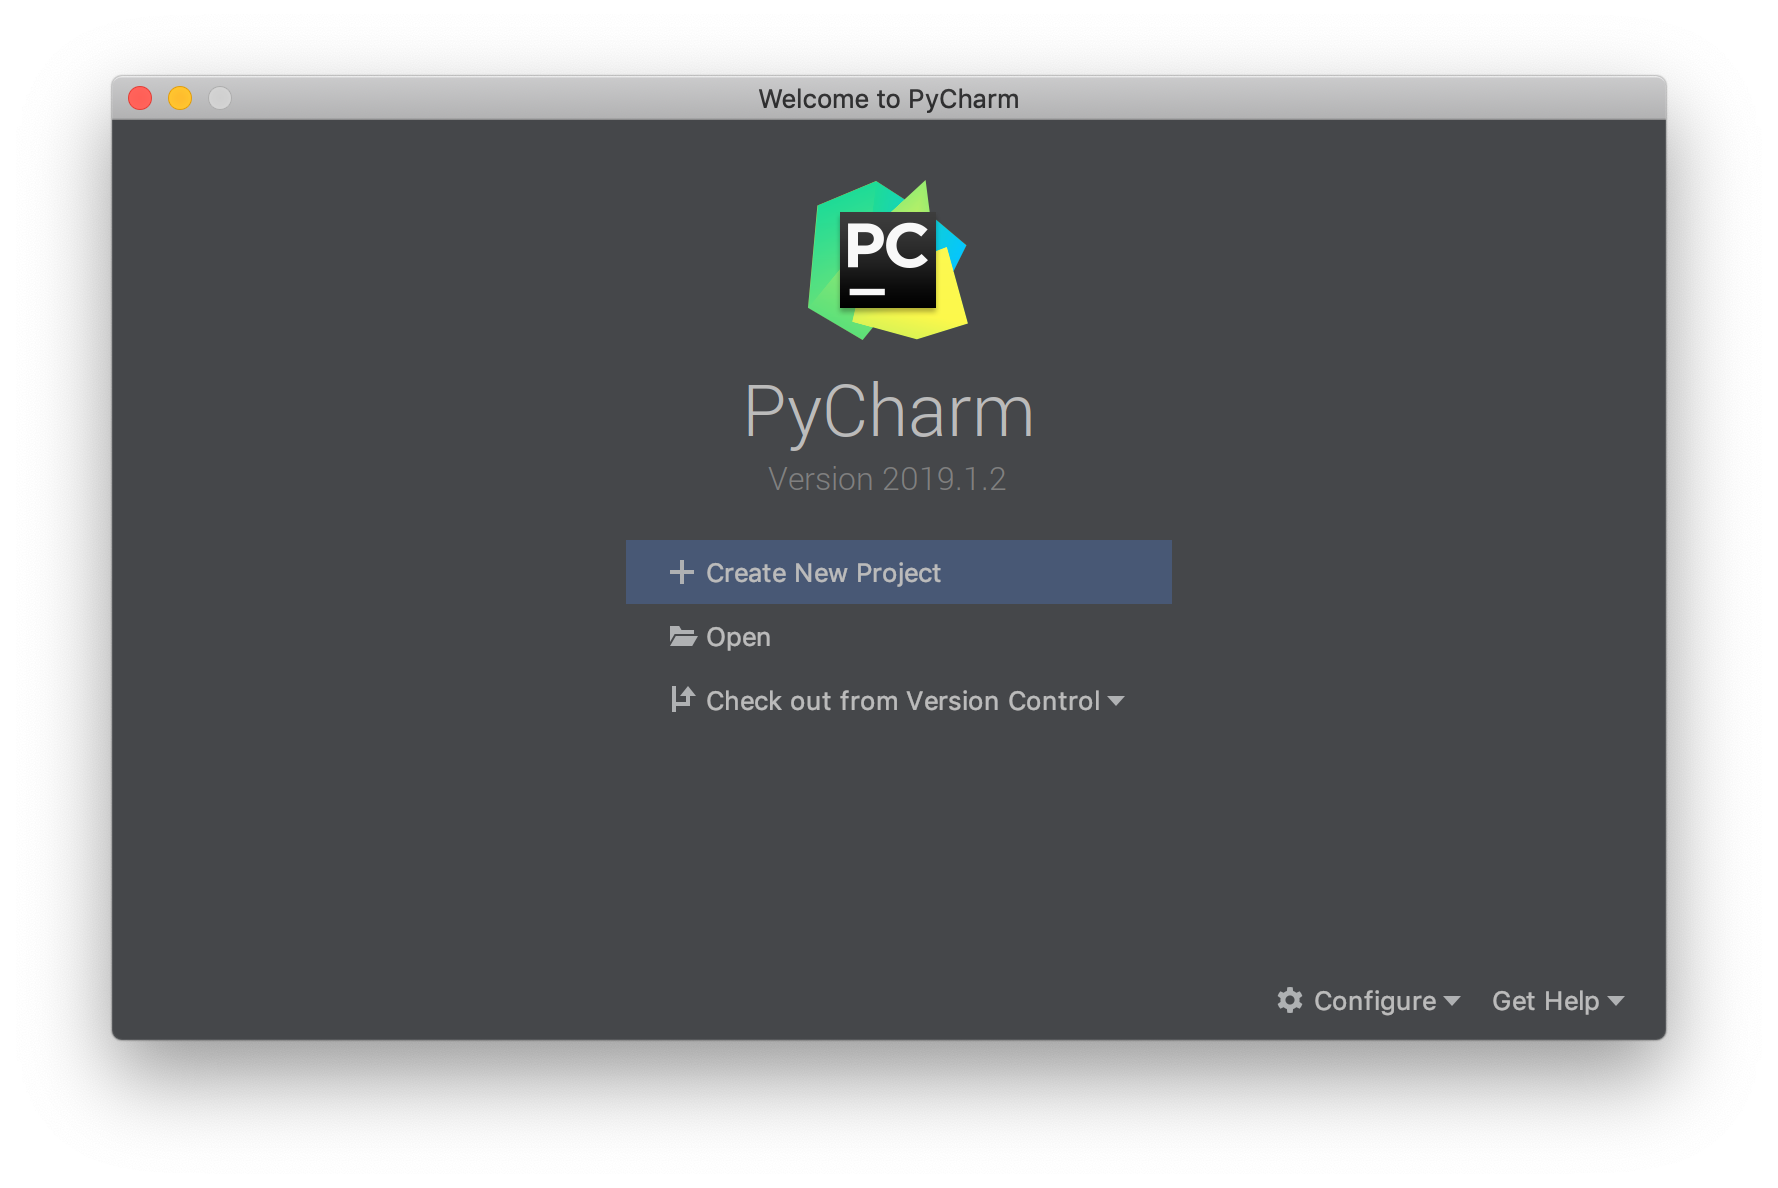
1. Open projects and dependencies
First, open project Identity, python-core and api one by one.
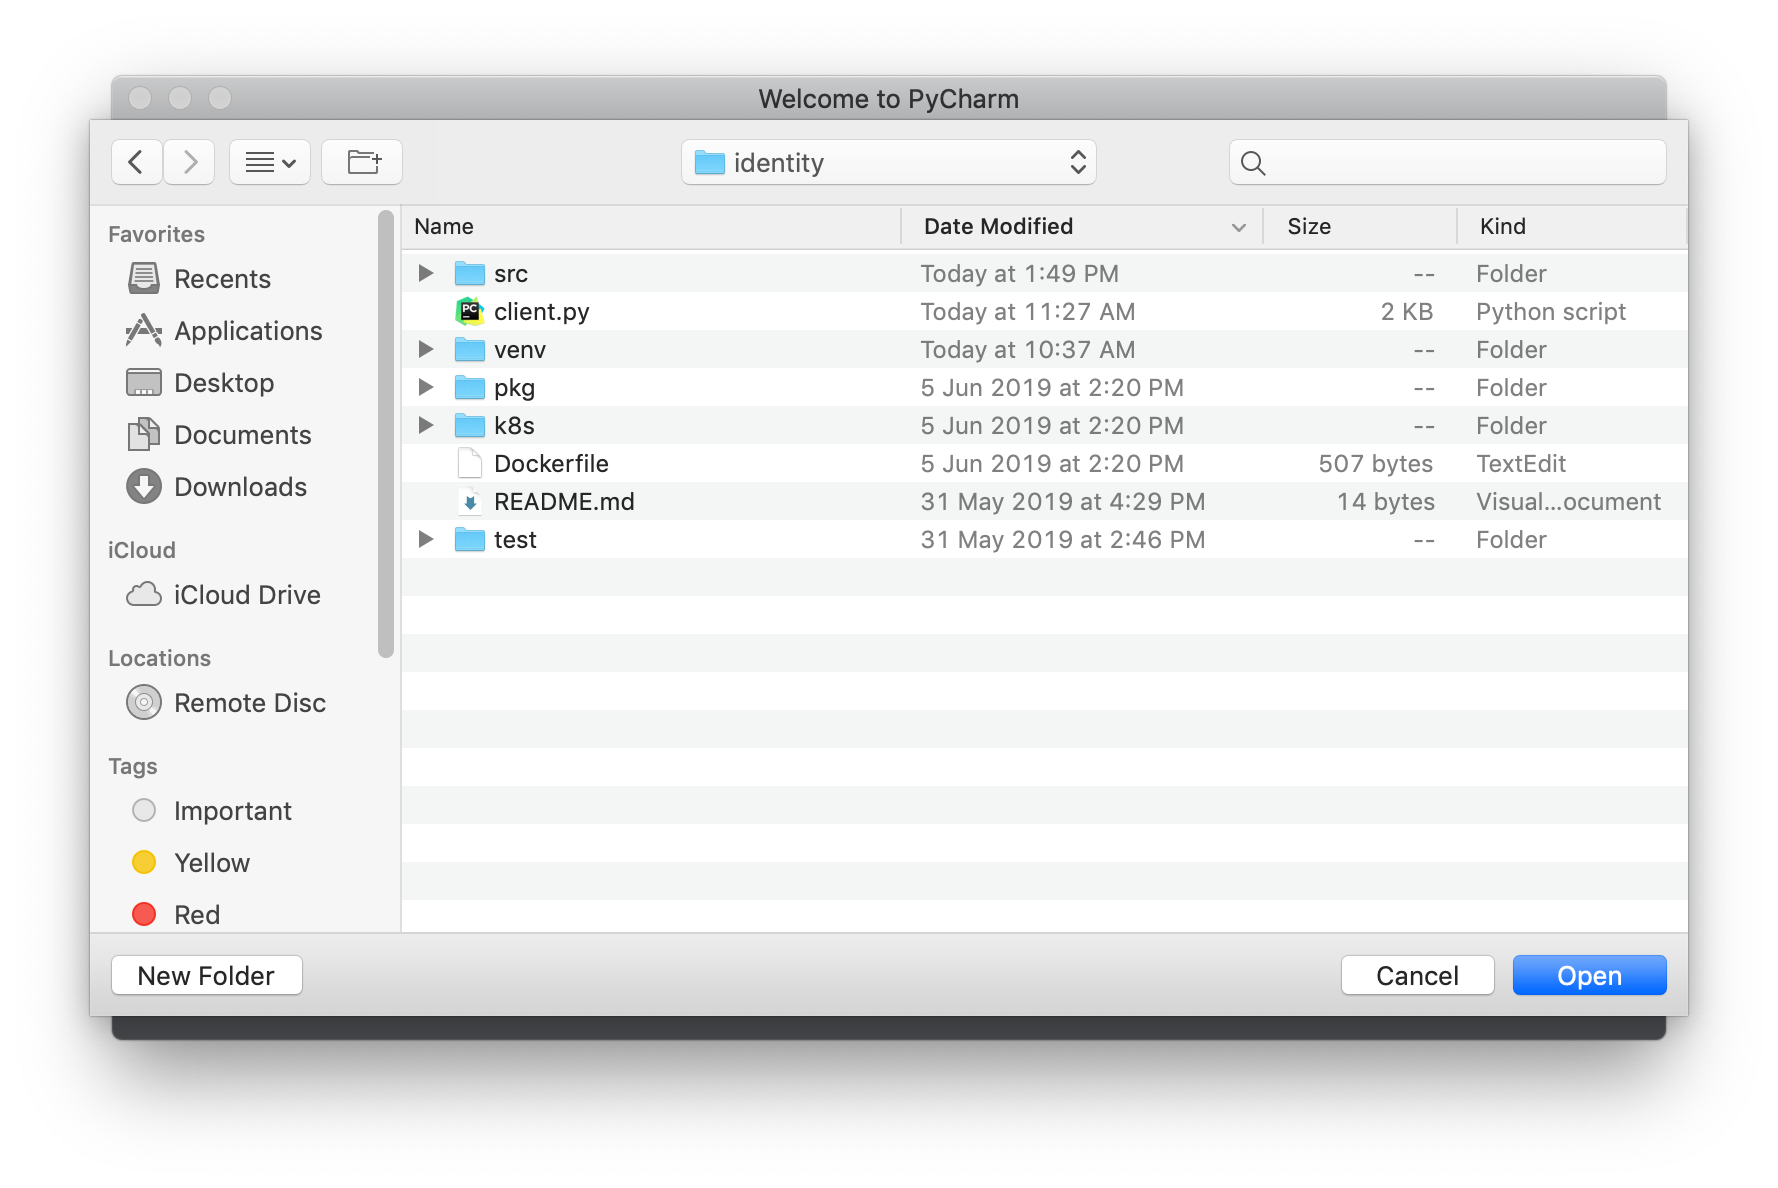
Click Open
Select your project directory. In this example '~/source/cloudone/identity'
Click File > Open , then select related project one by one. In this example '~/source/cloudone/python-core'
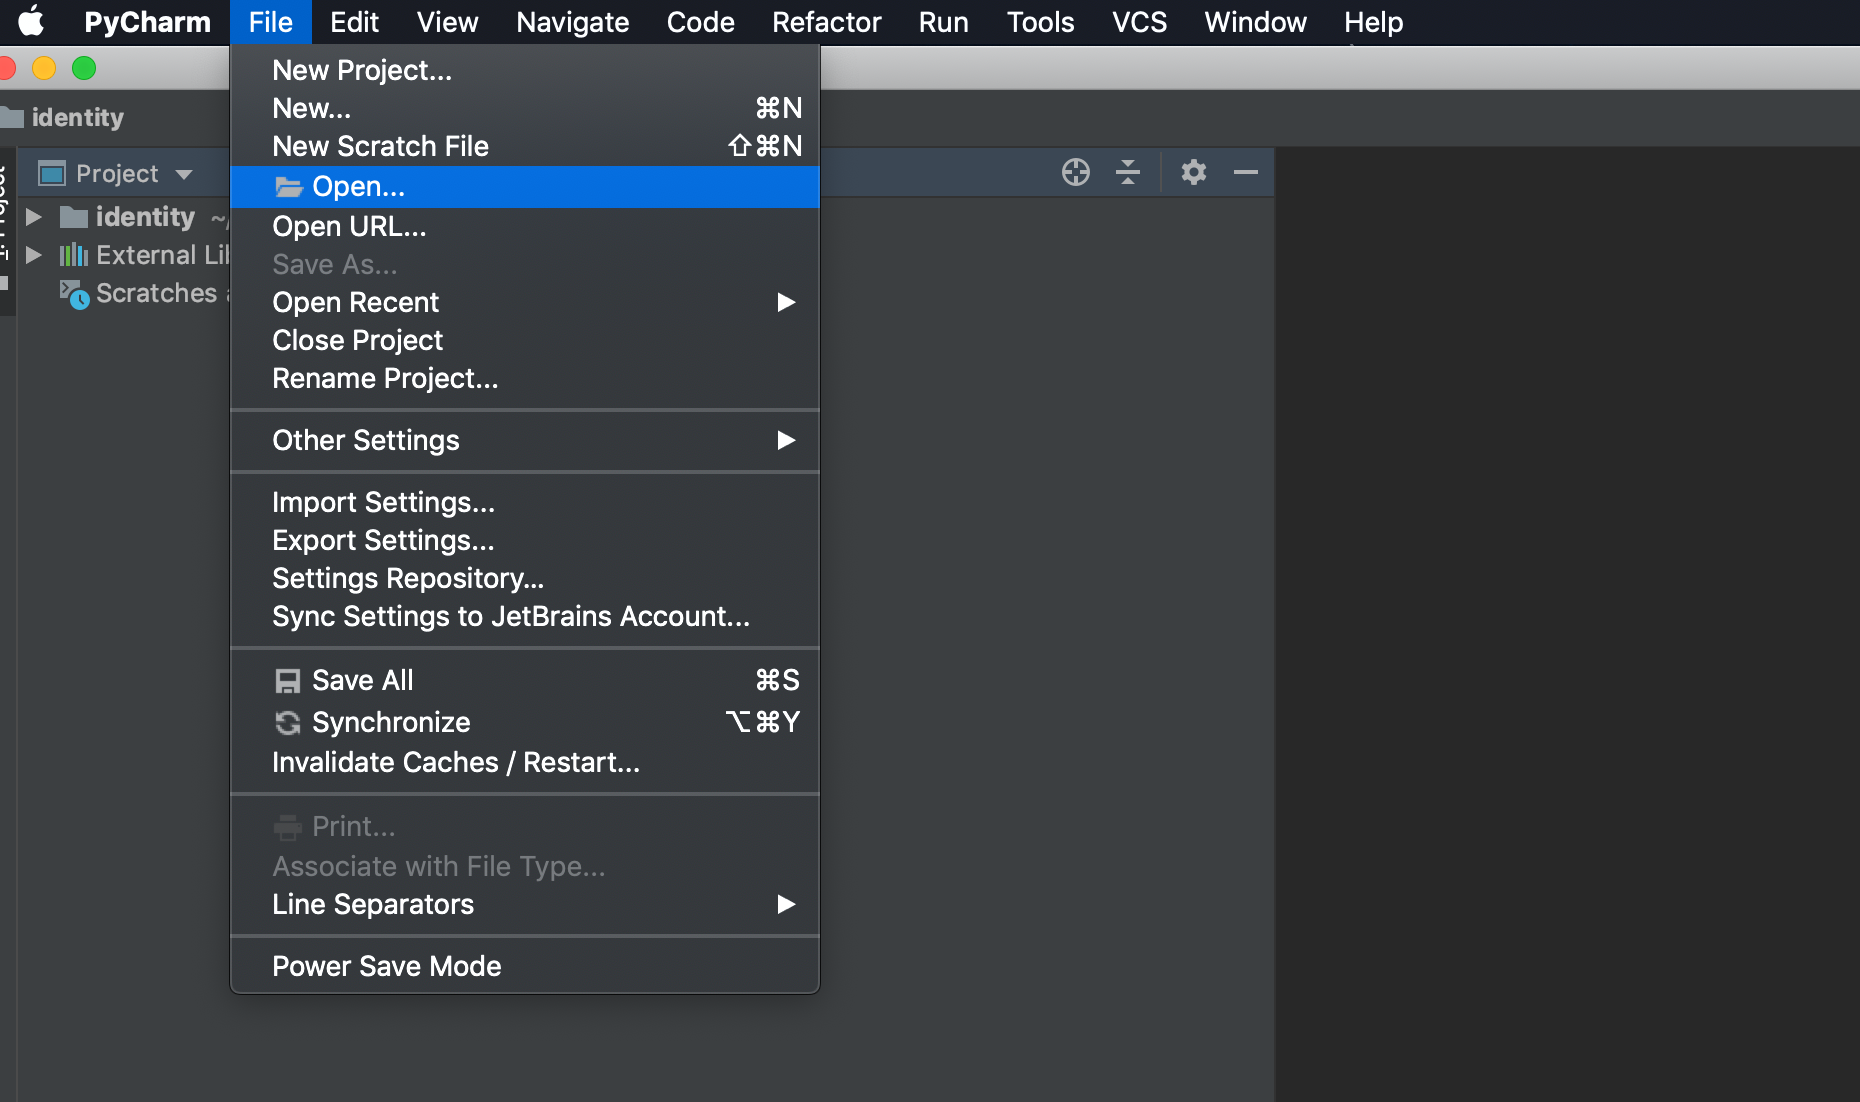
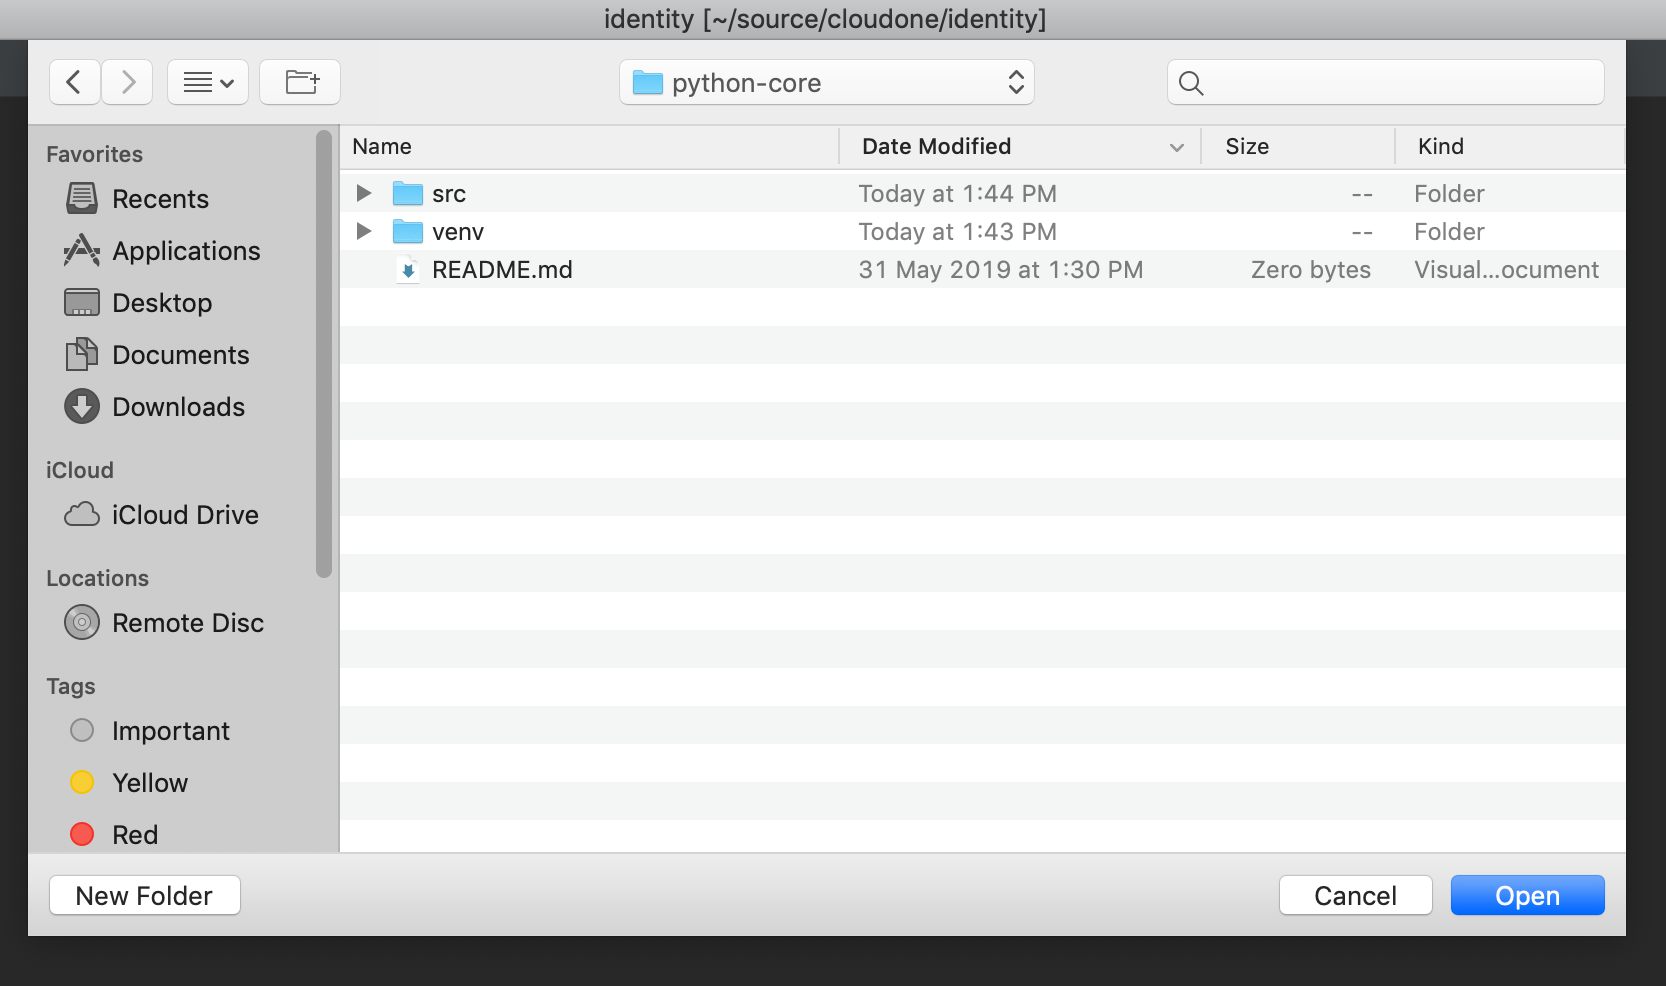
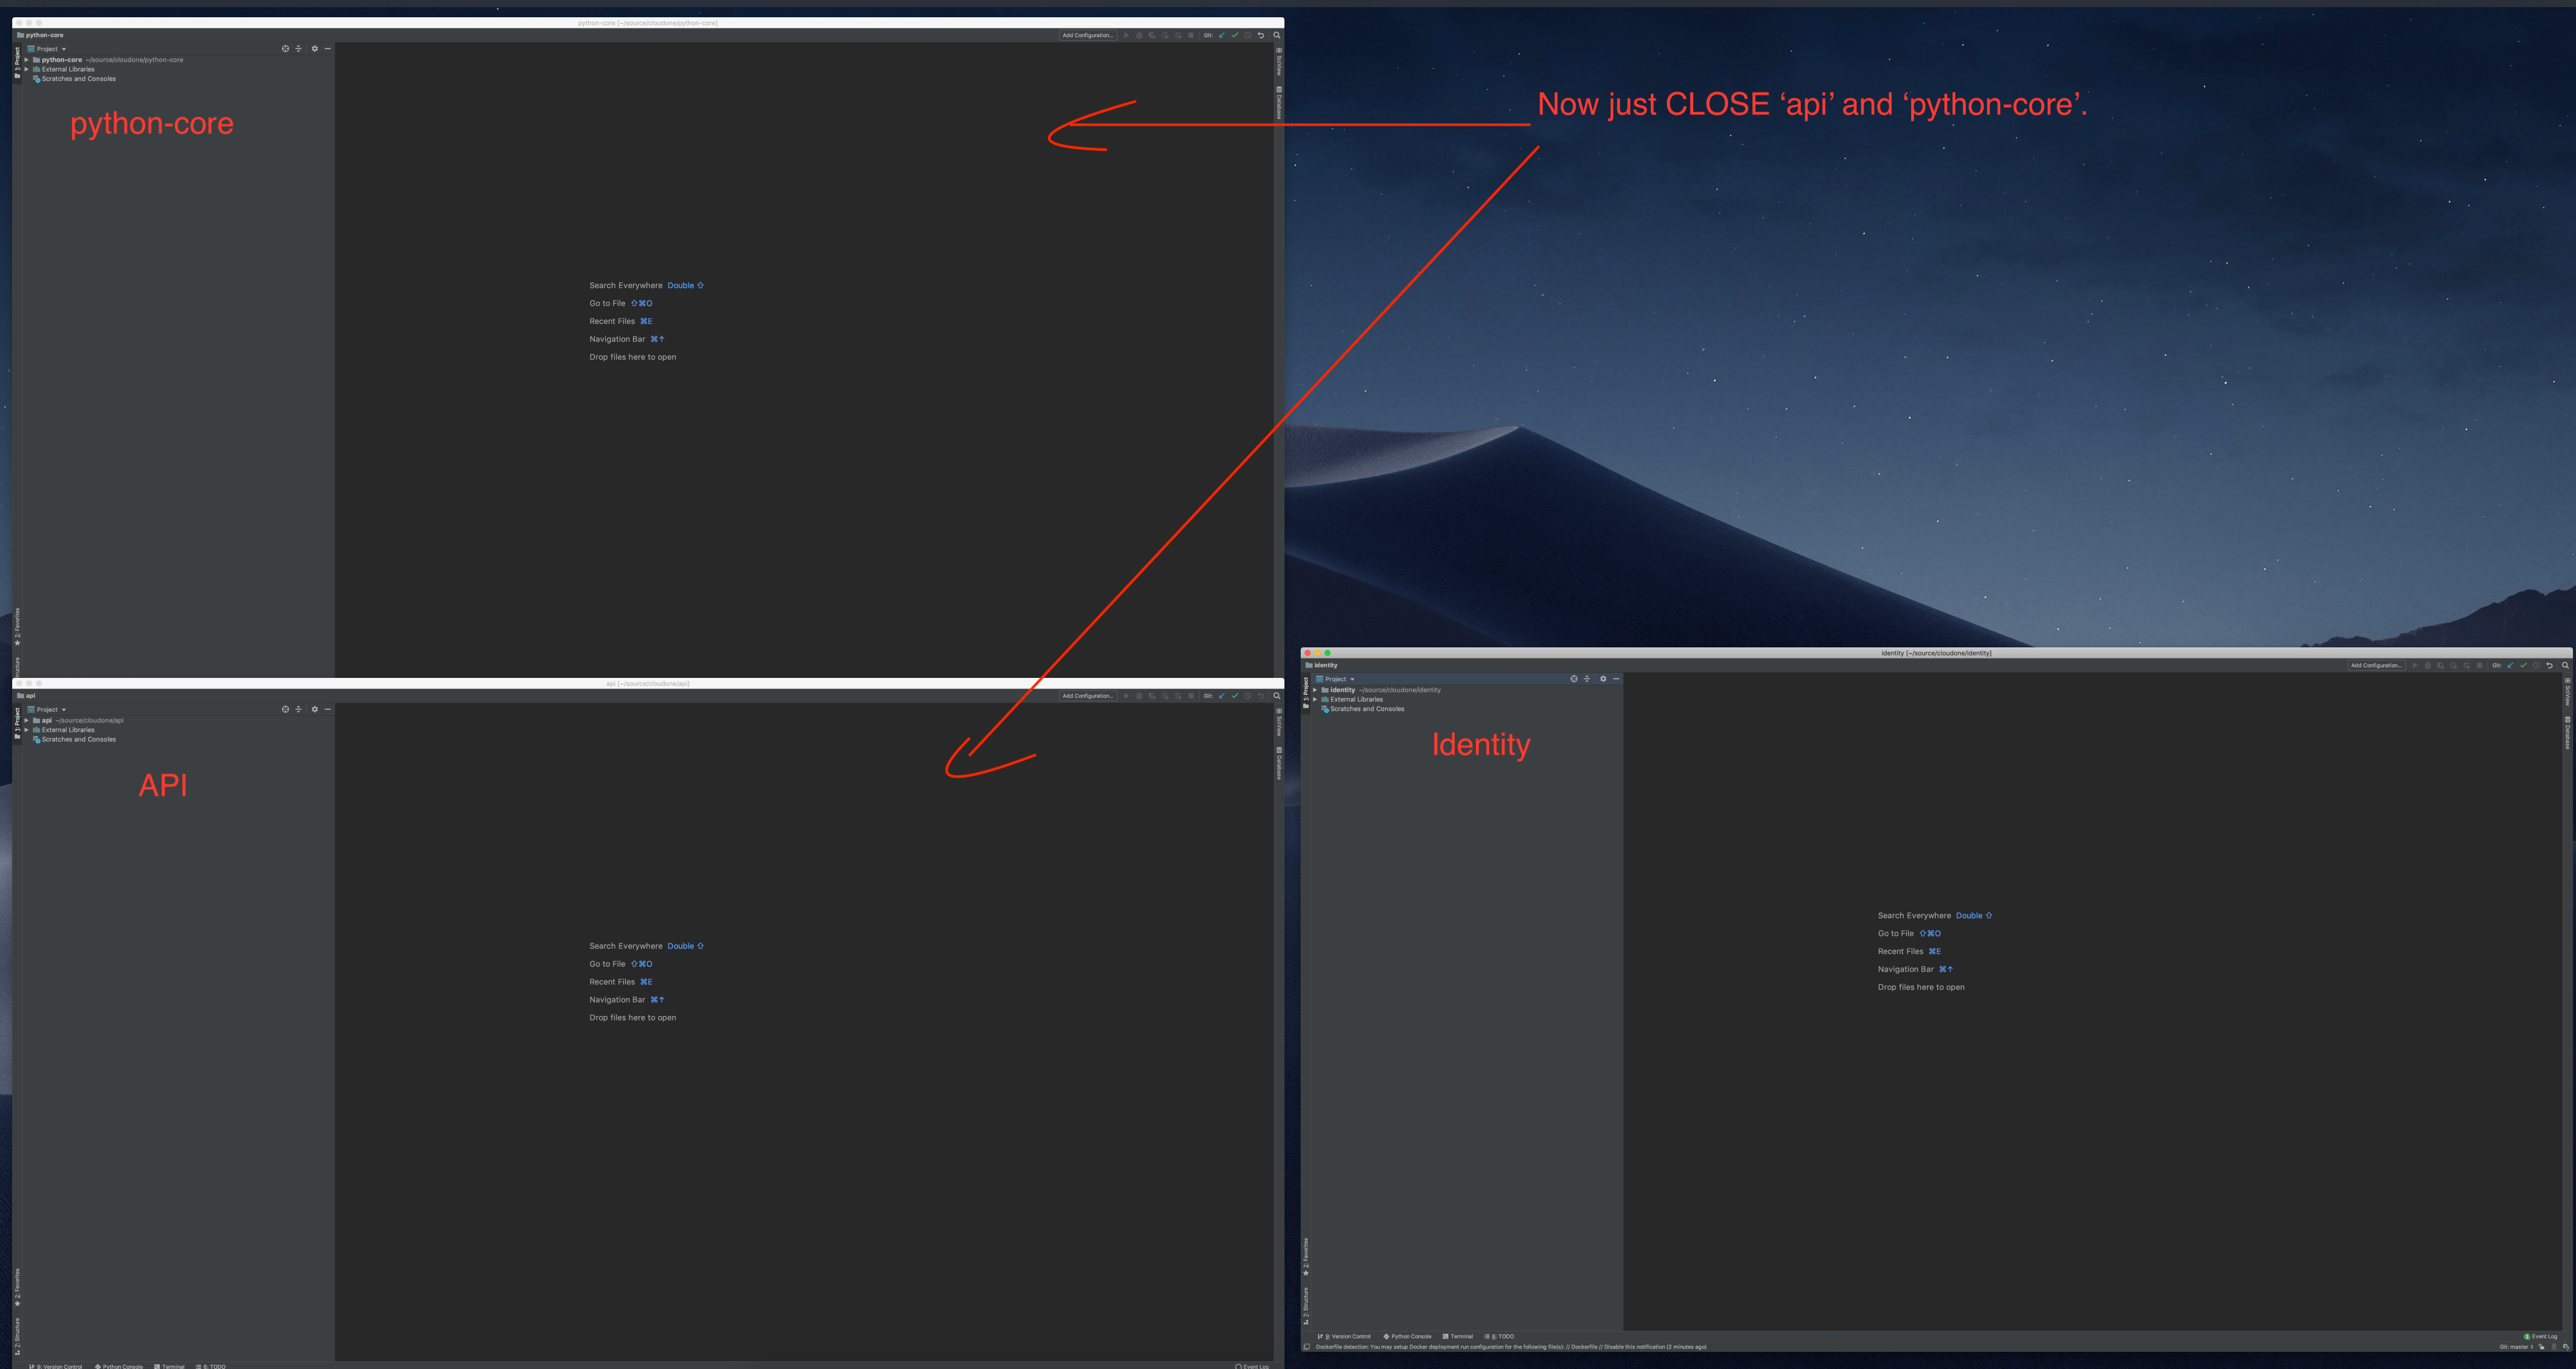
Select New Window for an additional project. You might need to do several times if you have multiple projects. Ex) python-core and api
Now we have 3 windows. Just close python-core and API projects.
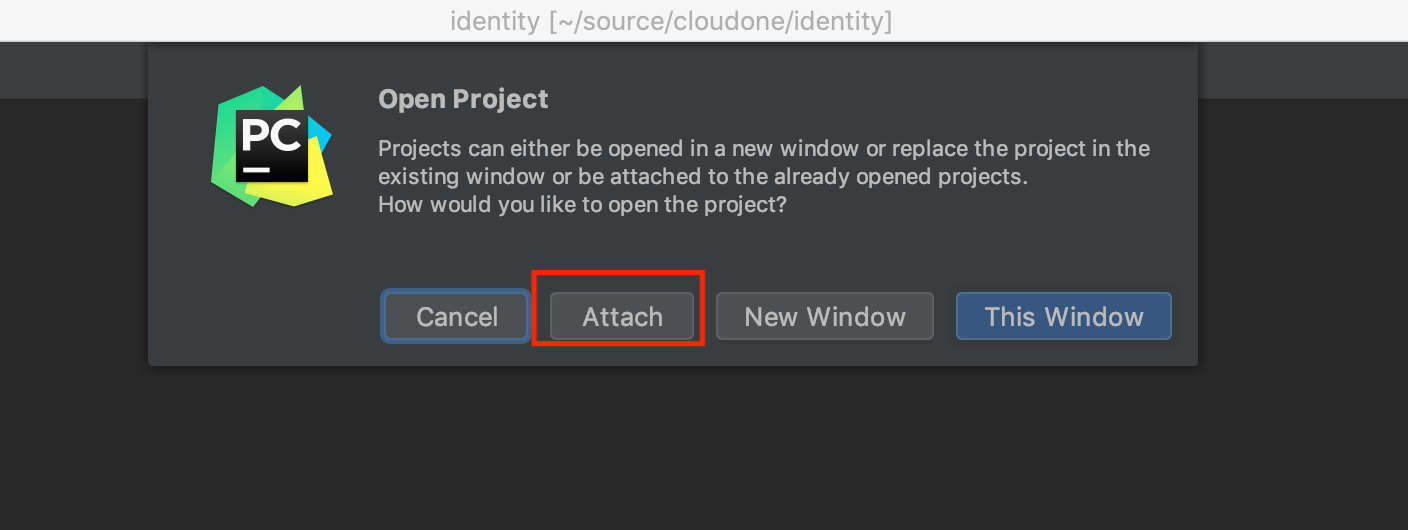
Once you open your project at least one time, you can attach them to each other. Let's do it on identity project. Do this again Open > select your anther project directory. In this example, python-core and API.
But this time, you can ATTACH it to Identity project.

You can attach a project as a module if it was imported at least once.
2. Configure Virtual Environment
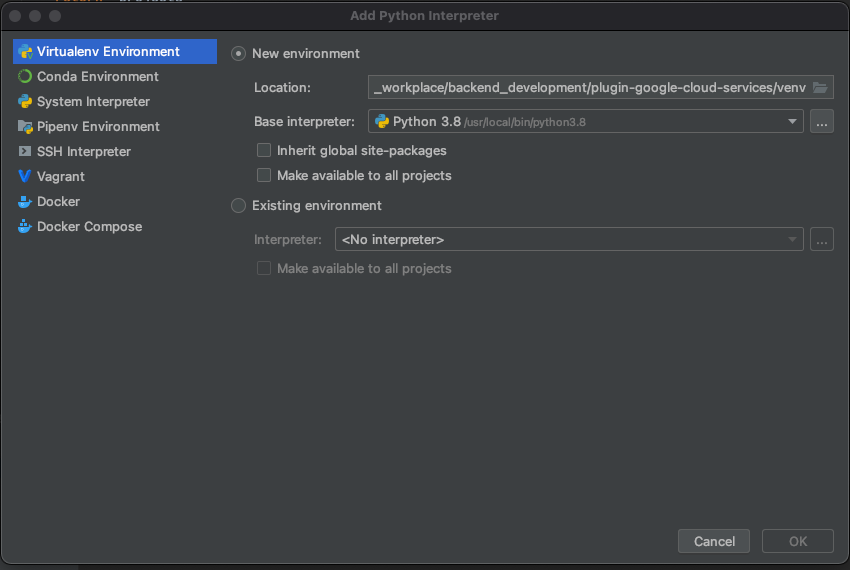
Add additional python interpreter
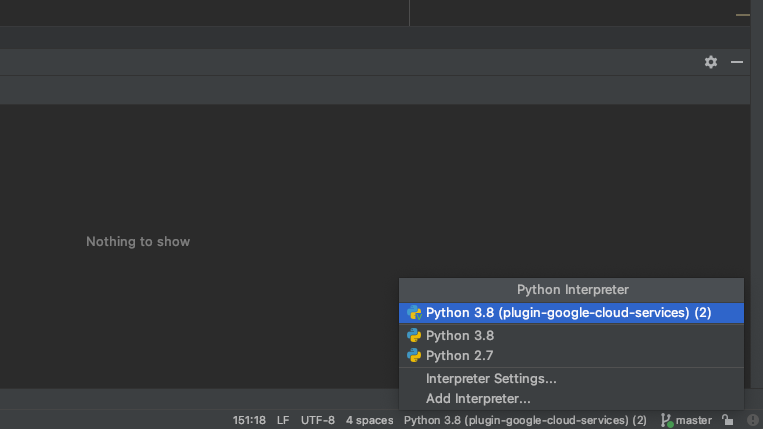
Click virtual environment section
Designate base interpreter as 'Python 3.8'(Python3 need to be installed previously)
Then click 'OK'
Return to 'Python interpreter > Interpreter Settings..'
List of installed python package on virtual environment will be displayed
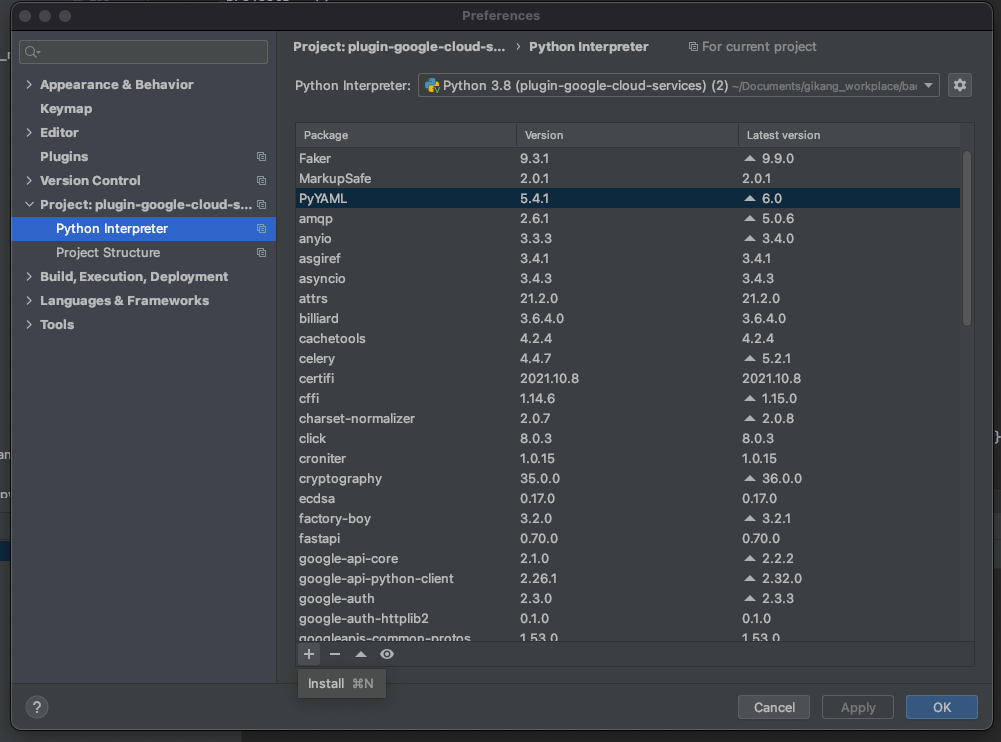
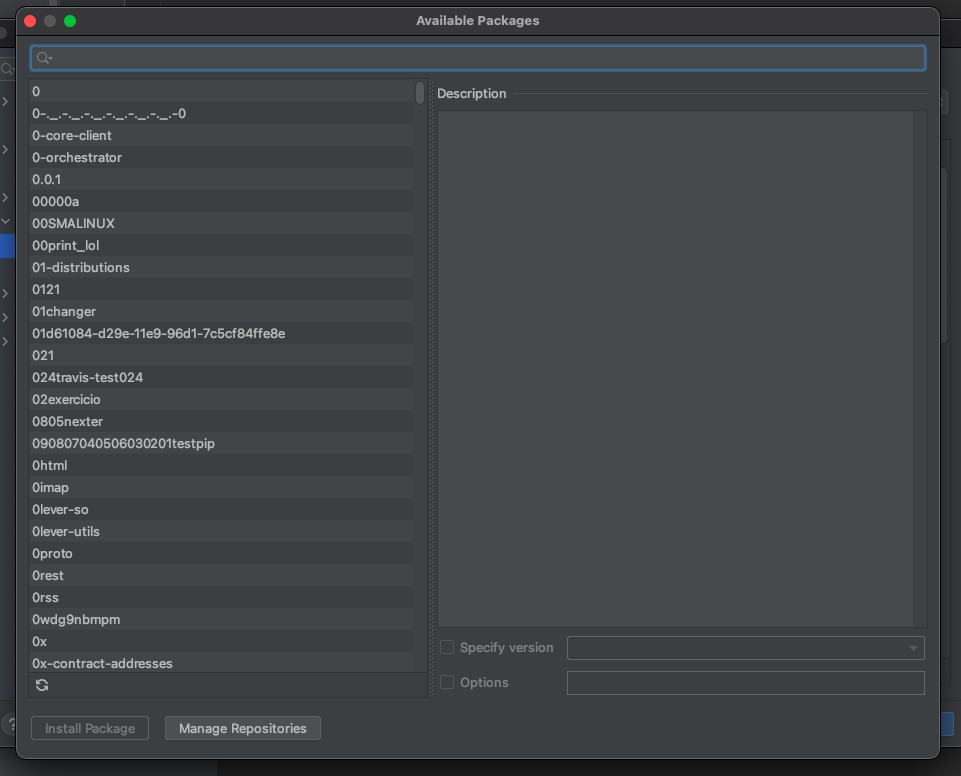
Click '+' button, Then search & click 'Install Package' below
'spaceone-core'
'spaceone-api'
'spaceone-tester'
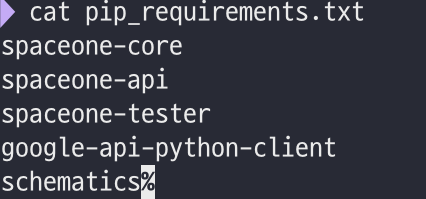
Additional libraries are in 'pkg/pip_requirements.txt' in every repository. You also need to install them.
Repeat above process or you can install through command line
$> pip3 install -r pip_requirements.txt
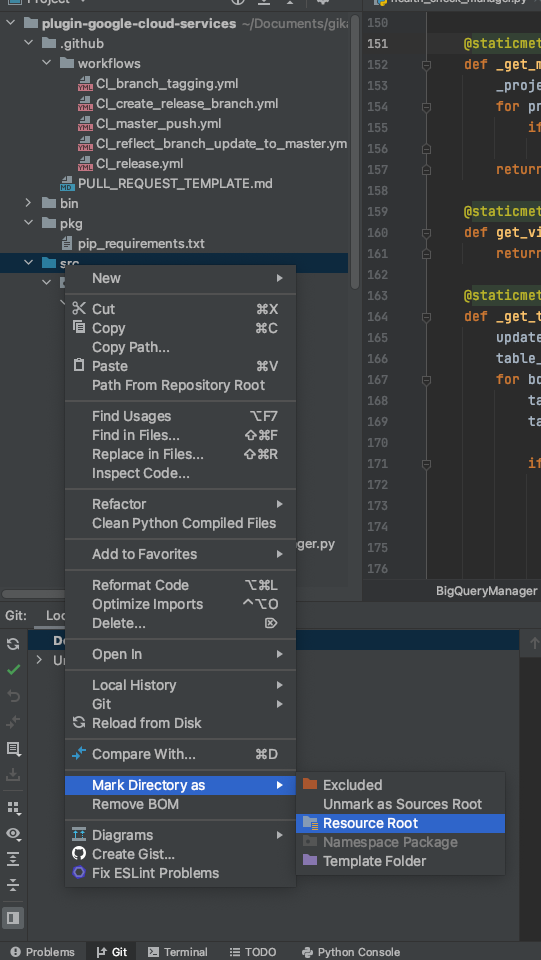
3. Run Server
- Set source root directory
- Right click on 'src' directory 'Mark Directory as > Resource Root'
- Set test server configuration
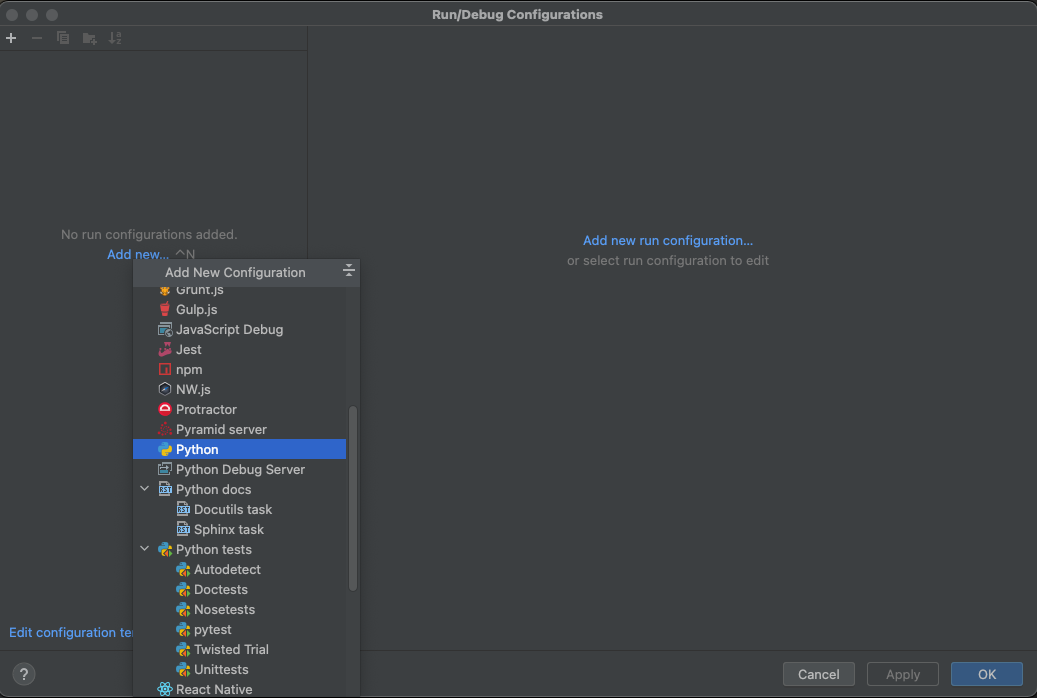
- Fill in test server configurations are as below, then click 'OK'
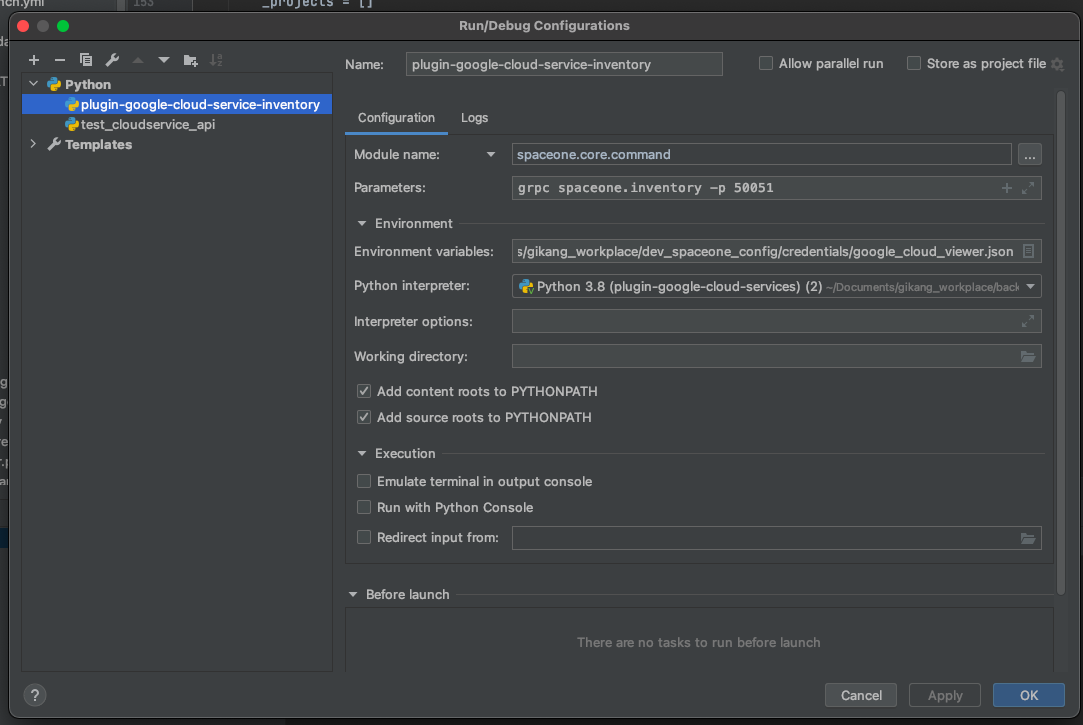
| Item | Configuration | Etc |
|---|---|---|
| Module name | spaceone.core.command | |
| Parameters | grpc spaceone.inventory -p 50051 | -p option means portnumber (Can be changed) |
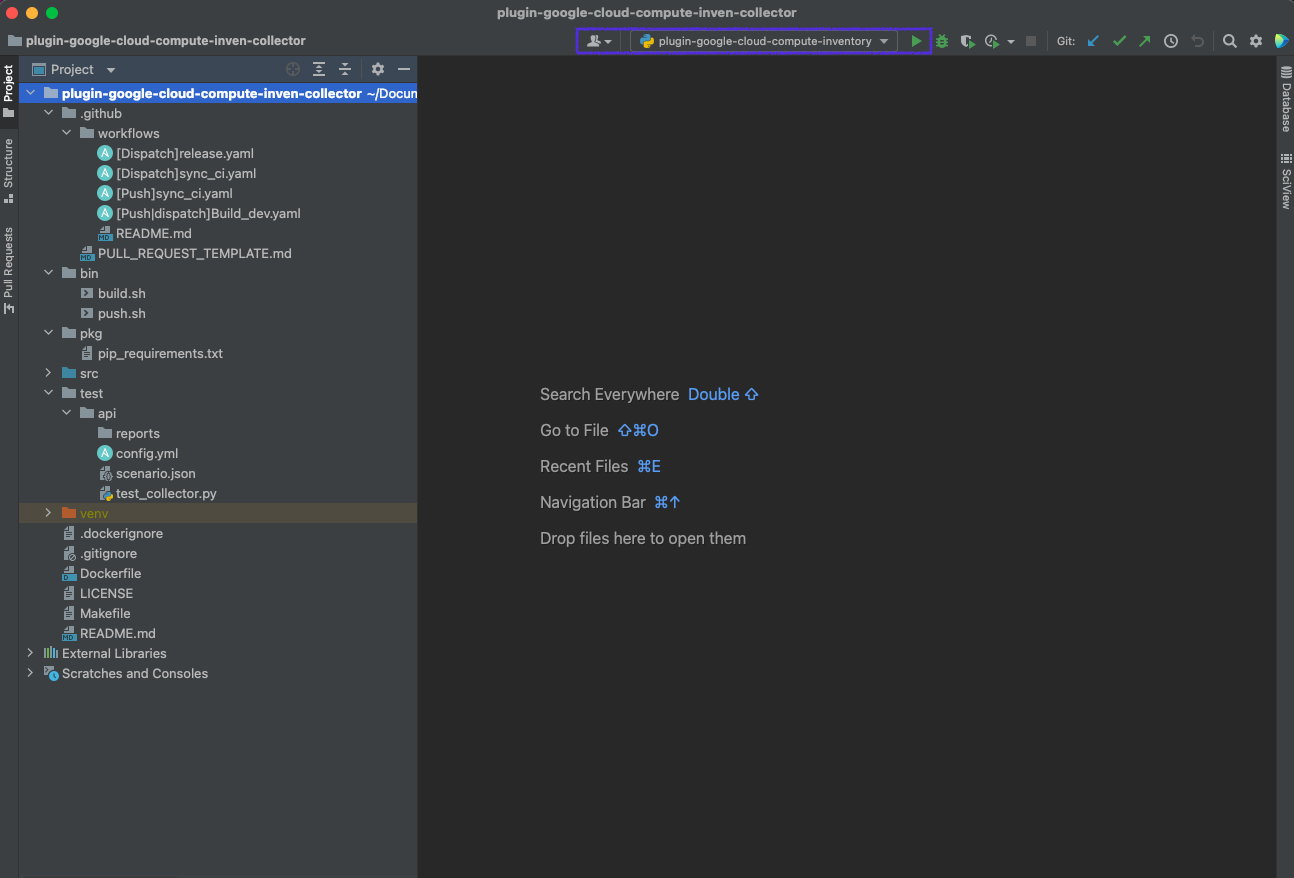
- You can run test server with 'play button' on the upper right side or the IDE
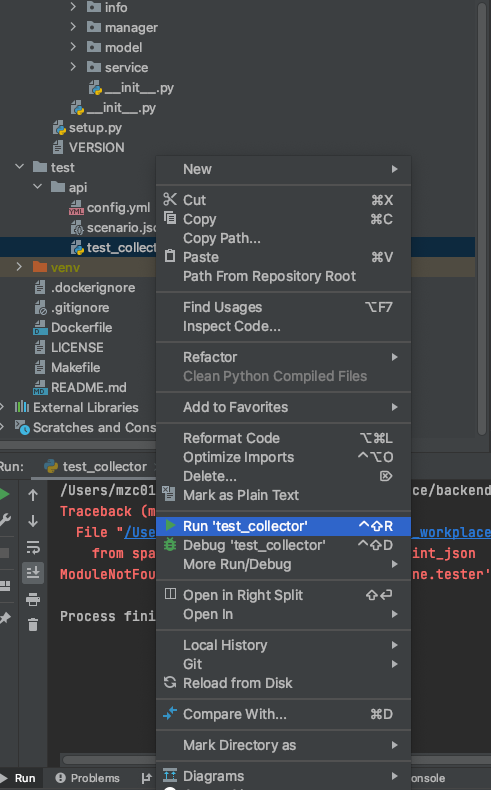
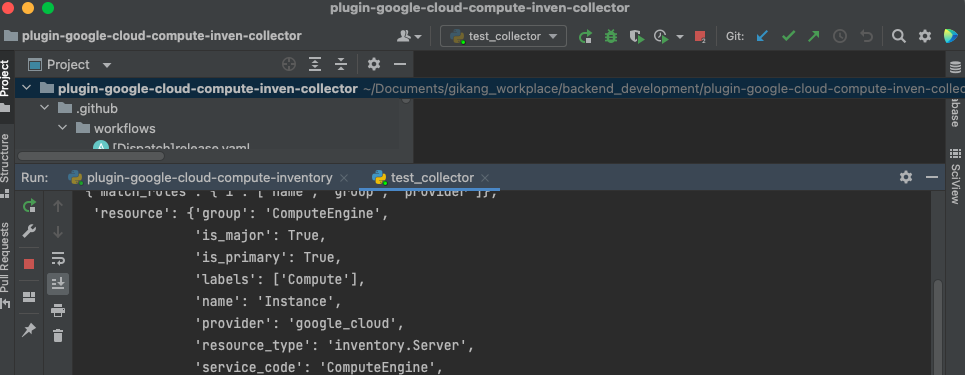
4. Execute Test Code
Every plugin repository has their own unit test case file in 'test/api' directory
- Right click on 'test_collector.py' file
- Click 'Run 'test_collector''
Some plugin needs credential to interface with other services. You need to make credential file and set them as environments before run
Go to test server configuration > test_server > Edit Configurations
Click Edit variables
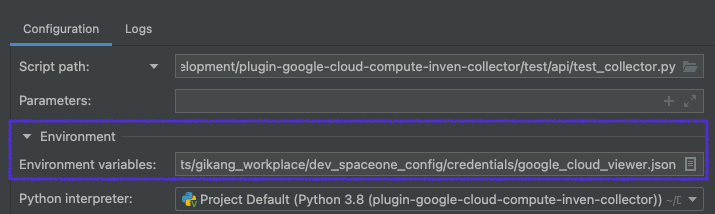
Add environment variable as below
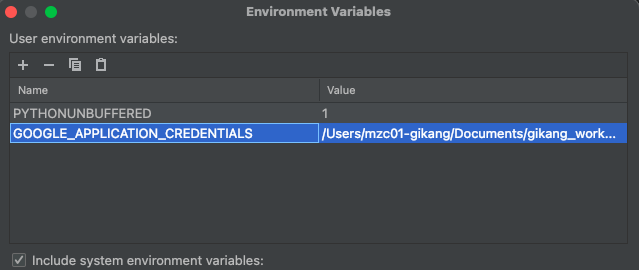
| Item | Configuration | Etc |
|---|---|---|
| PYTHONUNBUFFERED | 1 | |
| GOOGLE_APPLICATION_CREDENTIALS | Full path of your configuration file |
Finally you can test run your server
First, run test server locally
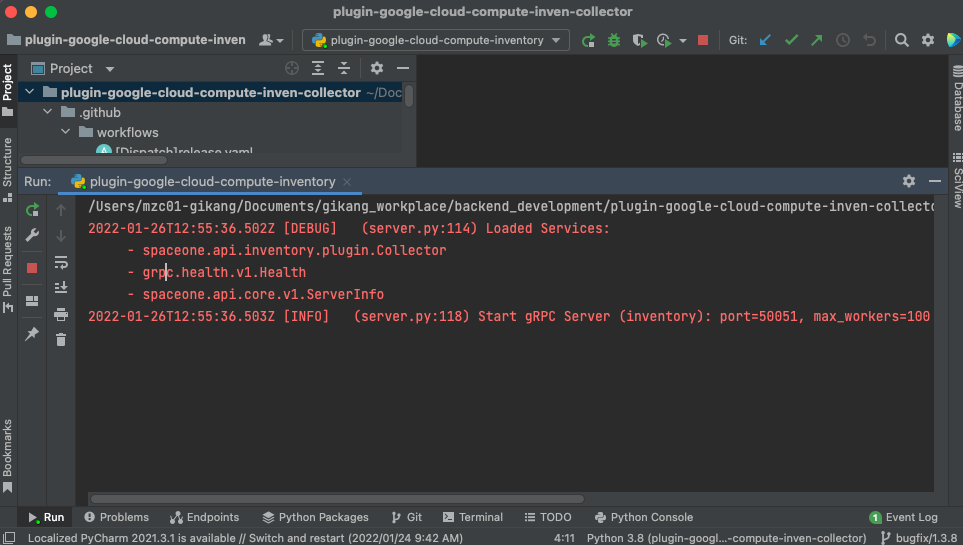
Second, run unit test
Using Terminal
3 - Plugin Designs
Inventory Collector
Inventory Collector 플러그인을 통해 전문적인 개발지식이 없는 시스템 엔지니어부터, 전문 클라우드 개발자들까지 원하는 클라우드 자산정보를 편리하게 수집하여 체계적으로 관리할 수 있습니다. 그리고, 수집한 자산 정보를 사용자 UI에 손쉽게 표현할 수 있습니다.
Inventory Collector 플러그인은 SpaceONE의 grpc framework 기본 모듈을 기반으로(spaceone-core, spaceone-api) 개발할 수 있습니다. 아래의 문서는 각각의 Cloud Provider별 상세 스펙을 나타냅니다.
AWS
Azure
Google Cloud
Google Cloud External IP Address
Collecting Google Cloud Instance Template
Collecting Google Cloud Load Balancing
Collecting Google Cloud Machine Image
Collecting Google Cloud Snapshot
Collecting Google Cloud Storage Bucket
Collecting Google Cloud VPC Network
Identity Authentication
Monitoring DataSources
Alert Manager Webhook
Notifications
Billing
4 - Collector
Add new Cloud Service Type
To add new Cloud Service Type
| Component | Source Directory | Description |
|---|---|---|
| model | src/spaceone/inventory/model/skeleton | Data schema |
| manager | src/spaceone/inventory/manager/skeleton | Data Merge |
| connector | src/spaceone/inventory/connector/skeleton | Data Collection |