Global Asset Management
Accessing the Menu
(1) Switch to Admin Center

Creating Global Collectors
Collectors created in Admin mode are designated as Global collectors, applying across all workspaces.
In individual workspaces, Global collectors can only collect data and cannot be modified or deleted.
➊ Creating a Collector
(1) In Admin Center, go to [Asset Inventory > Collector]
(2) Click the [+ Create] button.
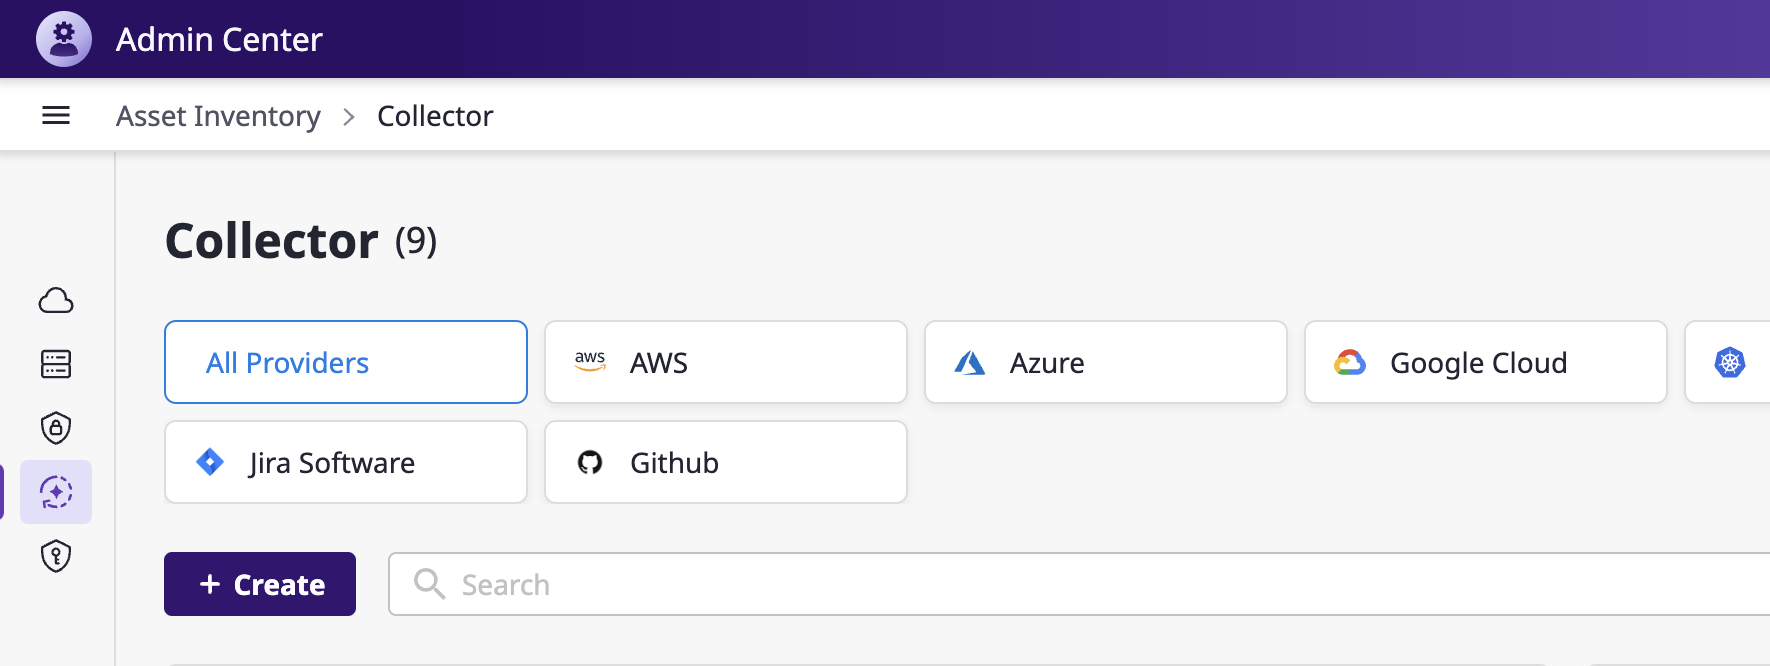
(3) Select an appropriate collector for the data needed to collect
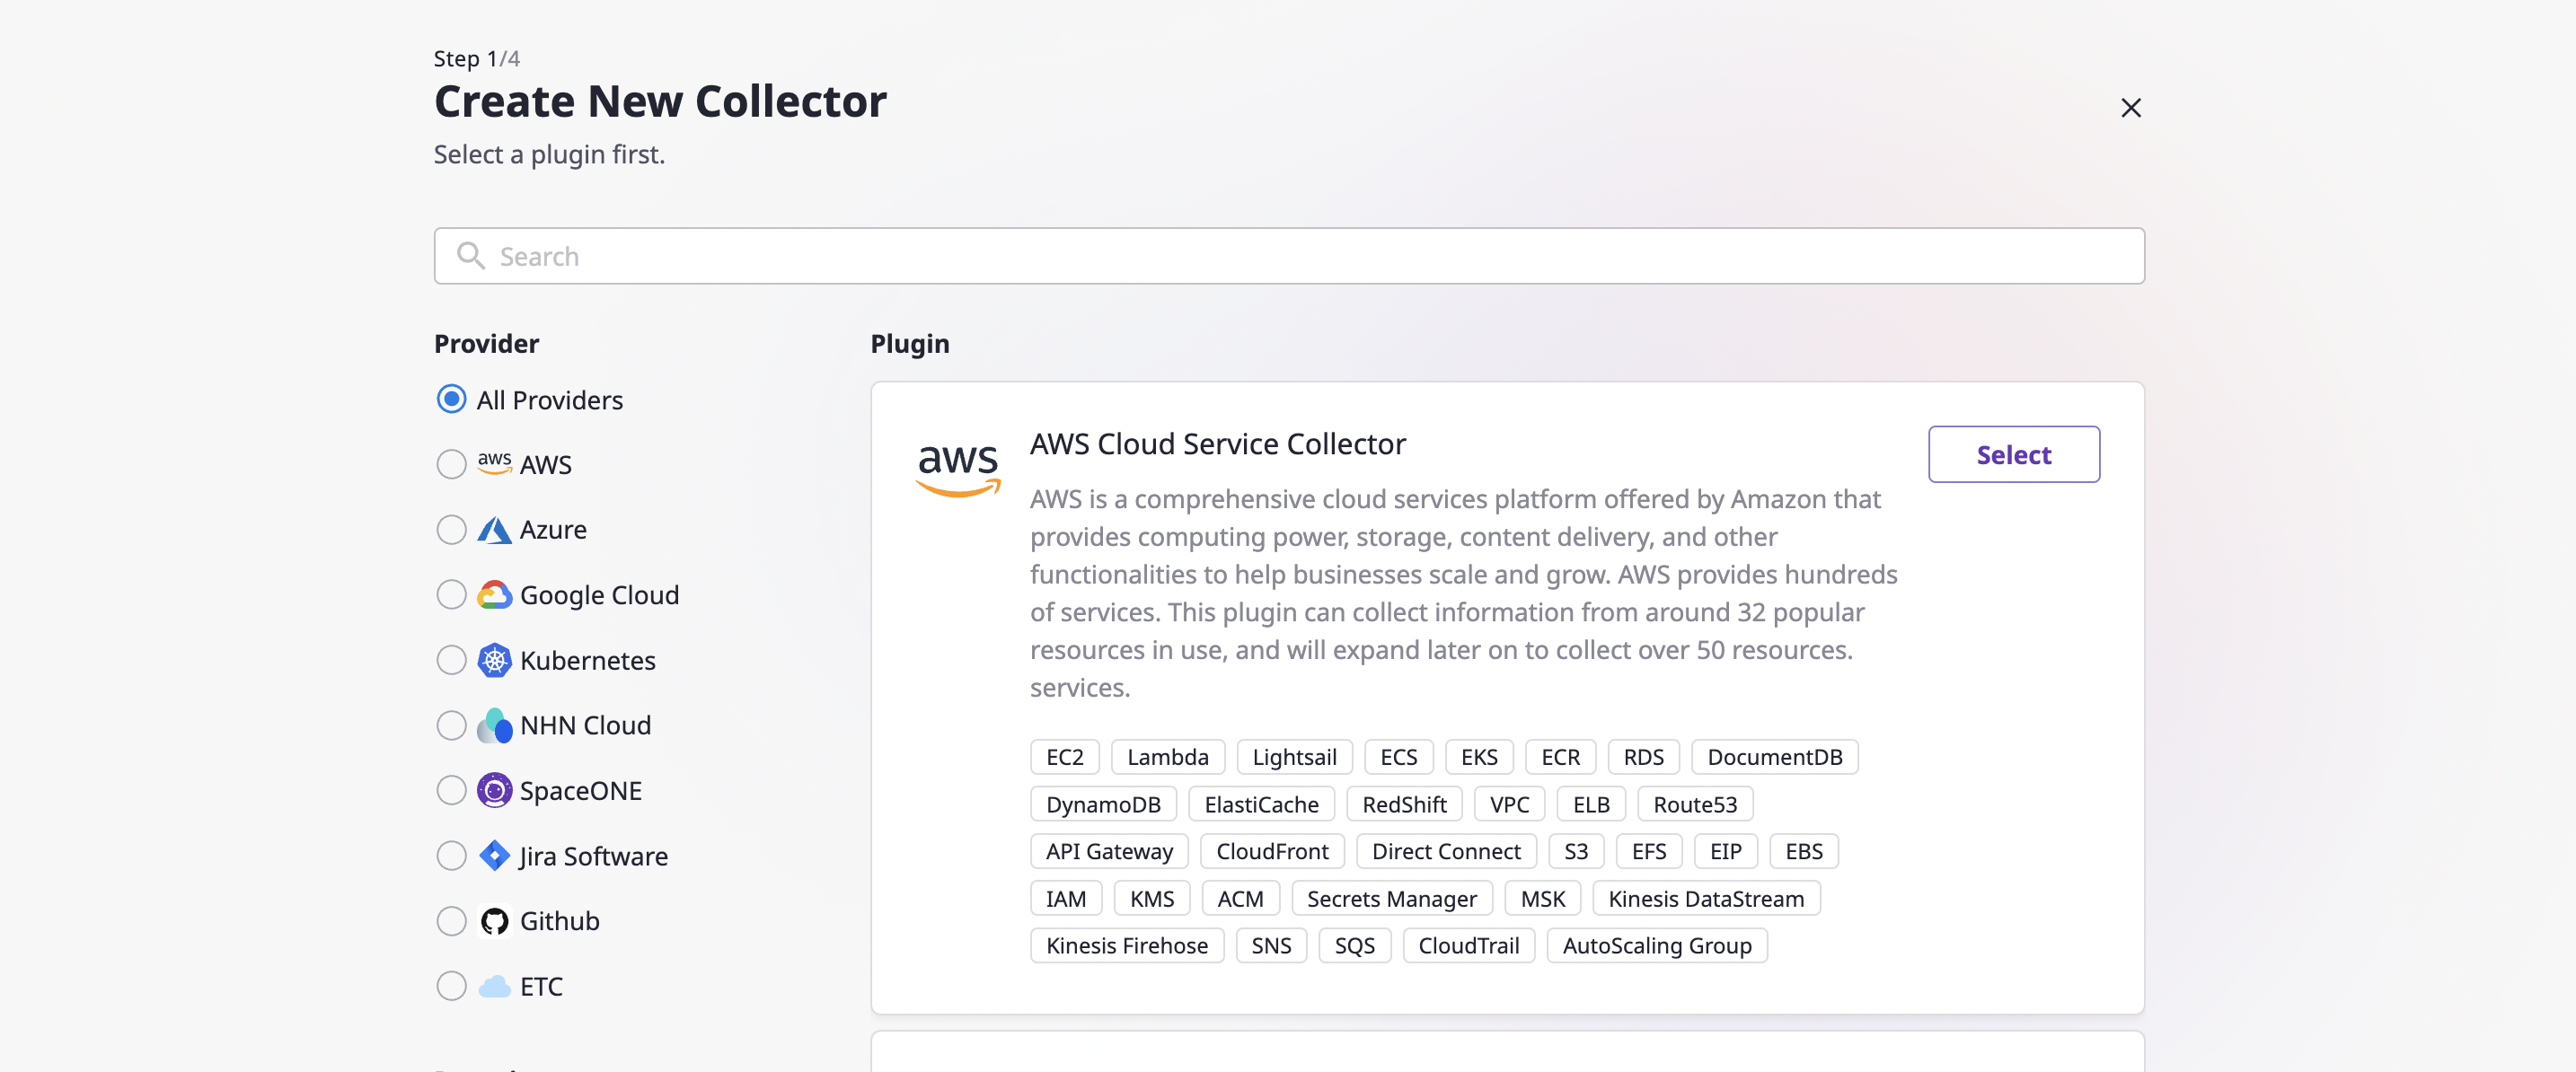
- Learn more about collector plugins here
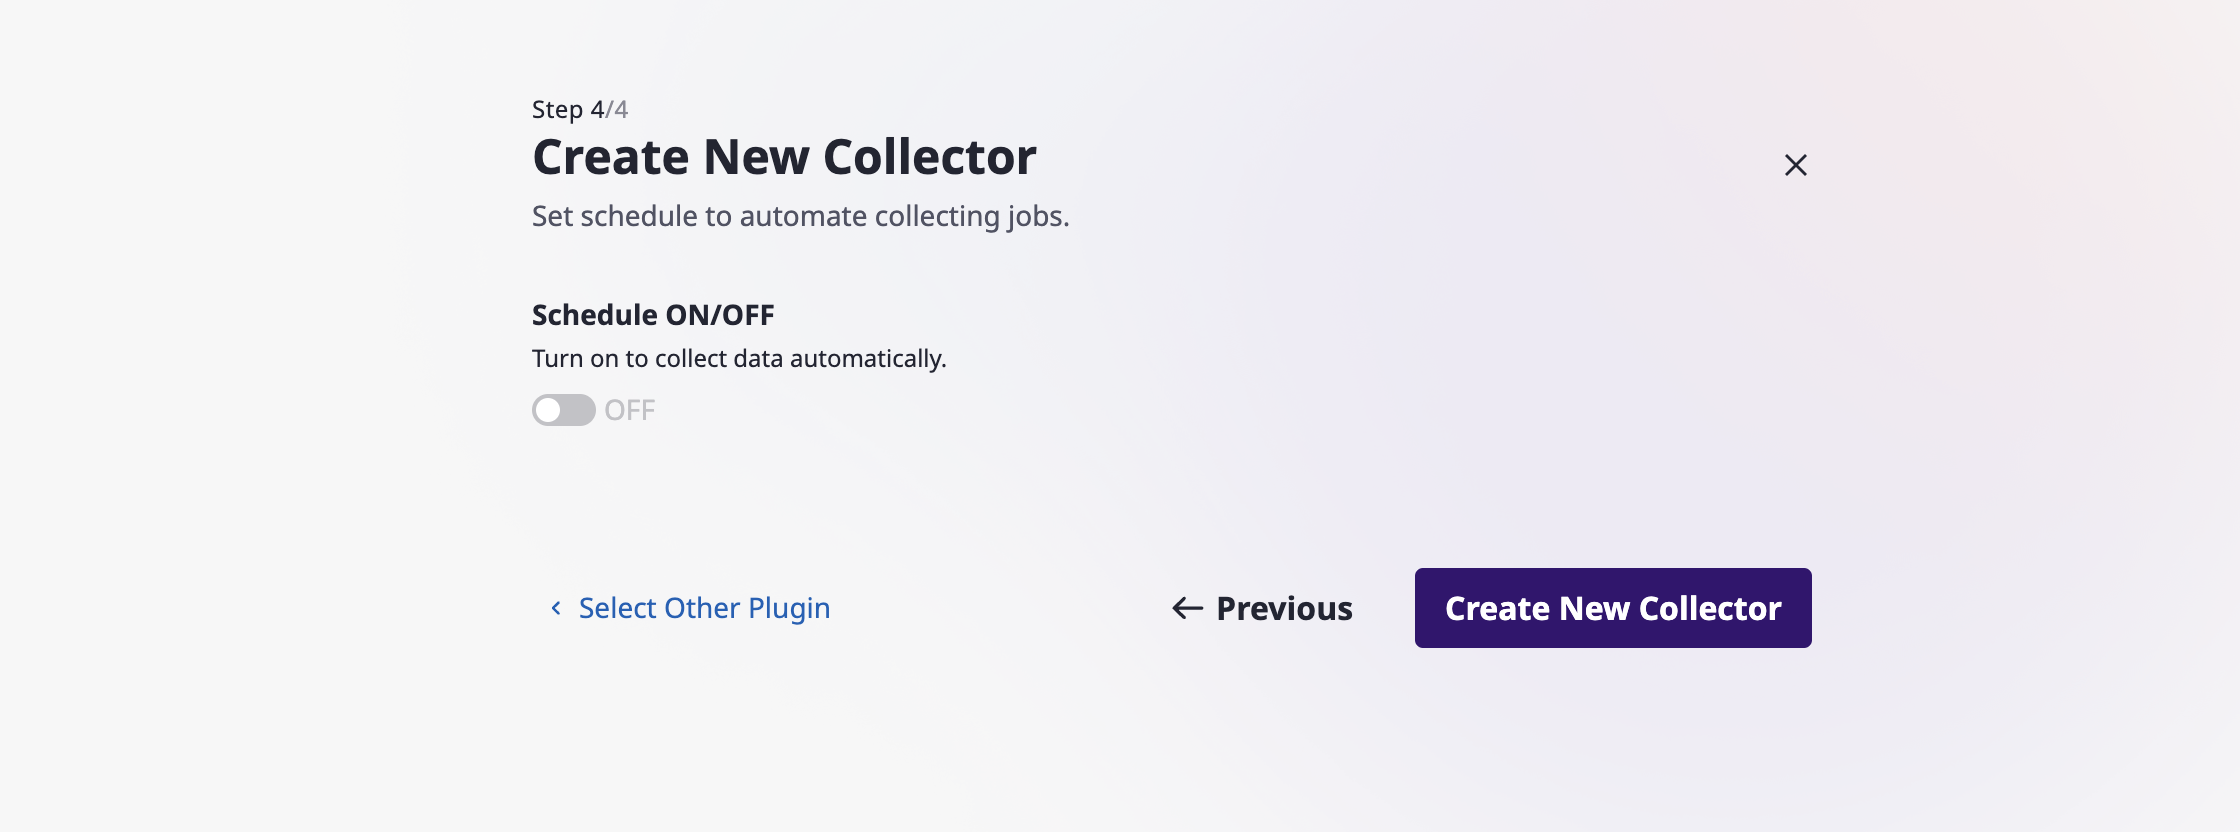
(4) Proceed through Steps 1 to 4
- In the final step (Step 4), you can set the collection schedule and enable 'Collect Data Immediately' upon creation.
➋ Editing/Deleting a Collector
(1) In Admin Center, go to [Asset Inventory > Collector]
(2) Select a collector needed to modify from the list
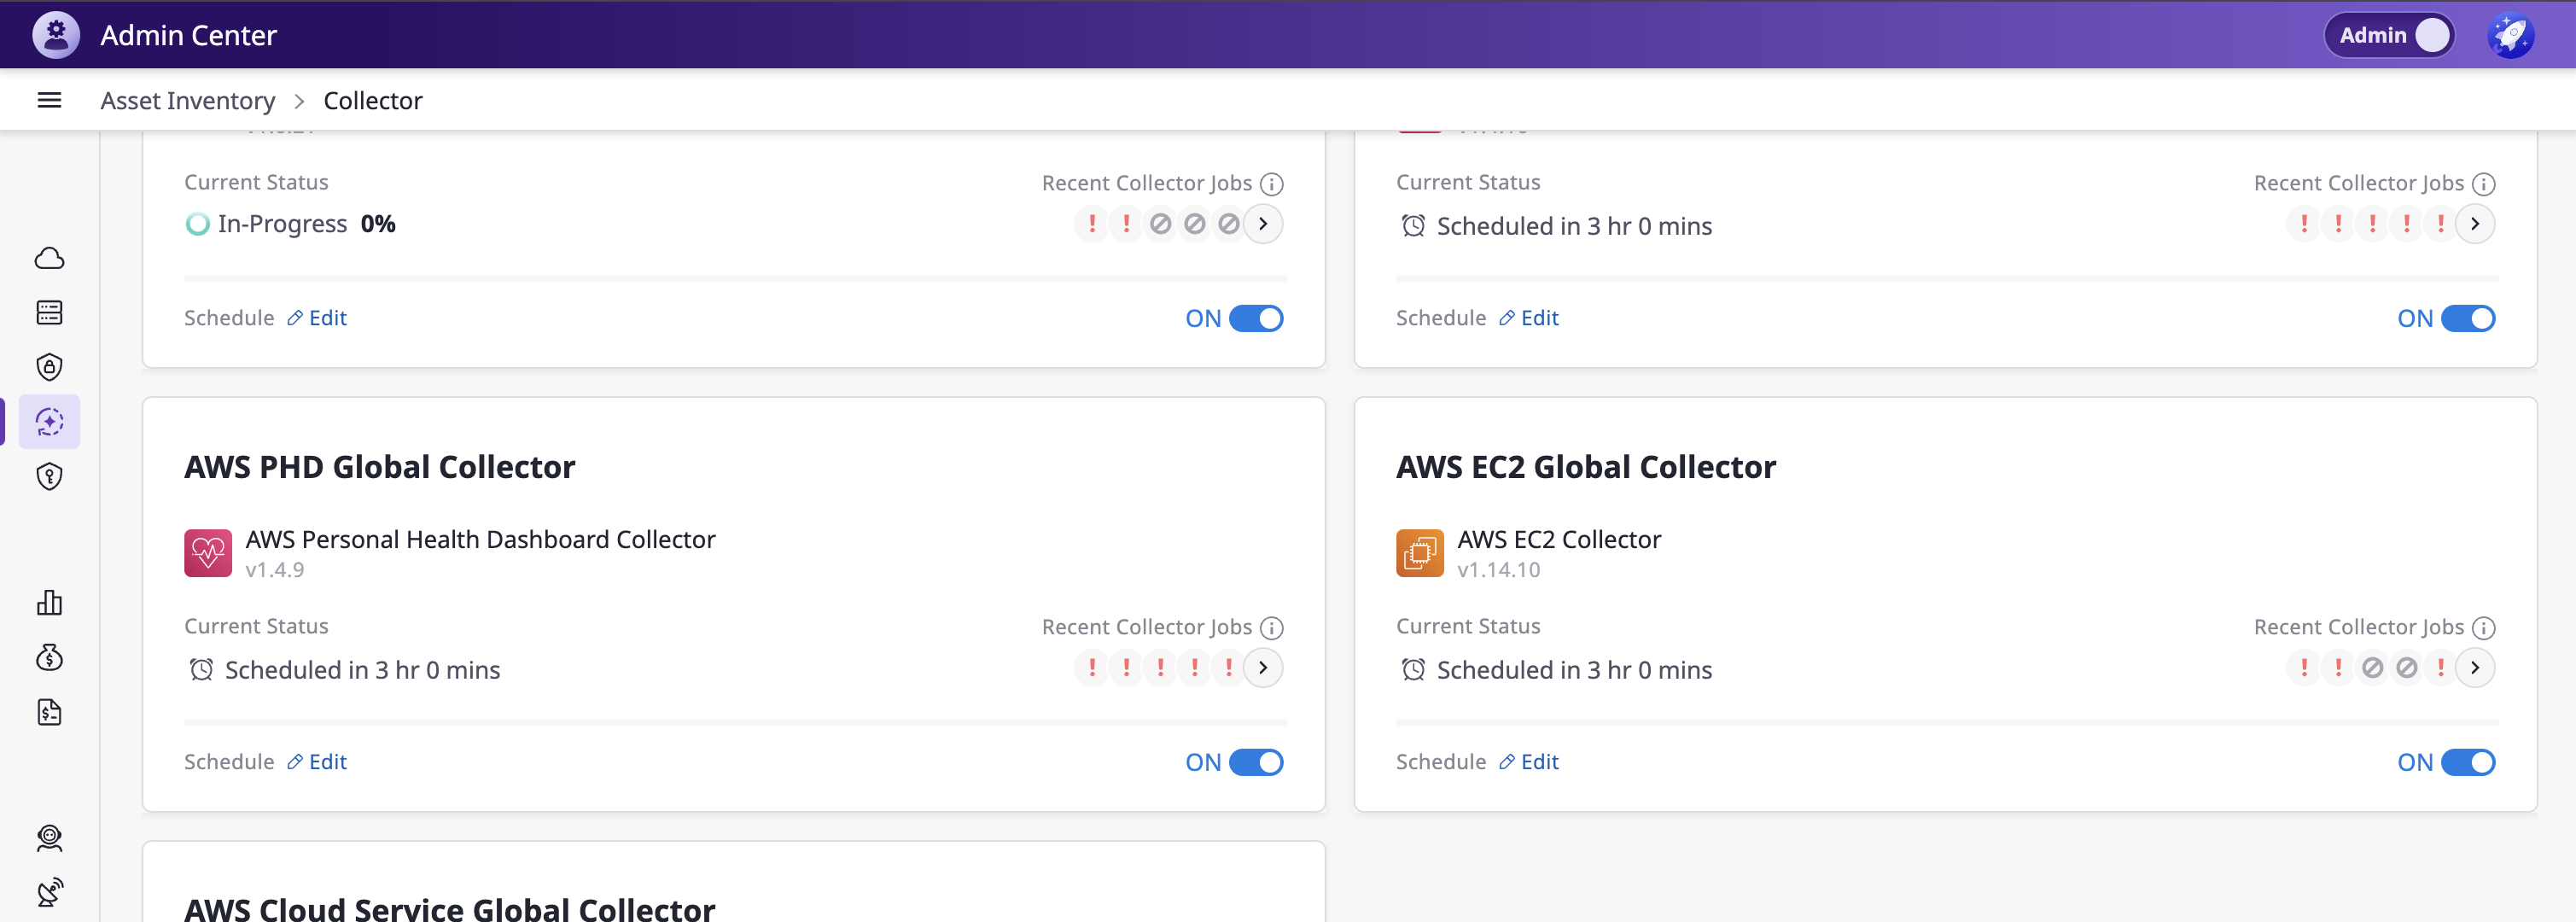
(3) In the detailed page of the selected collector, you can edit sections such as:
- Base Information / Schedule / Additional Options
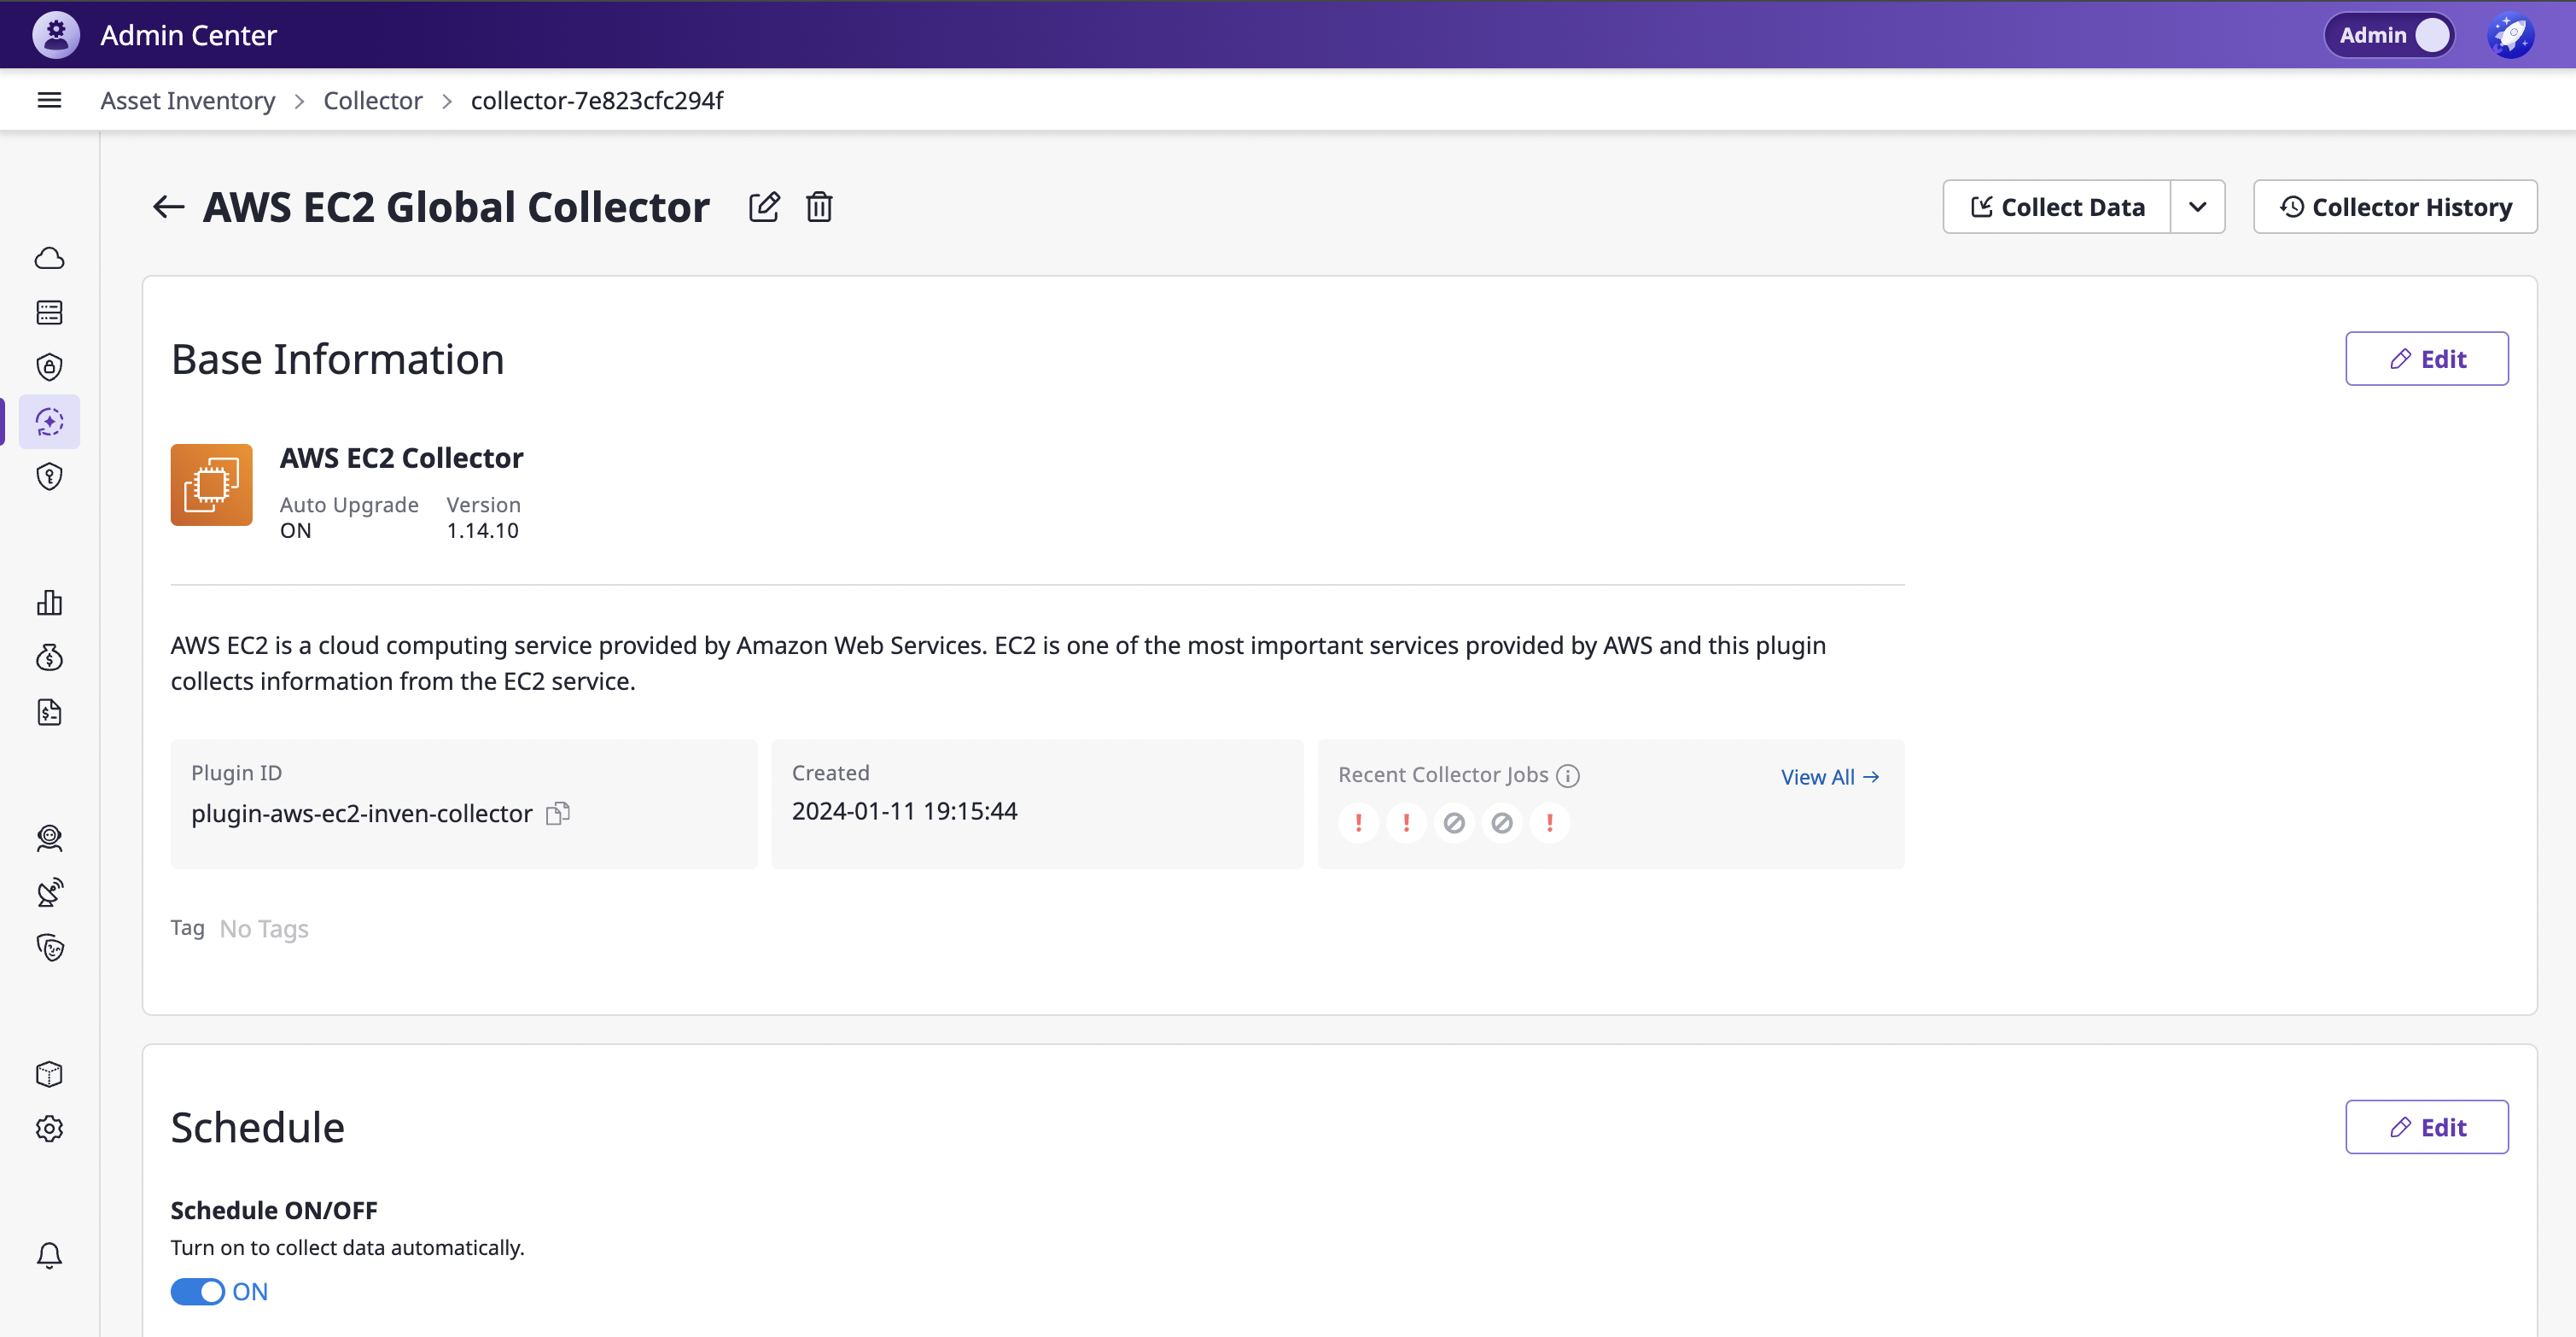
(4) Edit the collector name or delete it:
- Use the [✏️] edit button next to the collector name at the top to change the name.
- Use the [🗑️] delete button next to the collector name at the top to delete the collector.

➌ Collecting Data
(1) In Admin Center, go to [Asset Inventory > Collector]
(2) With mouse over, the [Collect Data] button appears, allowing immediate data collection
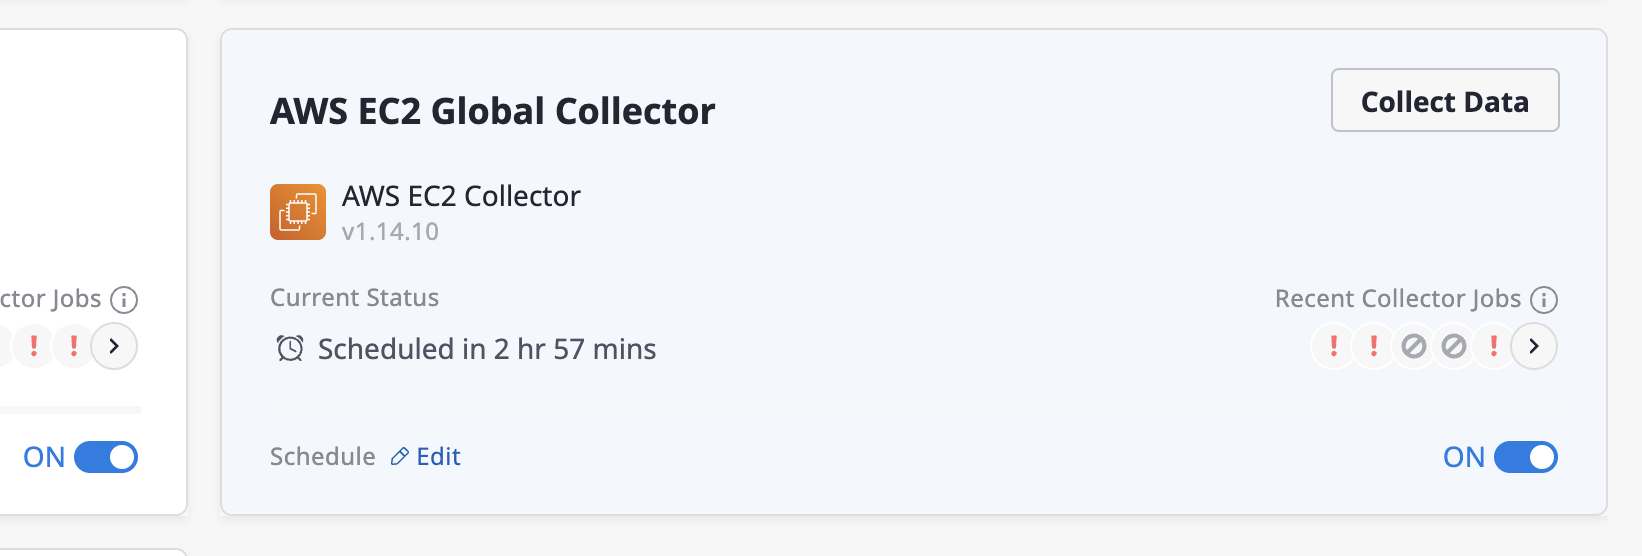
(3) Click a collector to go to the detailed page and use the [Collect Data] button at the top for immediate collection.

Data collection is based on (cloud) service accounts registered within each workspace.
For managing and registering service accounts in the workspace environment, please refer to here
Viewing All Resources in the Domain
In Admin mode, you can view all resources collected across all workspaces within the domain.
(1) [Asset Inventory > Cloud Service]: Overview of all cloud service resources.
(2) [Asset Inventory > Server]: Overview of servers within cloud service resources.
(3) [Asset Inventory > Security]: Security status and checklist based on the created security plugin frameworks.