Quick Start
Creating alerts
Alerts can be created in two ways:
- Create an alert manually in the Cloudforet console.
- Automatically create through an external monitoring service connection
Creating an alert manually from a console
(1) Go to the [Alert manager > Alert] page and click the [Create] button.
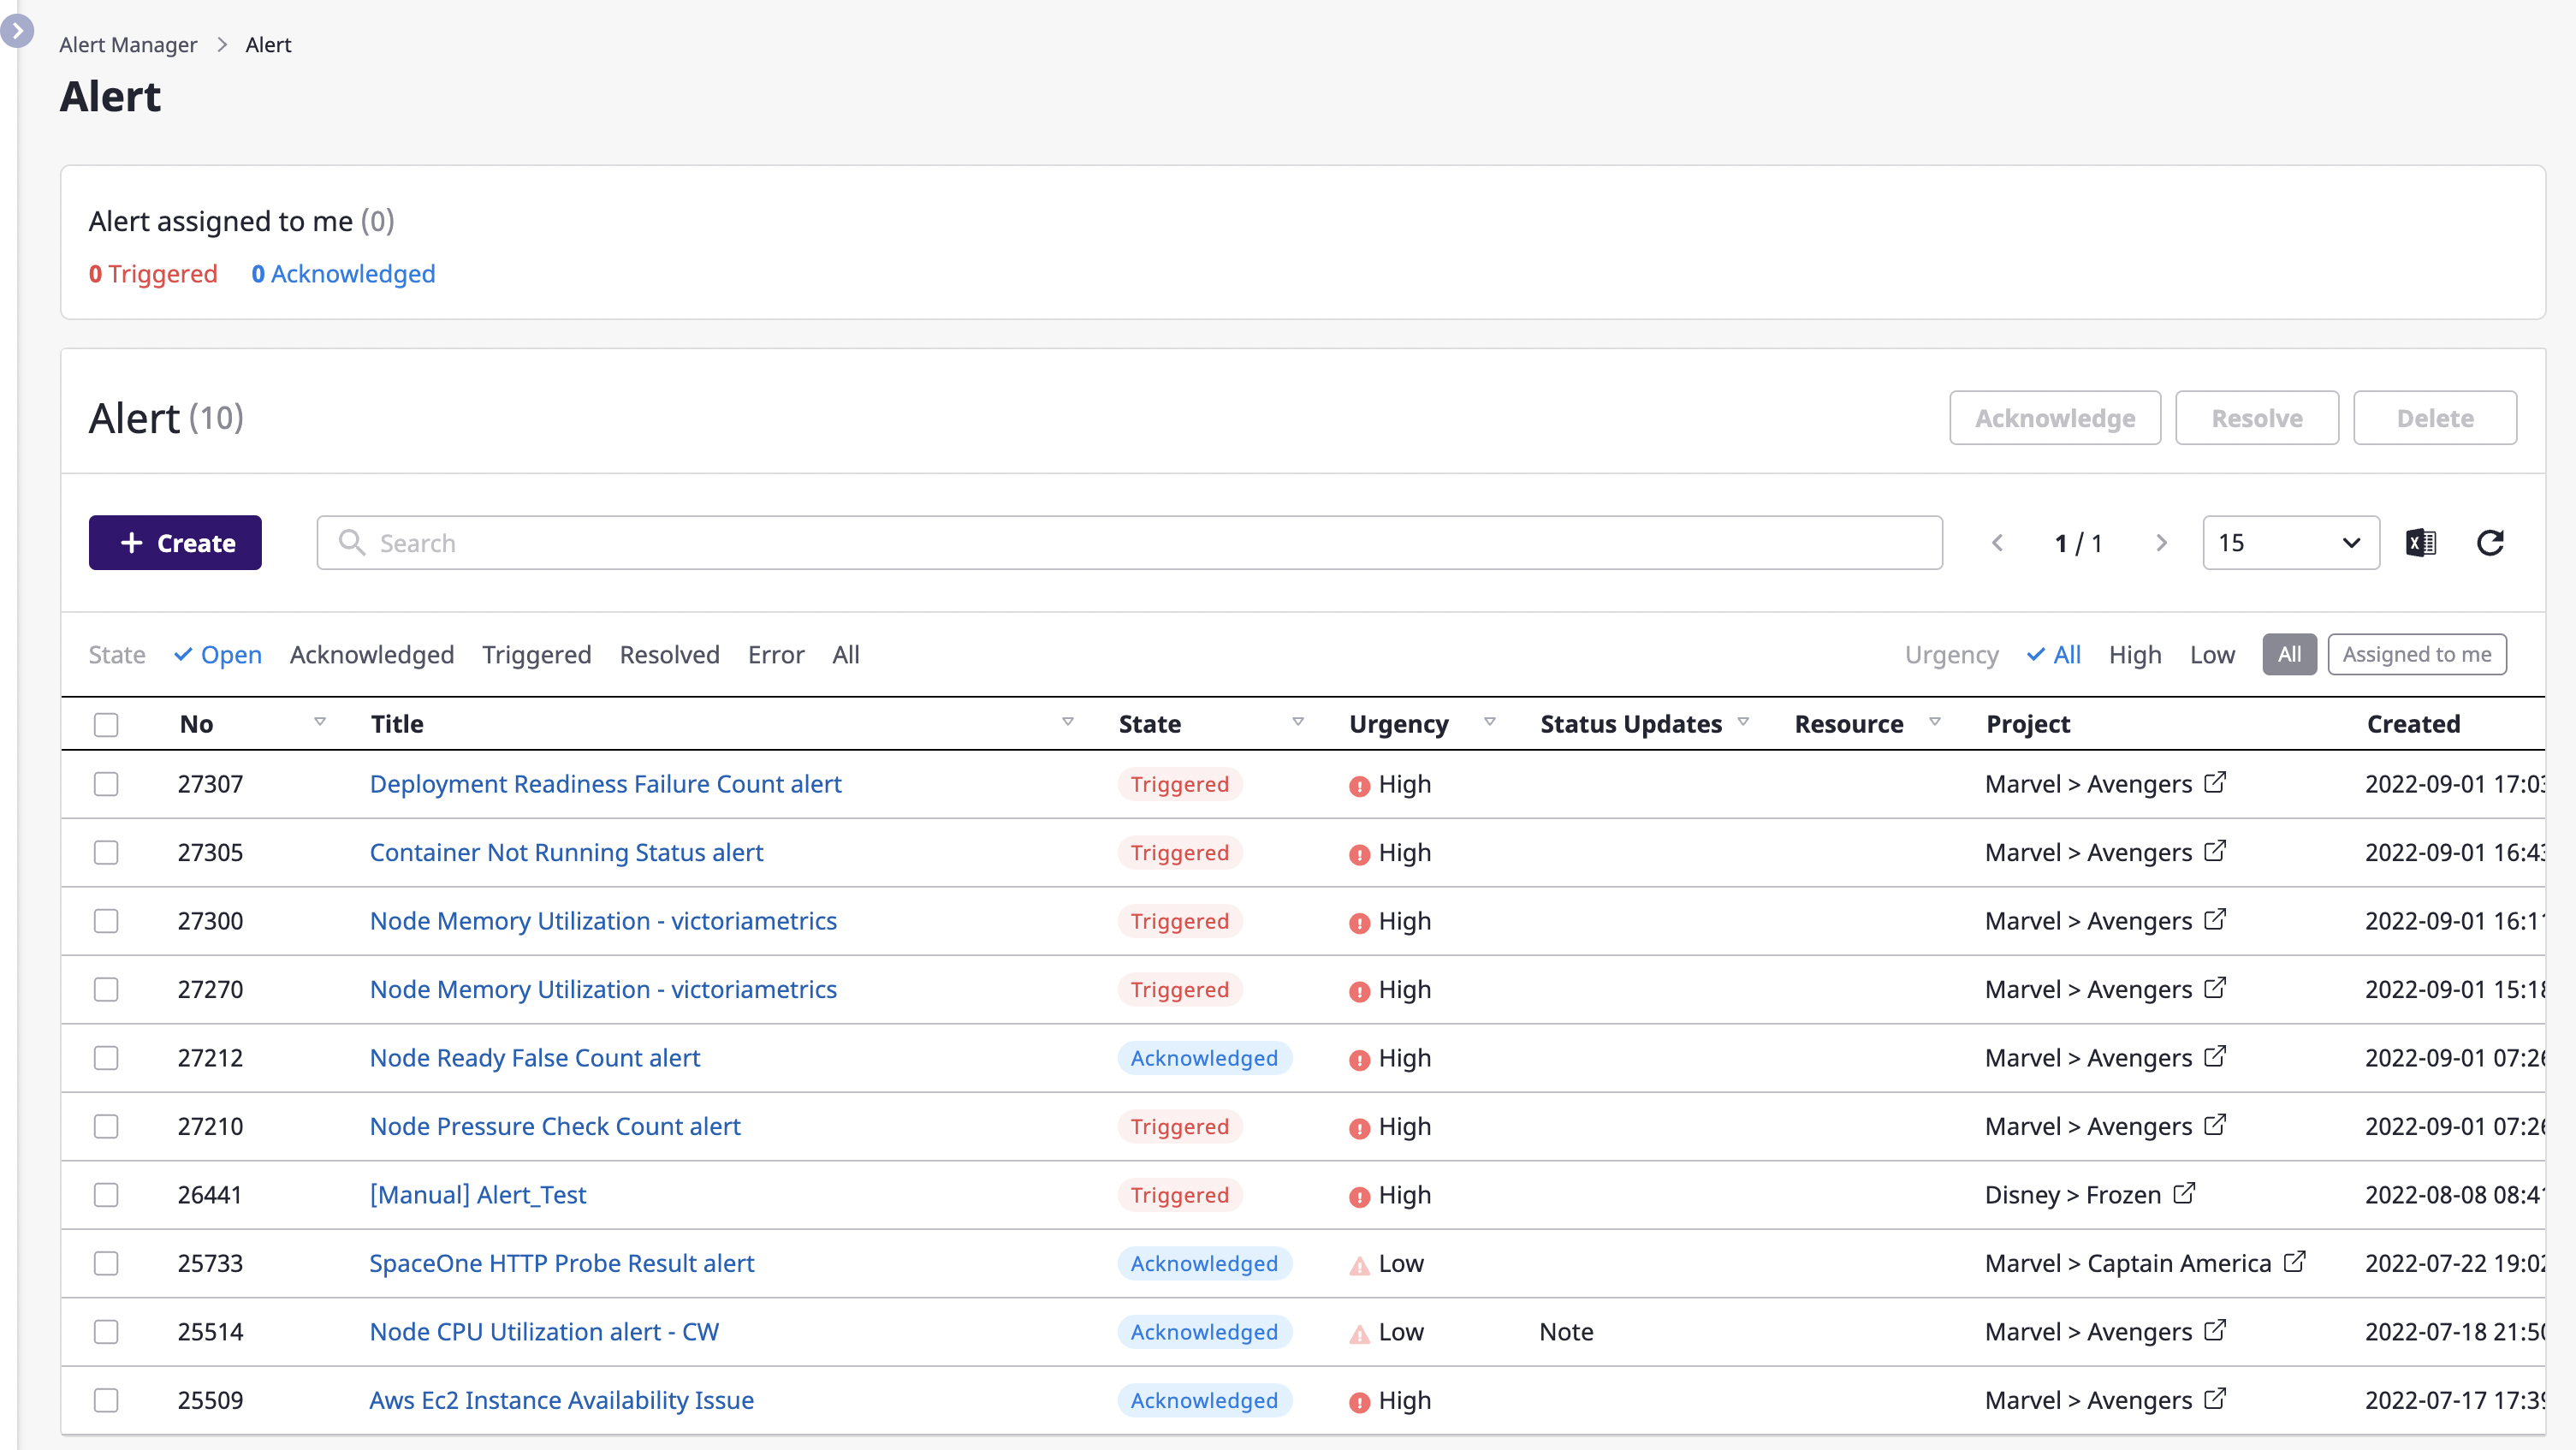
(2) When the [Create alert] modal dialog opens, fill in the input form.
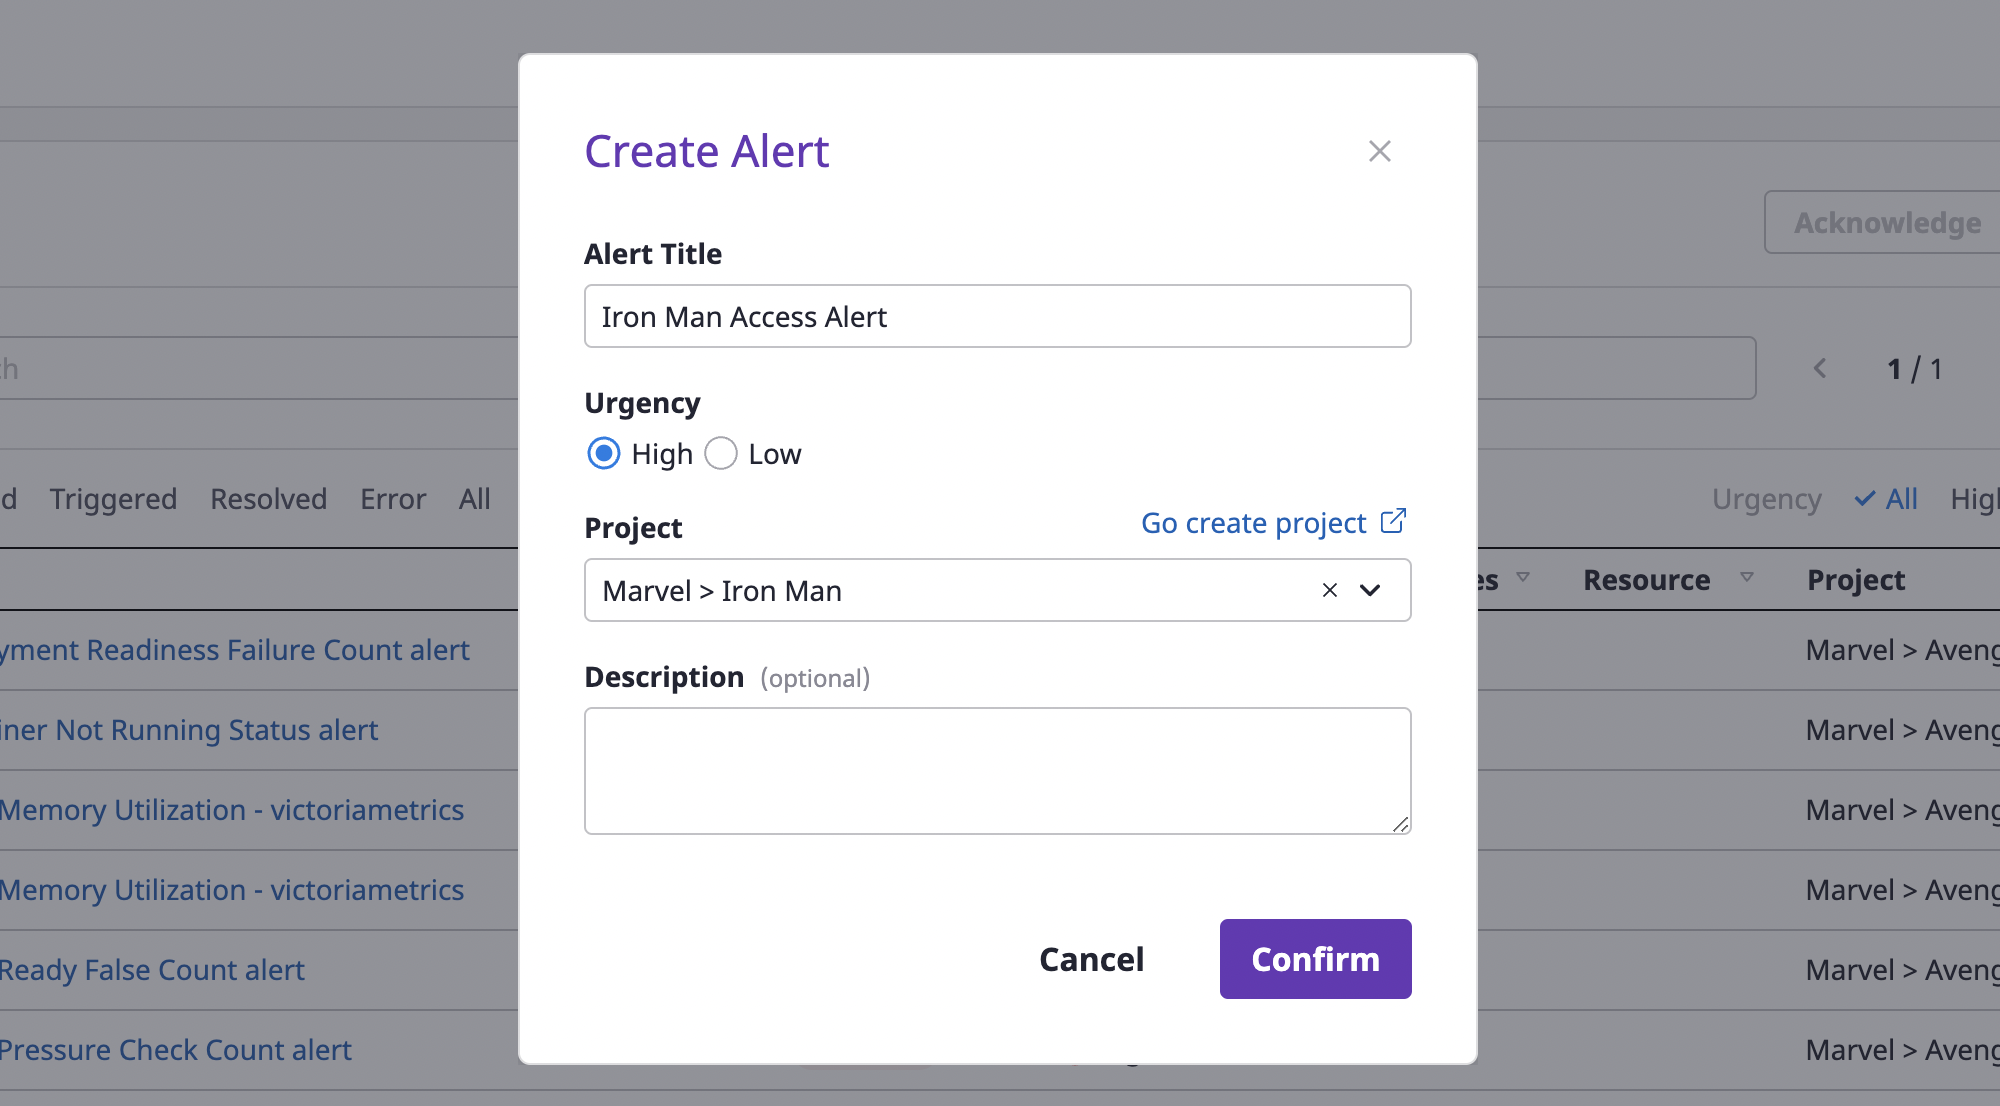
(2-1) Enter an [Alert title] and select [Urgency].
(2-2) Designate the project for which the alert occurred.
(2-3) Write [Comment] if an additional explanation is needed.
(3) Click the [OK] button to complete alert creation.
Connecting to an external monitoring service to receive alerts
When an external monitoring service is connected, an event message occurring in the service is automatically generated as an alert.
To receive alerts from the external monitoring, Webhook creation and Connection settings are required.
Webhook creation is performed in the Cloudforet console, but Connection settings must be done directly in the Cloud Service console that provides external monitoring services.
For more on how to connect an external monitoring service, see here.
Creating a webhook
To receive event messages from an external monitoring service, you need to create a webhook.
Webhooks can be created on the project detail page.
(1) Go to the [Alerts] tab of the project detail page and select the [Webhook] tab.
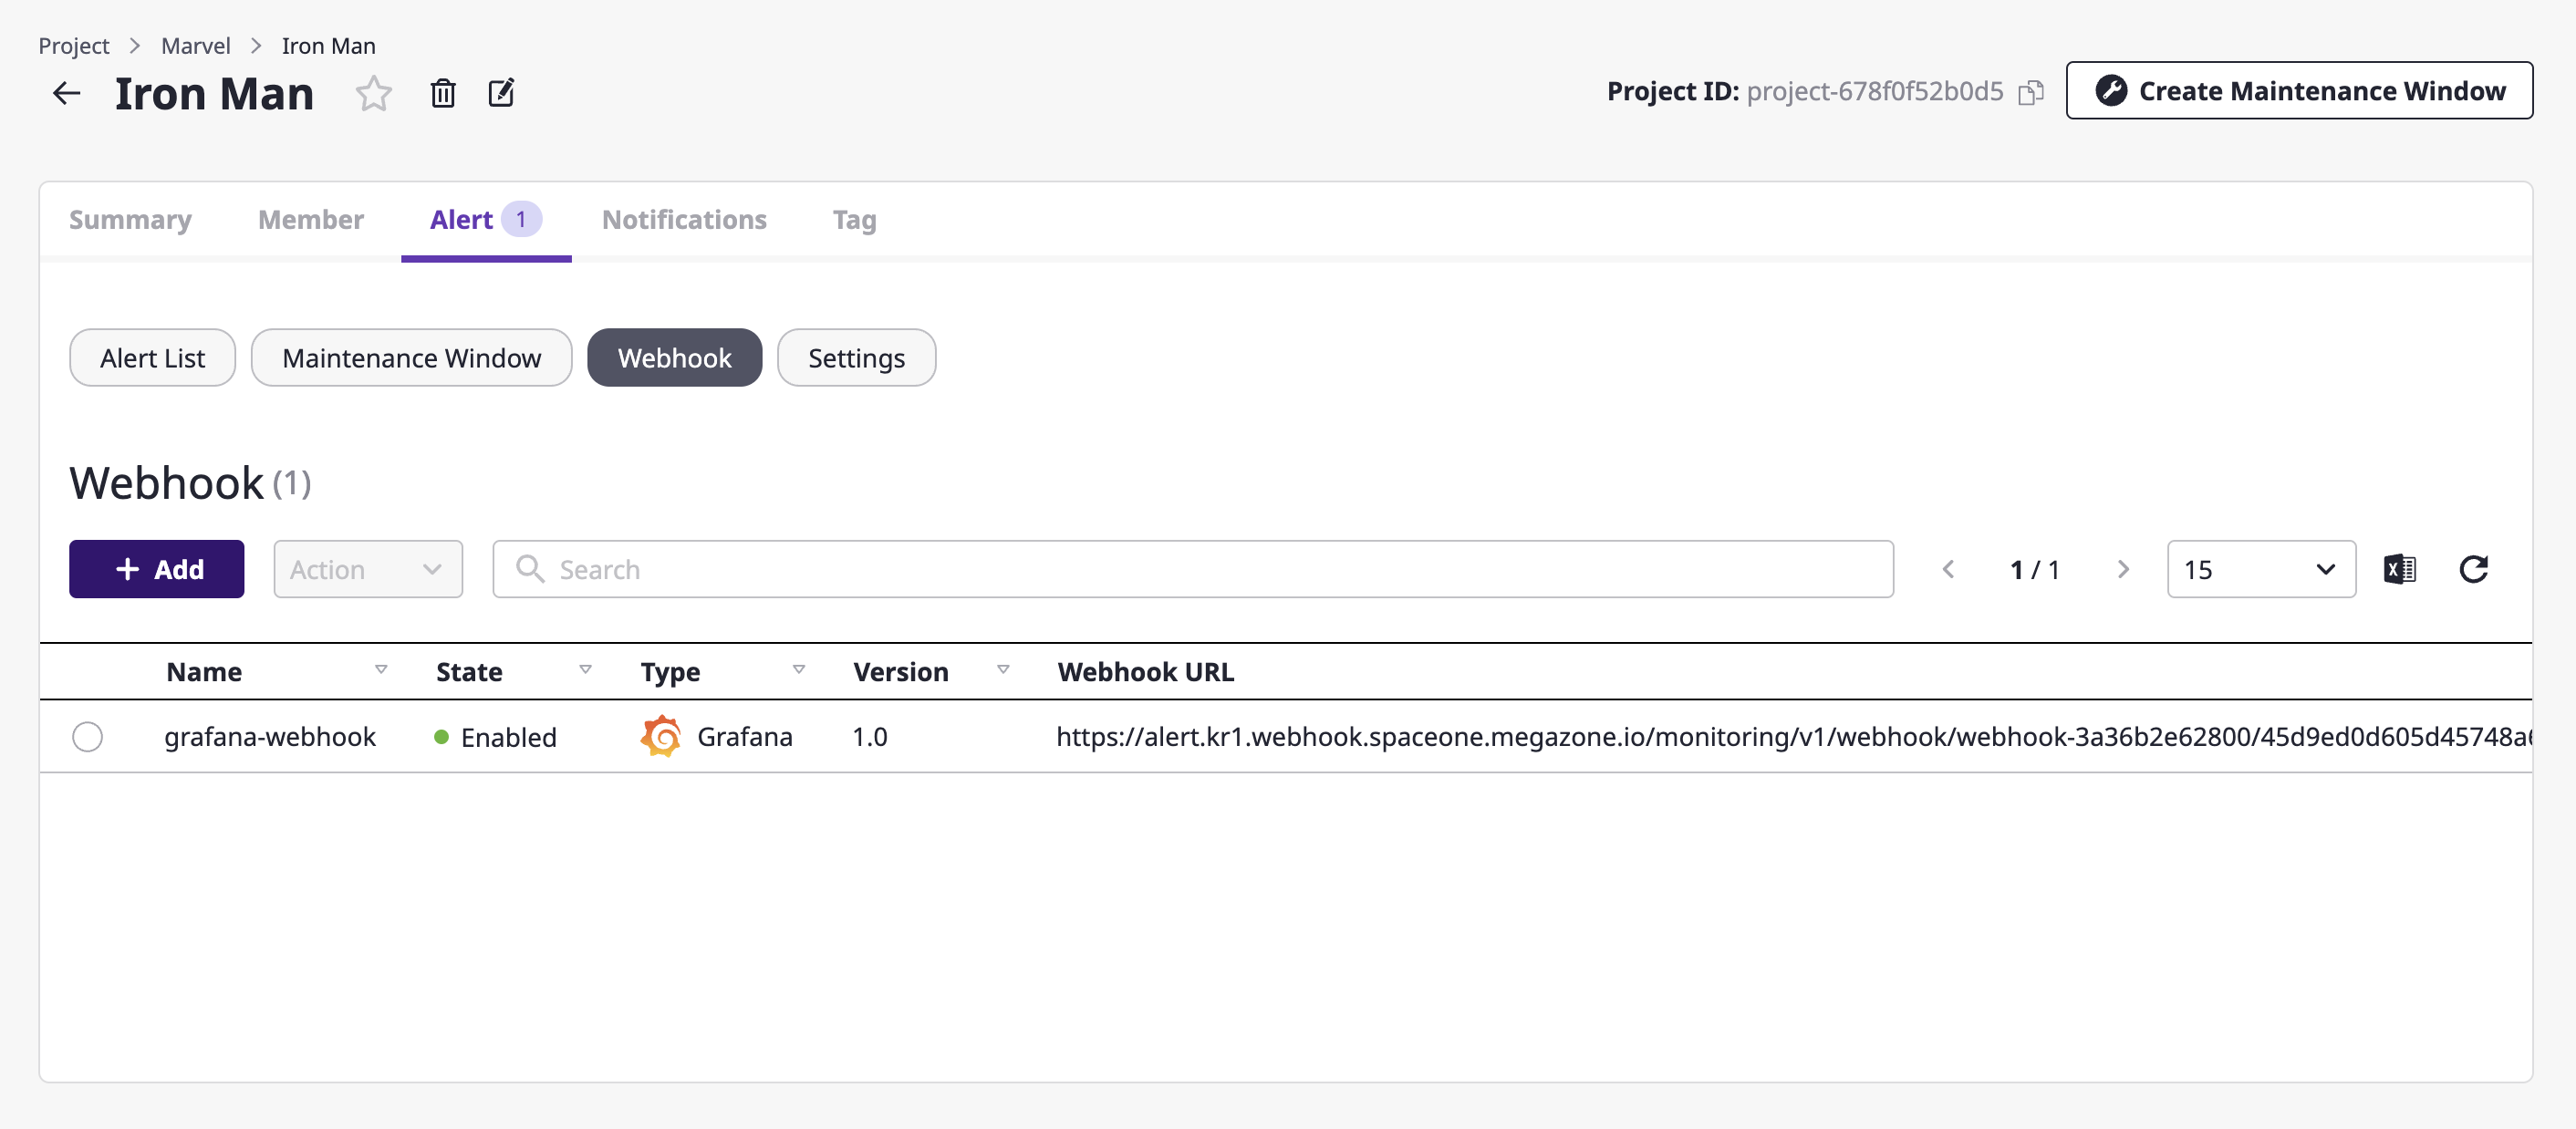
(2) Click the [Add] button.
(3) Write a name in an [Add webhook] modal dialog and select the plug-in of the external monitoring service to be connected.

(4) Click the [OK] button to complete set up.
Escalation policy settings
Whether an alert received via a webhook is sent as a notification to project members is determined by escalation policy.
(1) Inside the [Alert] tab of the project detail page, move to the [Settings] tab.

(2) Click the [Change] button in the escalation policy area.
(3) After selecting the [Create new policy] tab, enter the settings to create an escalation policy.
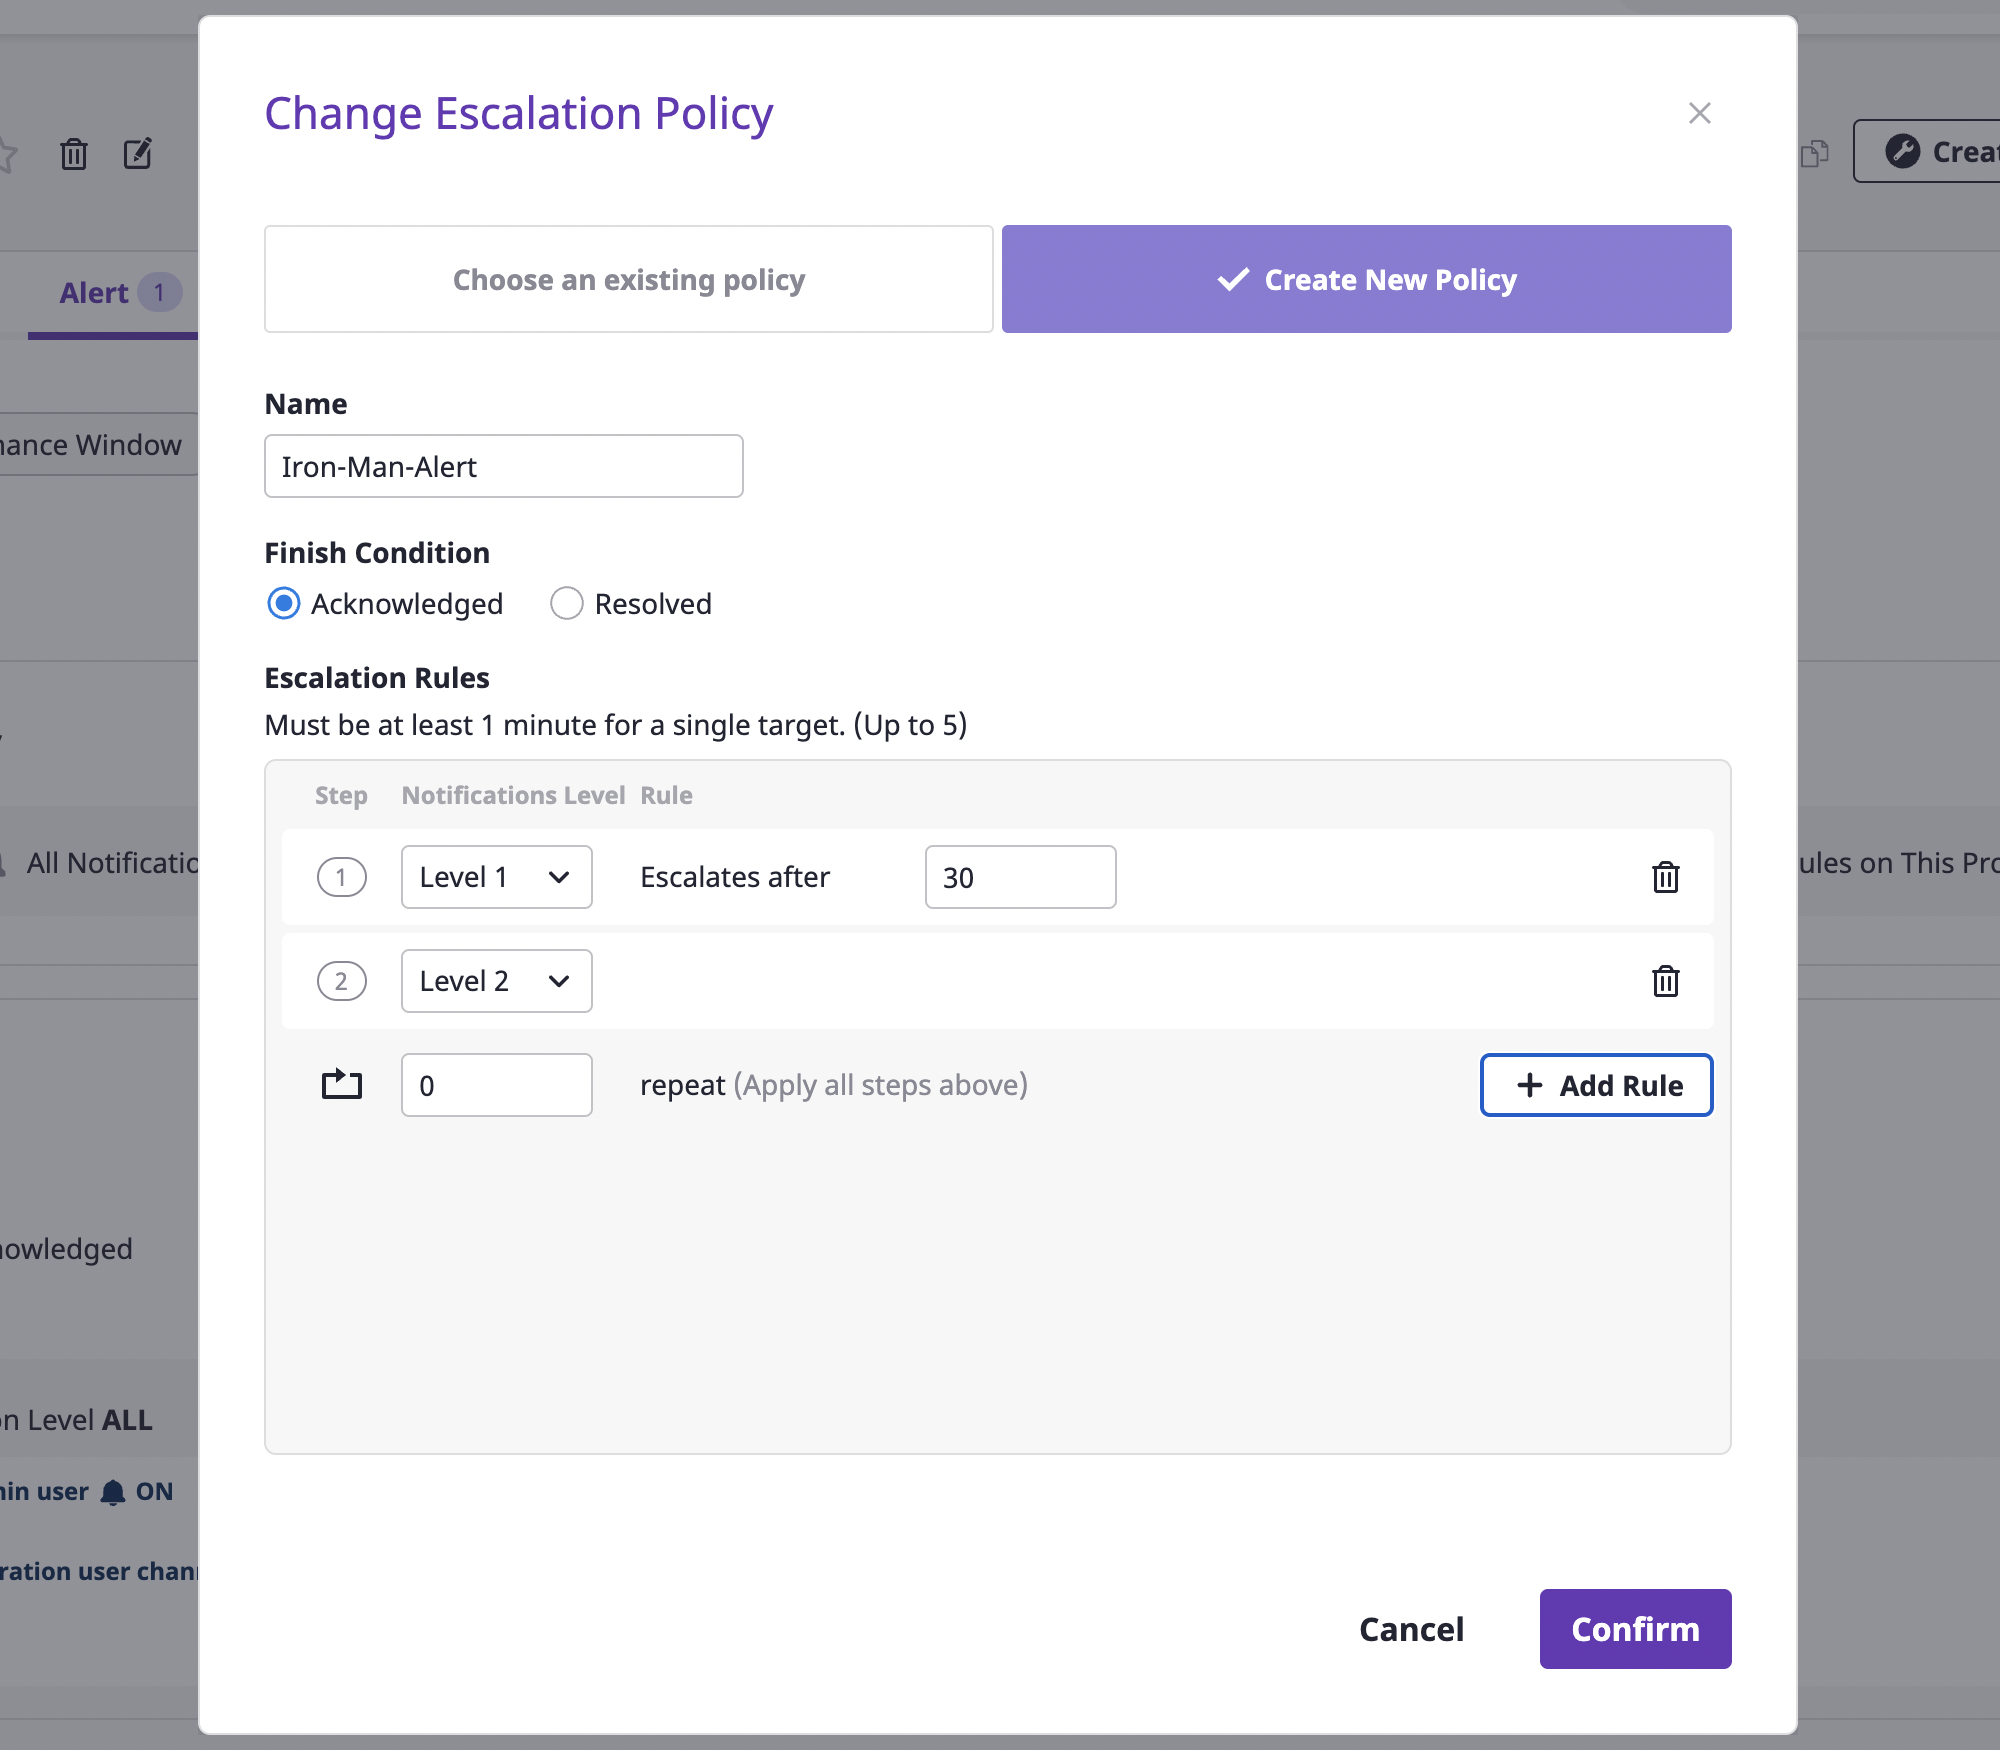
| Policy | Description |
|---|---|
| Exit condition (status) | Define the condition to stop the generated alarm. |
| Range | Indicate the scope in which escalation policy can be used. In case of "global," the policy can be used in all projects within the domain, and in case of "project," within the specified project. |
| Escalation Rules | All levels from LV1 to LV5 can be added. Alerts are sent to a notifications channel belonging to a set level, and a period between steps can be given in minutes from step 2 or higher. |
| Number of repetitions | Define how many times to repeat an alert notification. Notifications can be repeated up to 9 times. |
| Project (if you create it from the escalation rules page) | If the scope is a project, this indicates the project being targeted. |
(4) When all settings are completed, click the [OK] button to create the escalation policy.
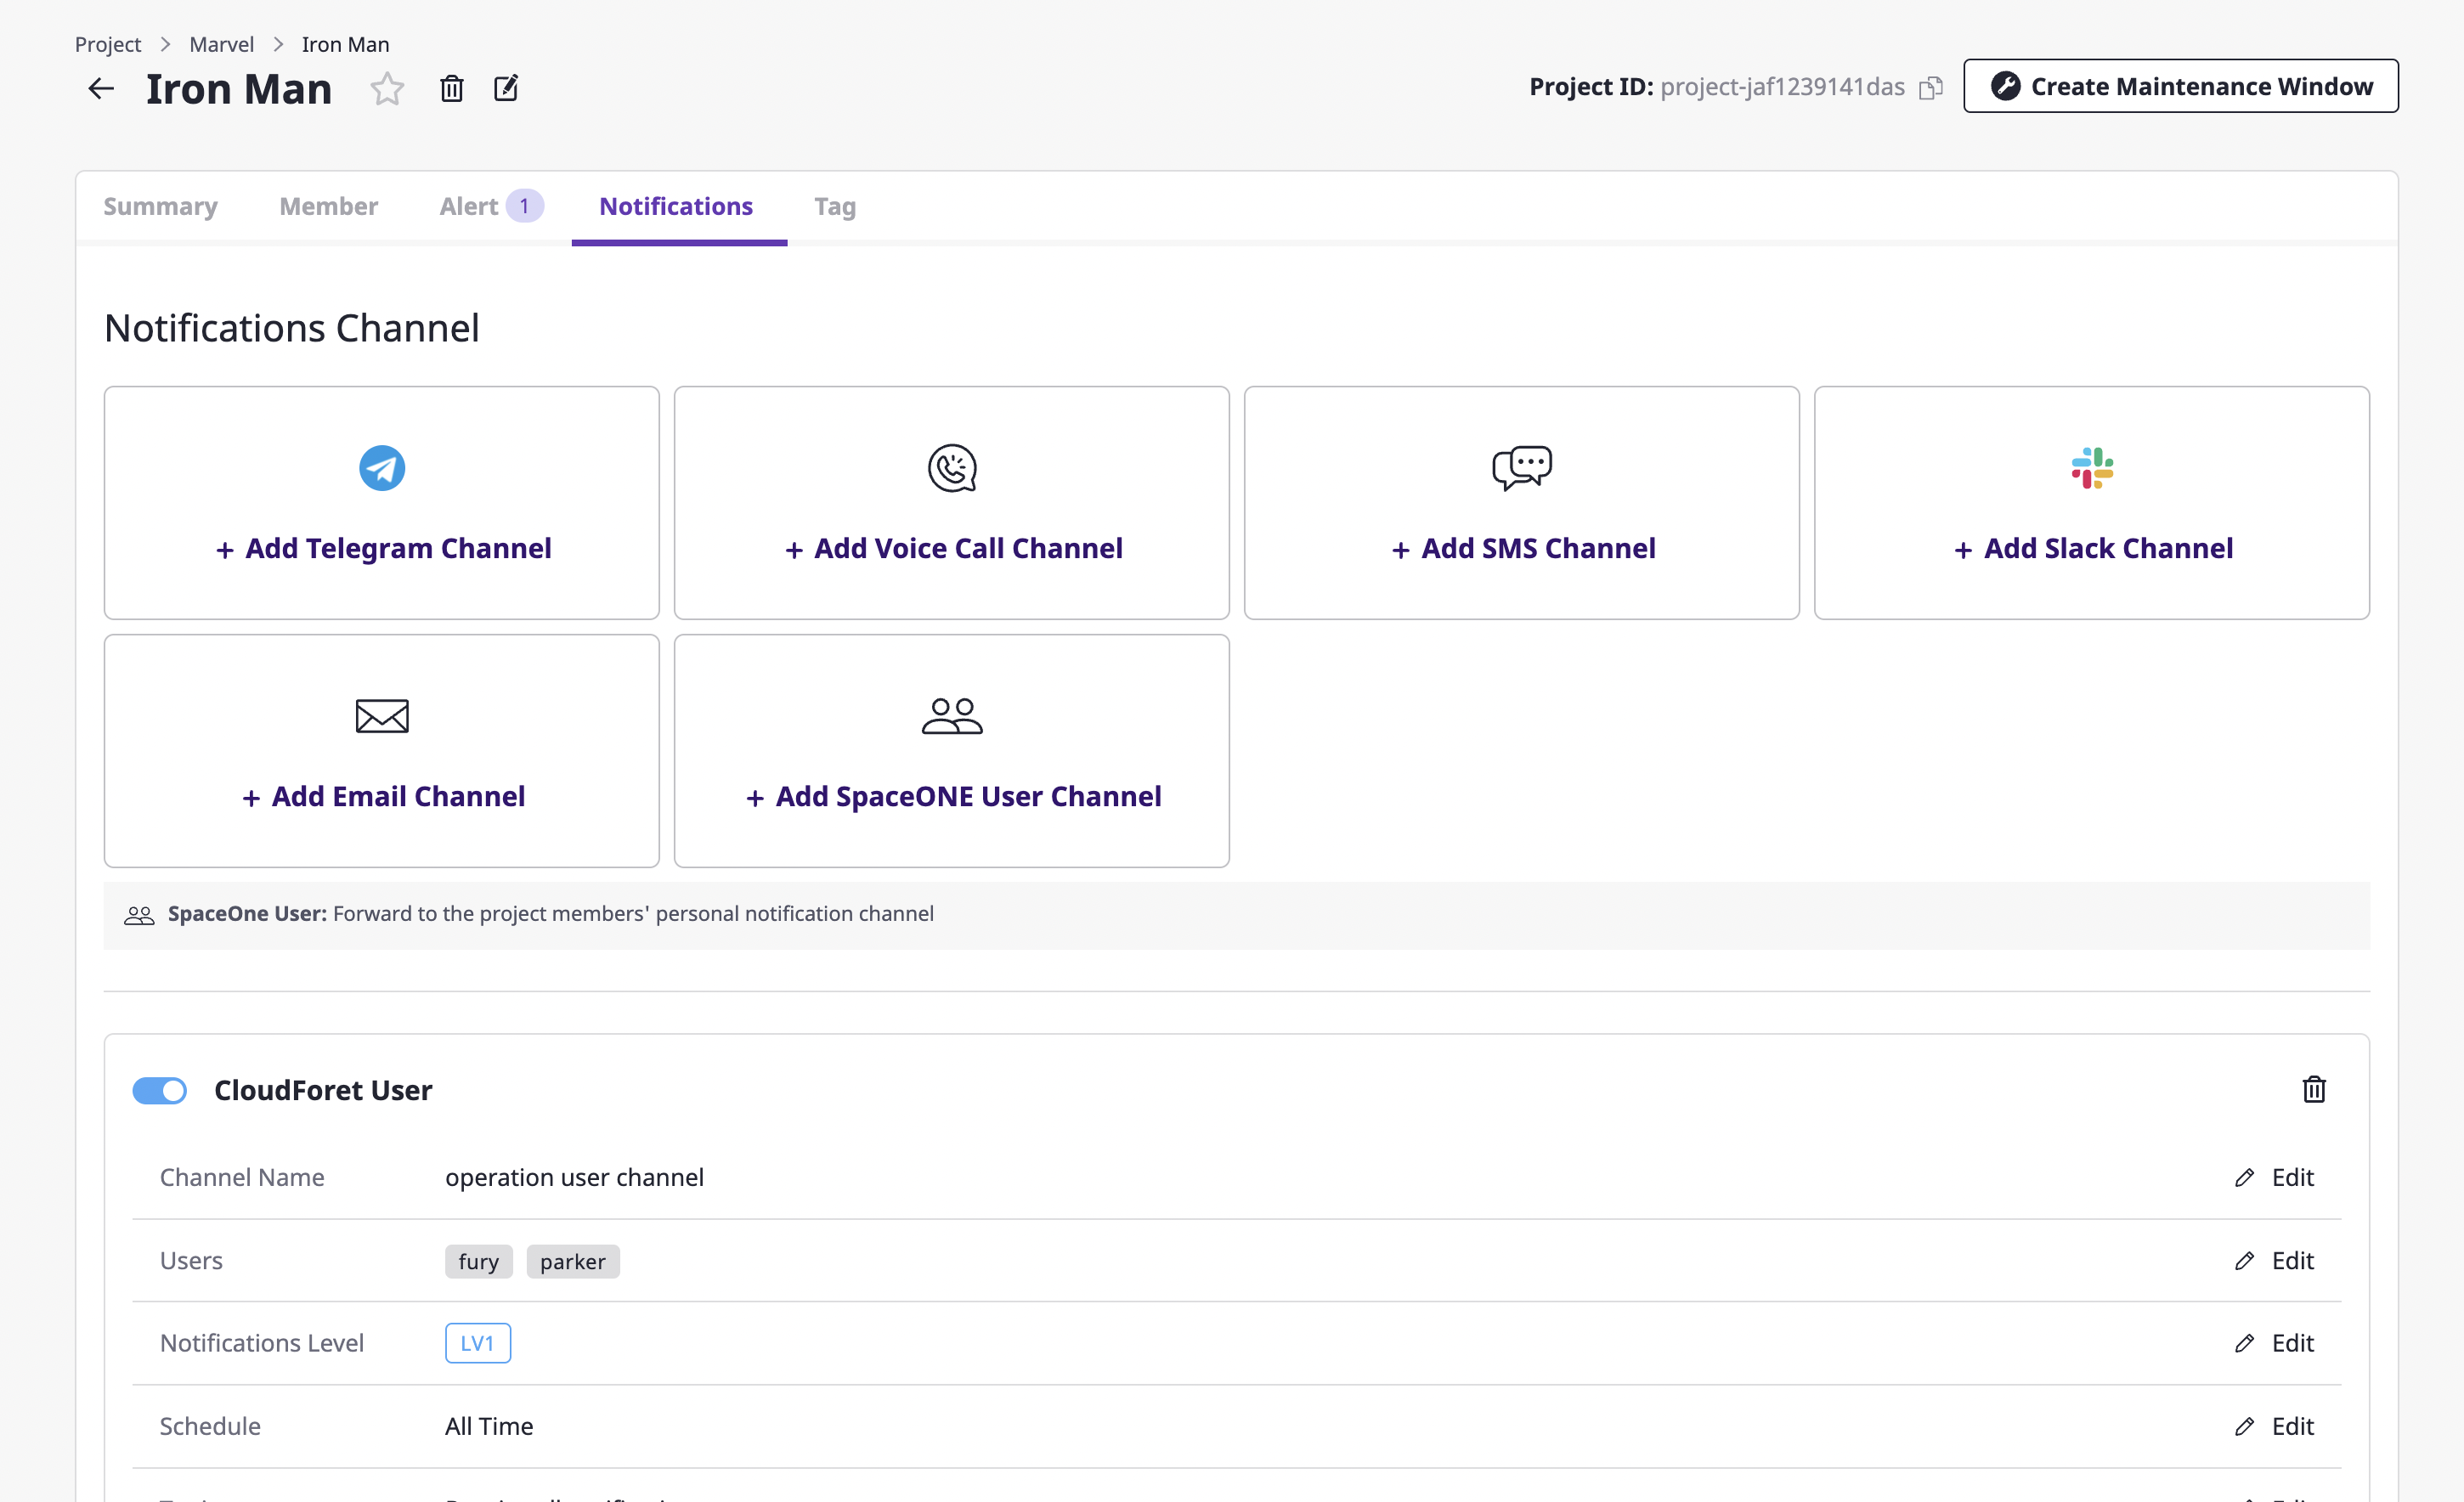
Notifications settings
In the [Notification] tab of the project detail page, you can decide whether or not to Create a notifications channel and enable it.
Notifications channel is a unit that expresses the systematic recipient area, including the method and level of notifications transmission. It helps to transmit alerts according to the level set in the escalation rule.
(1) On the project detail page, select the [Notification] tab and click the [Add channel] button of the desired notifications channel.
(2) On the notification creation page, enter the settings to create a notifications channel.
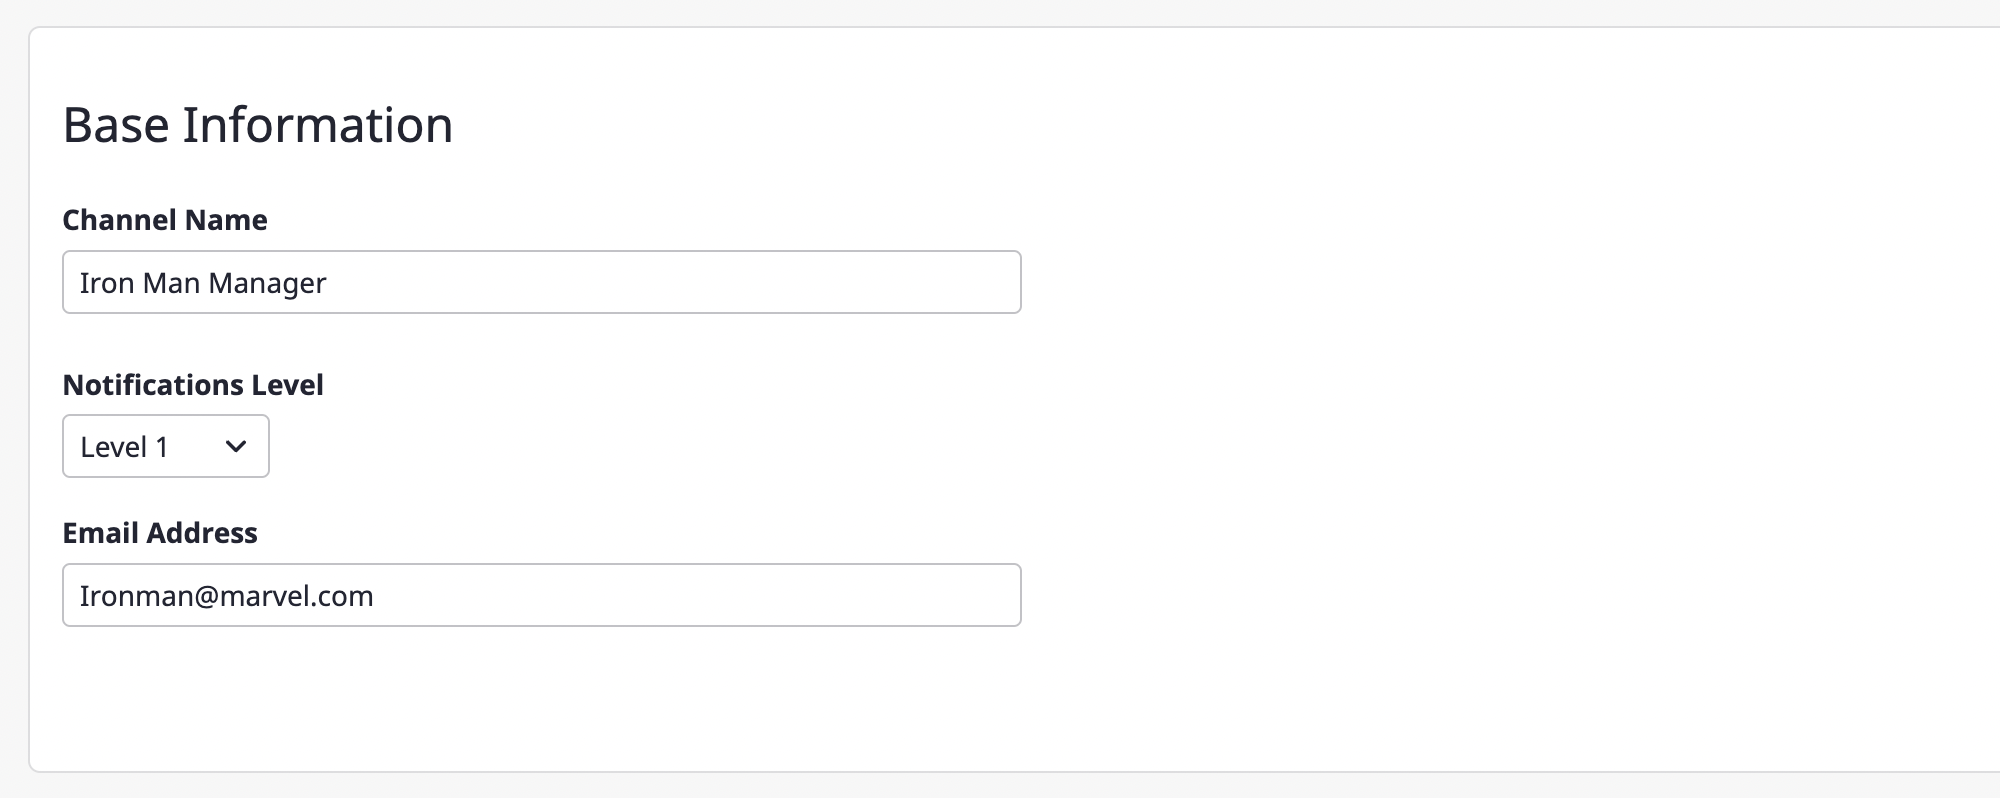
(2-1) Enter the basic information about the notifications channel you want to create, such as the required channel name and notification level. The [Channel name] and [Notification level] comprise the basic setting fields, and afterward, the remaining fields receive different information per channel.
(2-2) You can set a schedule to receive notifications only at certain times.

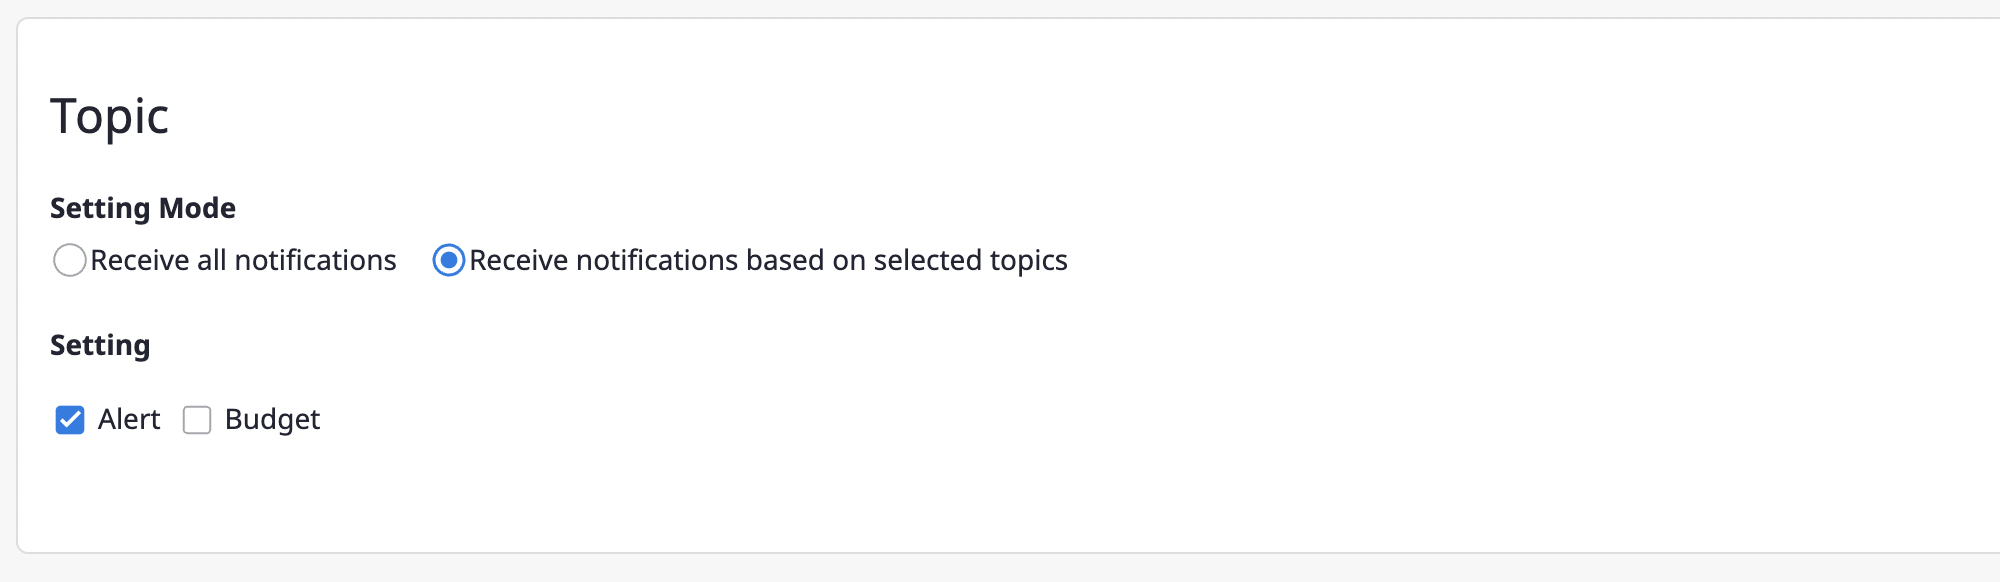
(2-3) Notifications can be received when an alert occurs or when a threshold for budget notifications was reached. You can set the occasions when you receive notifications in [Topic].
(3) Click the [Save] button to complete the notifications channel creation.
(4) Notifications channels that have been created can be checked at the bottom of the [Notification] tab.
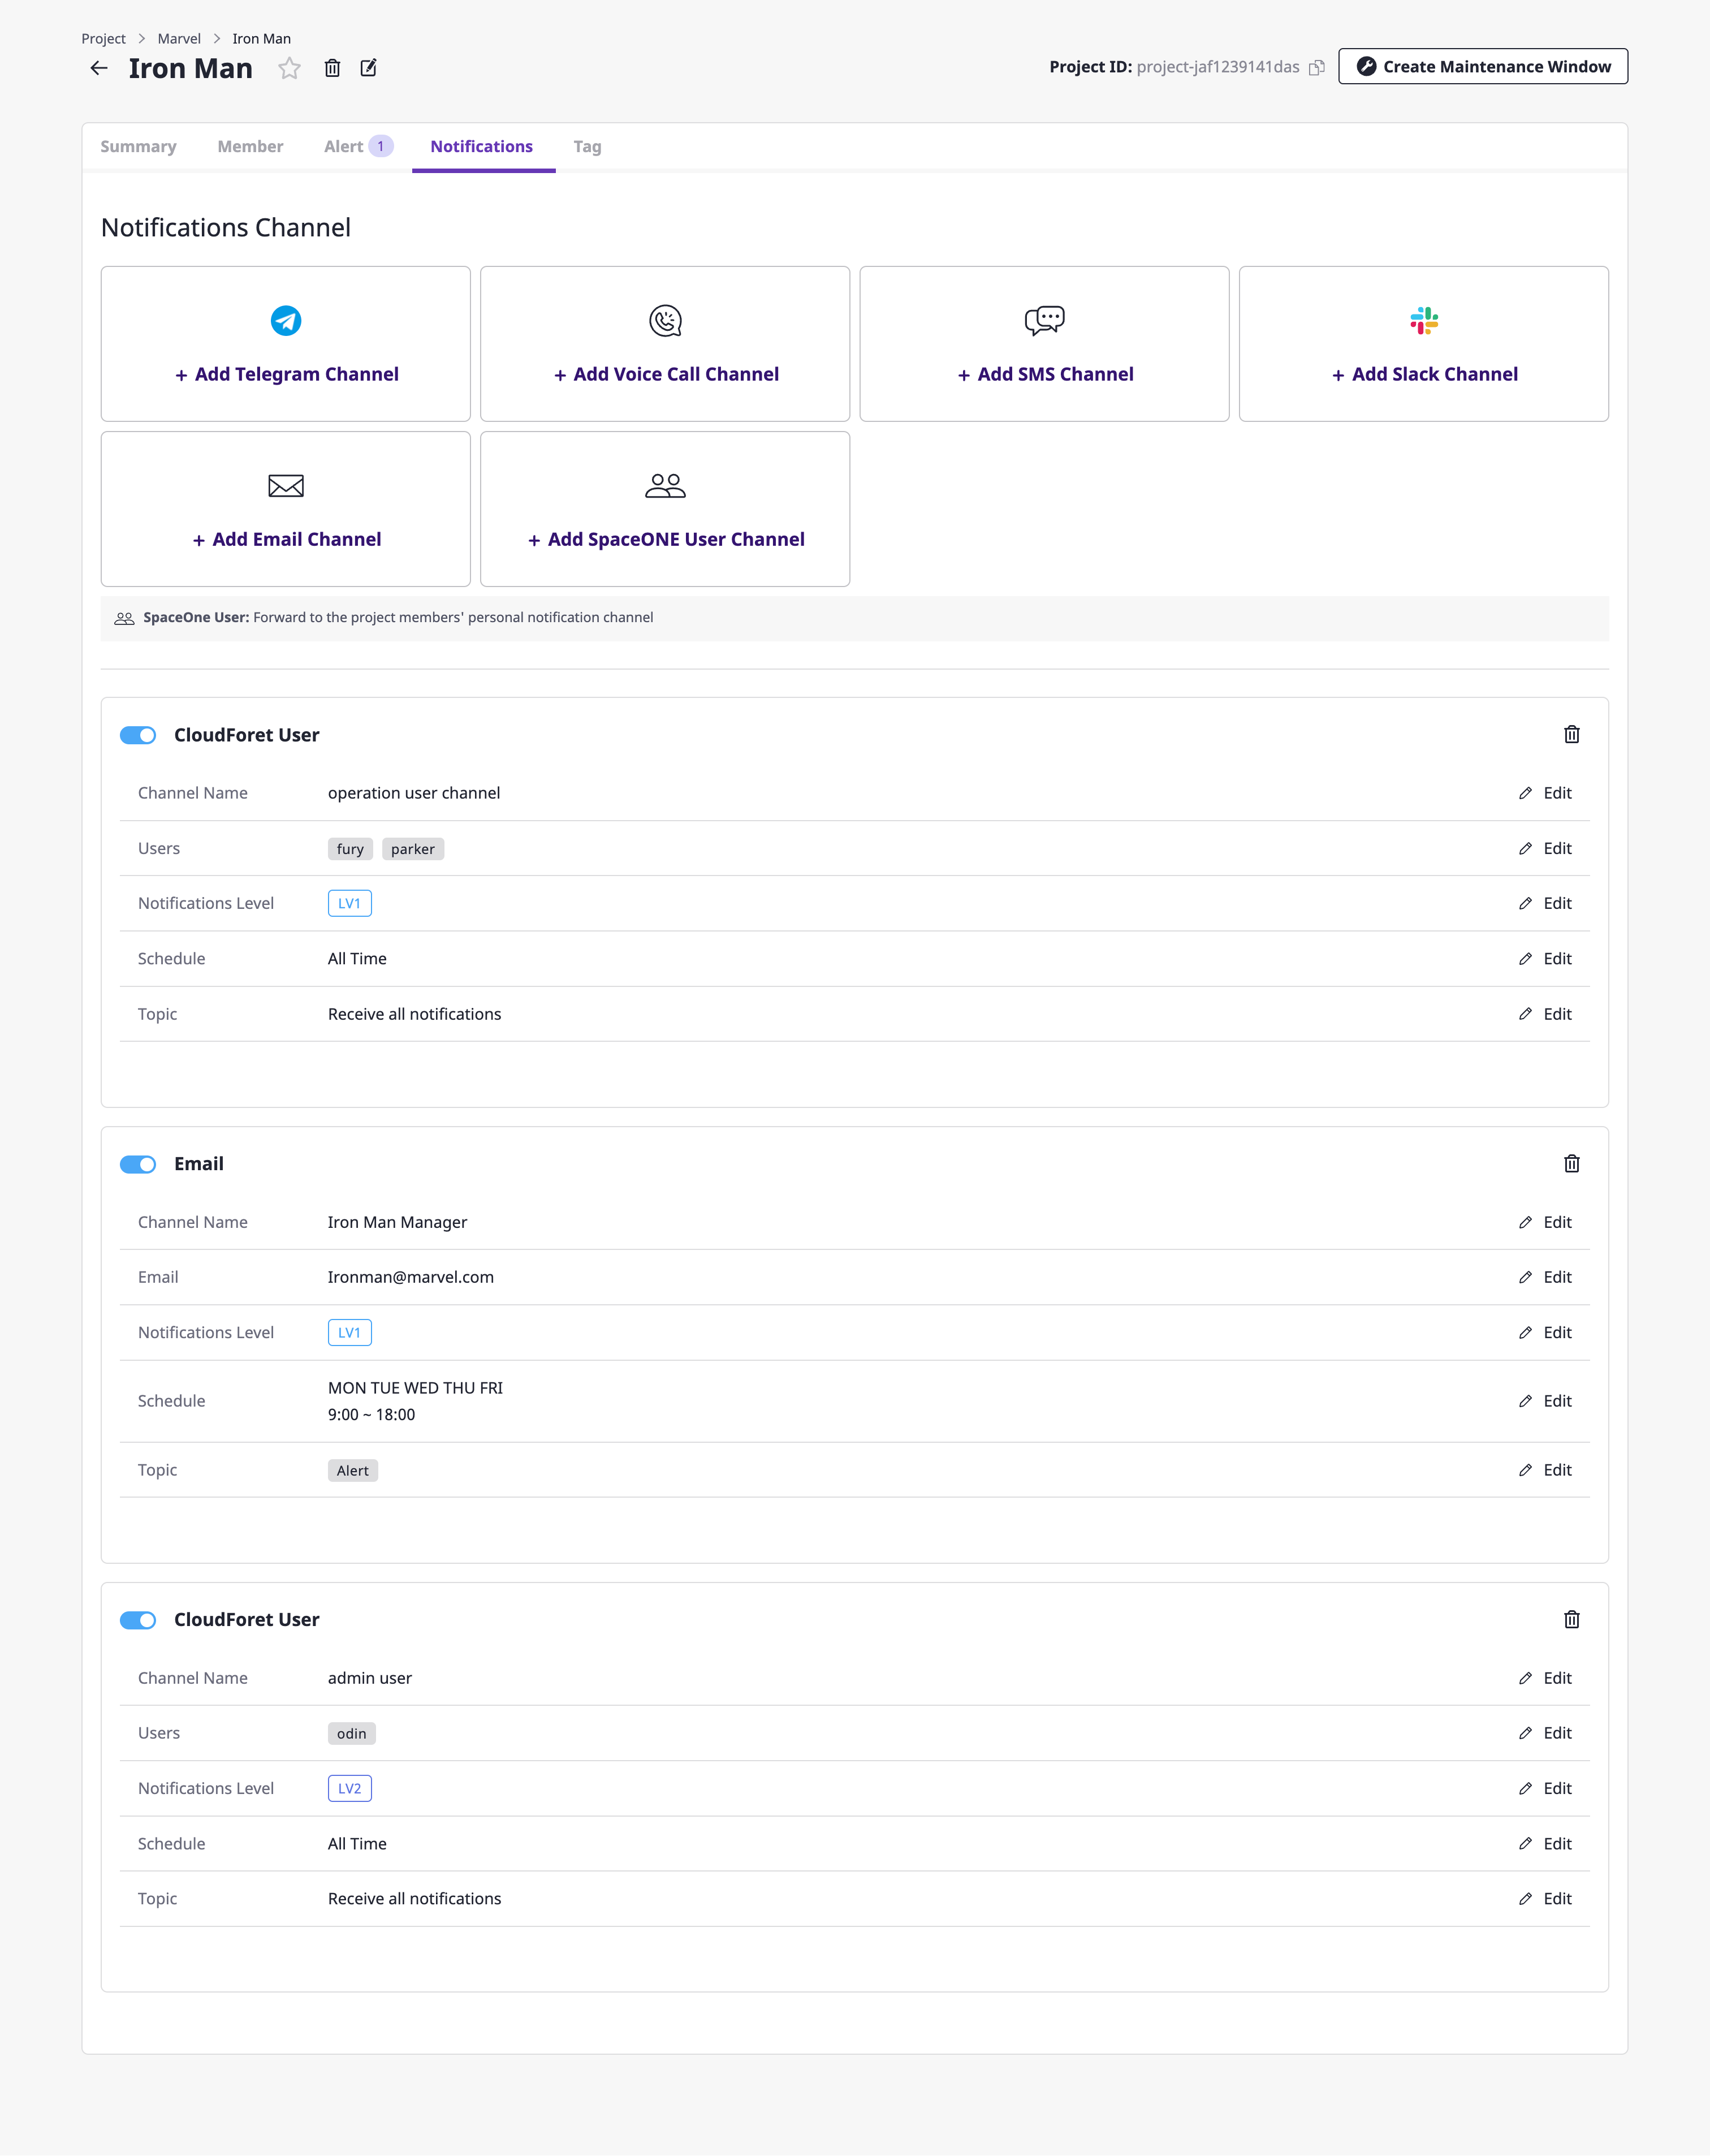
You can control whether to activate the corresponding notifications channel through the toggle button at the top left. Even if there is a level set up under the escalation policy, without activating the notifications channel, notifications will not go out.