This the multi-page printable view of this section. Click here to print.
Asset inventory
Cloud provider: refers to a cloud provider offering cloud services such as AWS, Google Cloud, Azure, etc.
Cloud service: refers to a cloud service that a cloud provider offers, as in the case of AWS EC2 Instance.
Cloud resource: refers to resources of cloud services, as in the case of servers of AWS EC2 Instance.
- 1: Quick Start
- 2: Cloud service
- 3: Server
- 4: Collector
- 5: Service account
1 - Quick Start
Creating a service account
Add a cloud service account in the [Asset inventory > Service account] page.
(1) Select a cloud service to add.

(2) Click the [Add] button.

(3) Fill out the service account creation form.
(3-1) Enter basic information.
(3-2) Specify the project to collect resources from according to the service account.

(3-3) Enter encryption key information.
Creating a collector
On the [Asset Inventory > Collector] page, create a collector to collect resources.
(1) Click the [Create] button.
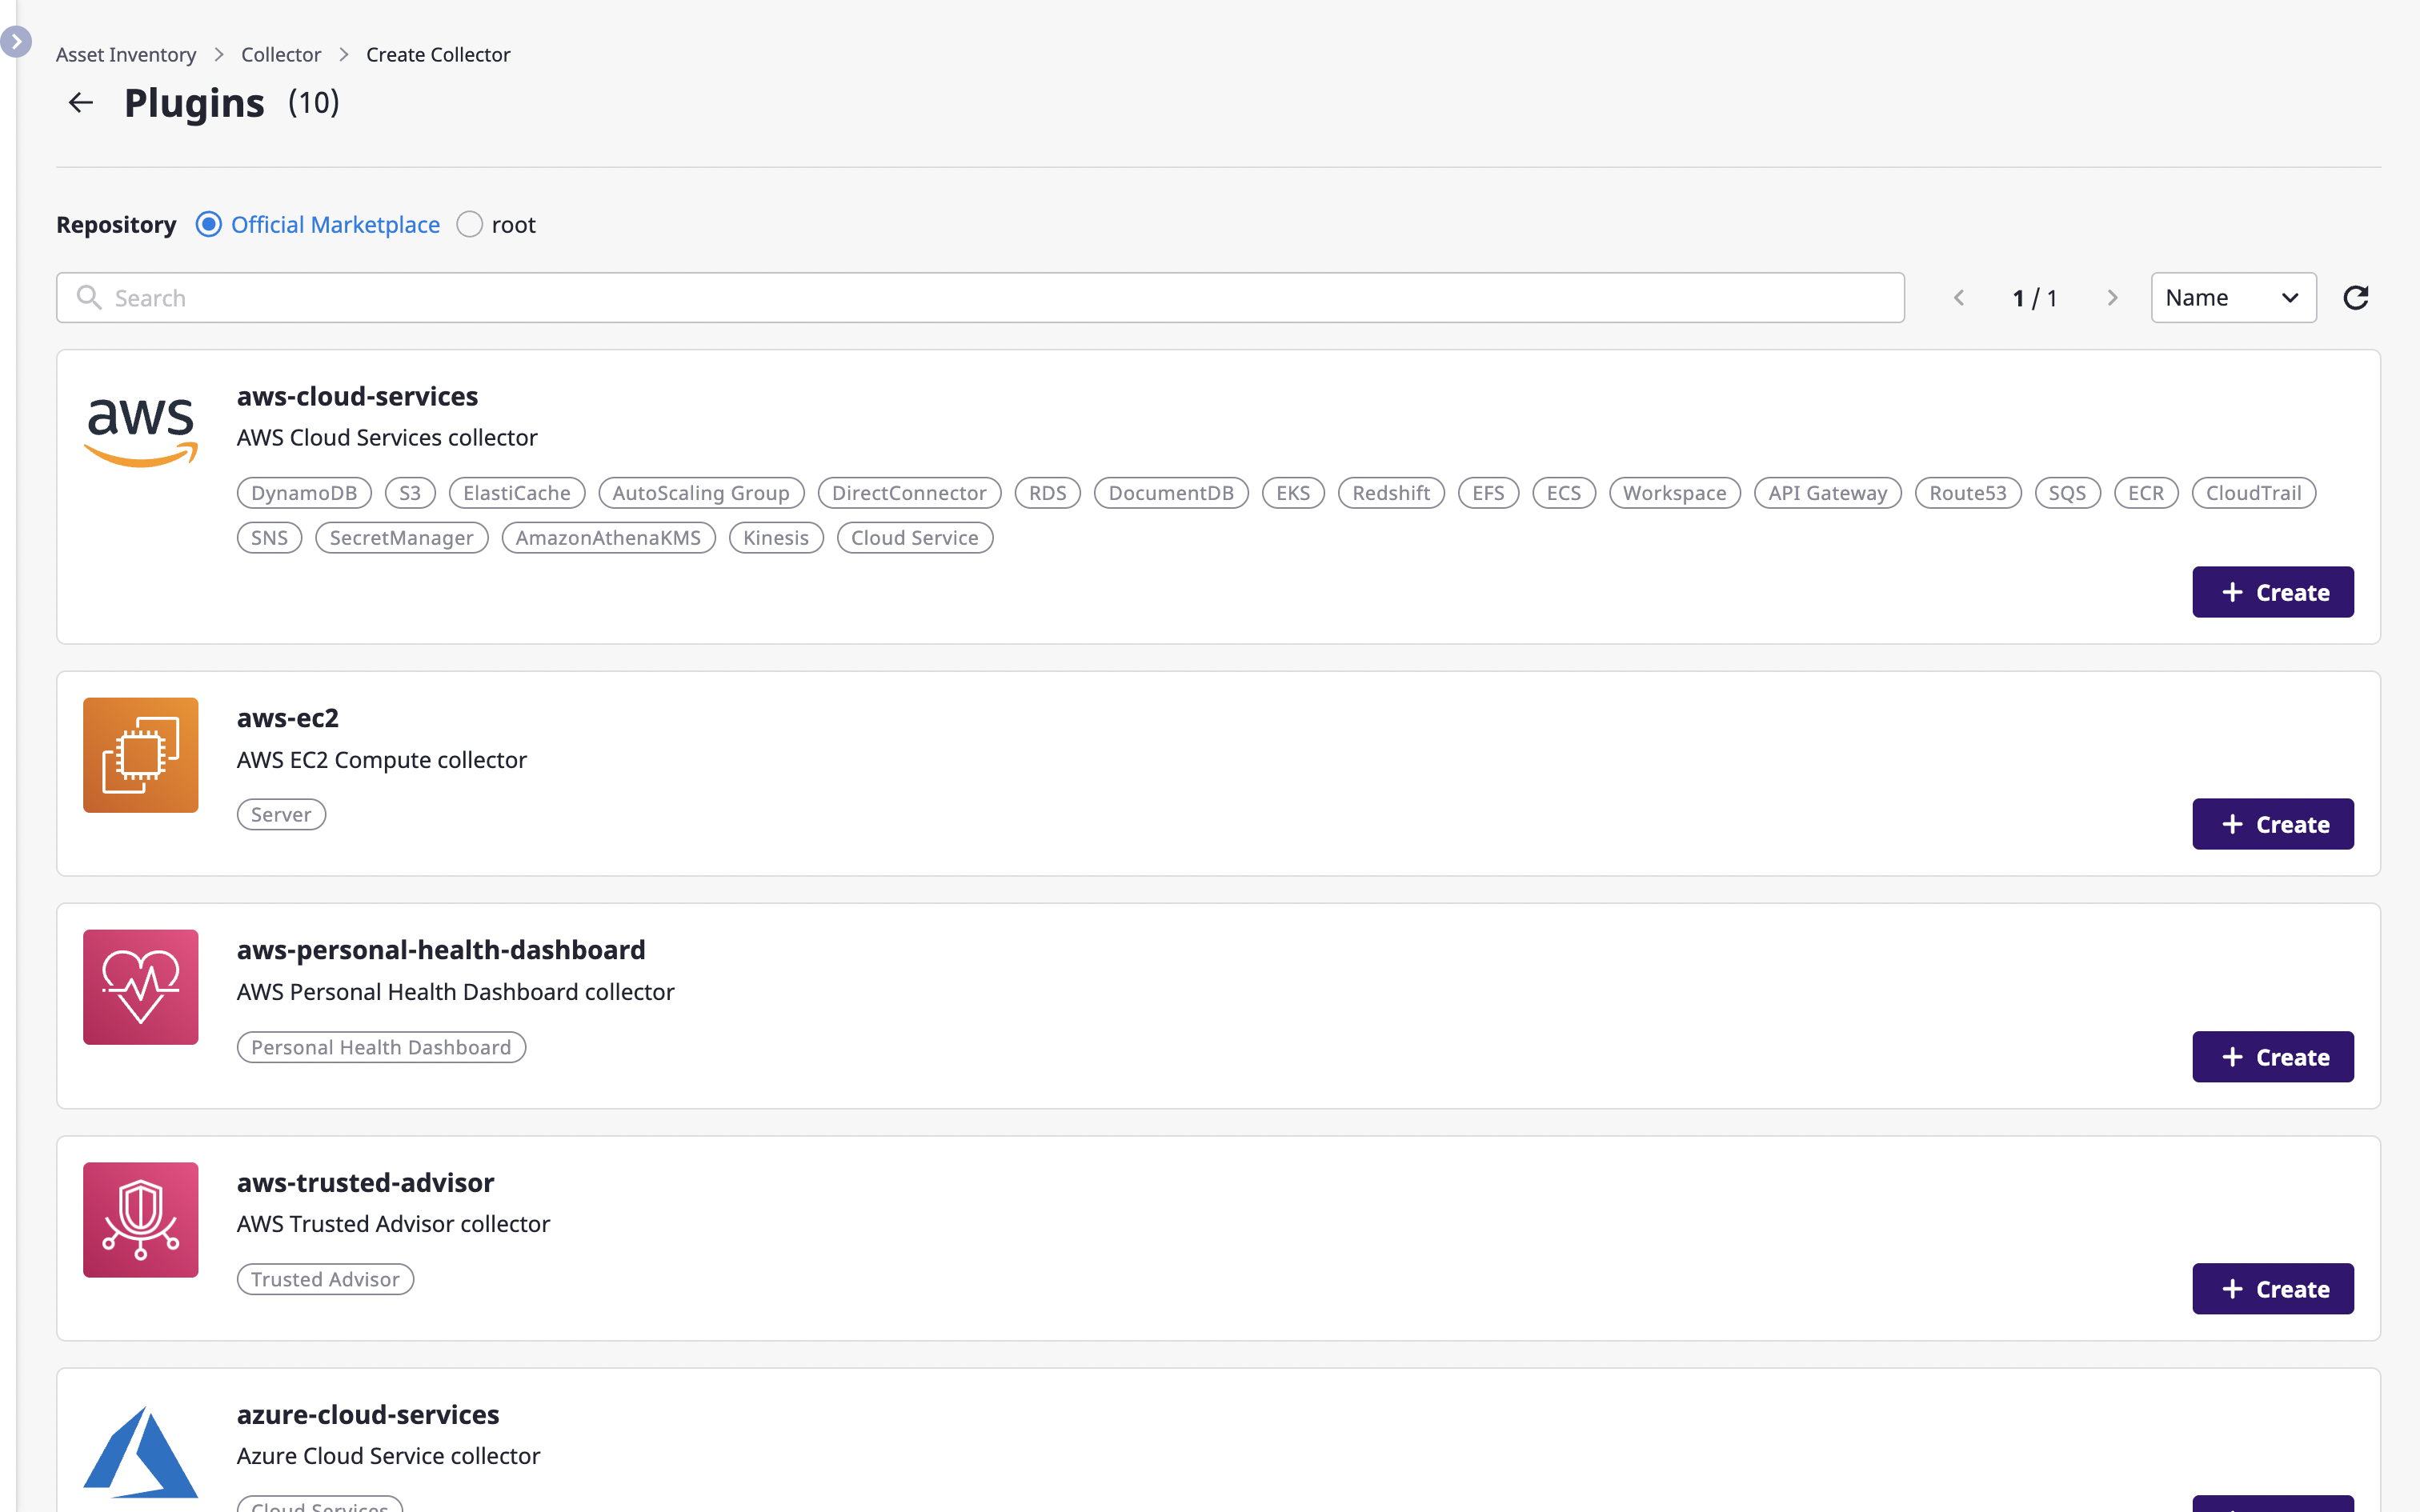
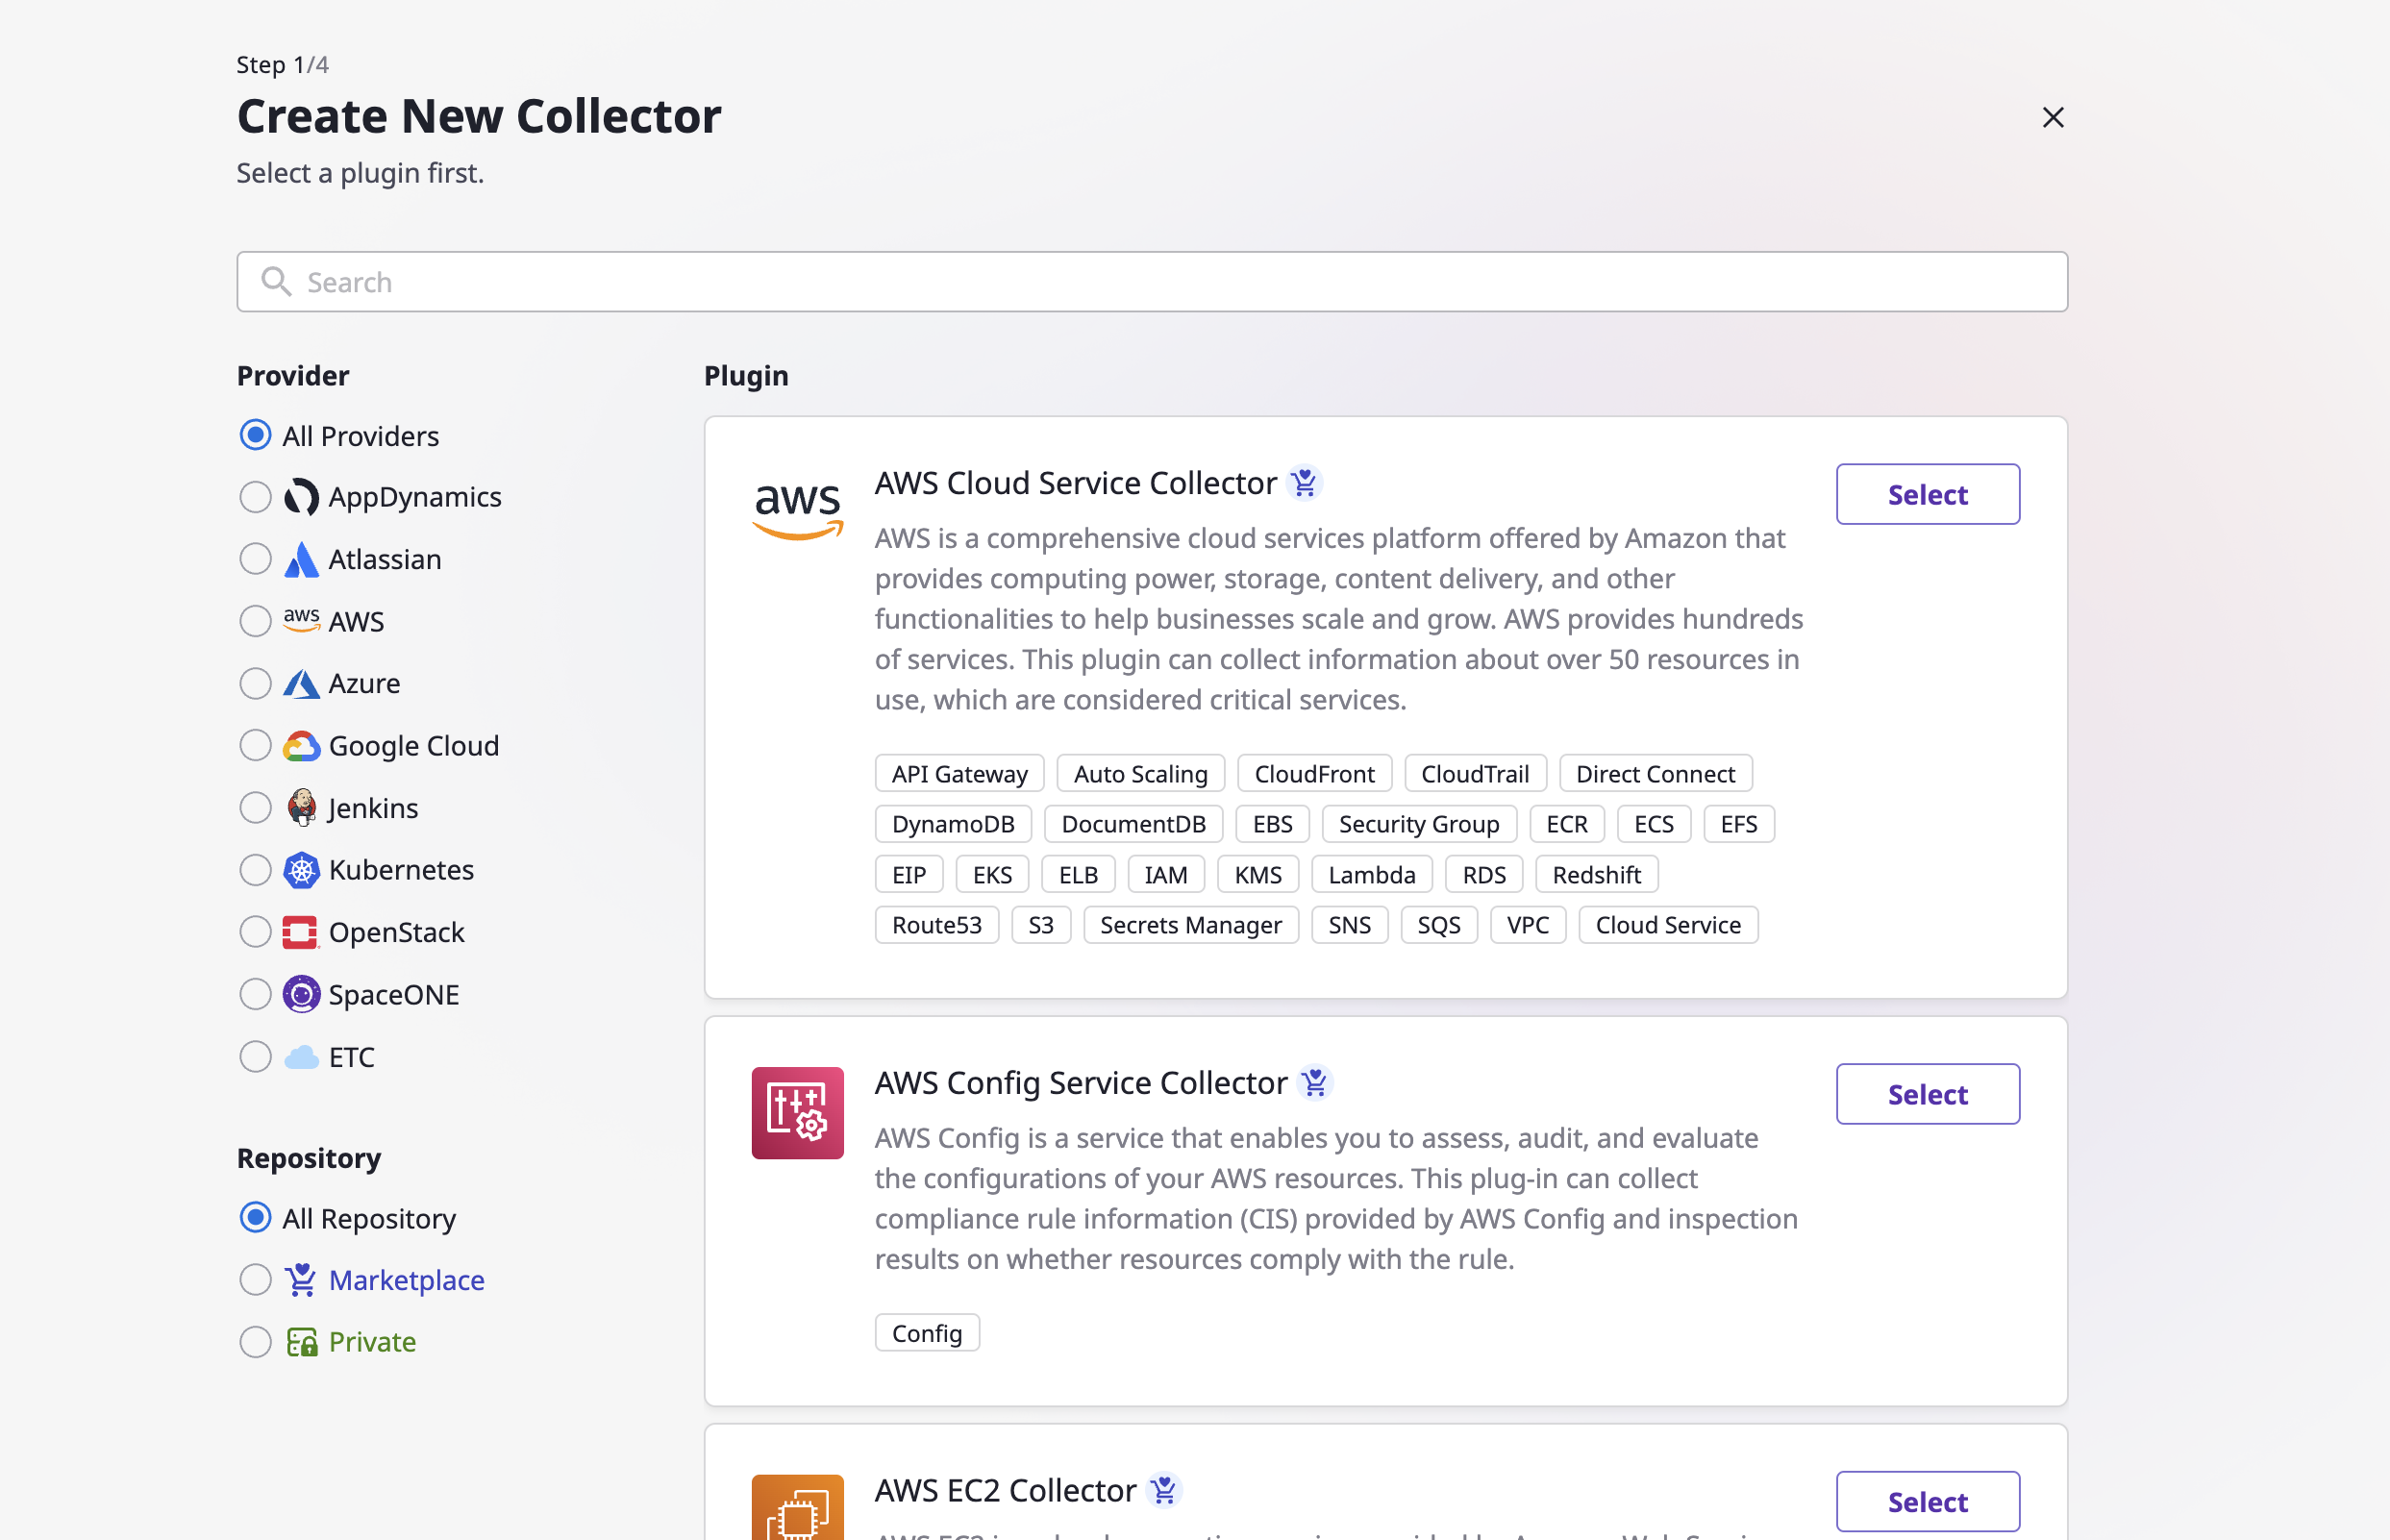
(2) Select the plugin to use when collecting resources.
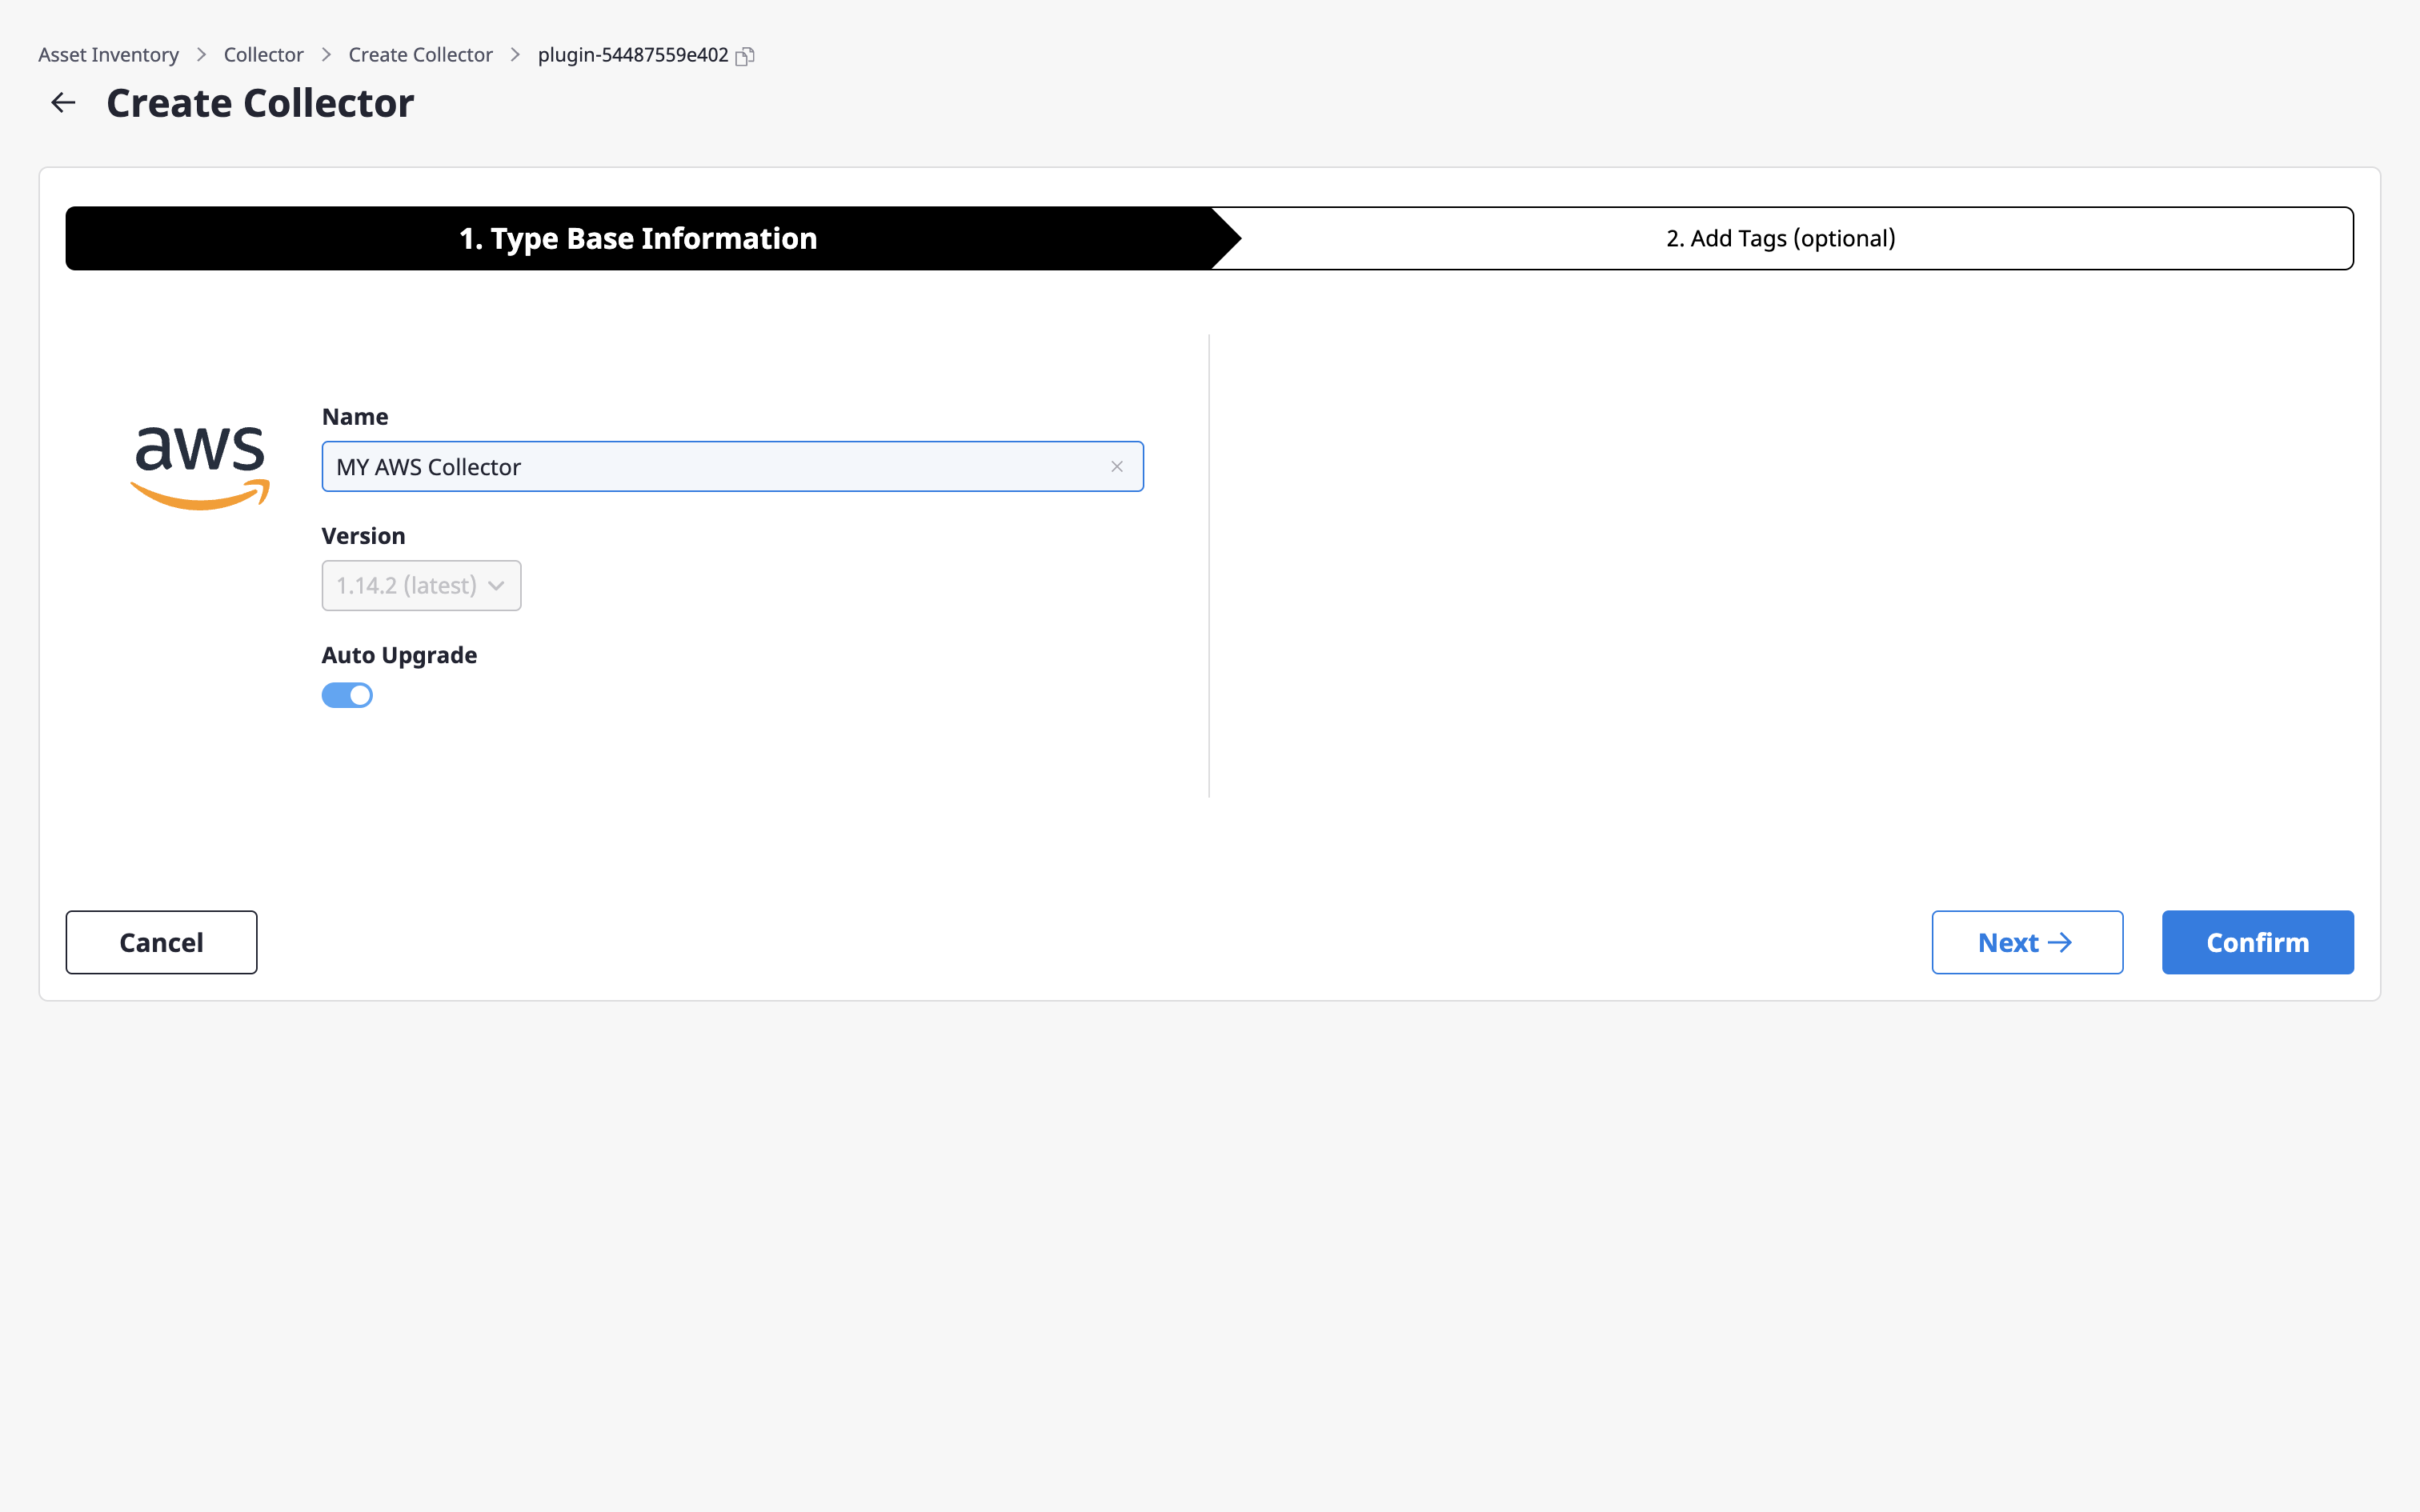
(3) Fill out the collector creation form. (3-1) Enter basic information such as a name and a version.
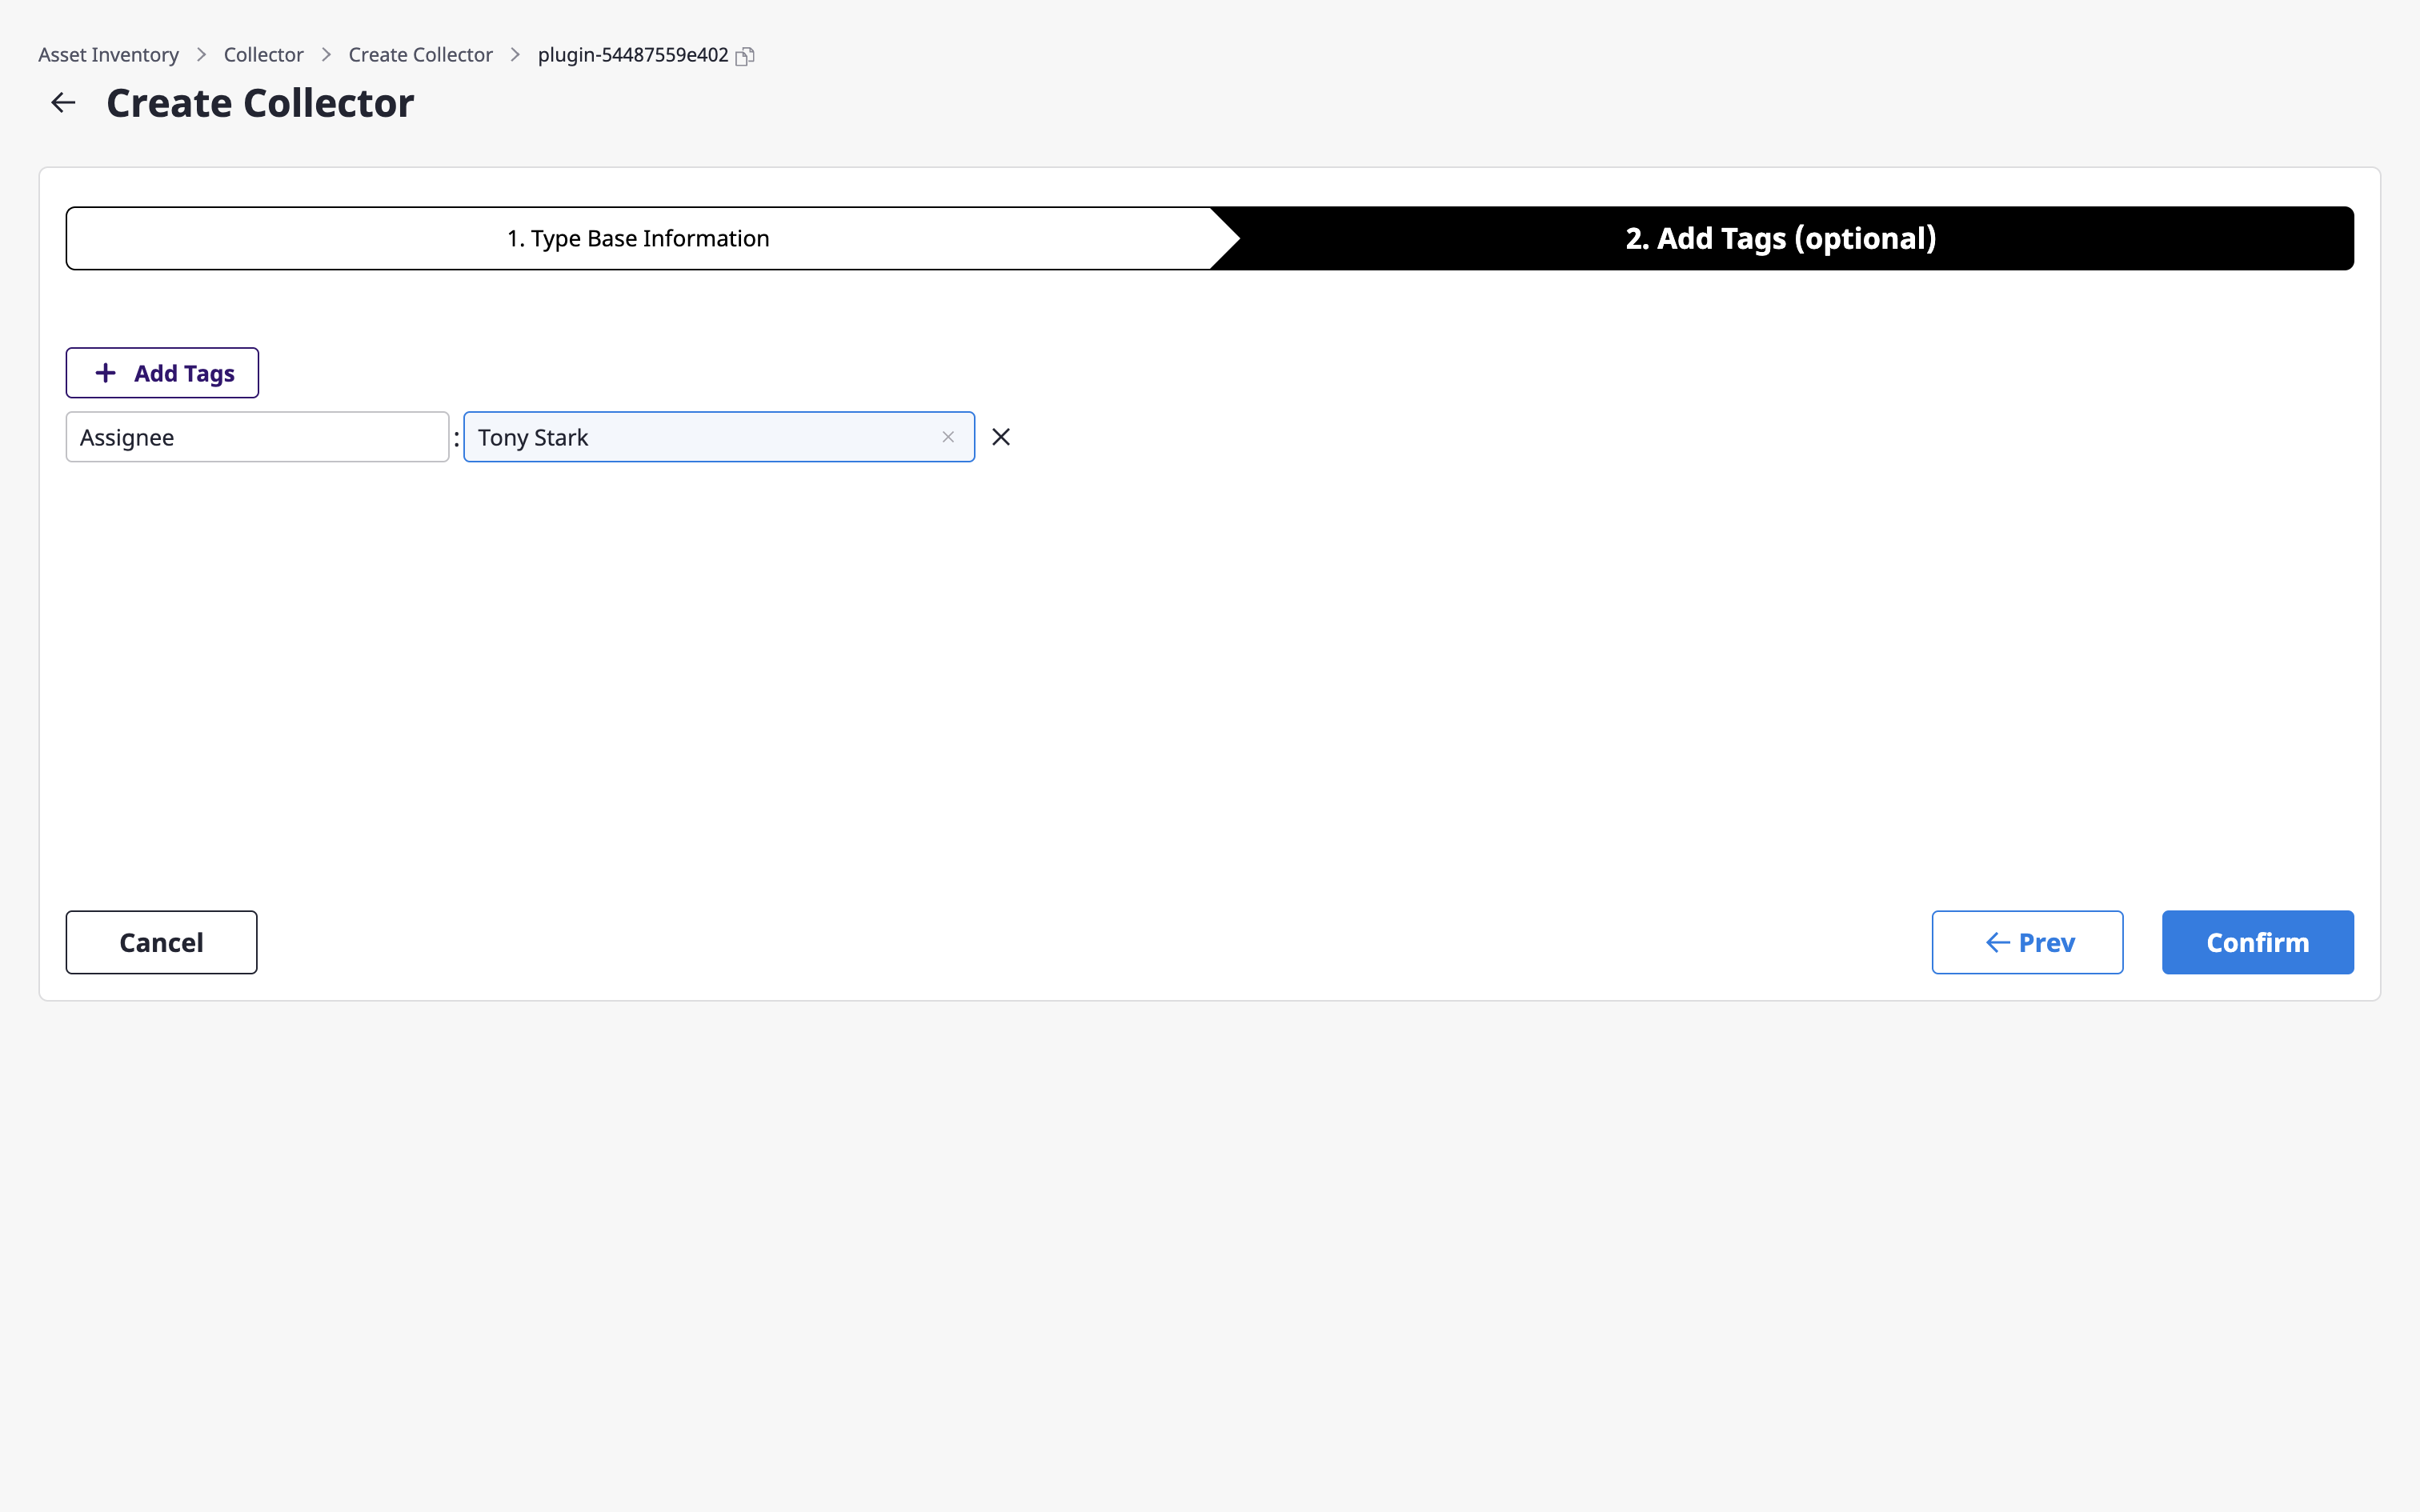
(3-2) Add tags if necessary.
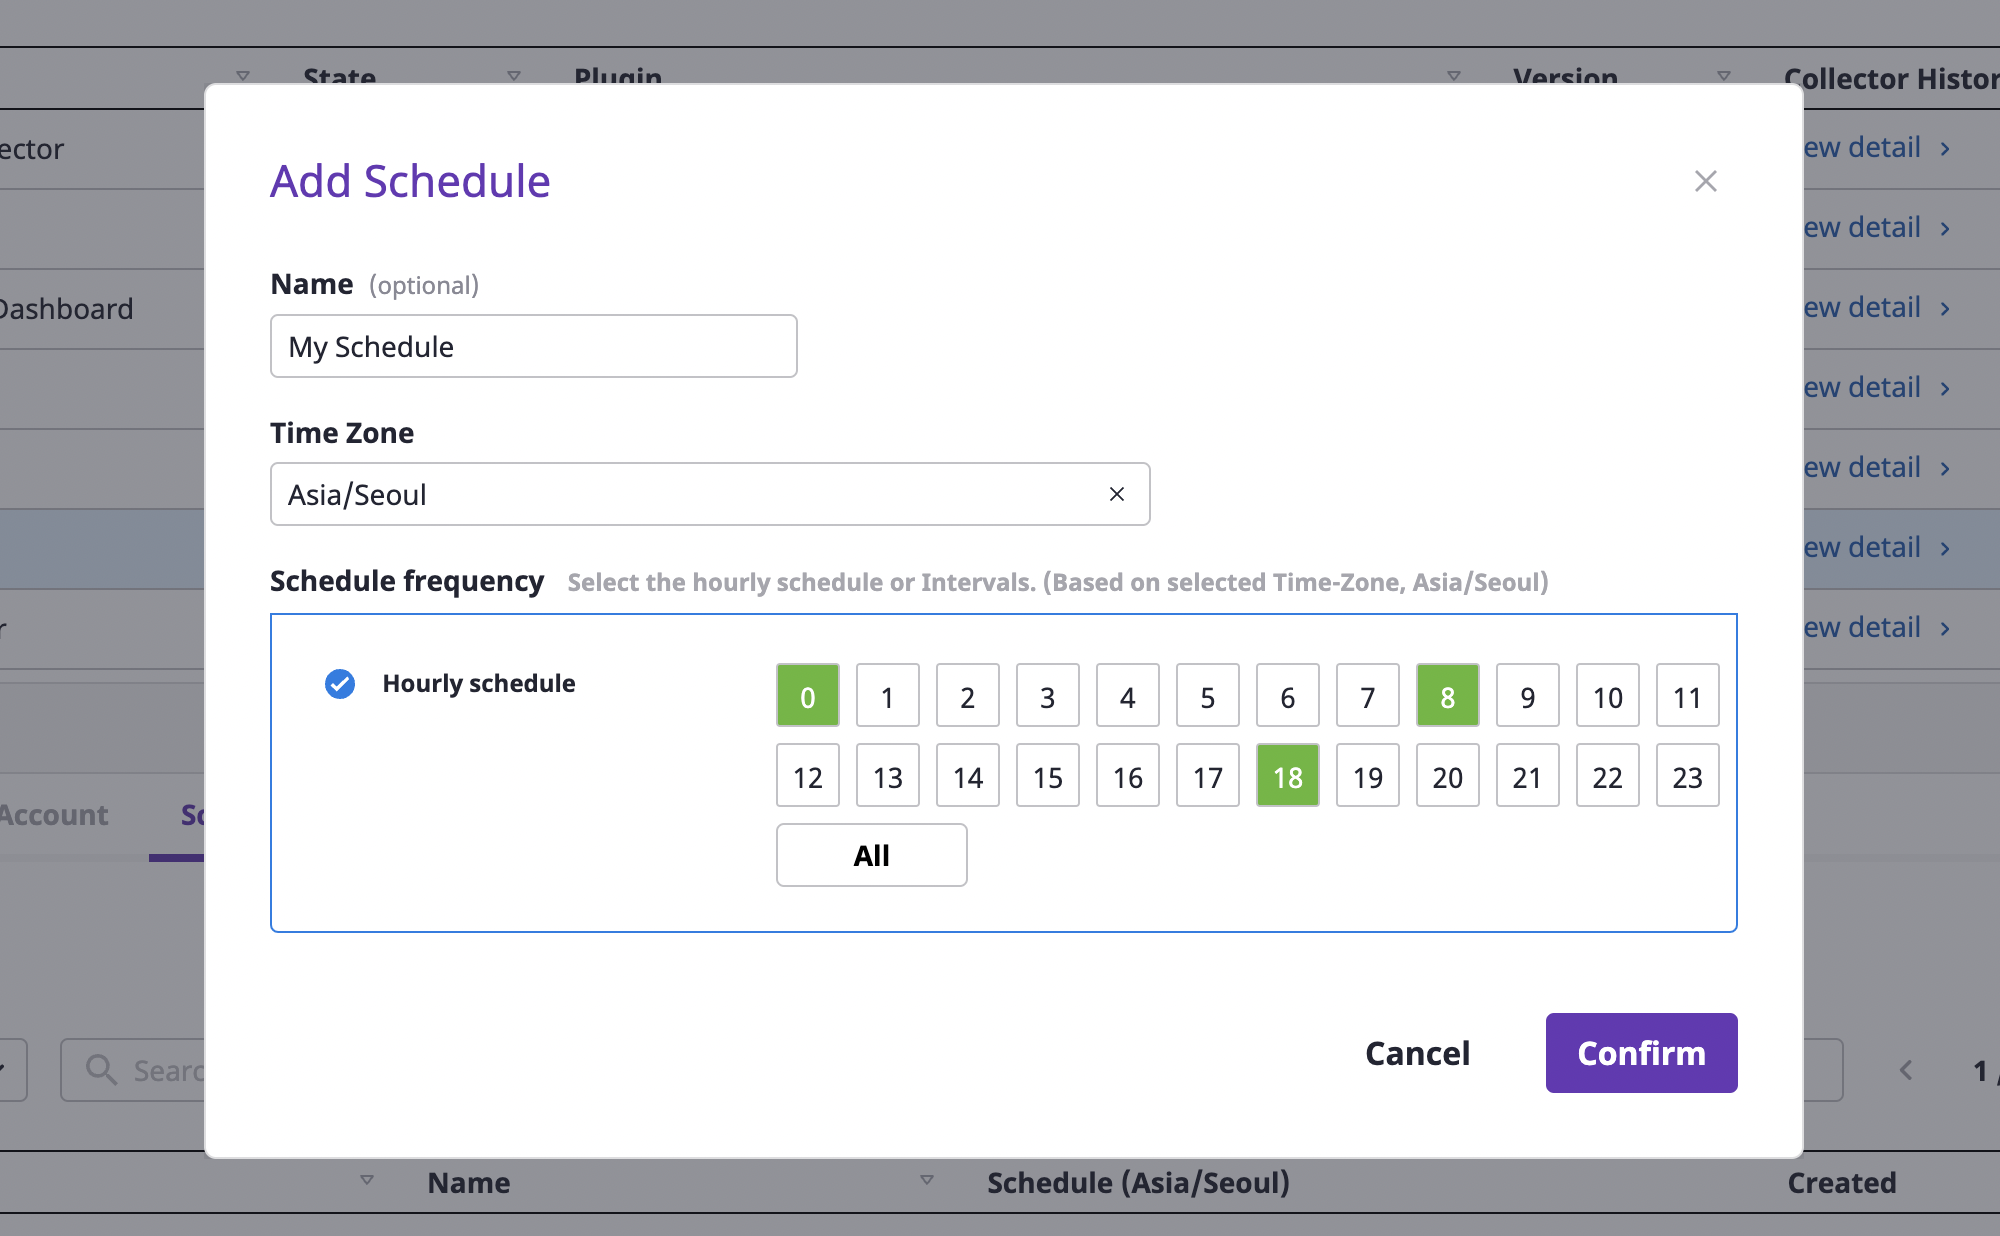
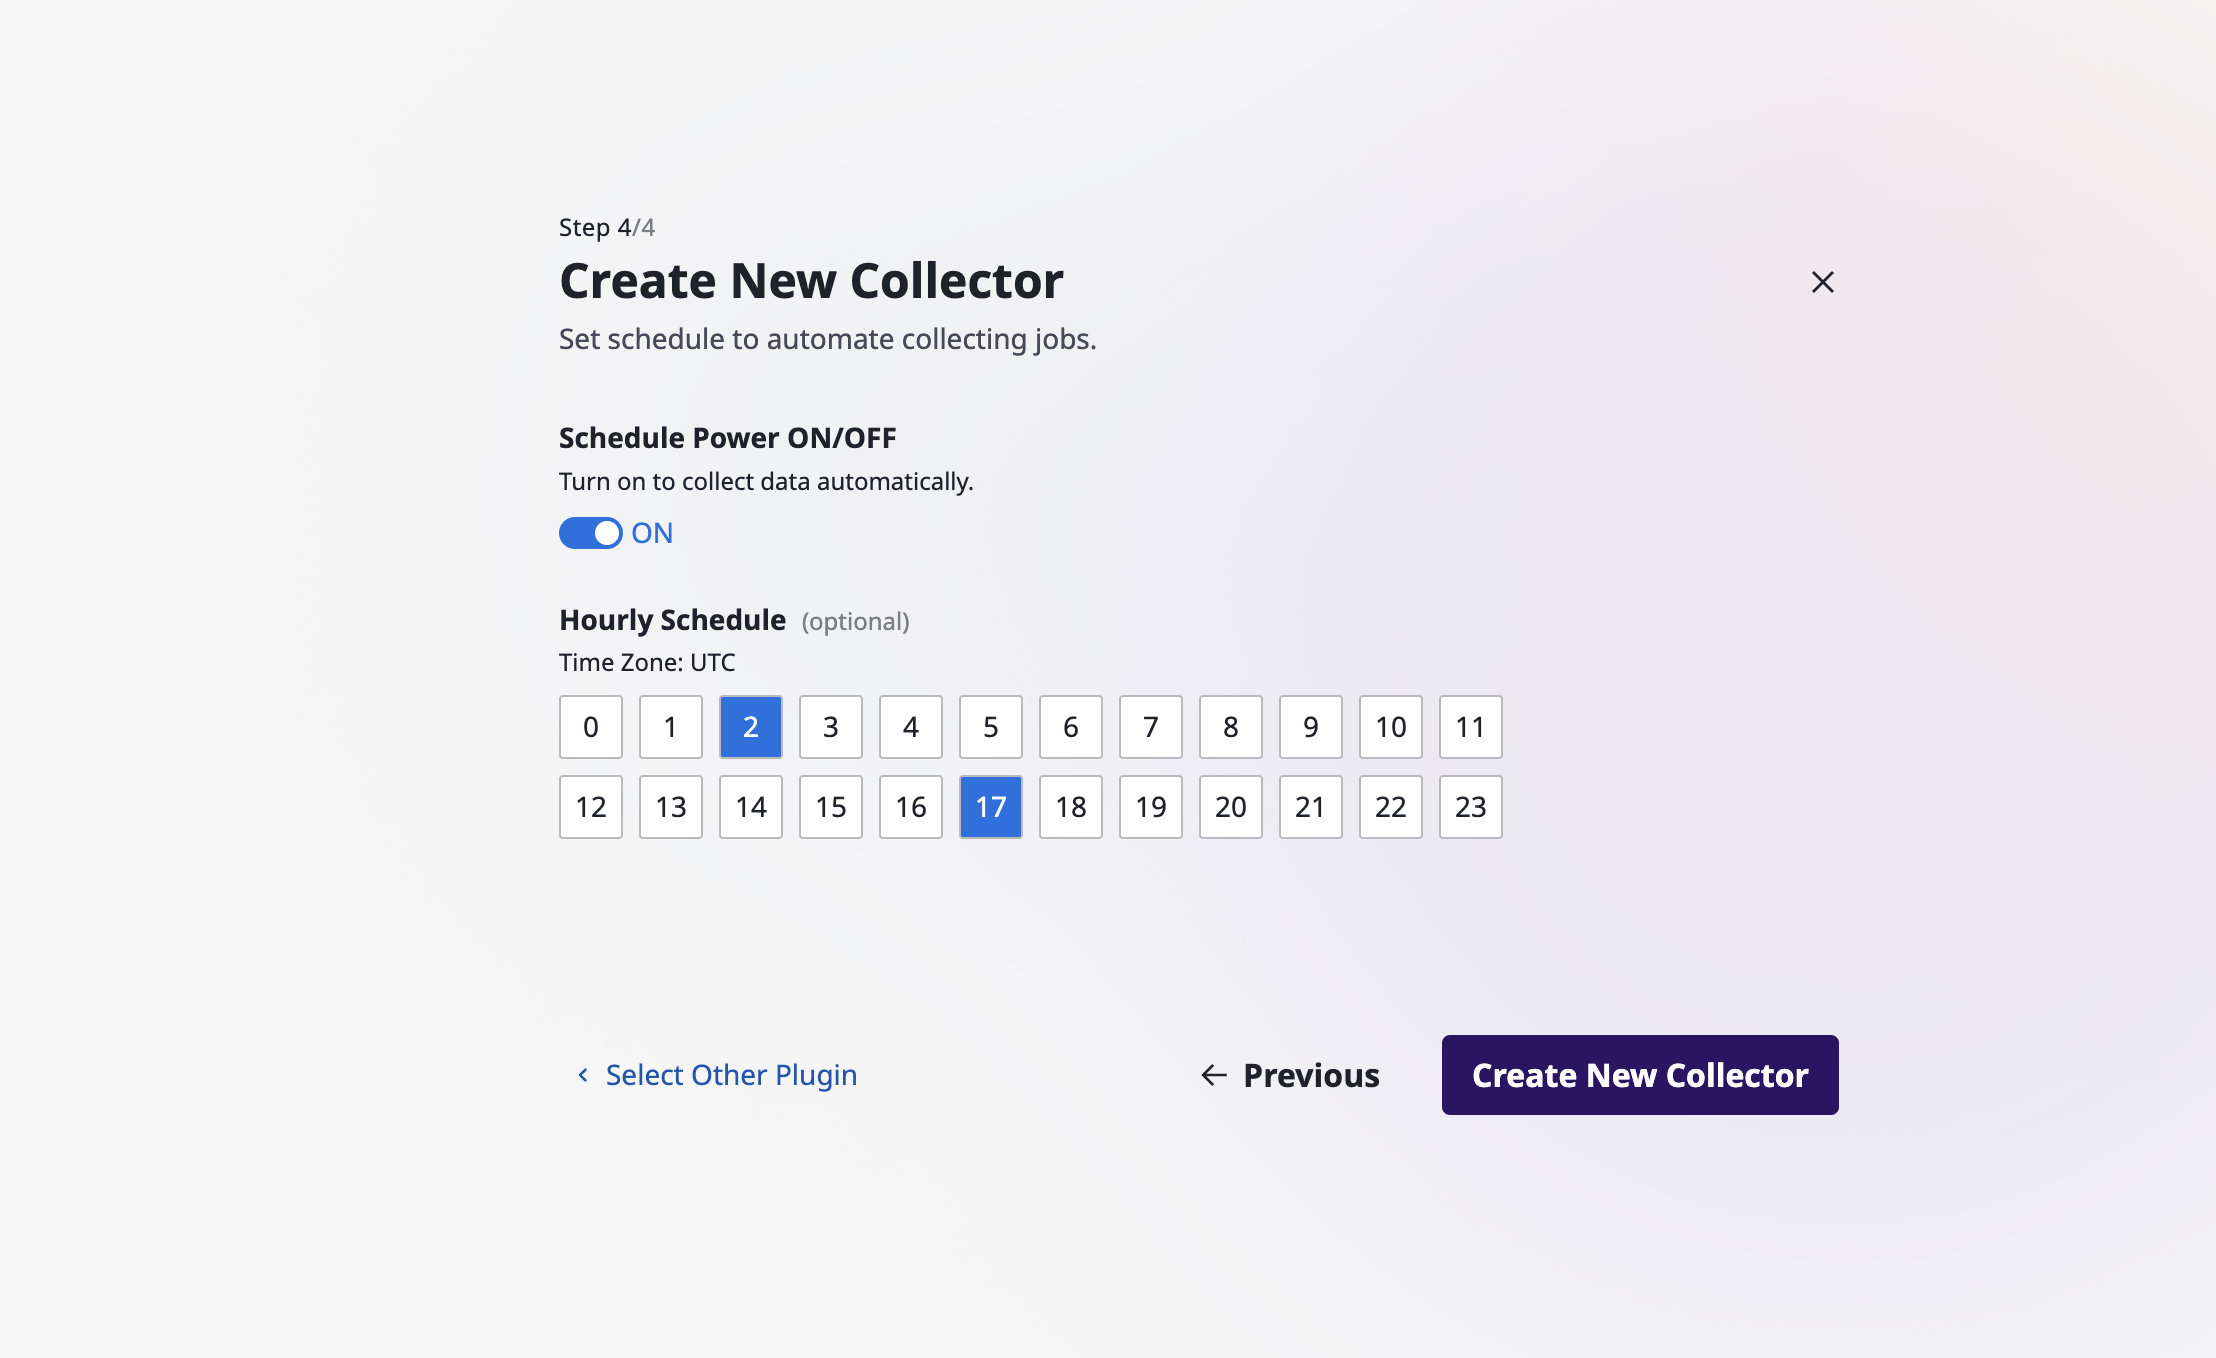
(4) Create a schedule for running the collector.
(4-1) On the [Asset inventory > Collector] page, select one collector from the table, and then click the [Add] button in the [Schedule] tab.
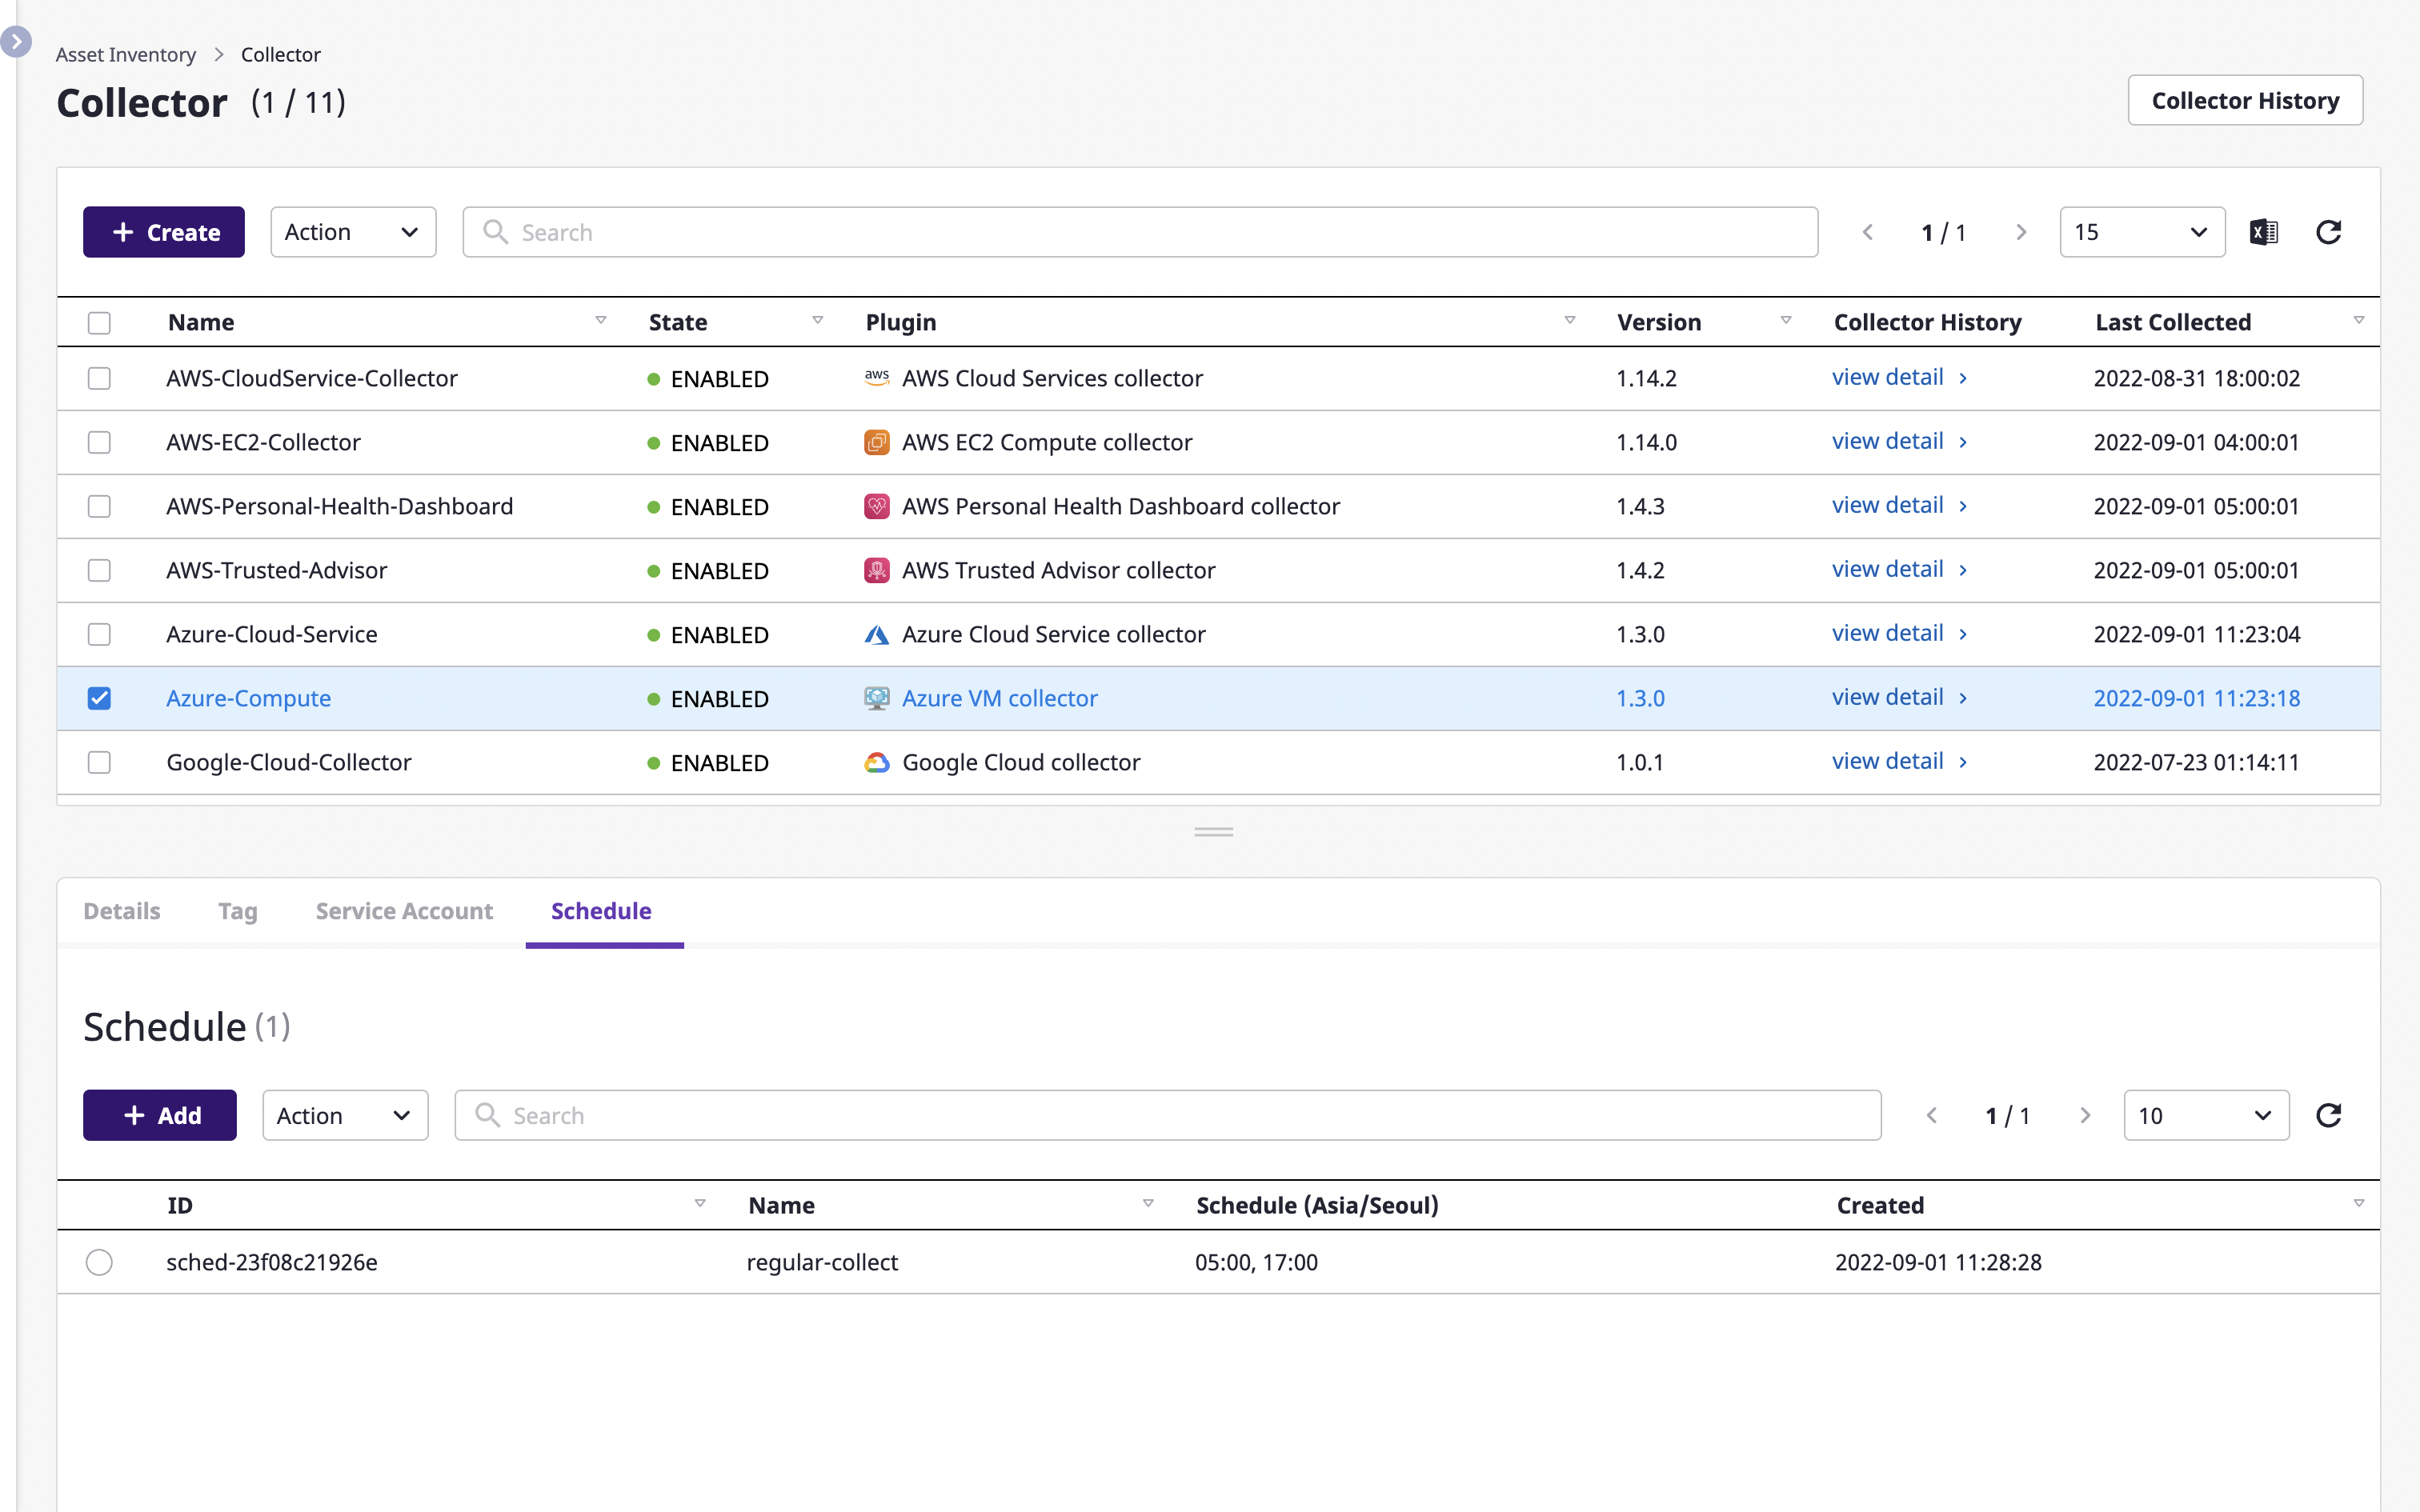
(4-2) In the [Add schedule] modal dialog, set the time to run the collector and click the [OK] button.
Verifying collected resources
You can view the collected resources in [Asset inventory > Cloud service].
2 - Cloud service
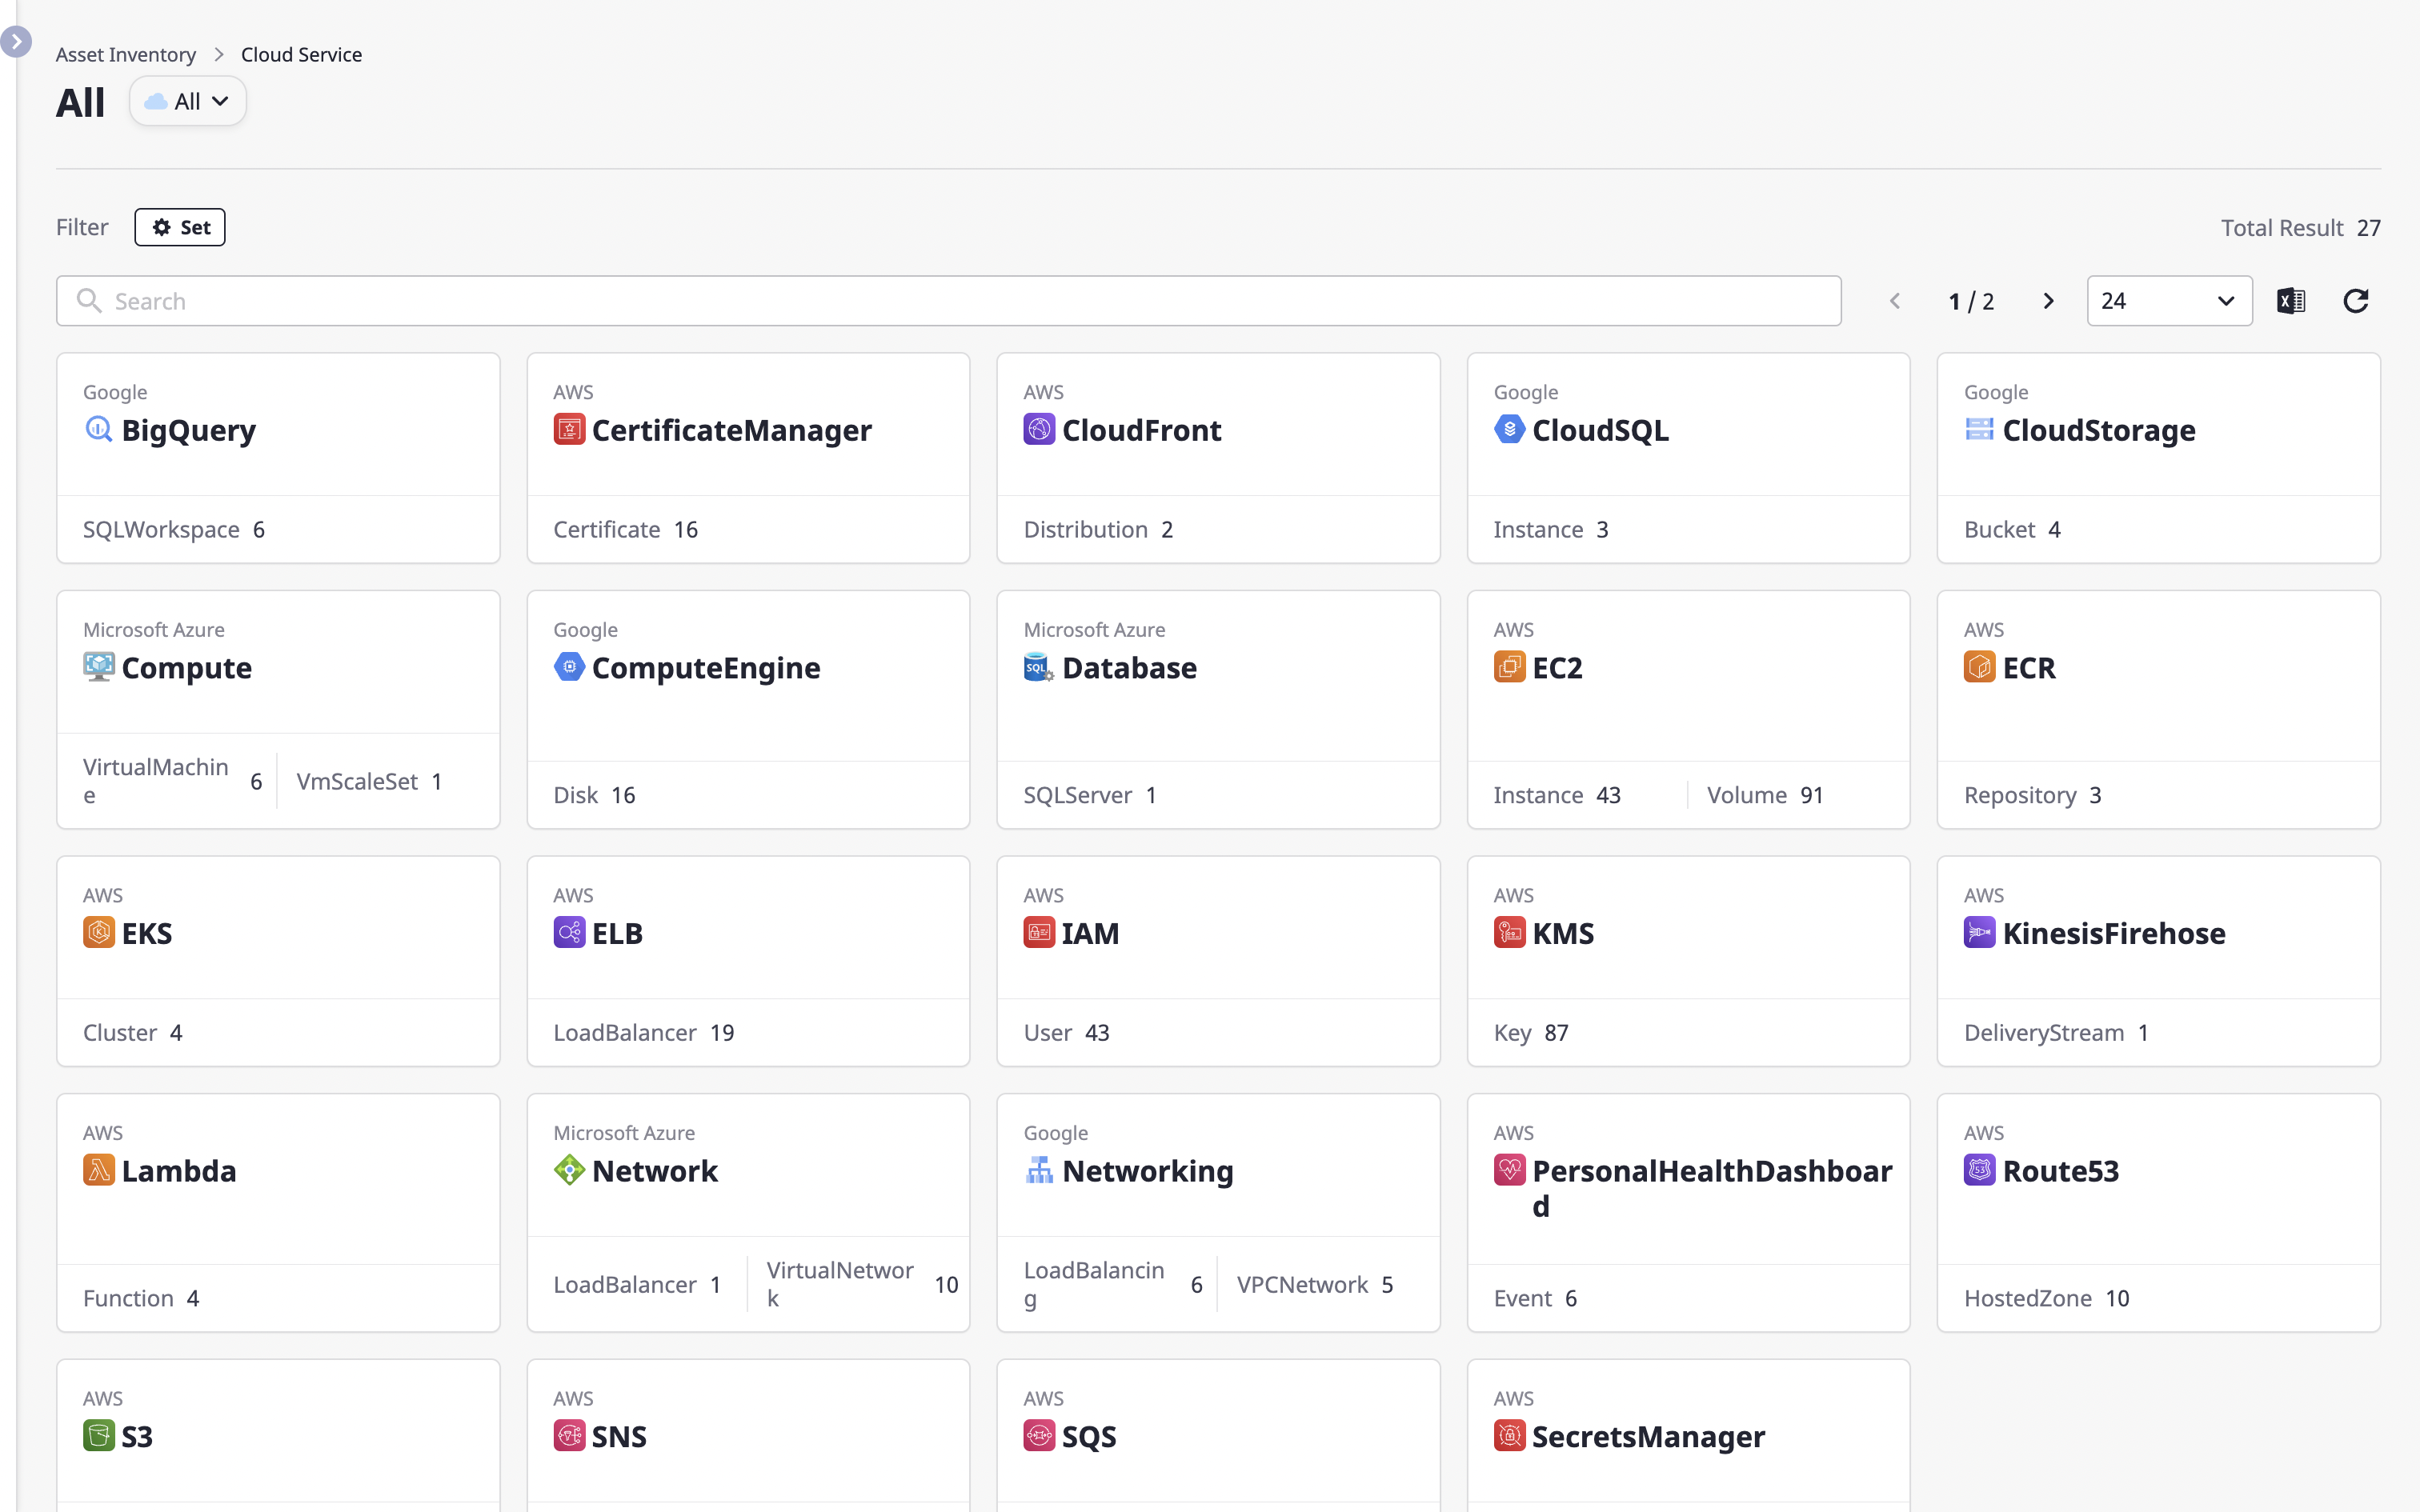
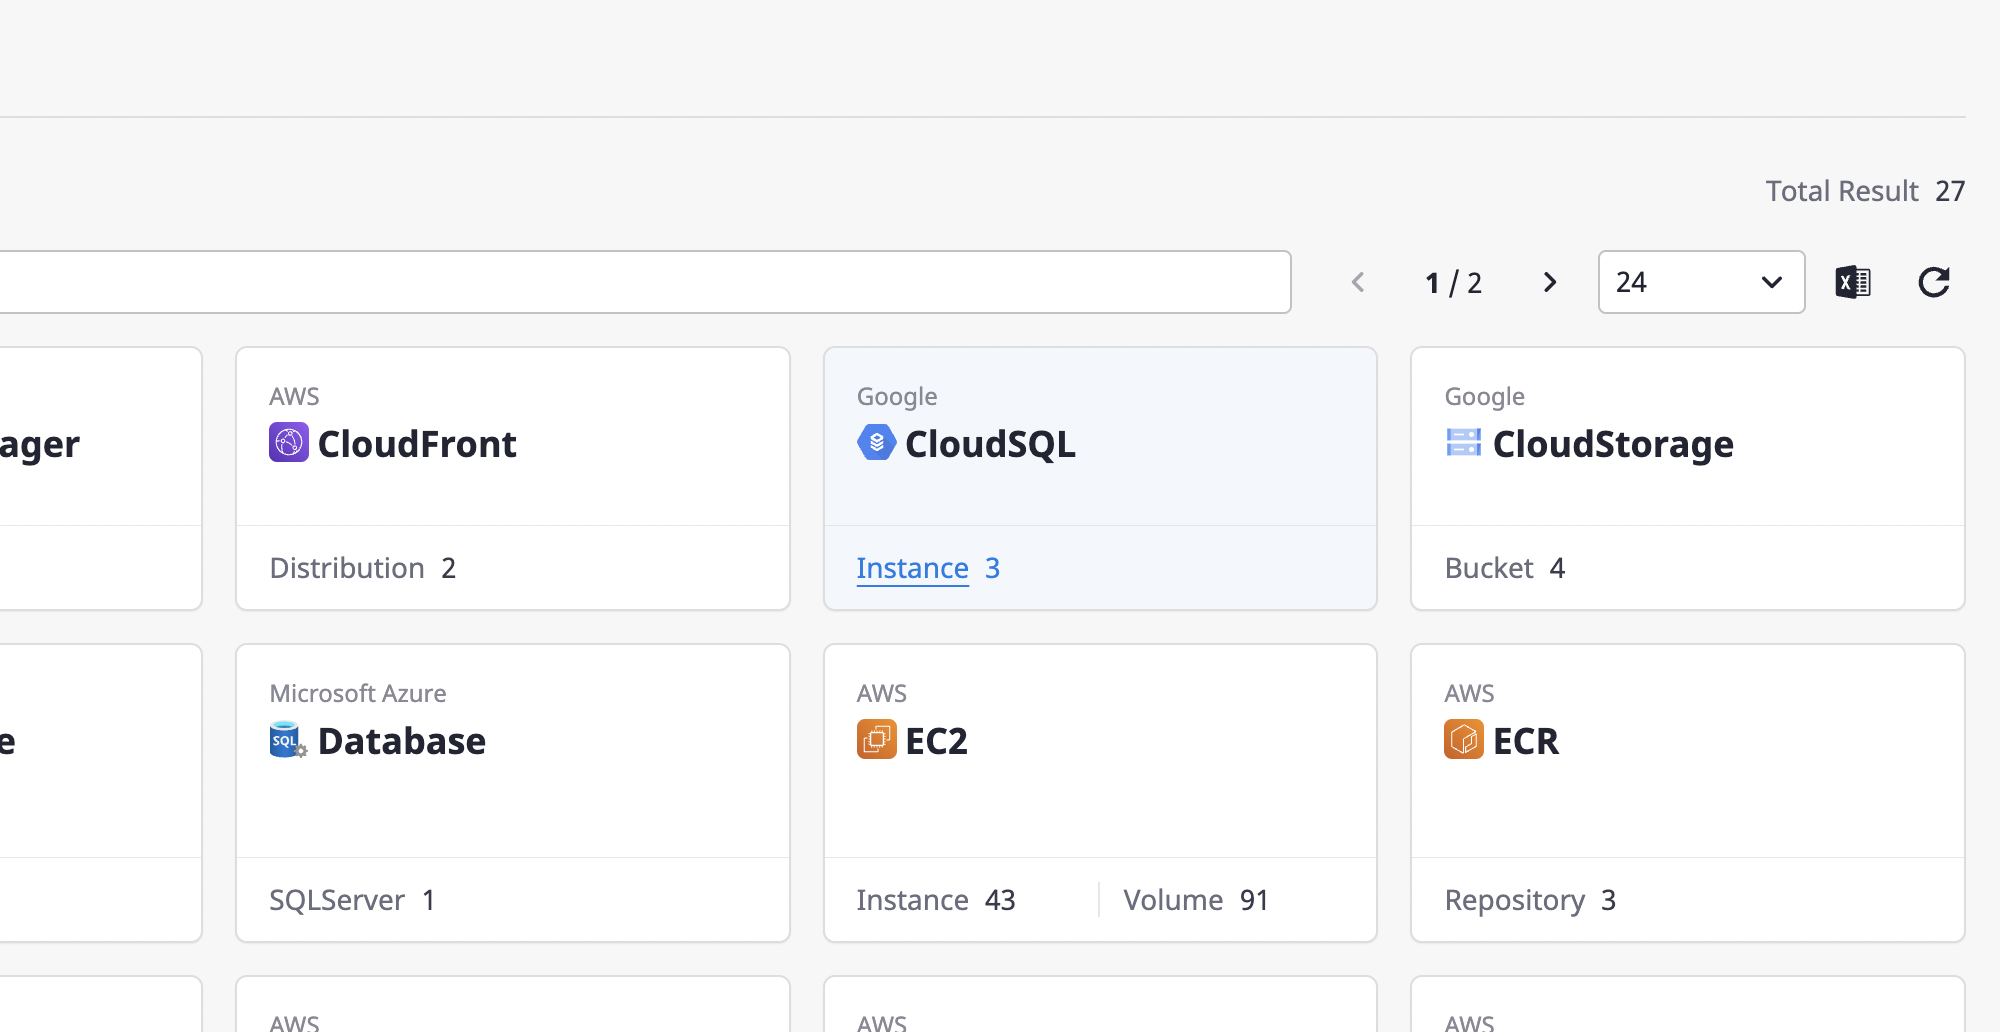
Viewing a list of cloud services
The cloud service page displays the status of cloud service usage by Provider.
Advanced Search and filter settings allow you to filter the list by refined criteria.
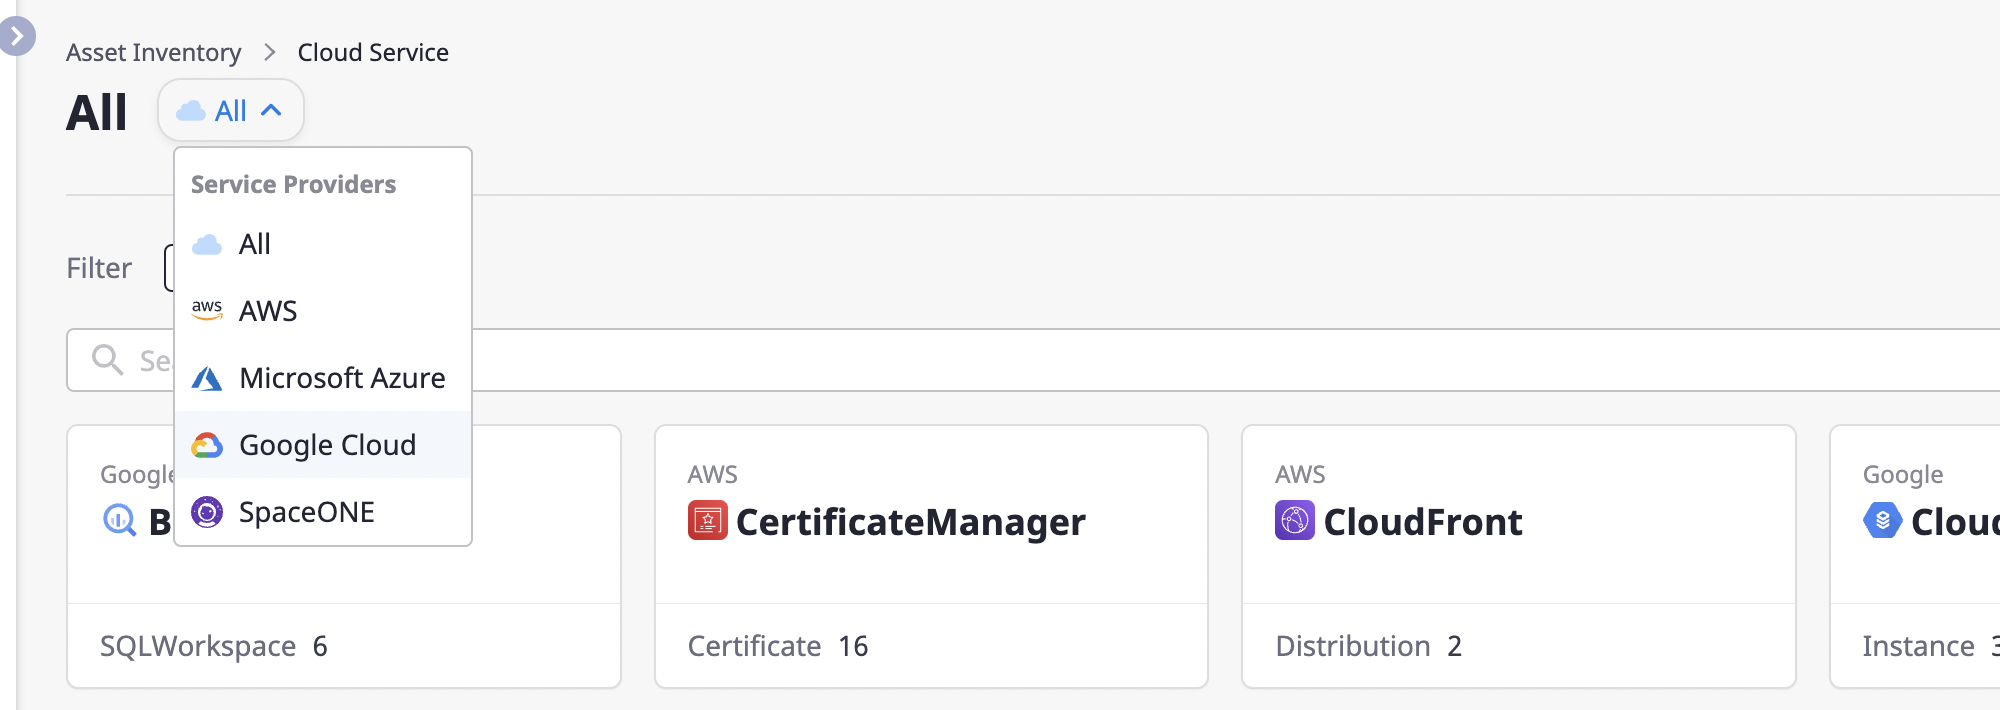
Choosing a Provider
Select a provider to view cloud services provided through a certain provider only.
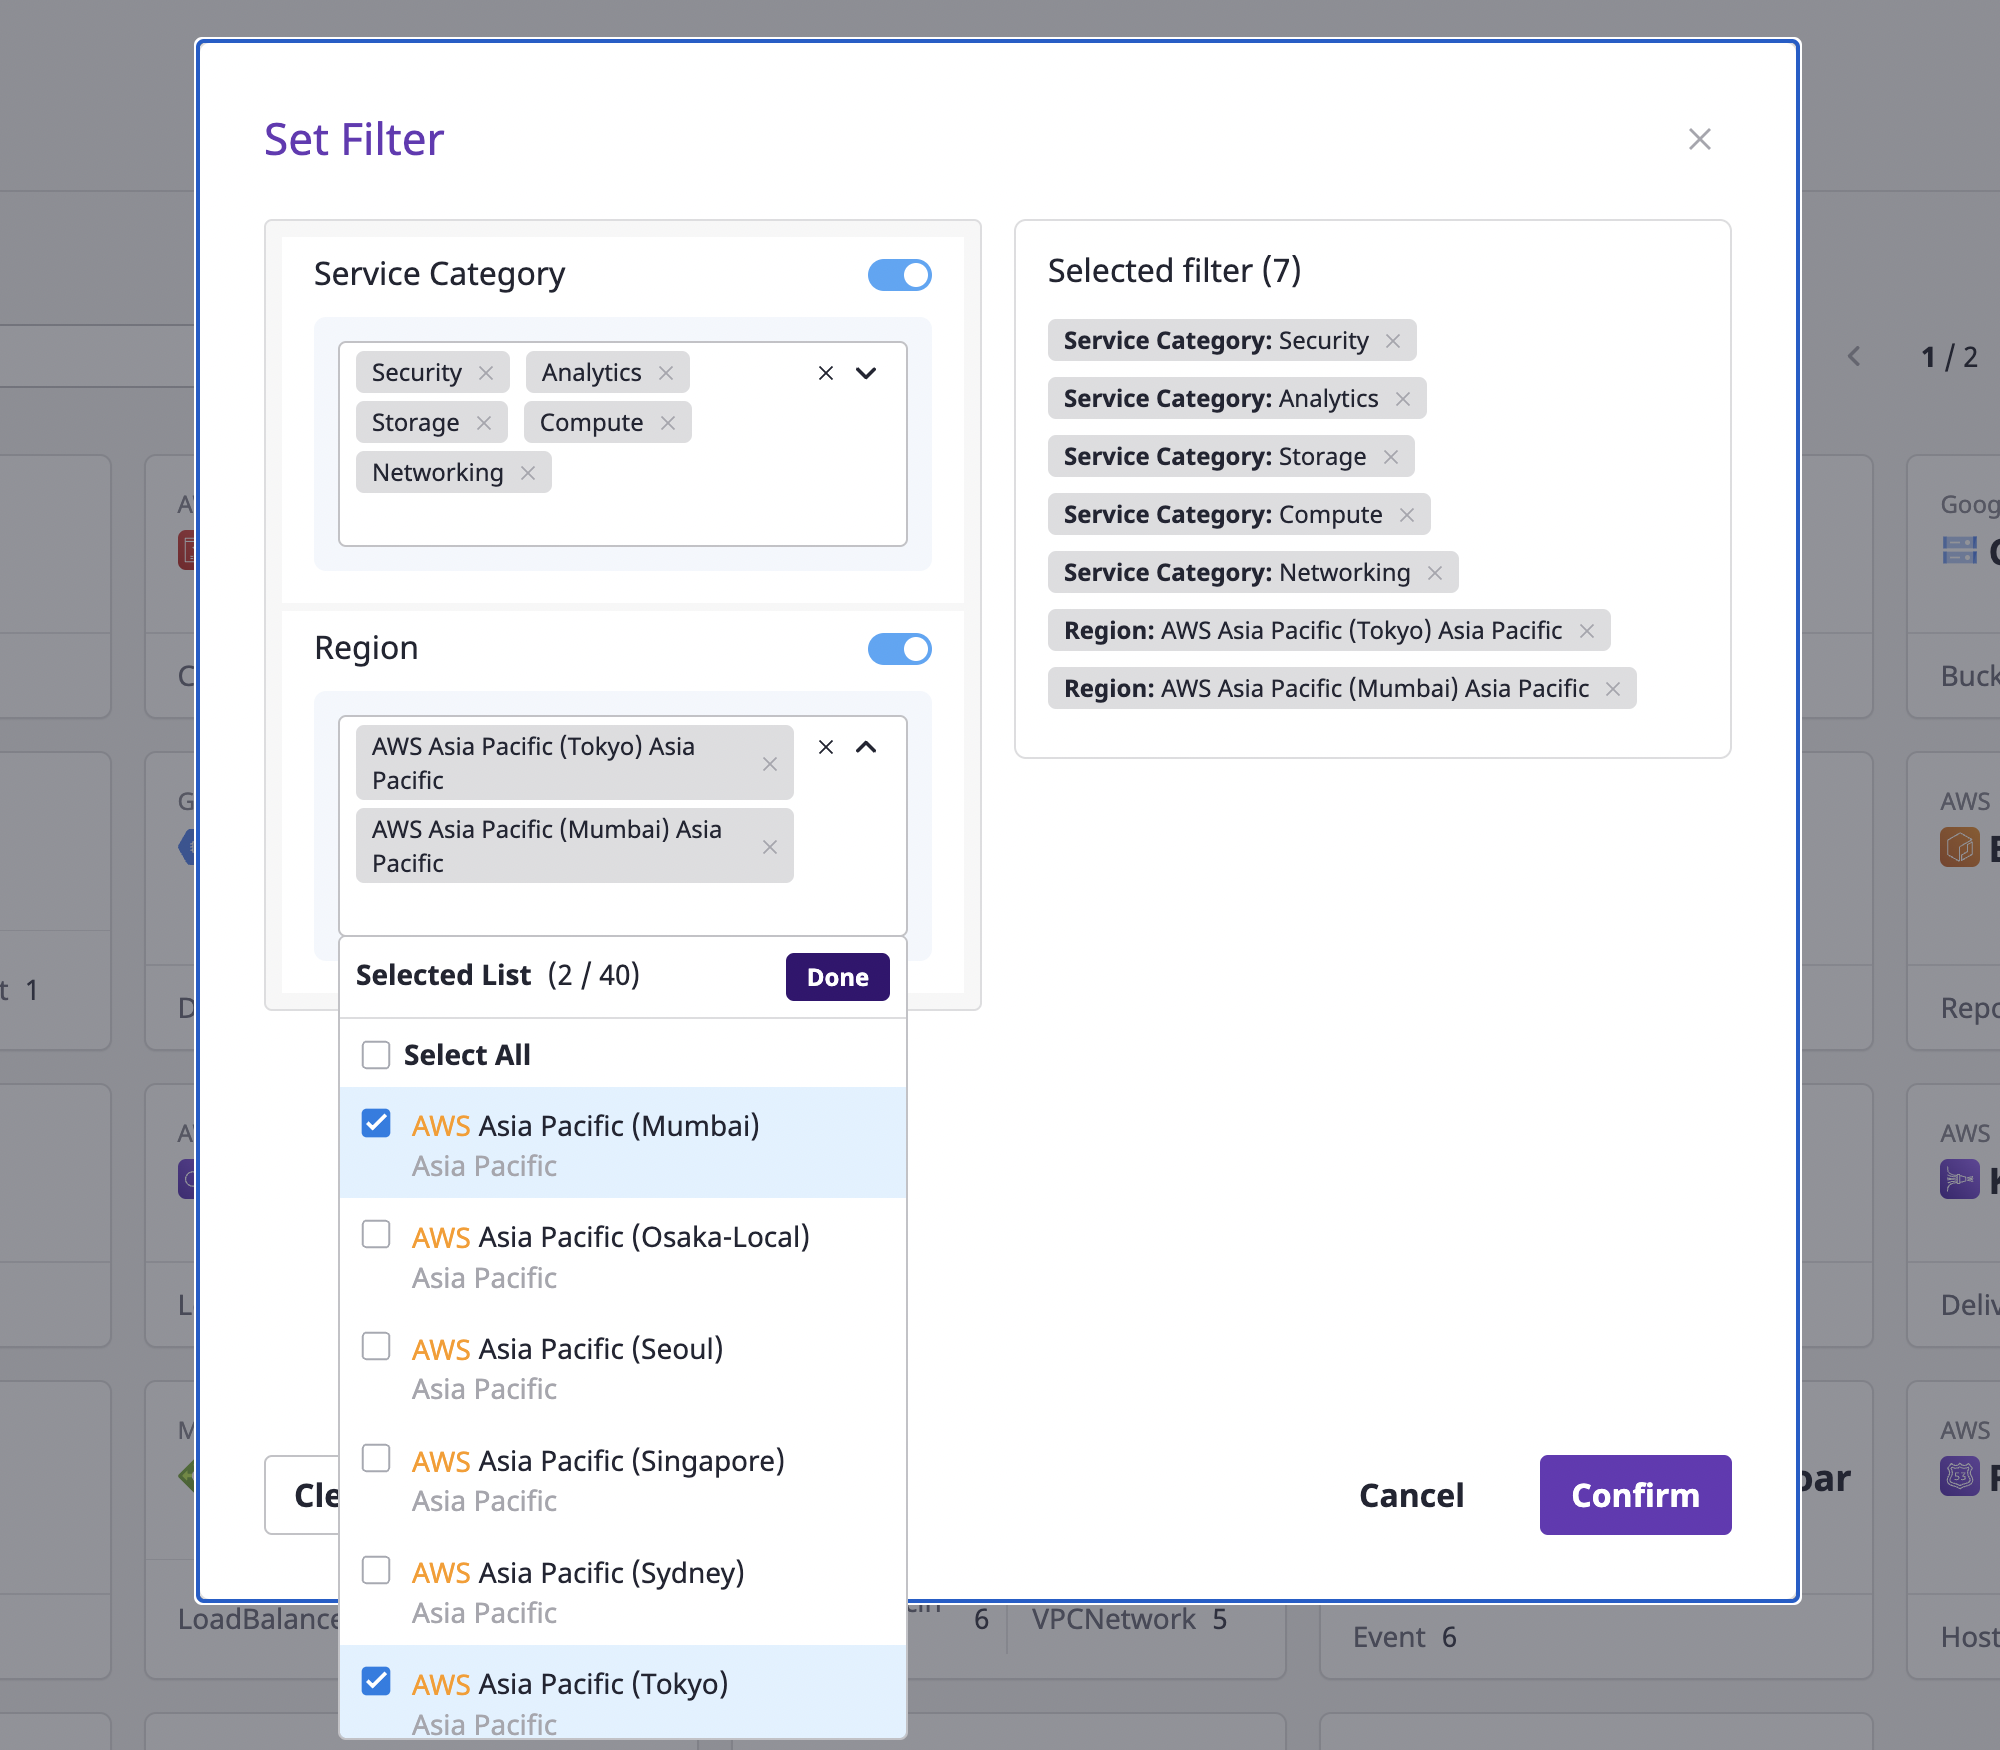
Filter settings
You can search with more detailed conditions by setting service classification and region filters.
(1) Click the [Settings] button to open the [Filter Settings] modal dialog.
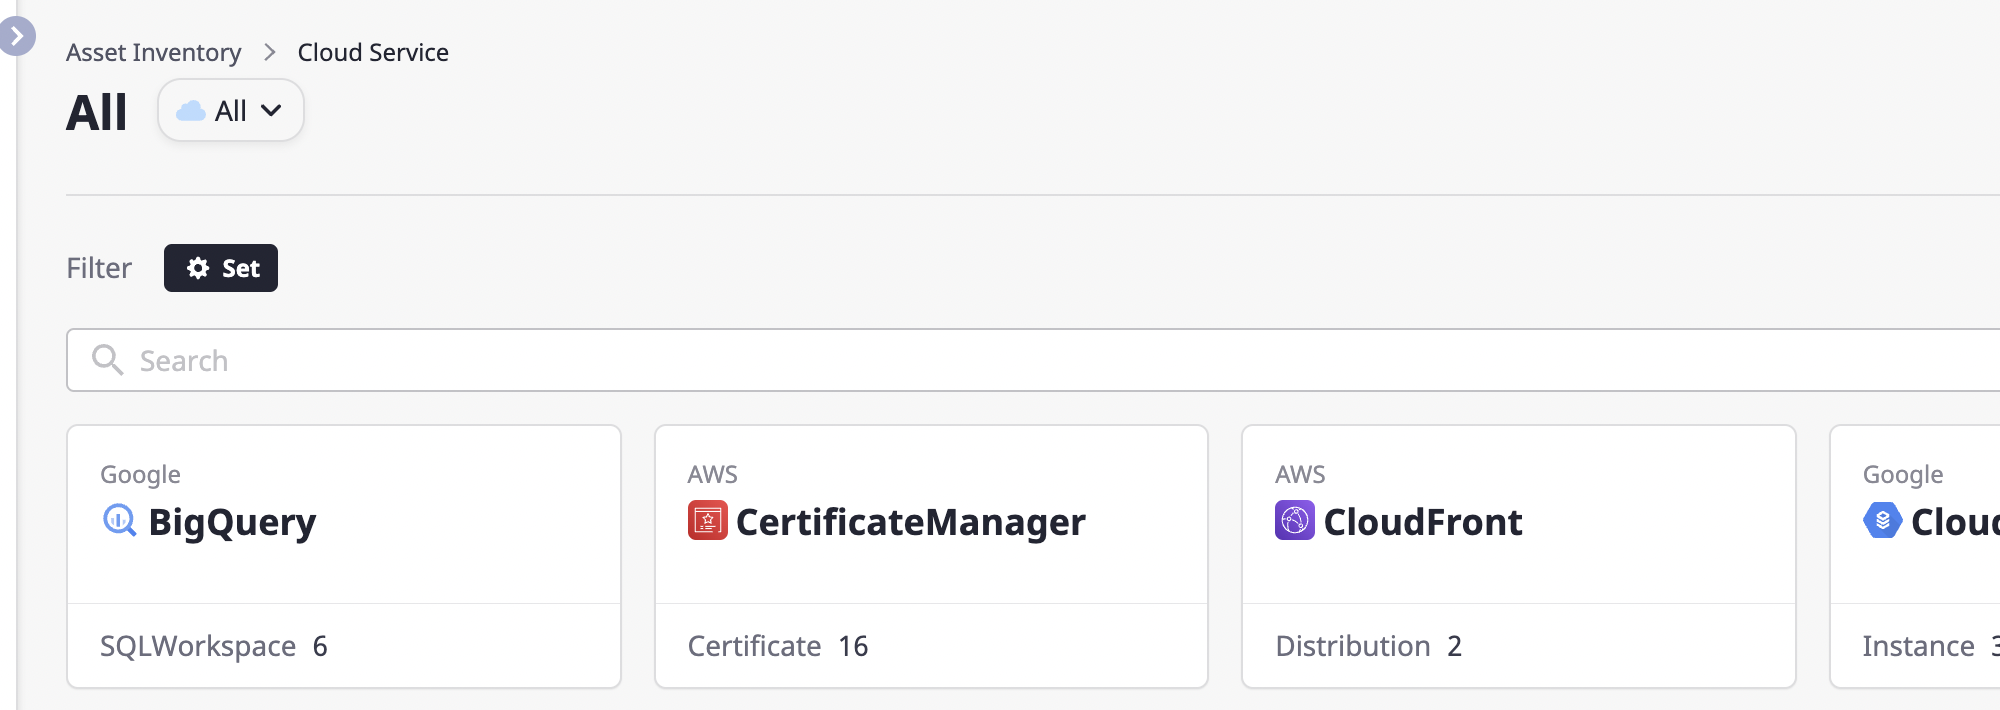
(2) After selecting the desired filter, click the [OK] button to apply it.
Exploring Cloud Service
You can check the details of certain cloud services on the cloud service detail page.
Click a card on the cloud service page to go to the detail page.
You can check detailed information about the selected cloud service in the cloud service list on the left.
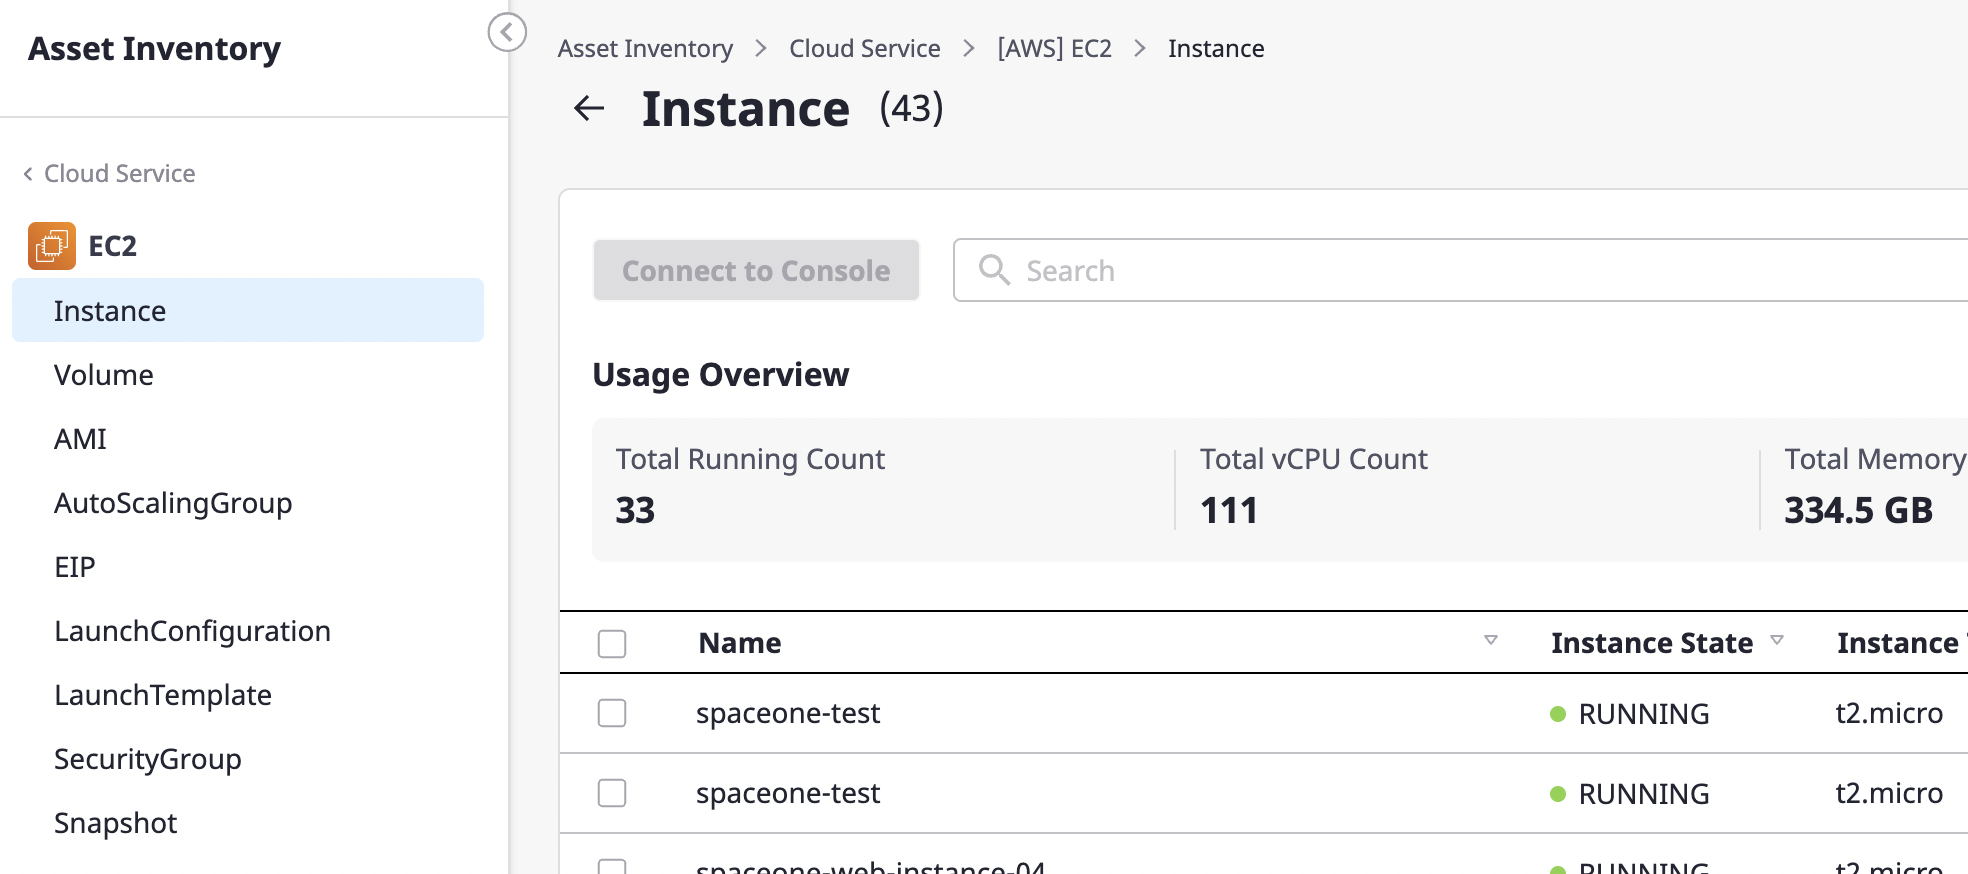
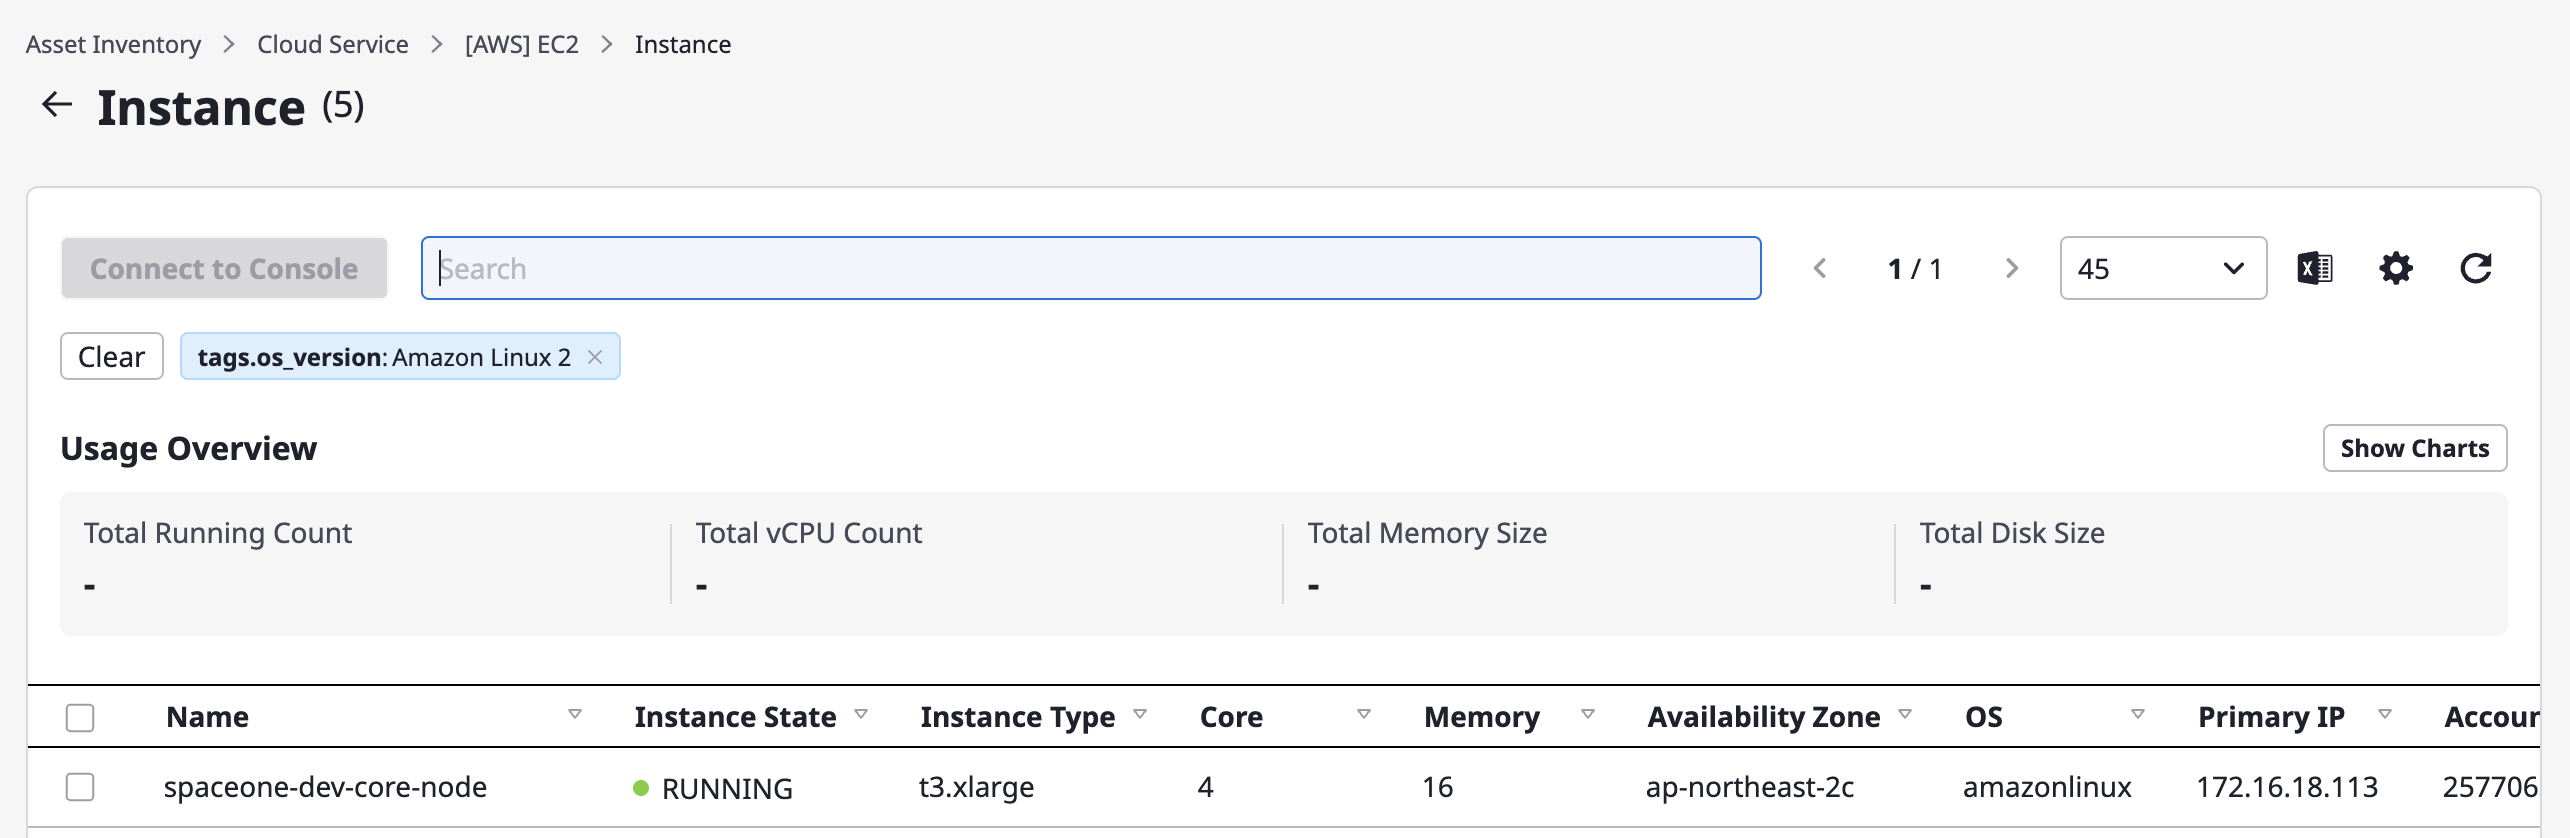
Viewing a list of resources in cloud services
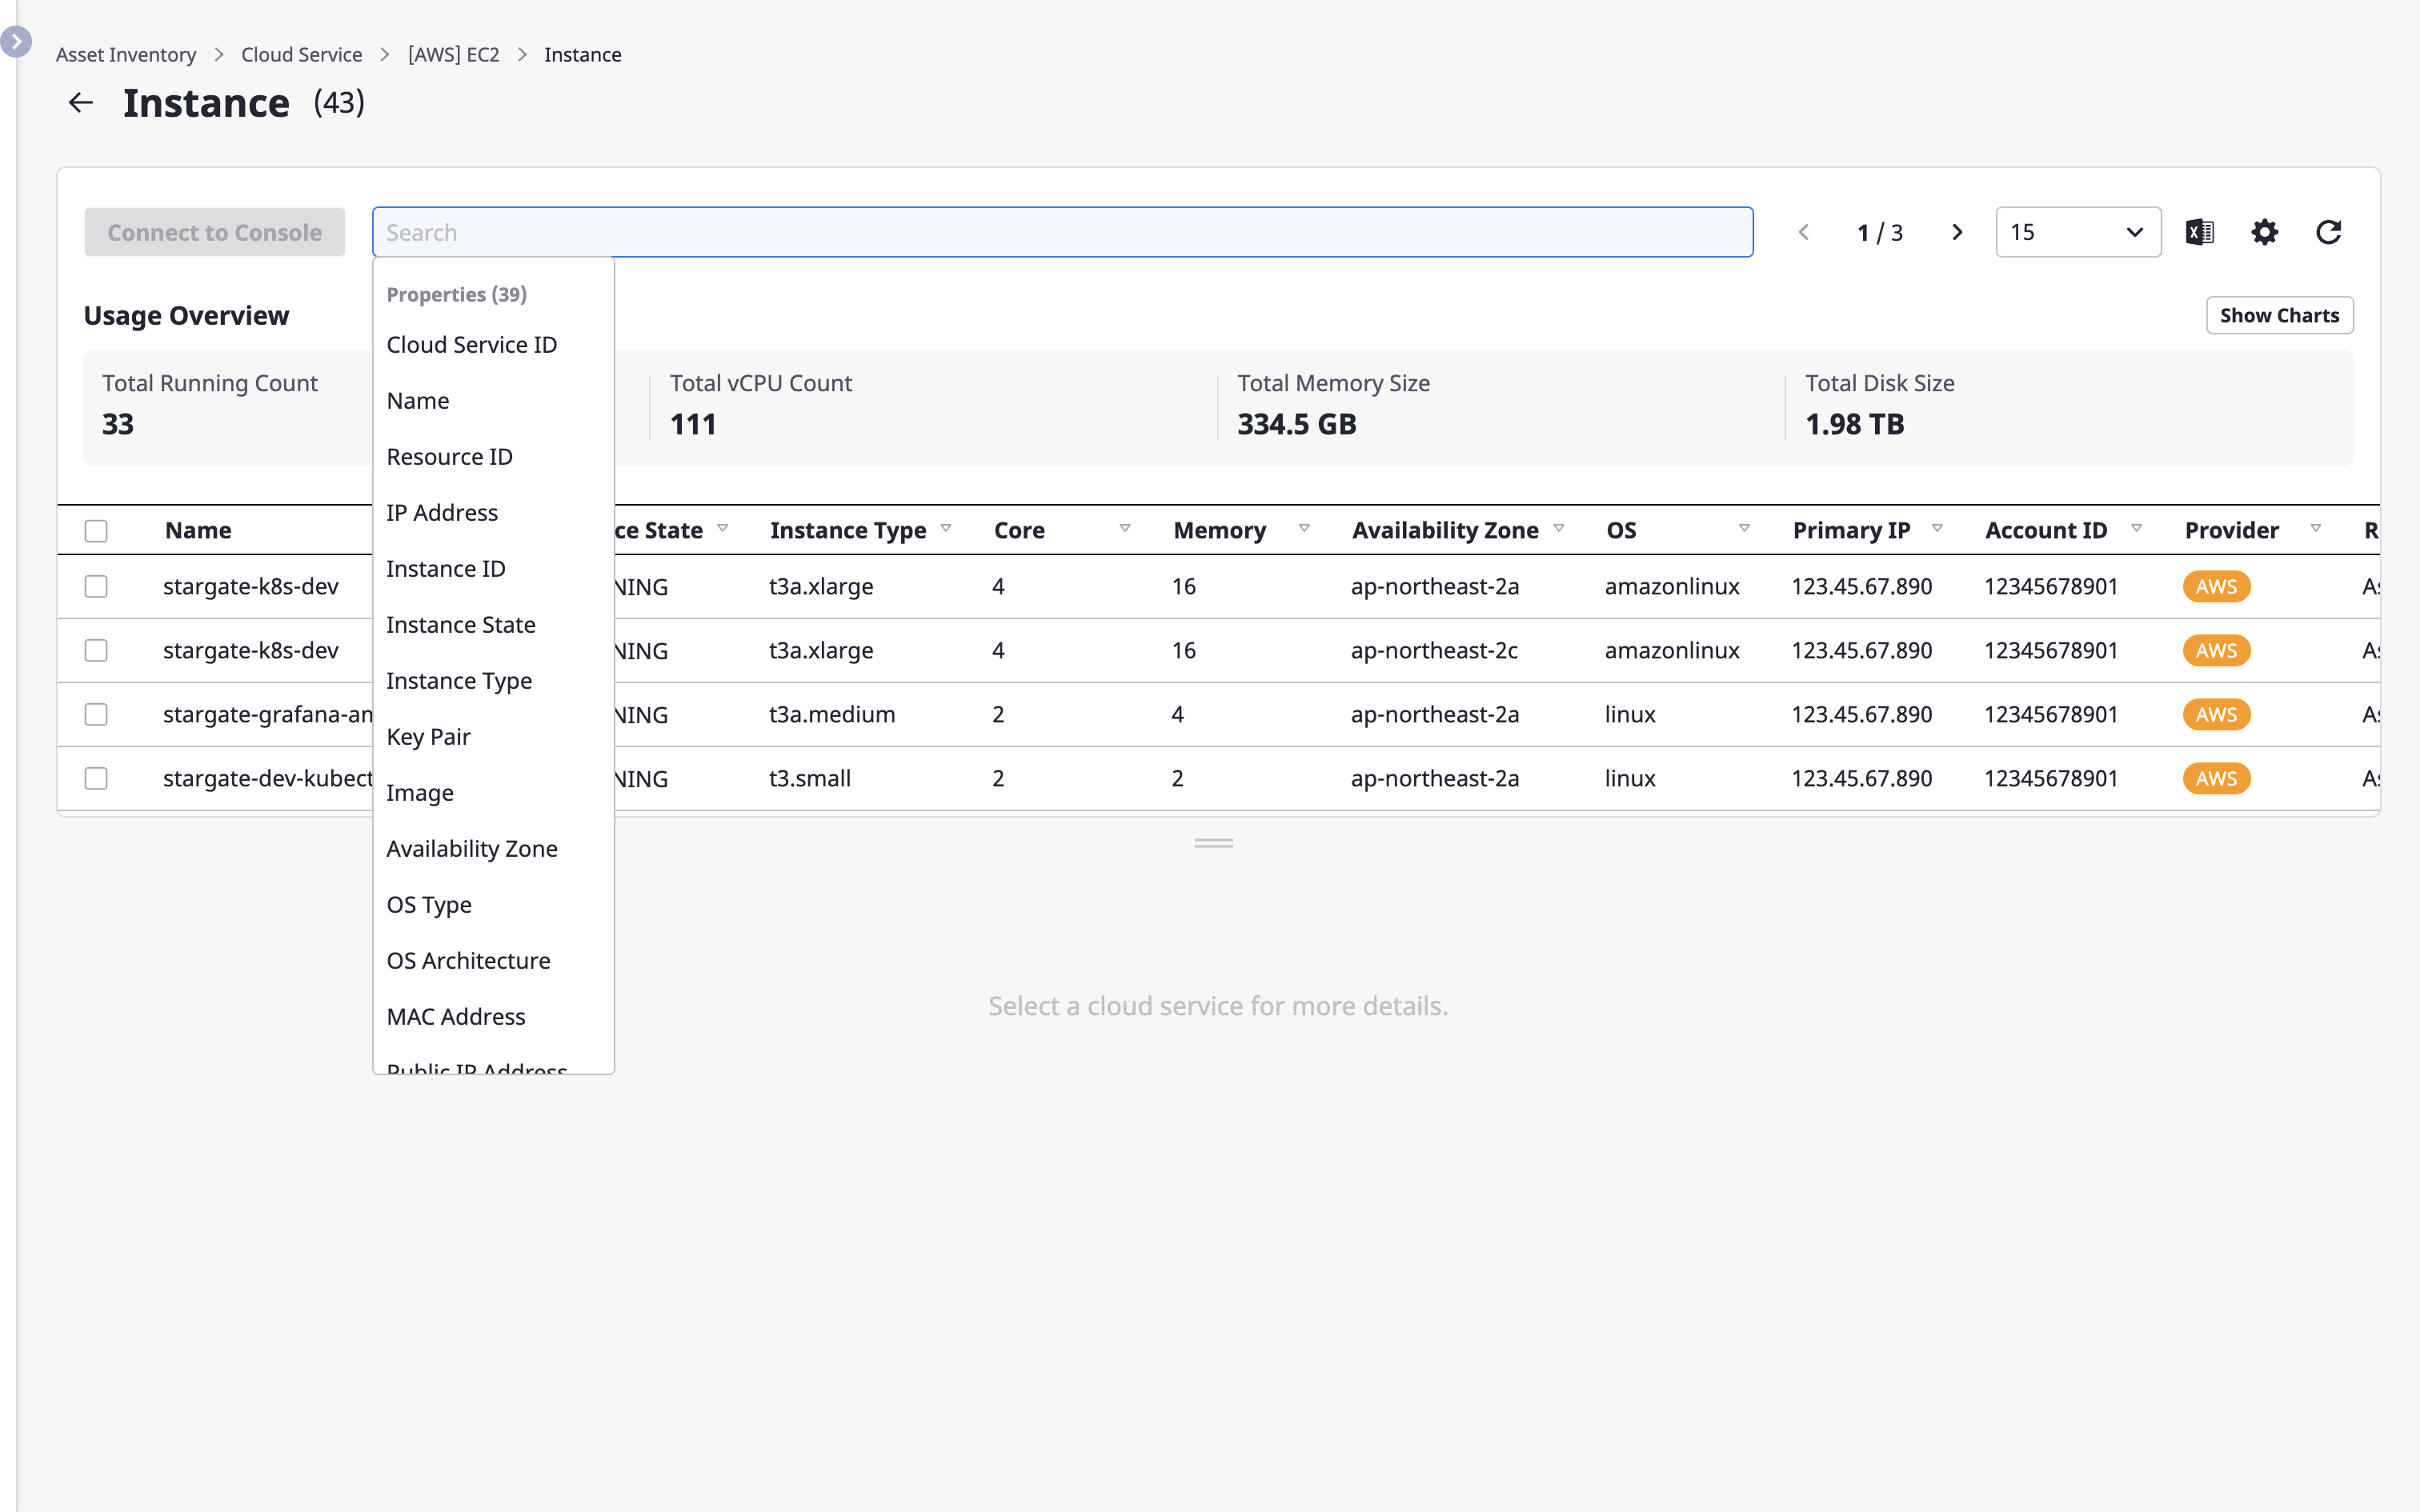
You can enter a search word to see a list of cloud resources that match your criteria.
See here for a detailed description of Advanced search.
Click the [Excel] icon button to [Export as an Excel file] for a list of resources (/ko/docs/guides/advanced/excel-export) or click the [Settings] icon button to [Personalize table fields](/ko/ docs/guides/advanced/custom-table).
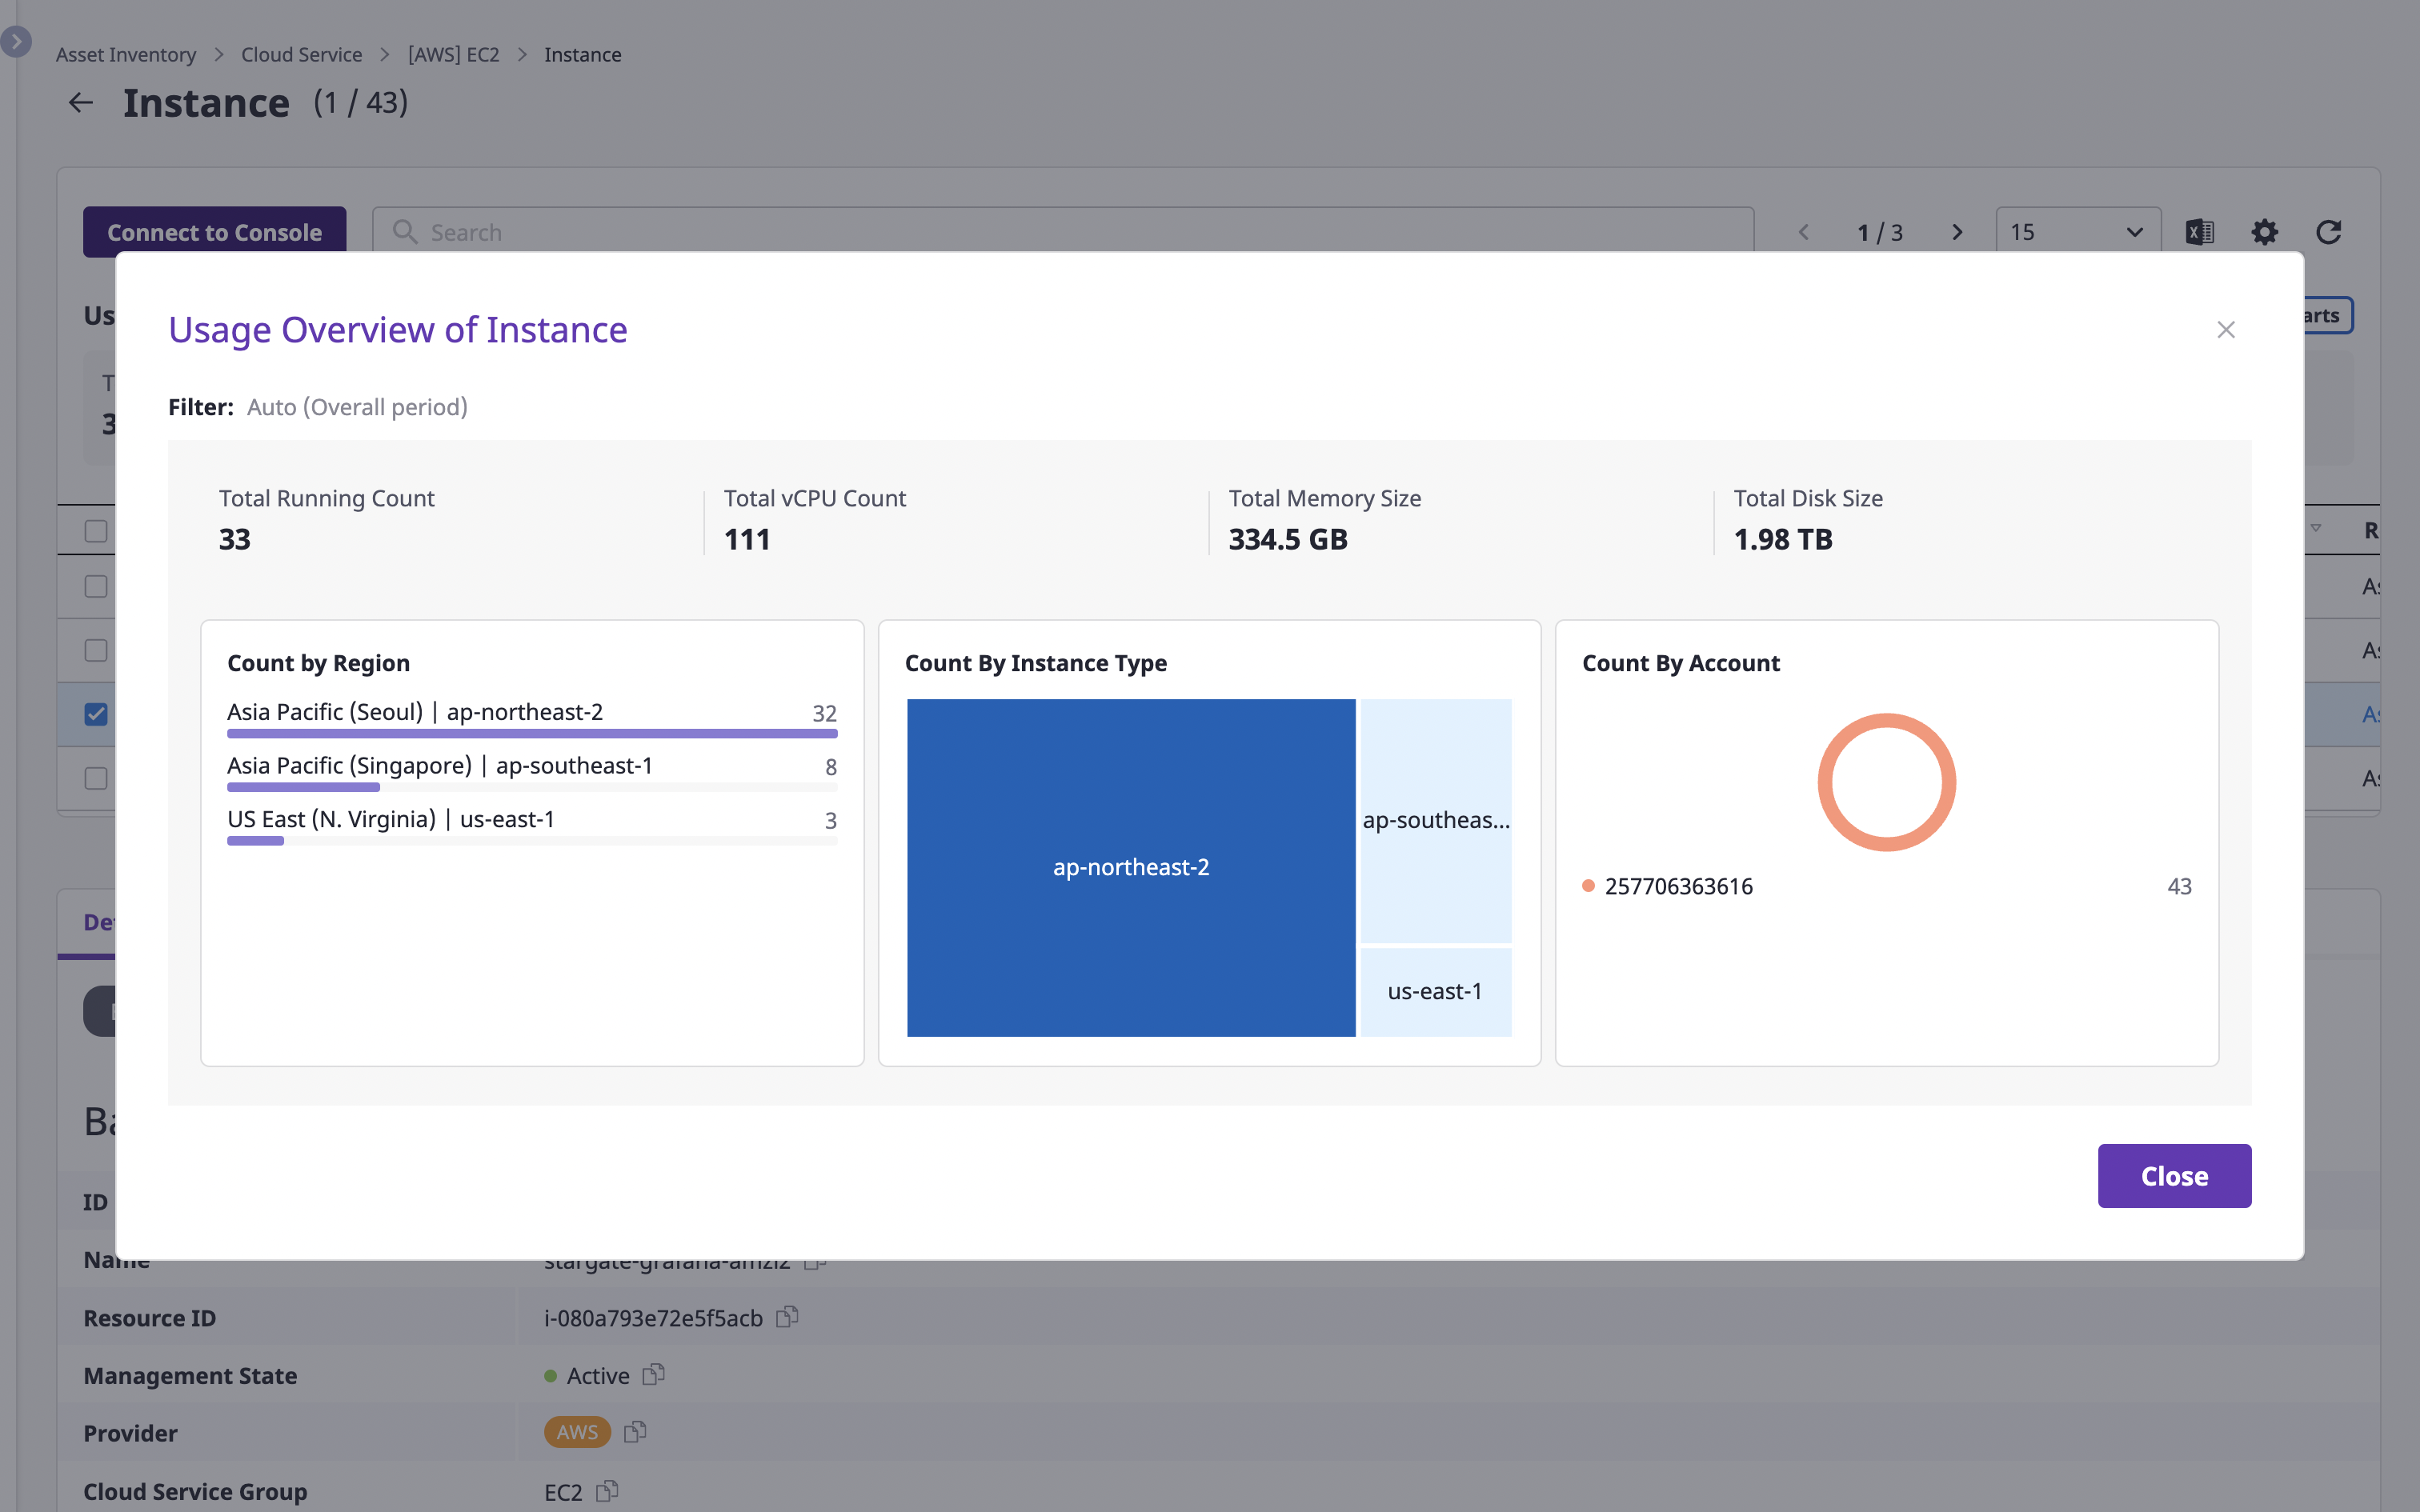
Viewing the status of cloud service usage
You can check statistical information about the selected cloud service.
For more detailed information, click the [View chart] button on the right.
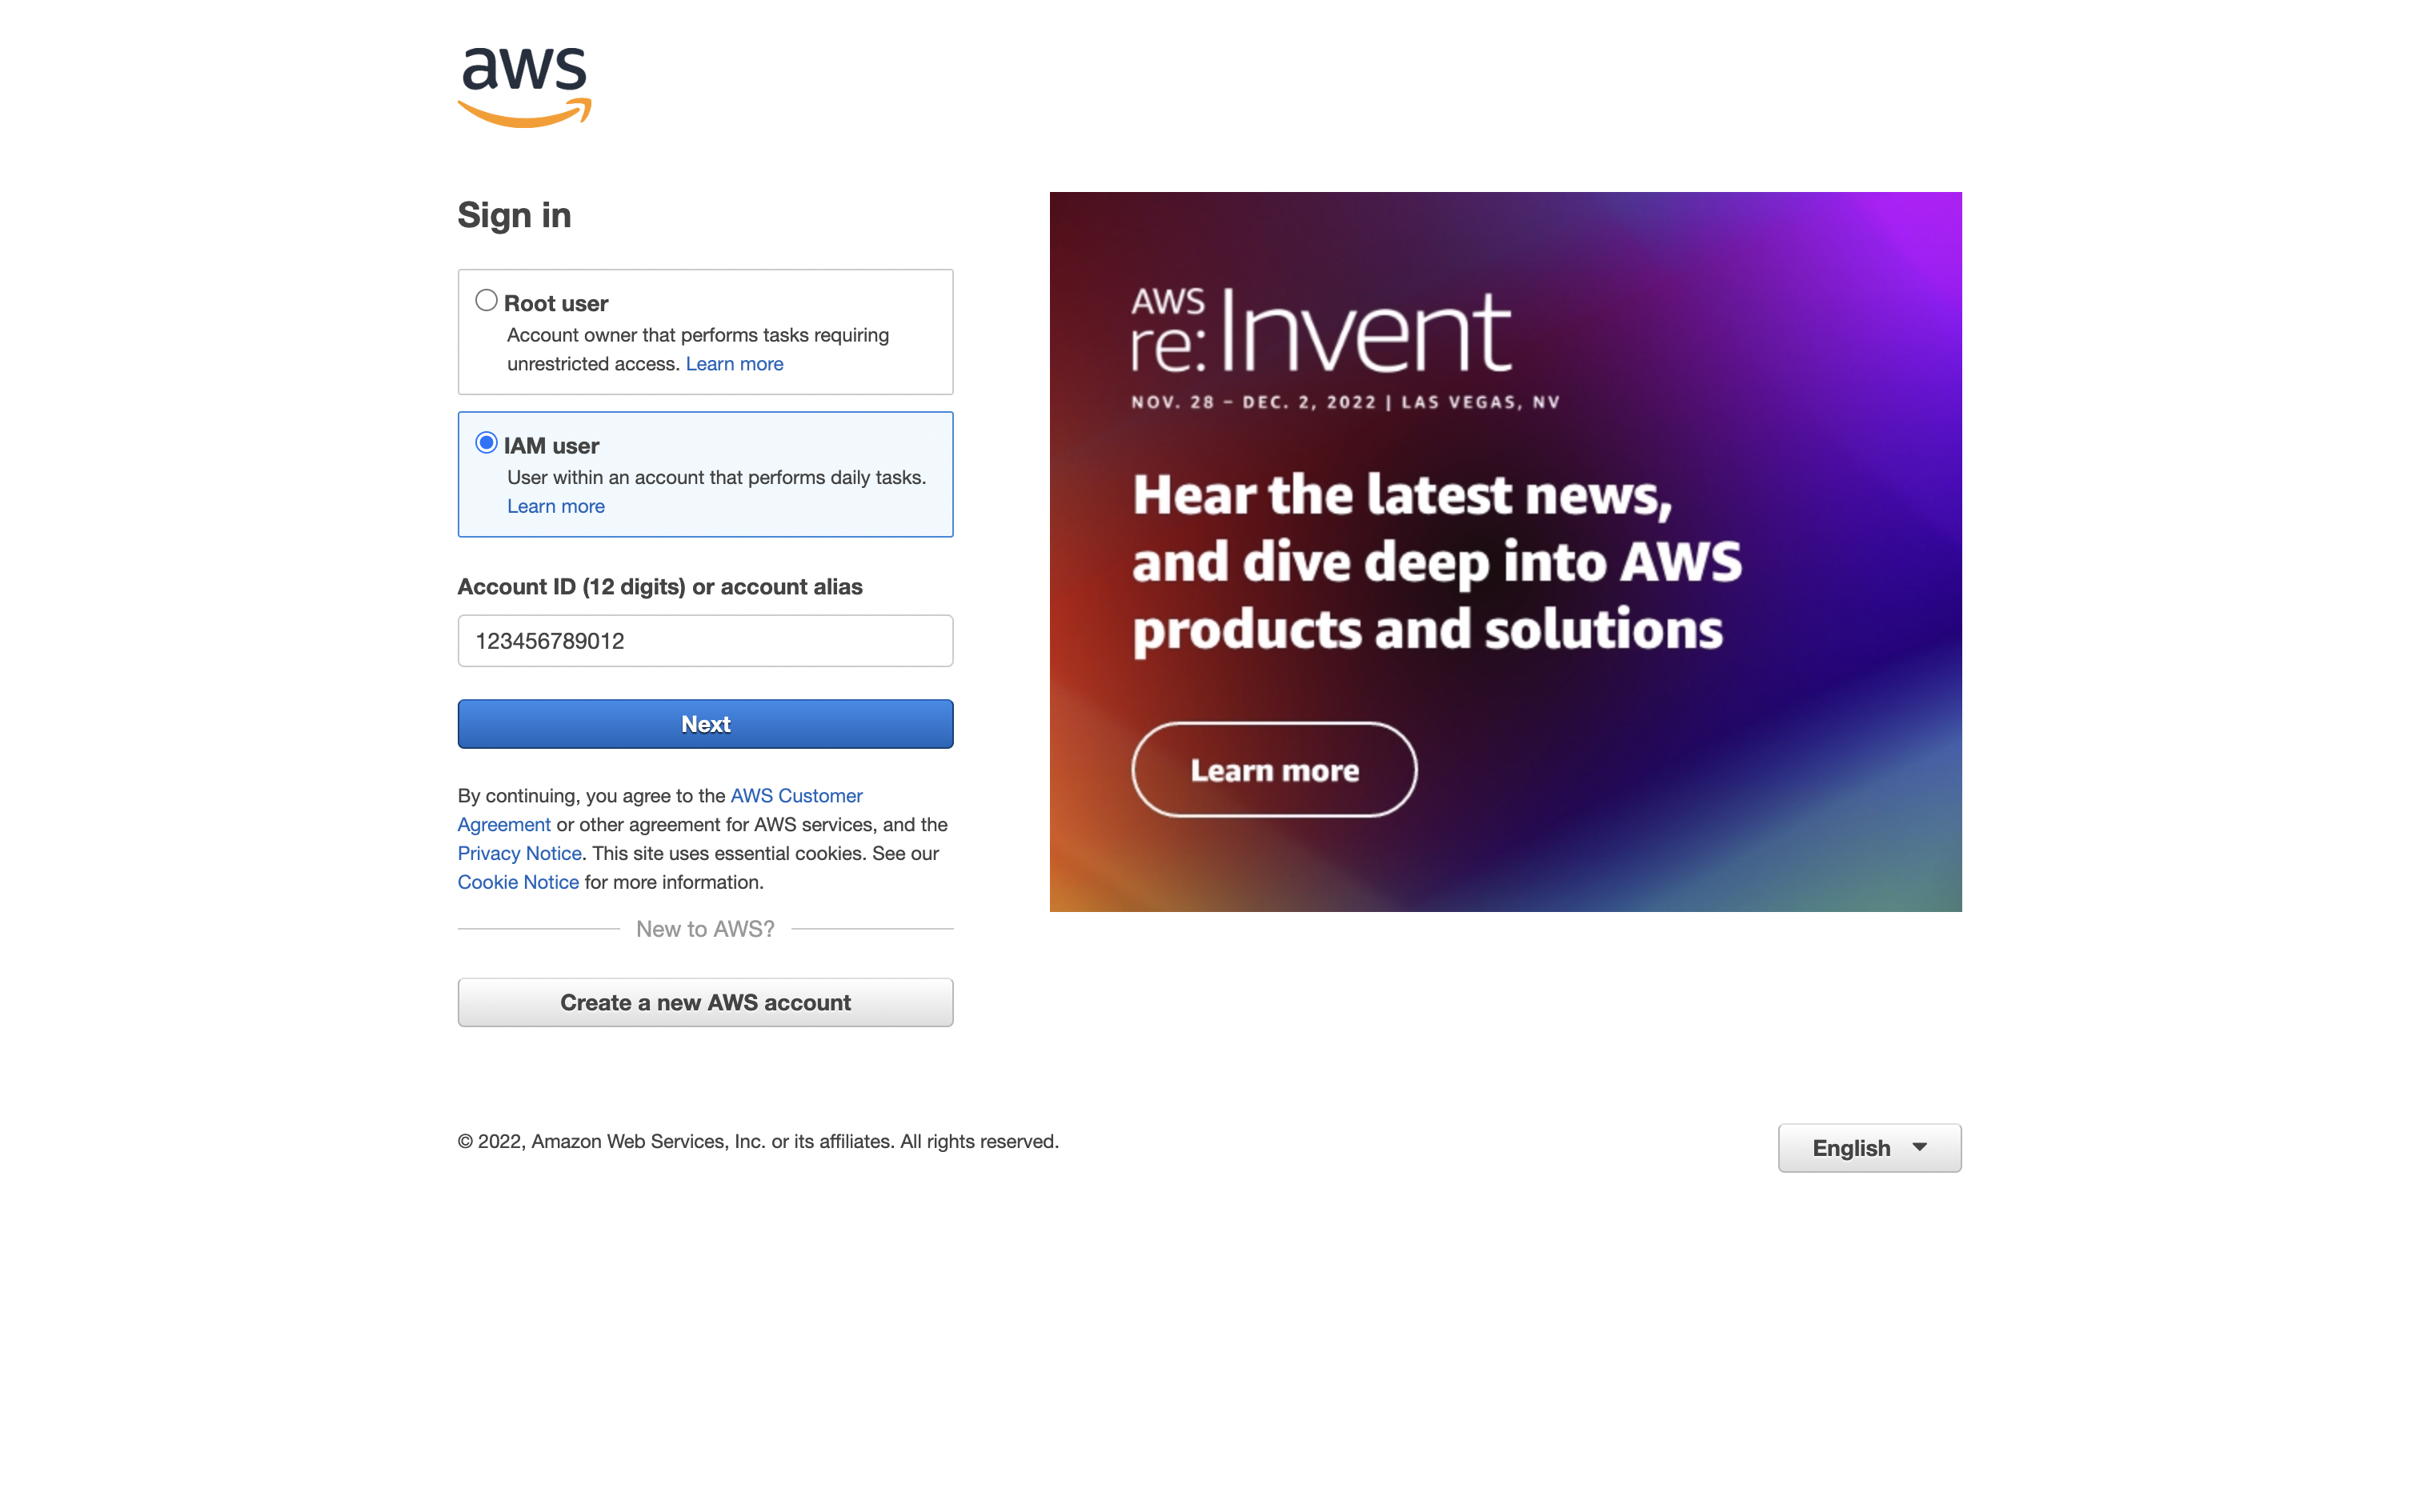
Opening cloud resources console
Sometimes you need to work in a console provided by a cloud resources provider.
(1) Select the cloud resource to which you want to connect the console.
(2) Click the [Console connection] button.
(3) By clicking the button, open the provider's console in a new tab where you can continue working with the cloud resource.
Below is an example of the AWS EC2 Instance console that was opened.
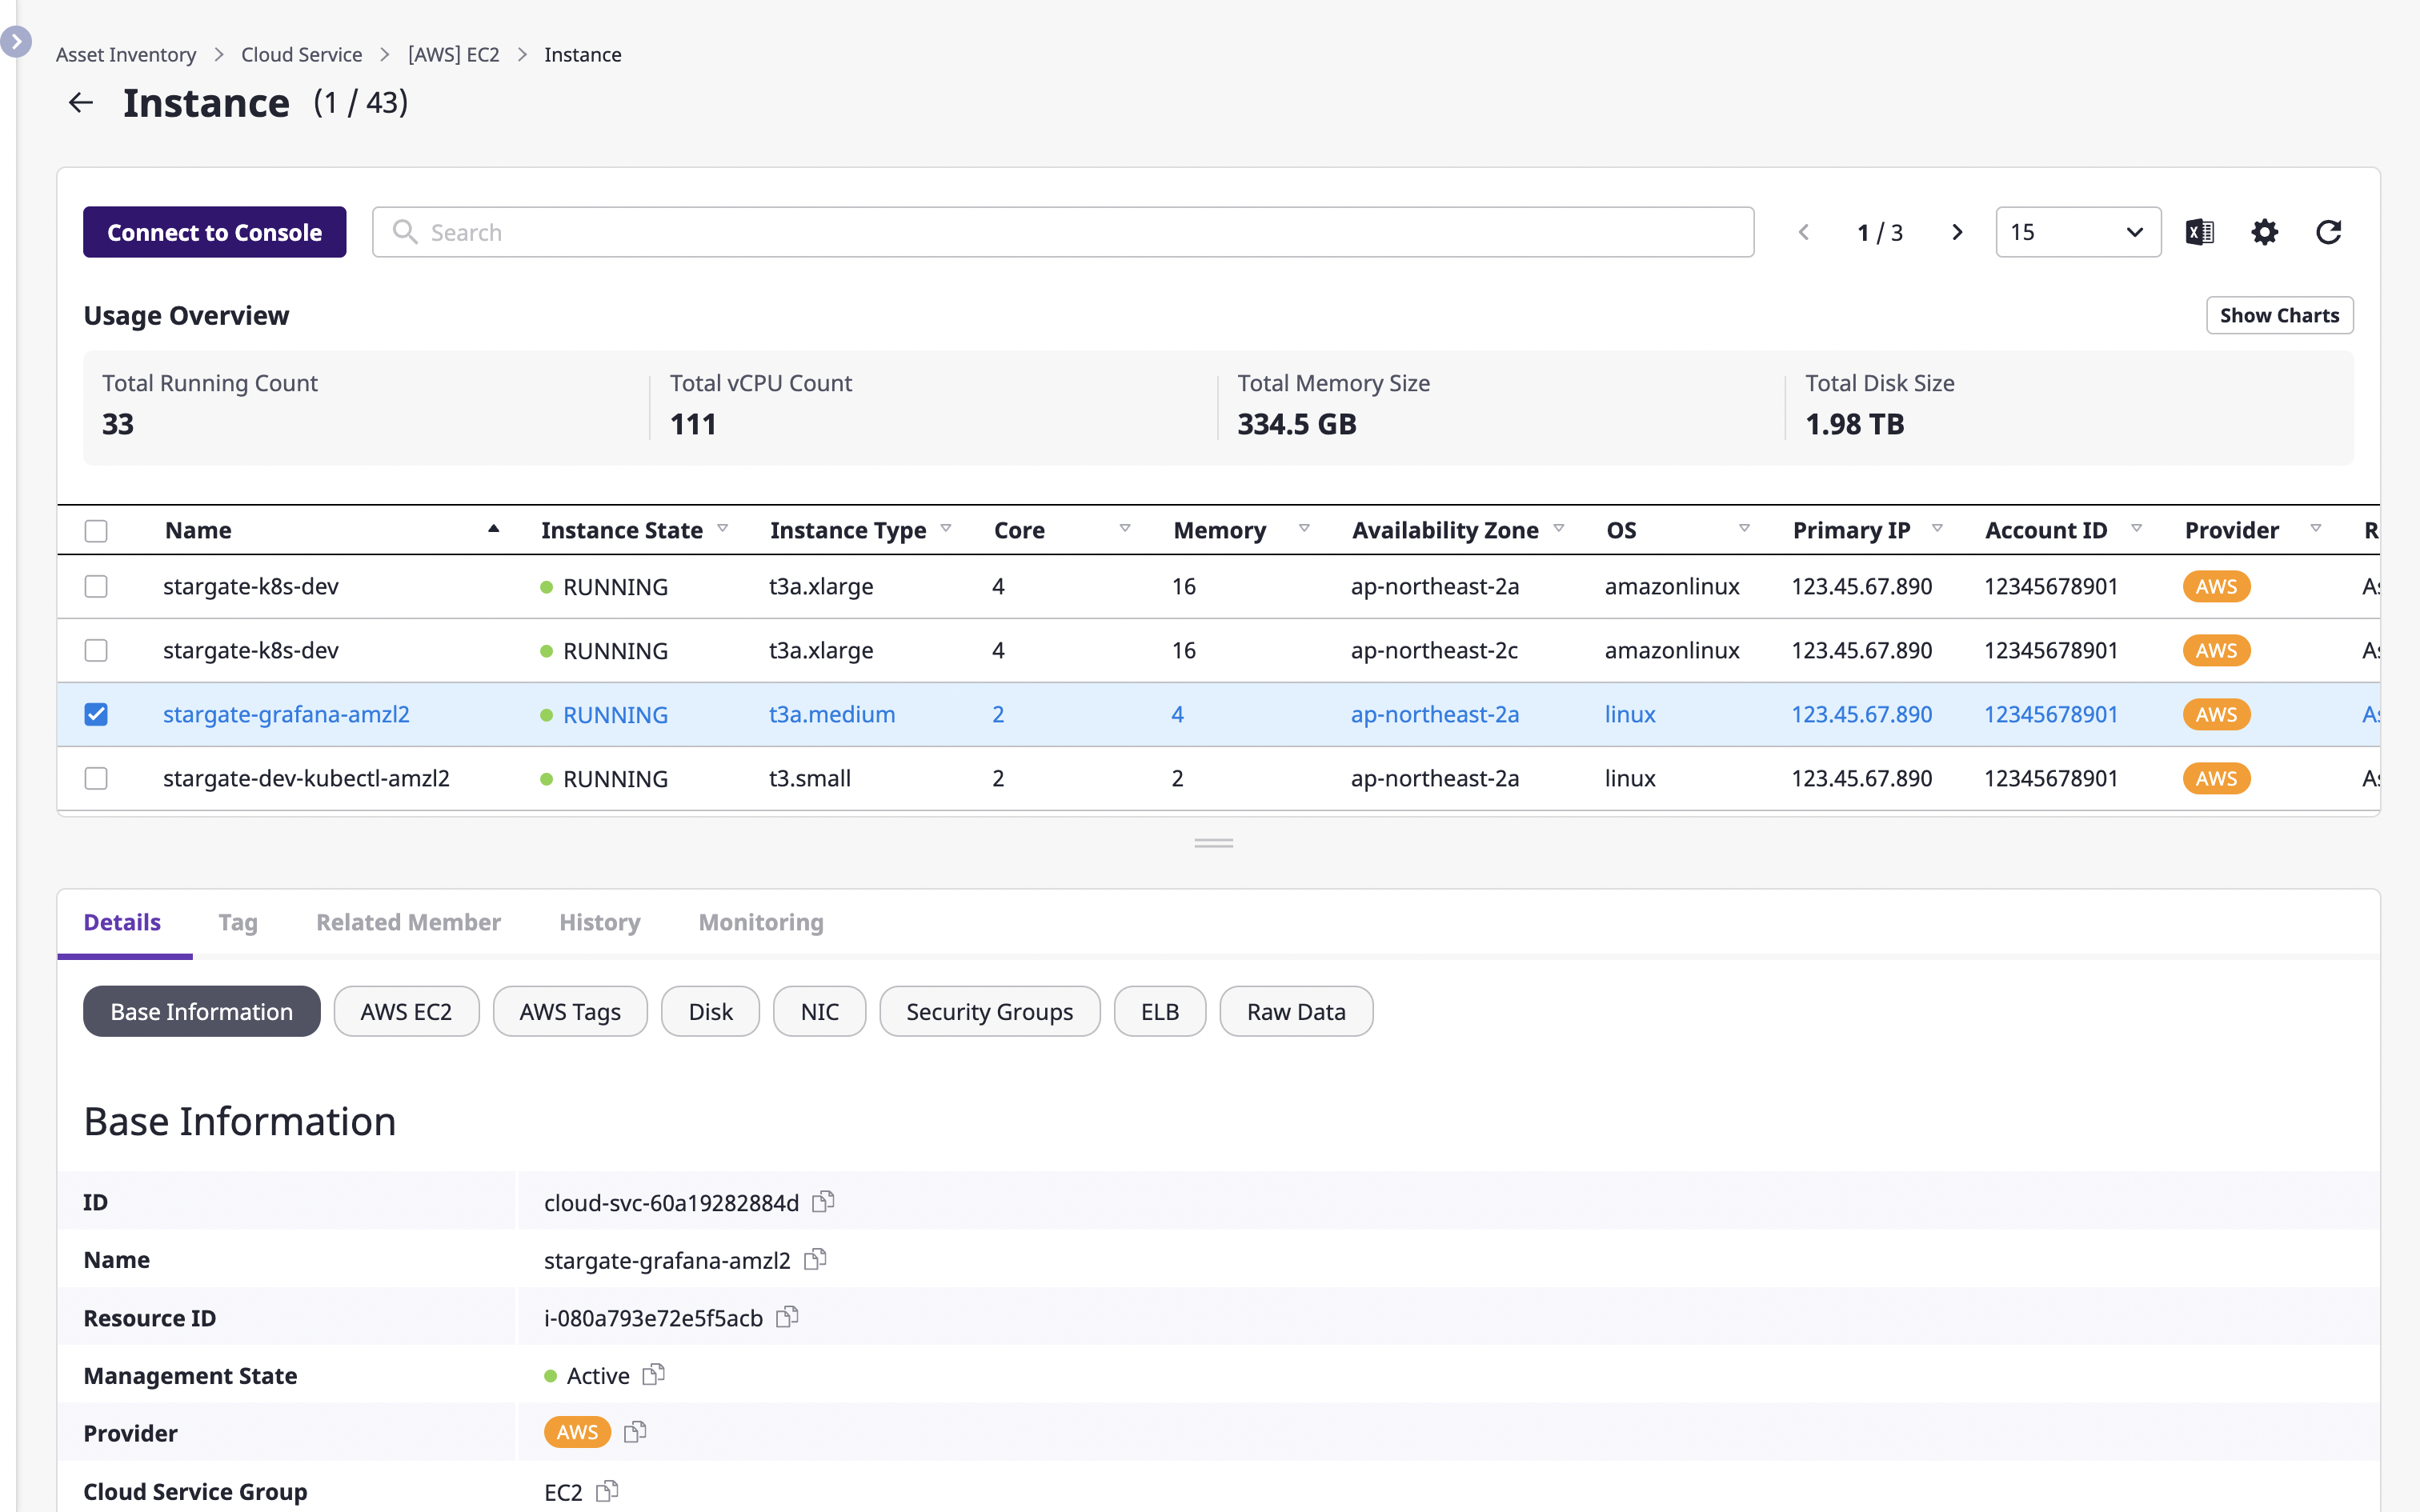
Exploring resources in cloud services
If you select an item you want to look at in the list of cloud resources, you can check information about that resource at the bottom.
- [Details] (#check-cloud-resources-details)
- [Tag] (#manage-cloud-resources-tag)
- [Associated member] (#check-cloud-resource-associated-member)
- [Change history] (#check-cloud-resource-associated-member)
- [Monitoring] (#check-cloud-resource-monitoring-information)
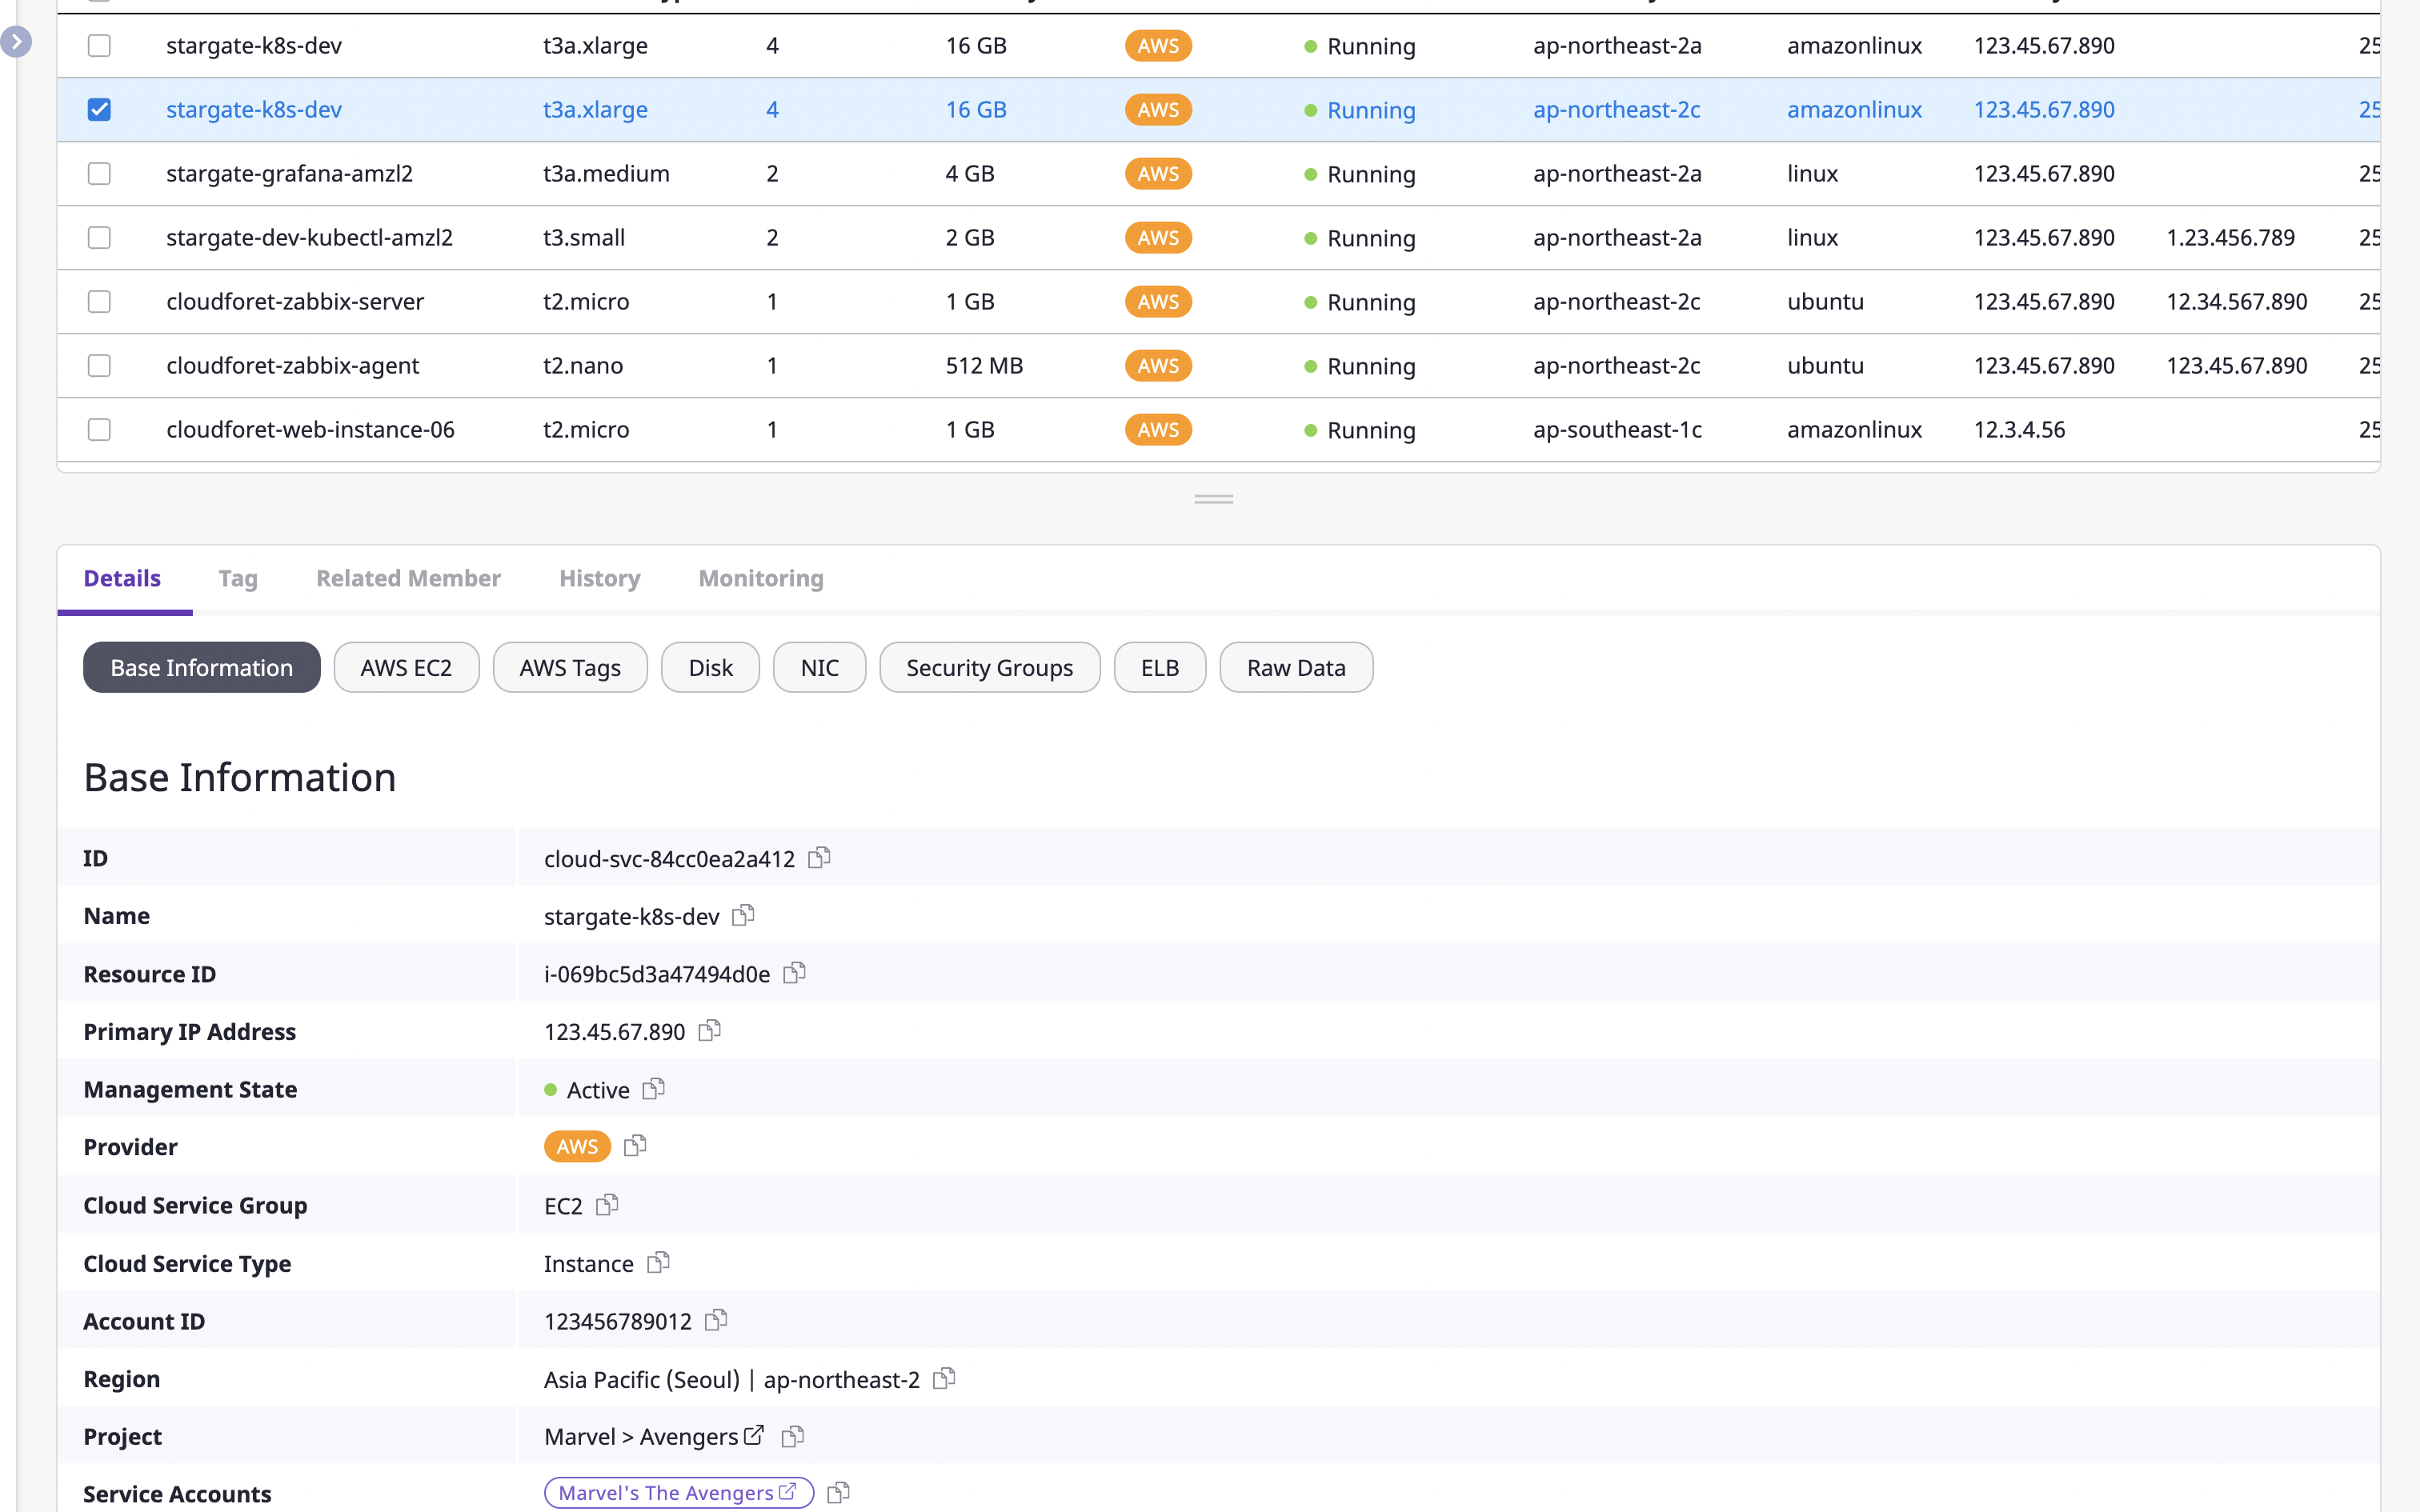
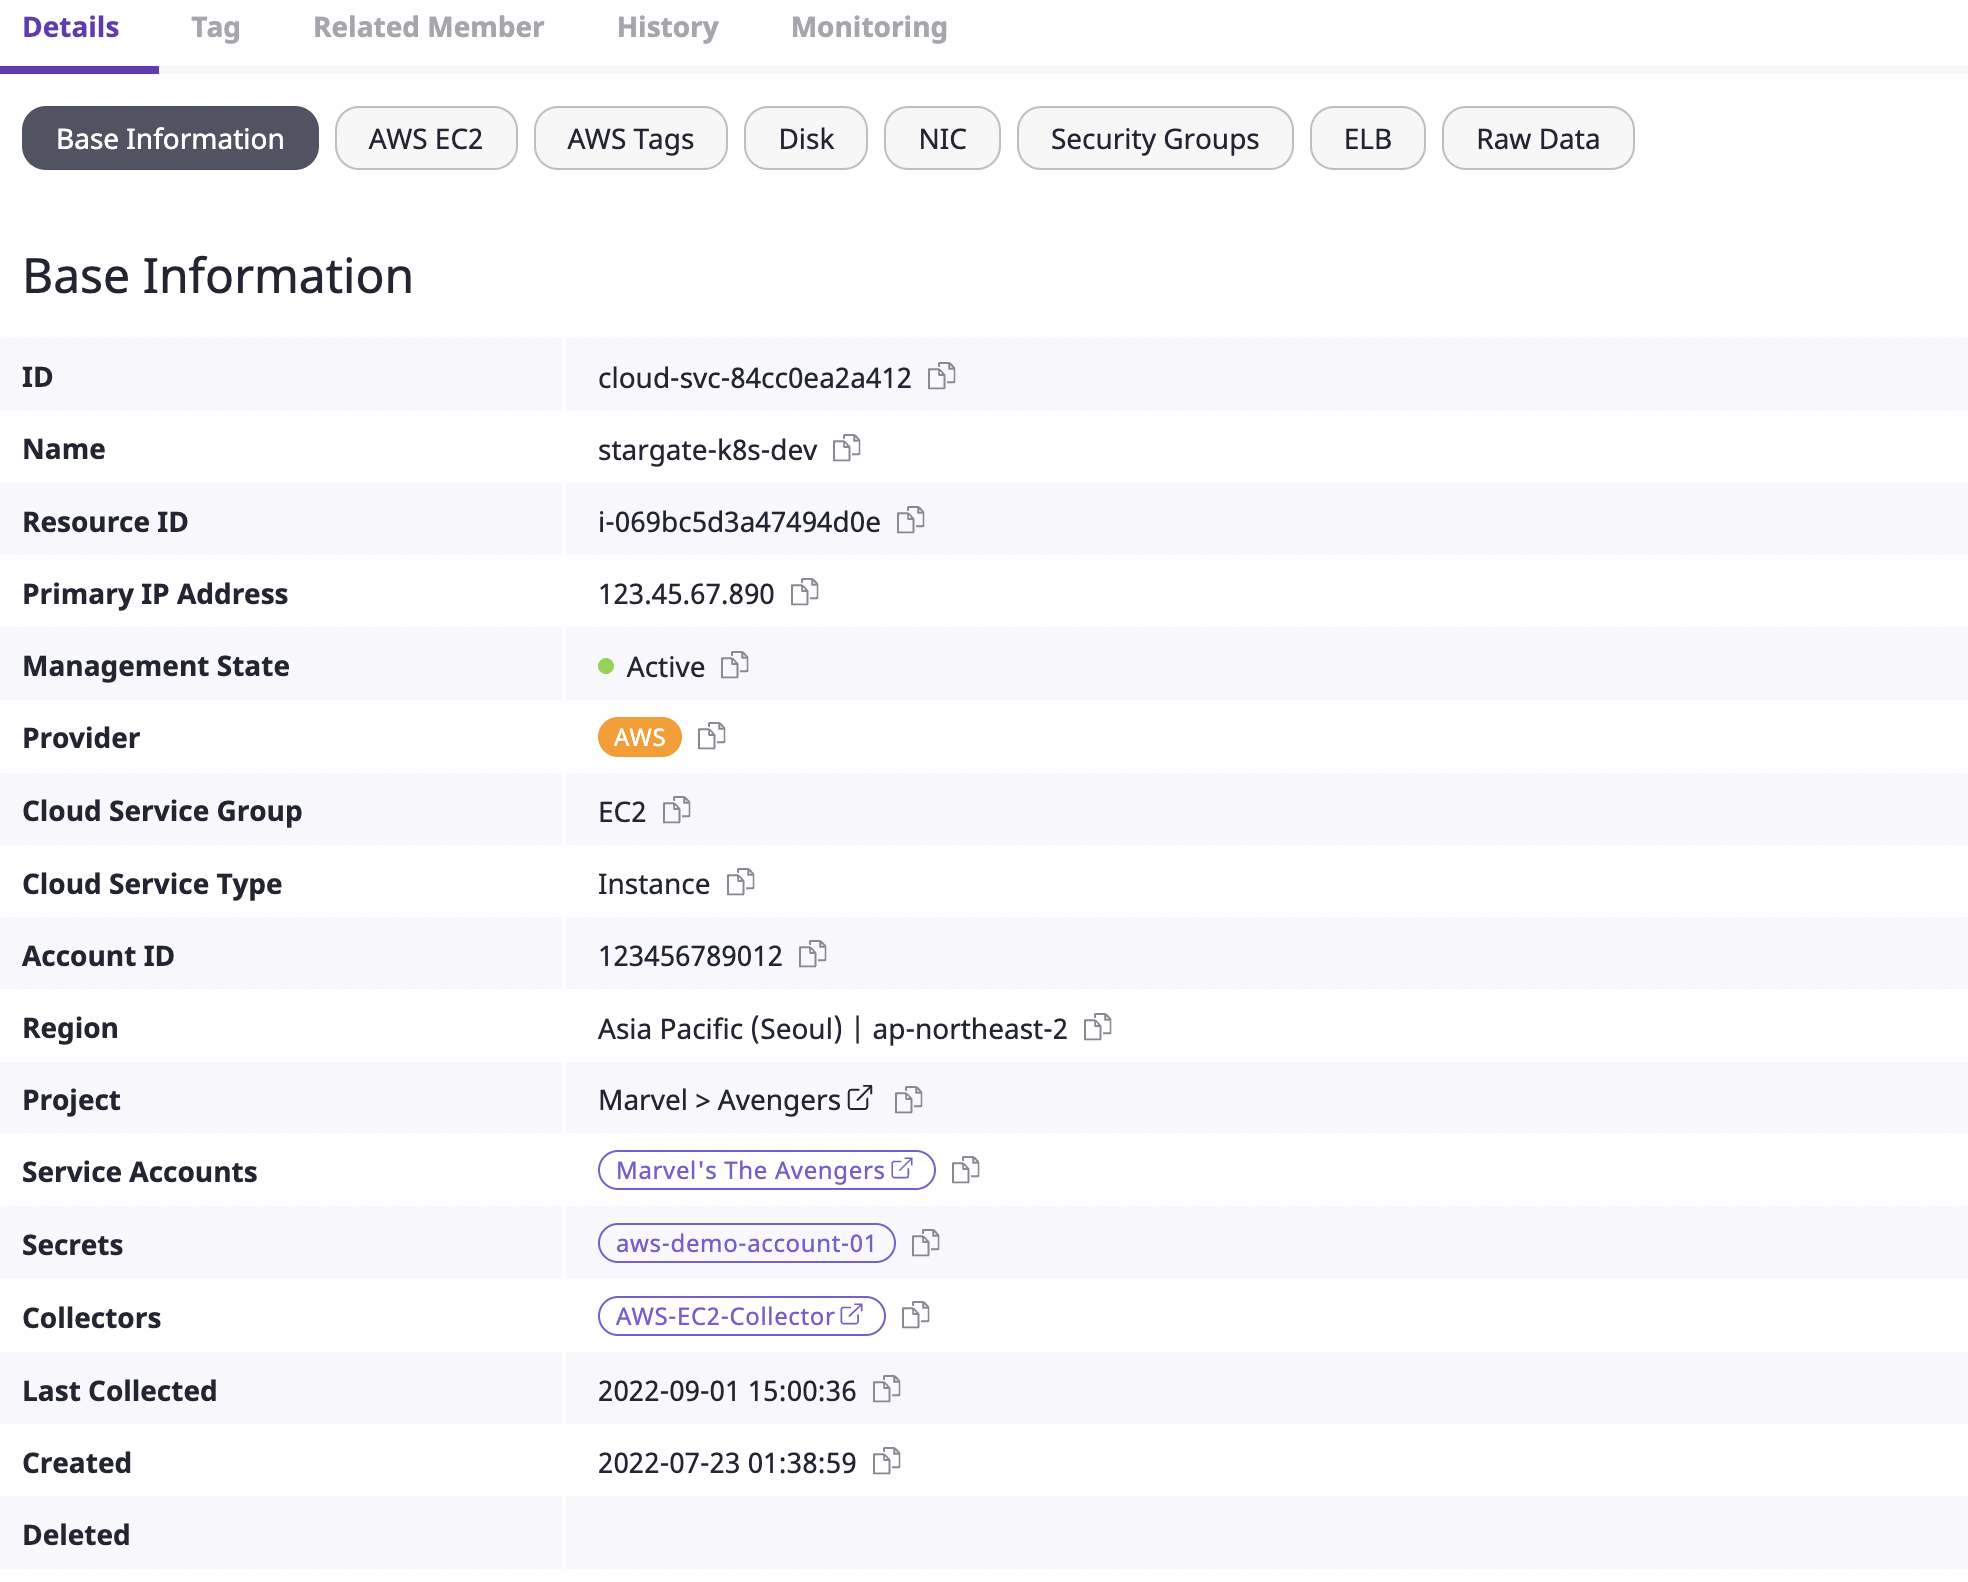
Checking cloud resource details
Detailed information about the selected resource is displayed.
The information displayed here is divided into a Basic tab and a More information tab.
- Basic tab: This is provided as default in the cloud resources details, and the [Basic information] and [Original data] tabs are applicable.
- More information Tab: All tabs except the main tab are determined by the collector plugin that gathers resources. For detailed information, see here.
The image above is an example of cloud resources details.
Except for the [Basic information] tab and [Original data] tabs, all other tabs (AMI, Permissions, Tags) offer information added by the collector plugin.
Managing cloud resources tags
There are two types of tags for cloud resources: Managed and Custom.
For each cloud resource, you can either view the Managed tags added from the provider or add Custom tags.
Each tag in the form of key: value can be useful when searching for specific resources.
[ Viewing Managed Tags ]
- The
Managedtags can't be directly edited or removed in Cloudforet.
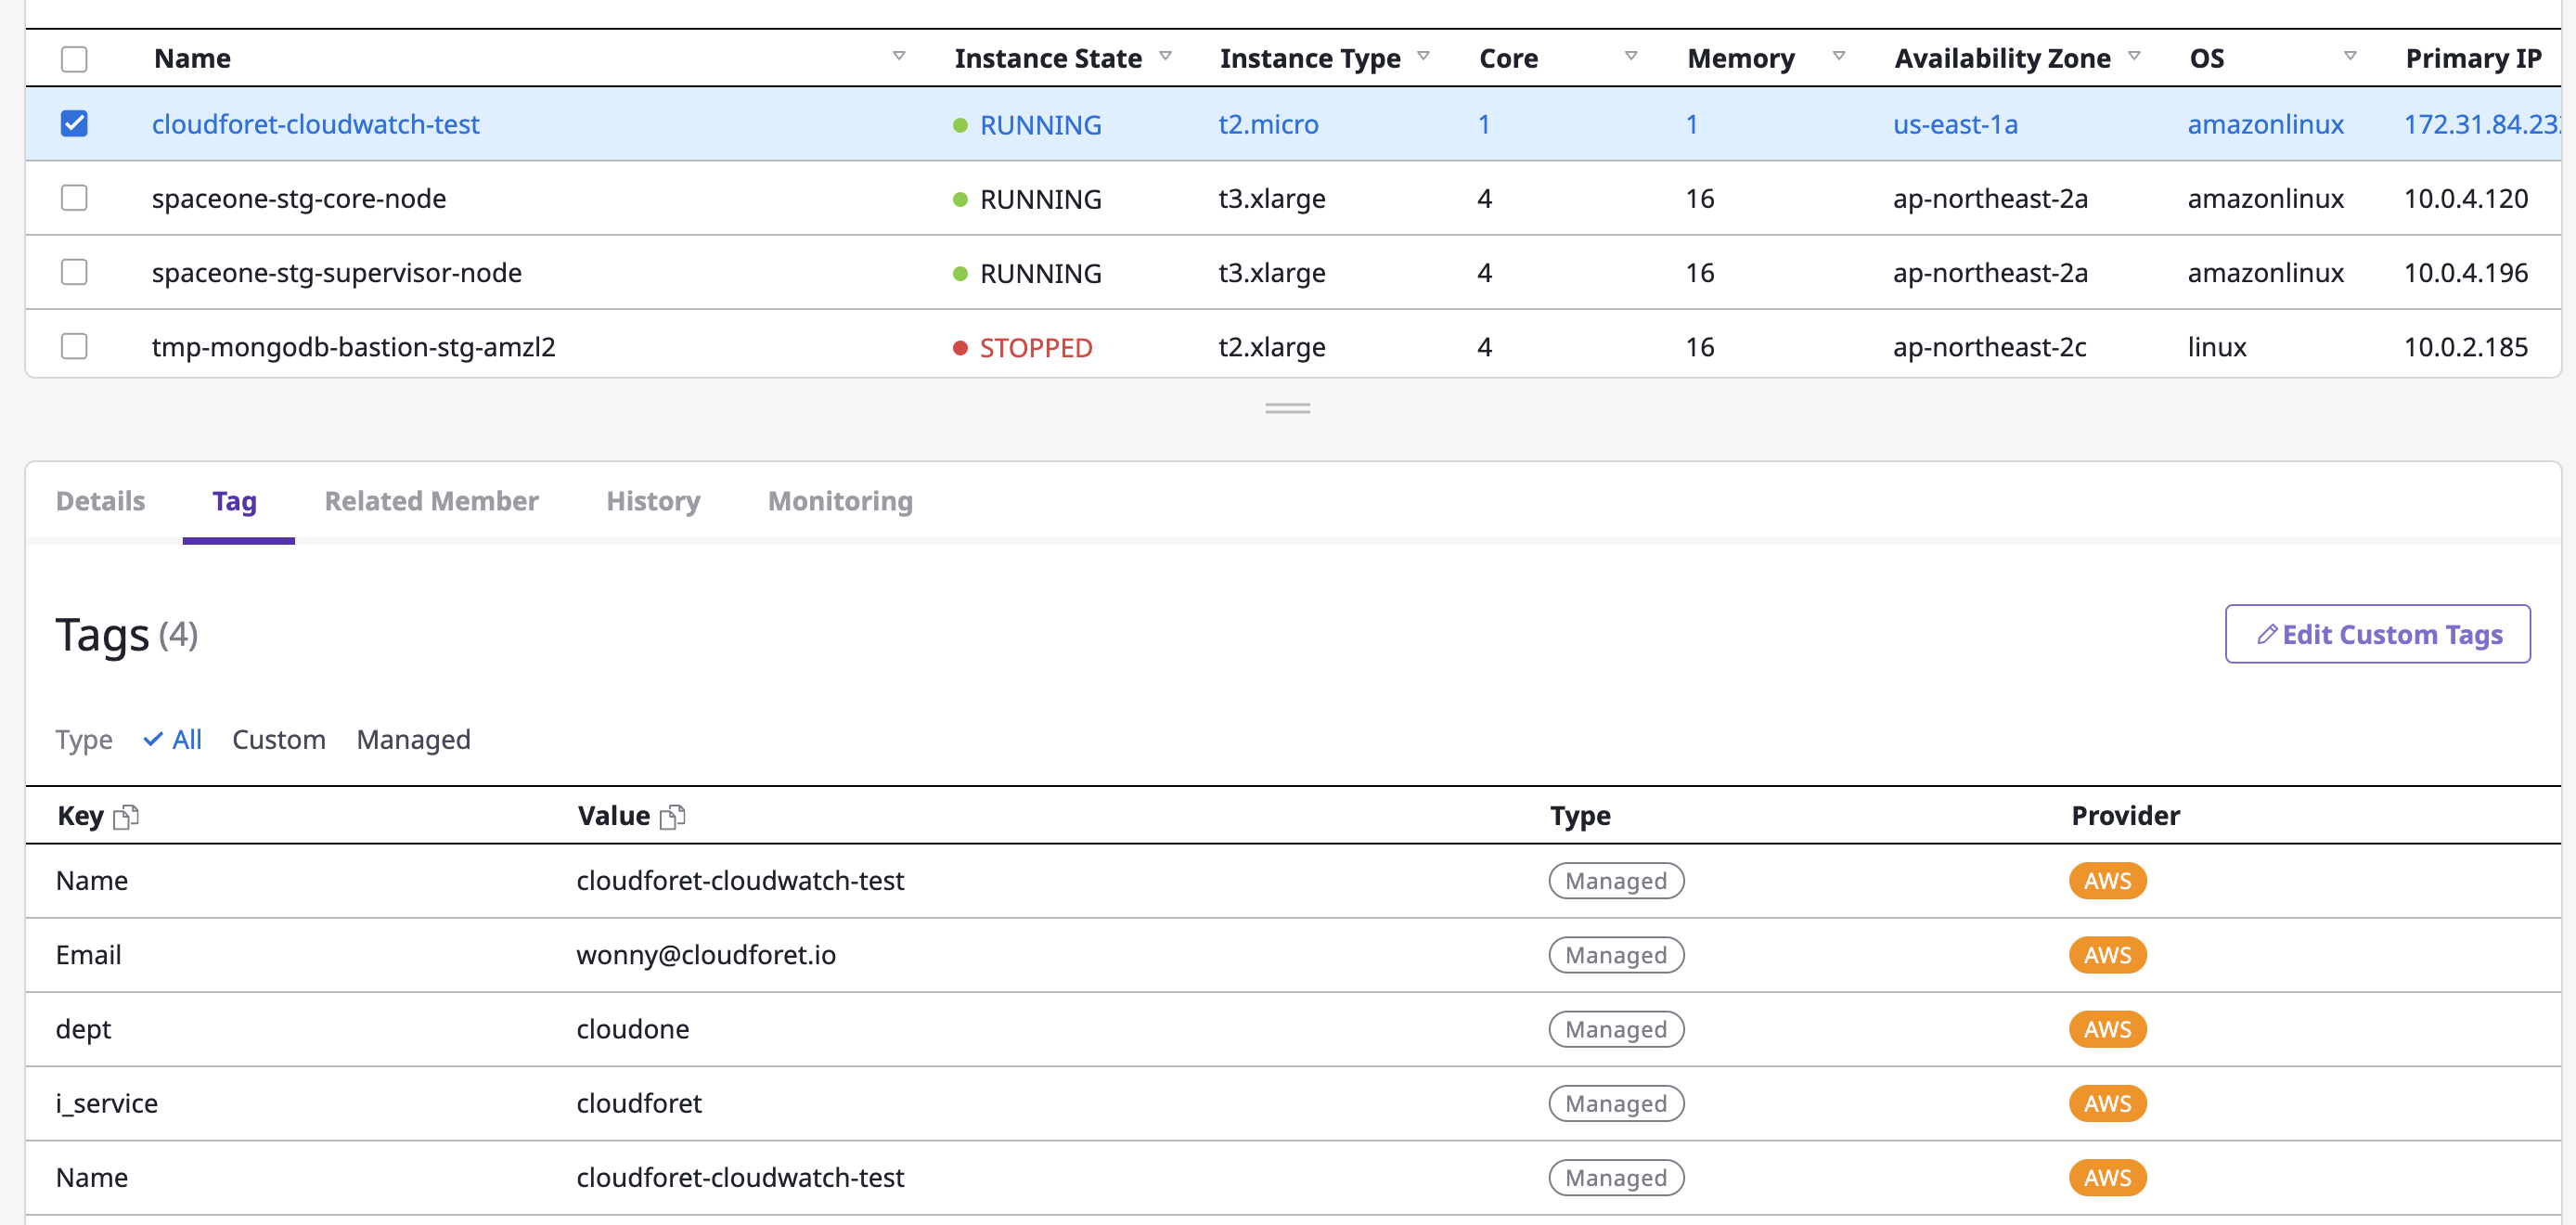
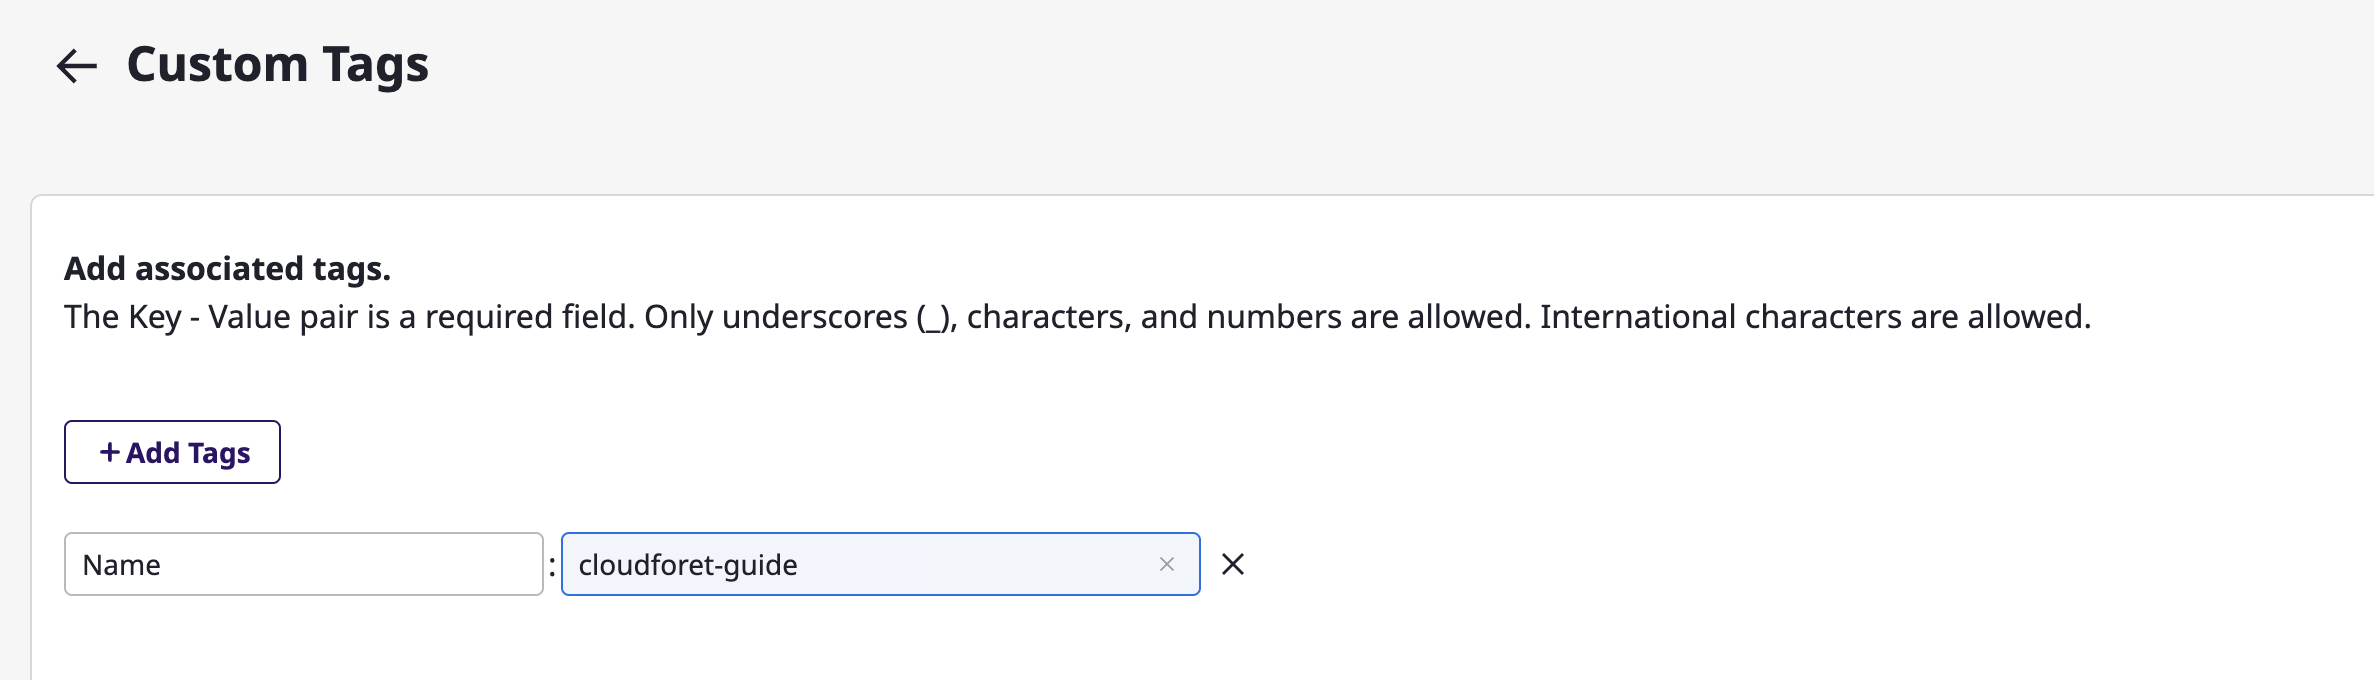
[ Creating & Viewing Custom Tags ]
(1) Click the [Edit Custom Tags] button

(2) After entering the tag in the form of key:value on the tag page, click the [Save] button to complete this process.
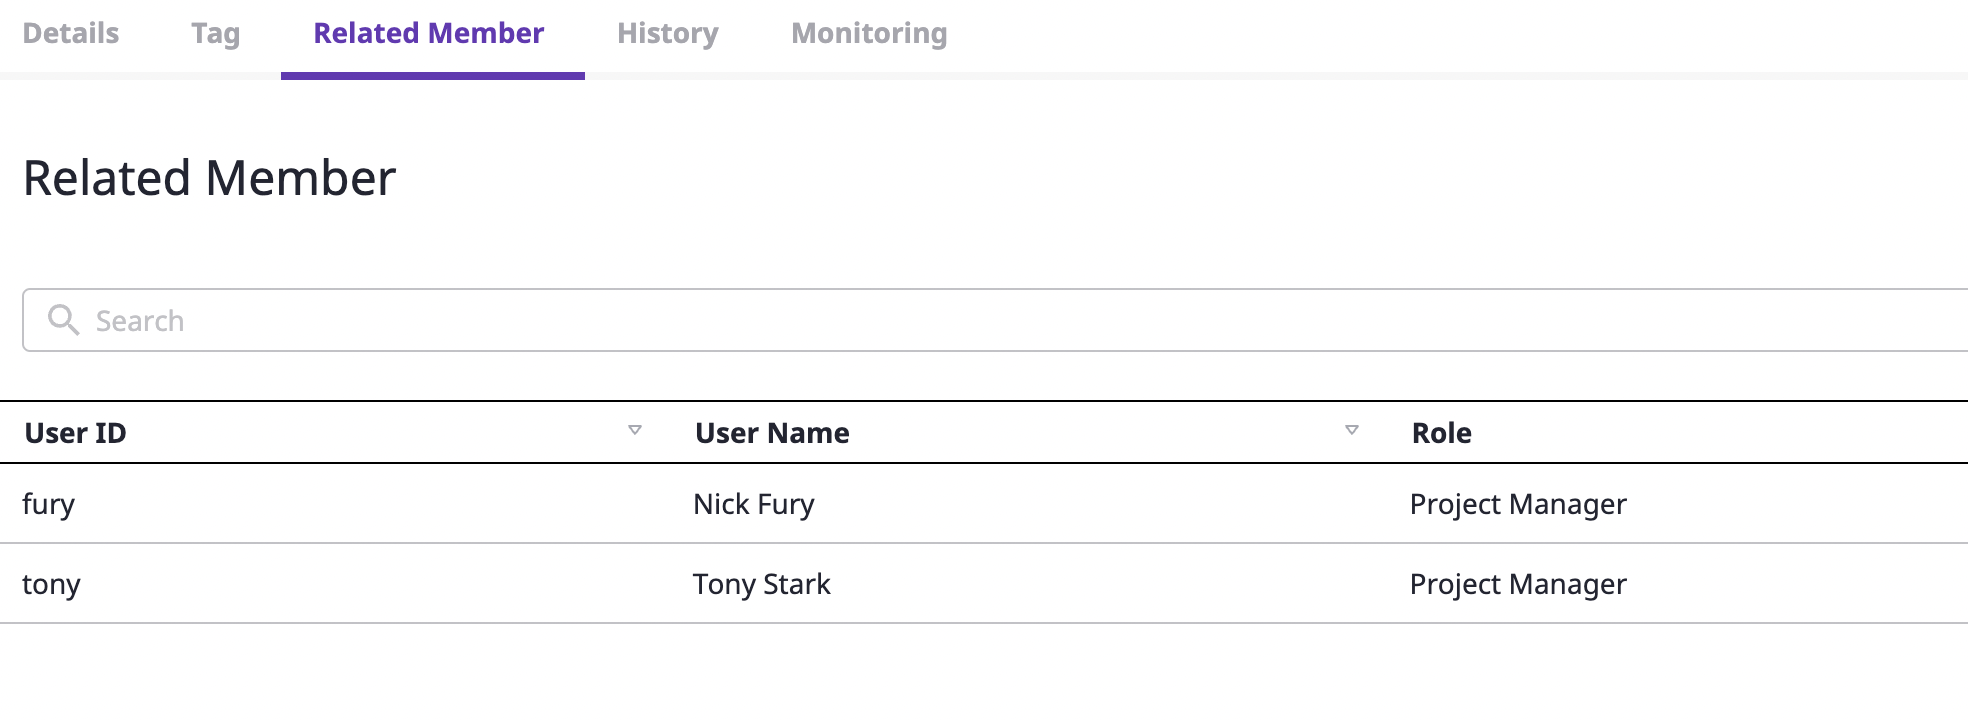
Checking members associated with cloud resources
In the [Associated members] tab, you can check user information that meets the conditions below:
- A user who has access to the cloud resource as a Project member
Viewing history of changing cloud resources
In the [Change history] tab, you can quickly identify changes by date/time of the selected cloud resource.
(1) You can select a certain date or search for the content you want to check.
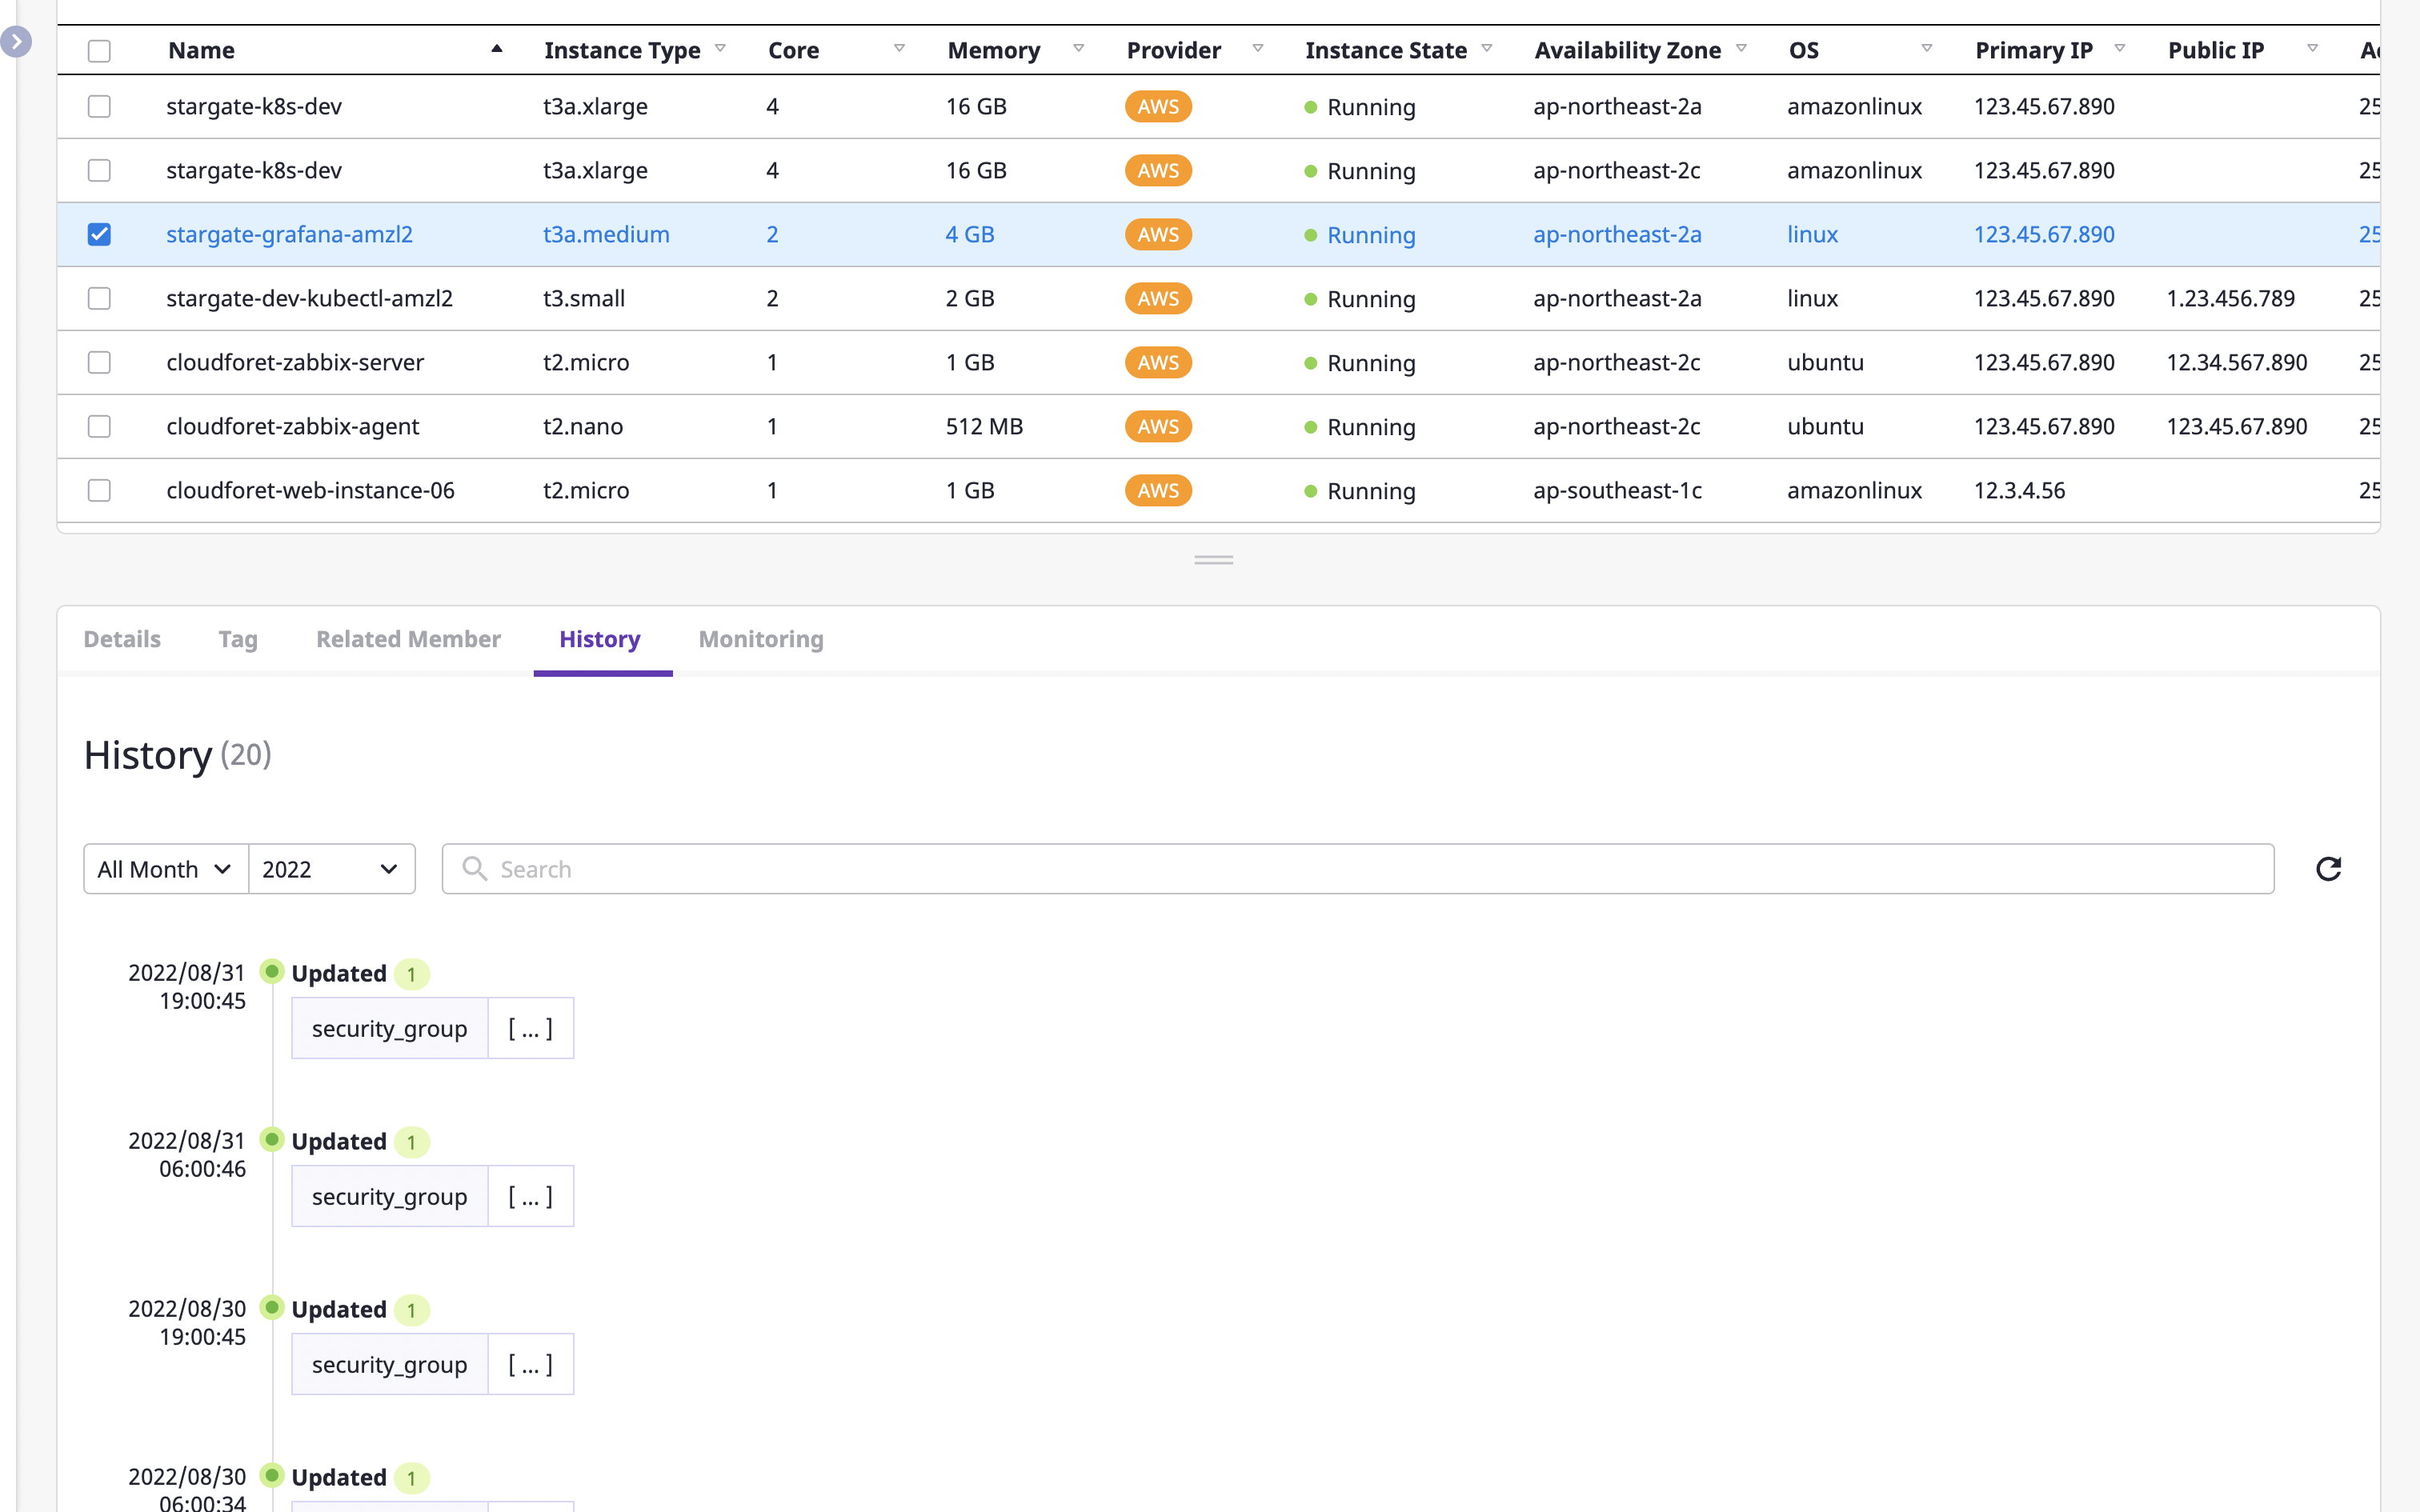
(2) When you click a certain key value or time period, you can check the details of the corresponding history of changes.
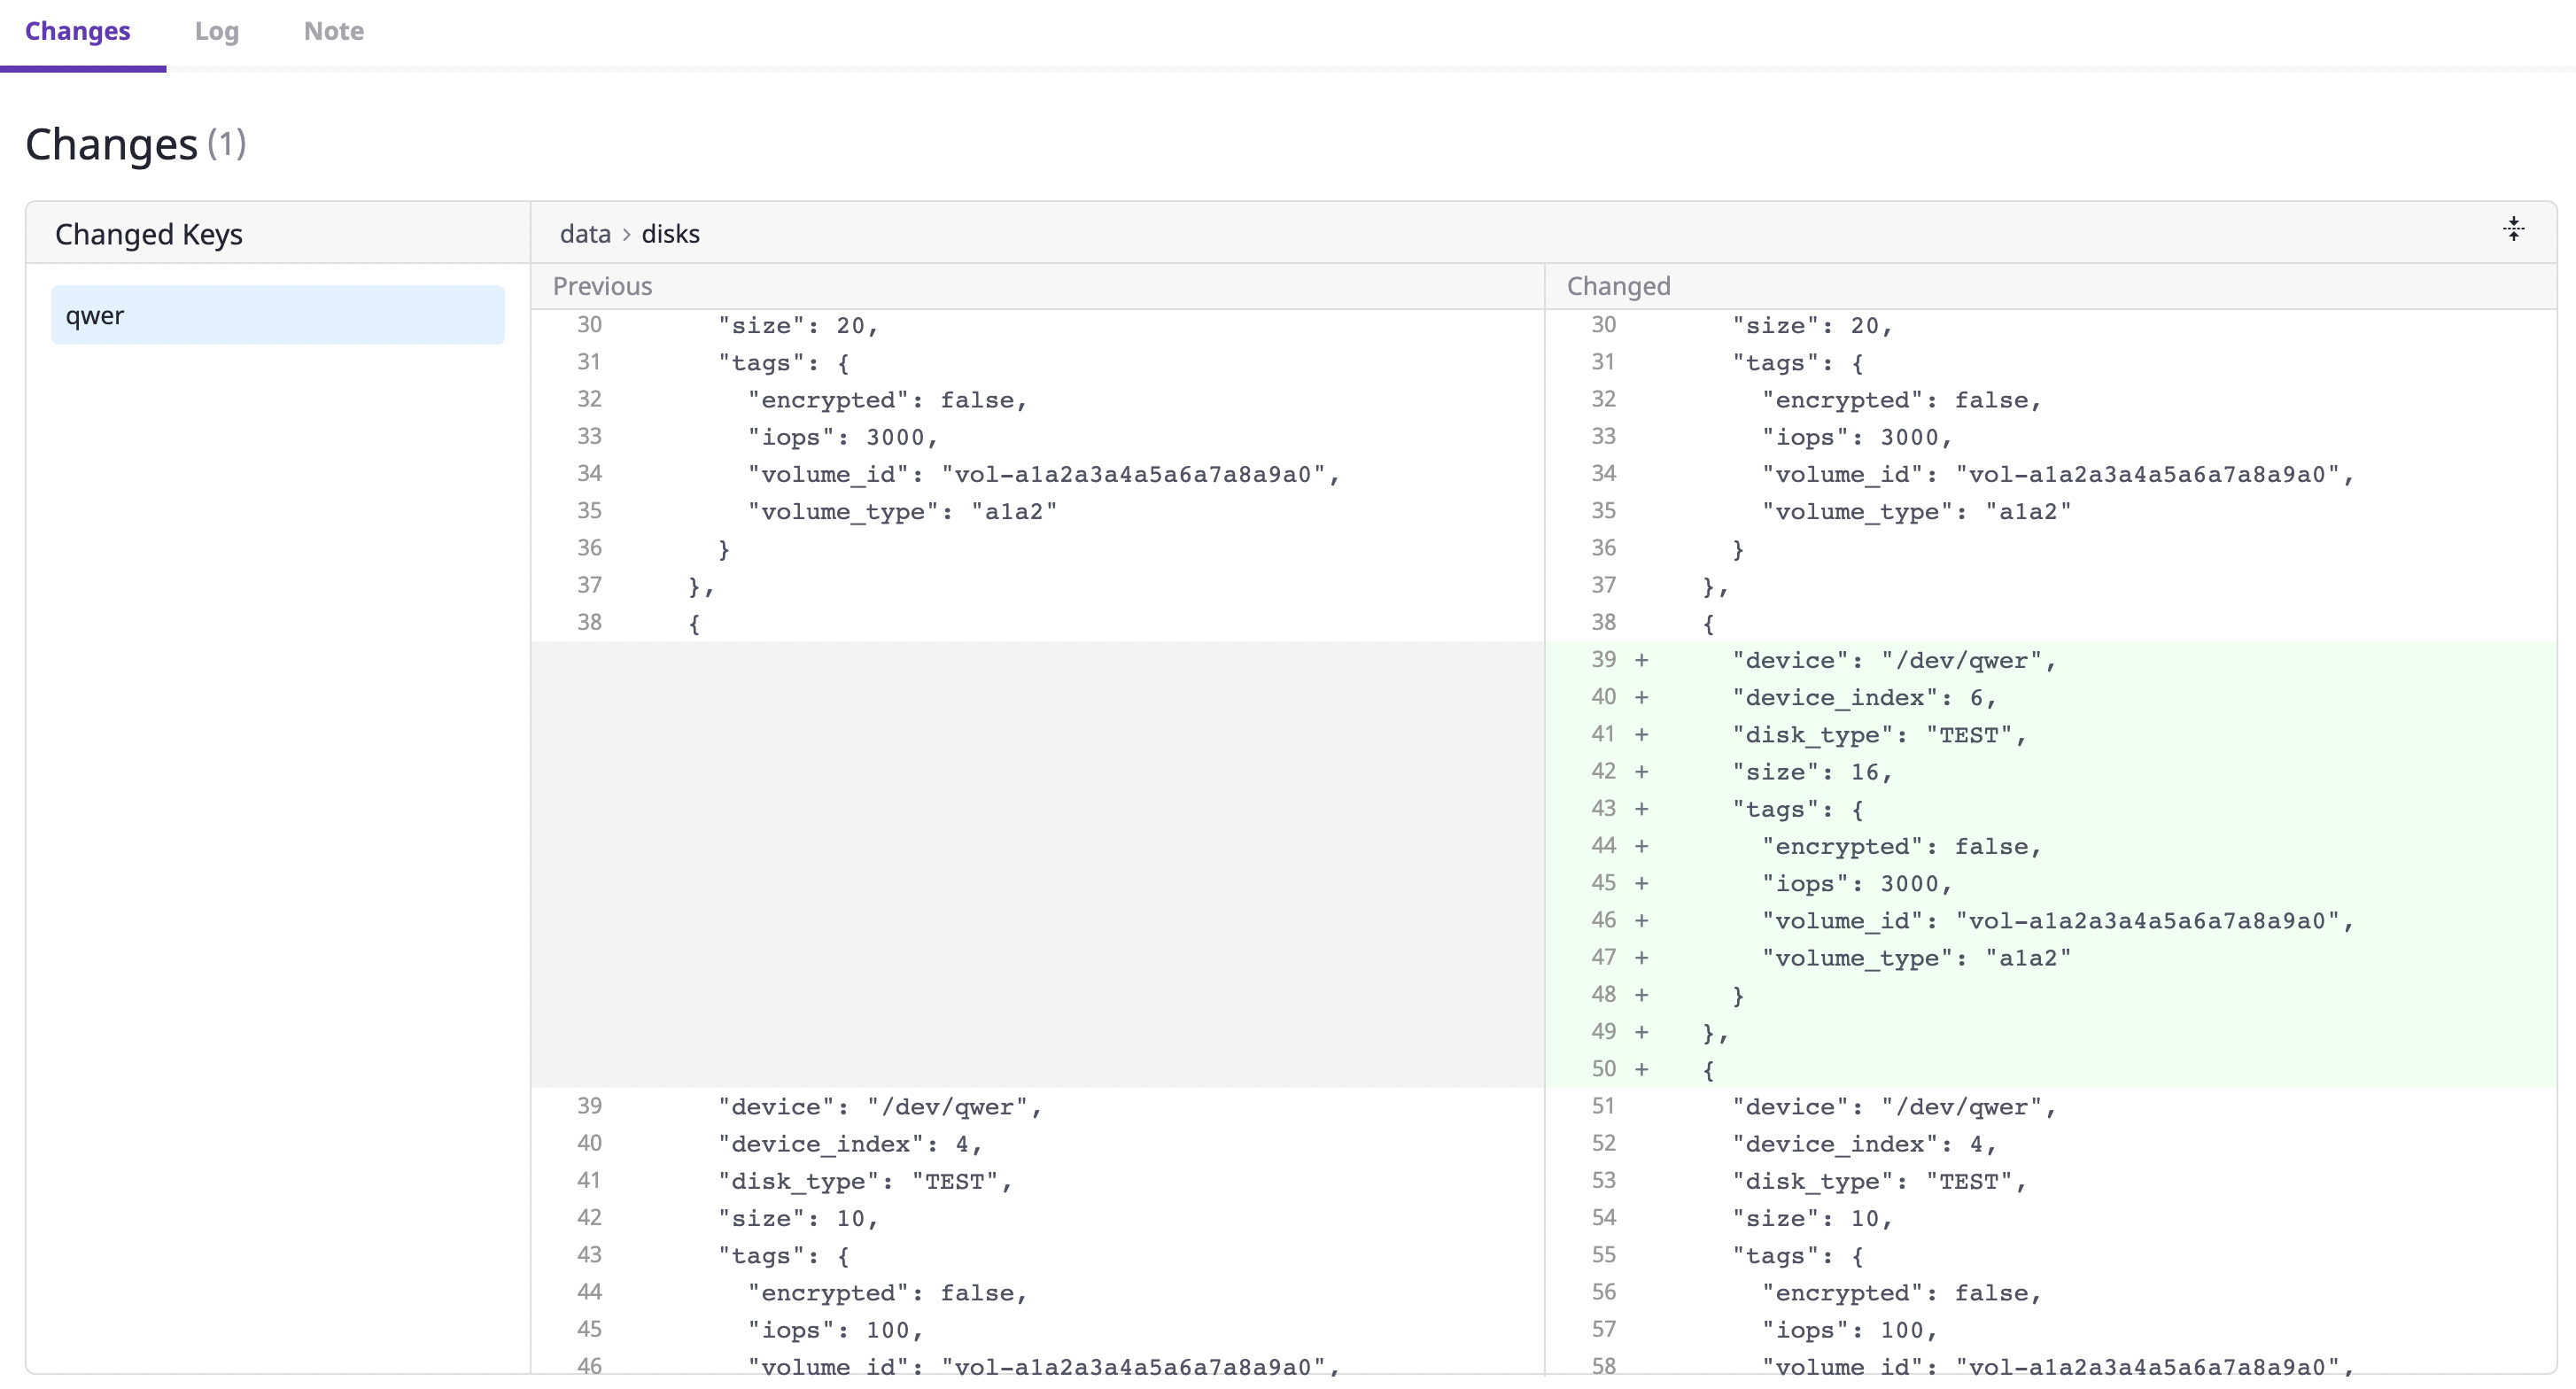
(2-1) Contents of changes: You can check the details of which key values of the resource were updated and how.
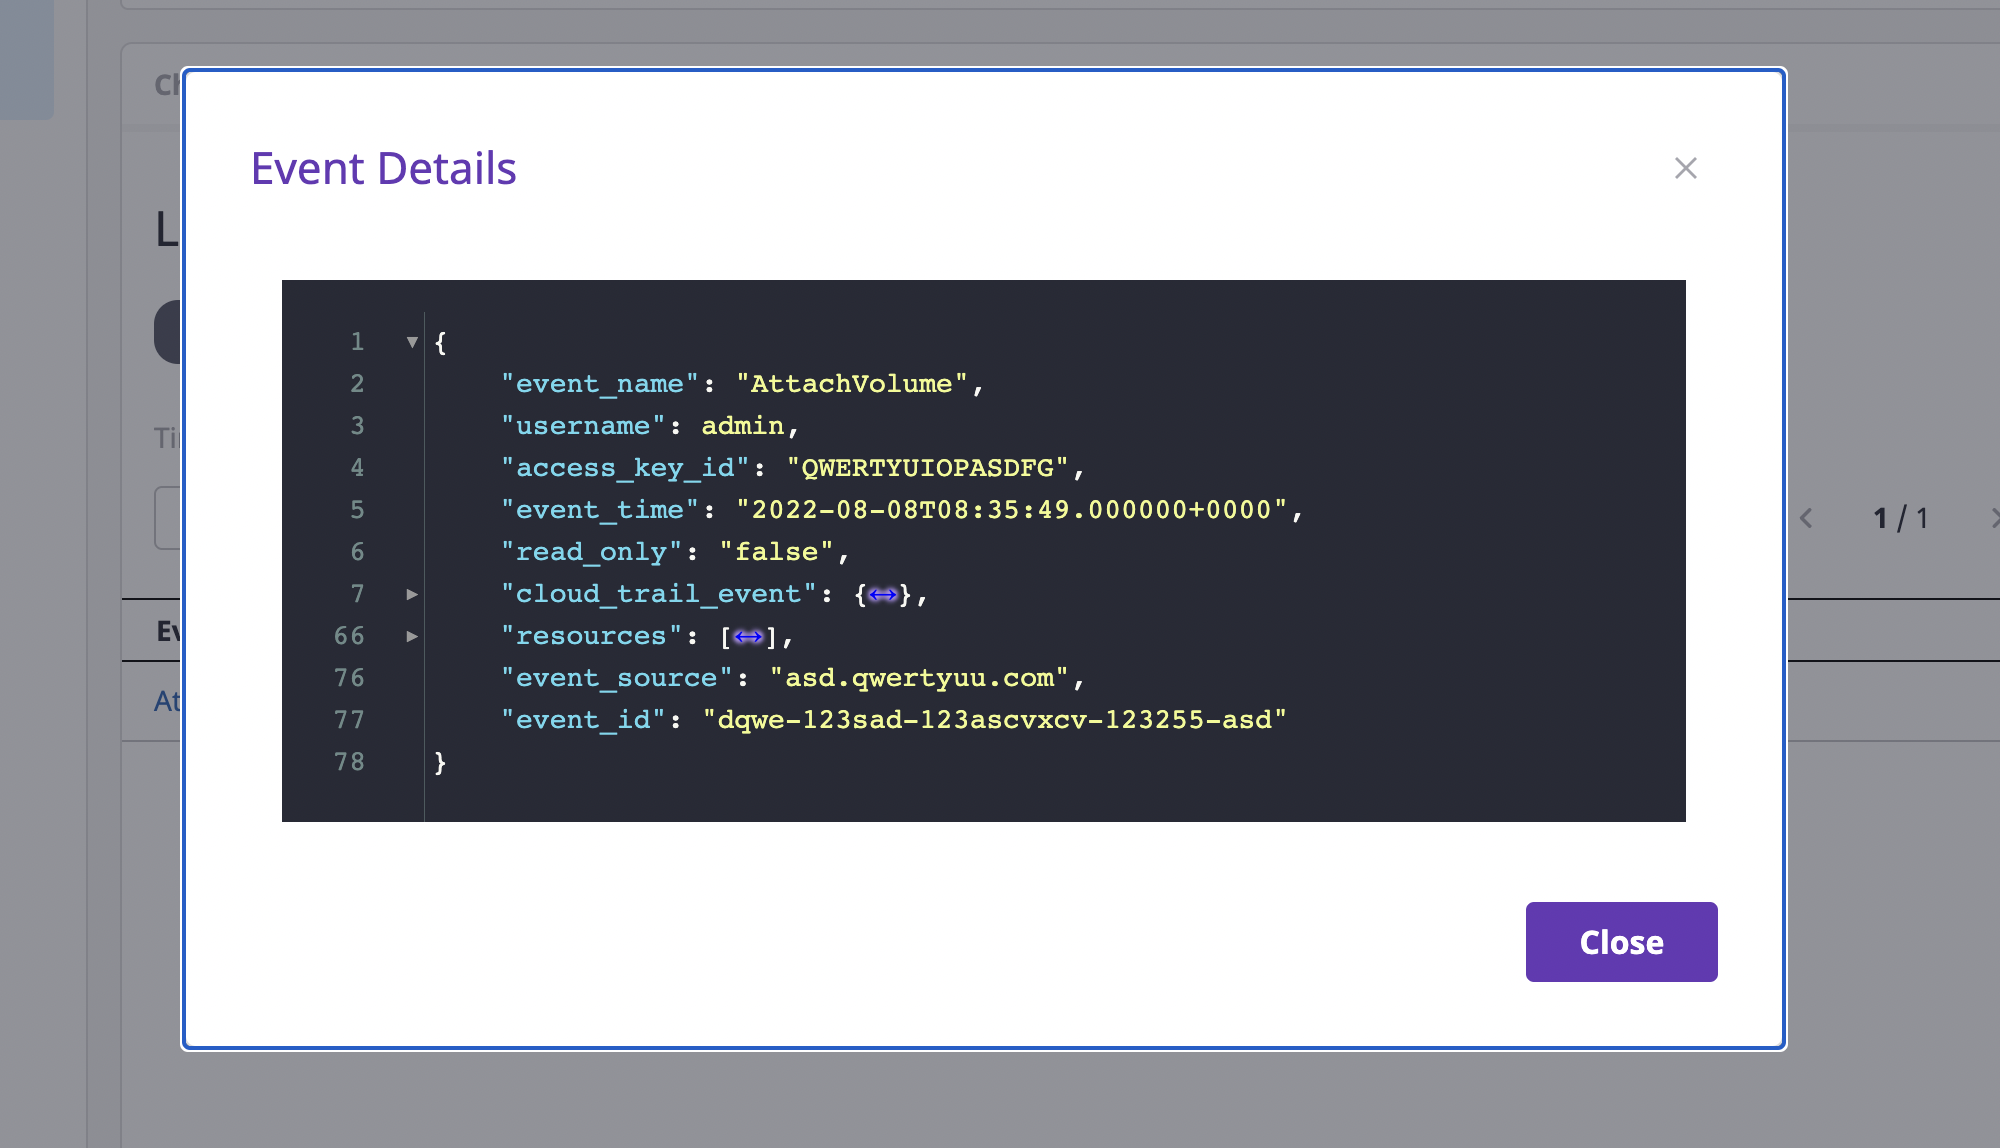
(2-2) Logs: As we support detailed logs by providers such as AWS CloudTrail, you can check which detailed events have occurred within/without of the selected time. This has a great advantage when identifying users who have made changes to a particular resource.

You can check the detailed log by clicking the value key you want to check.
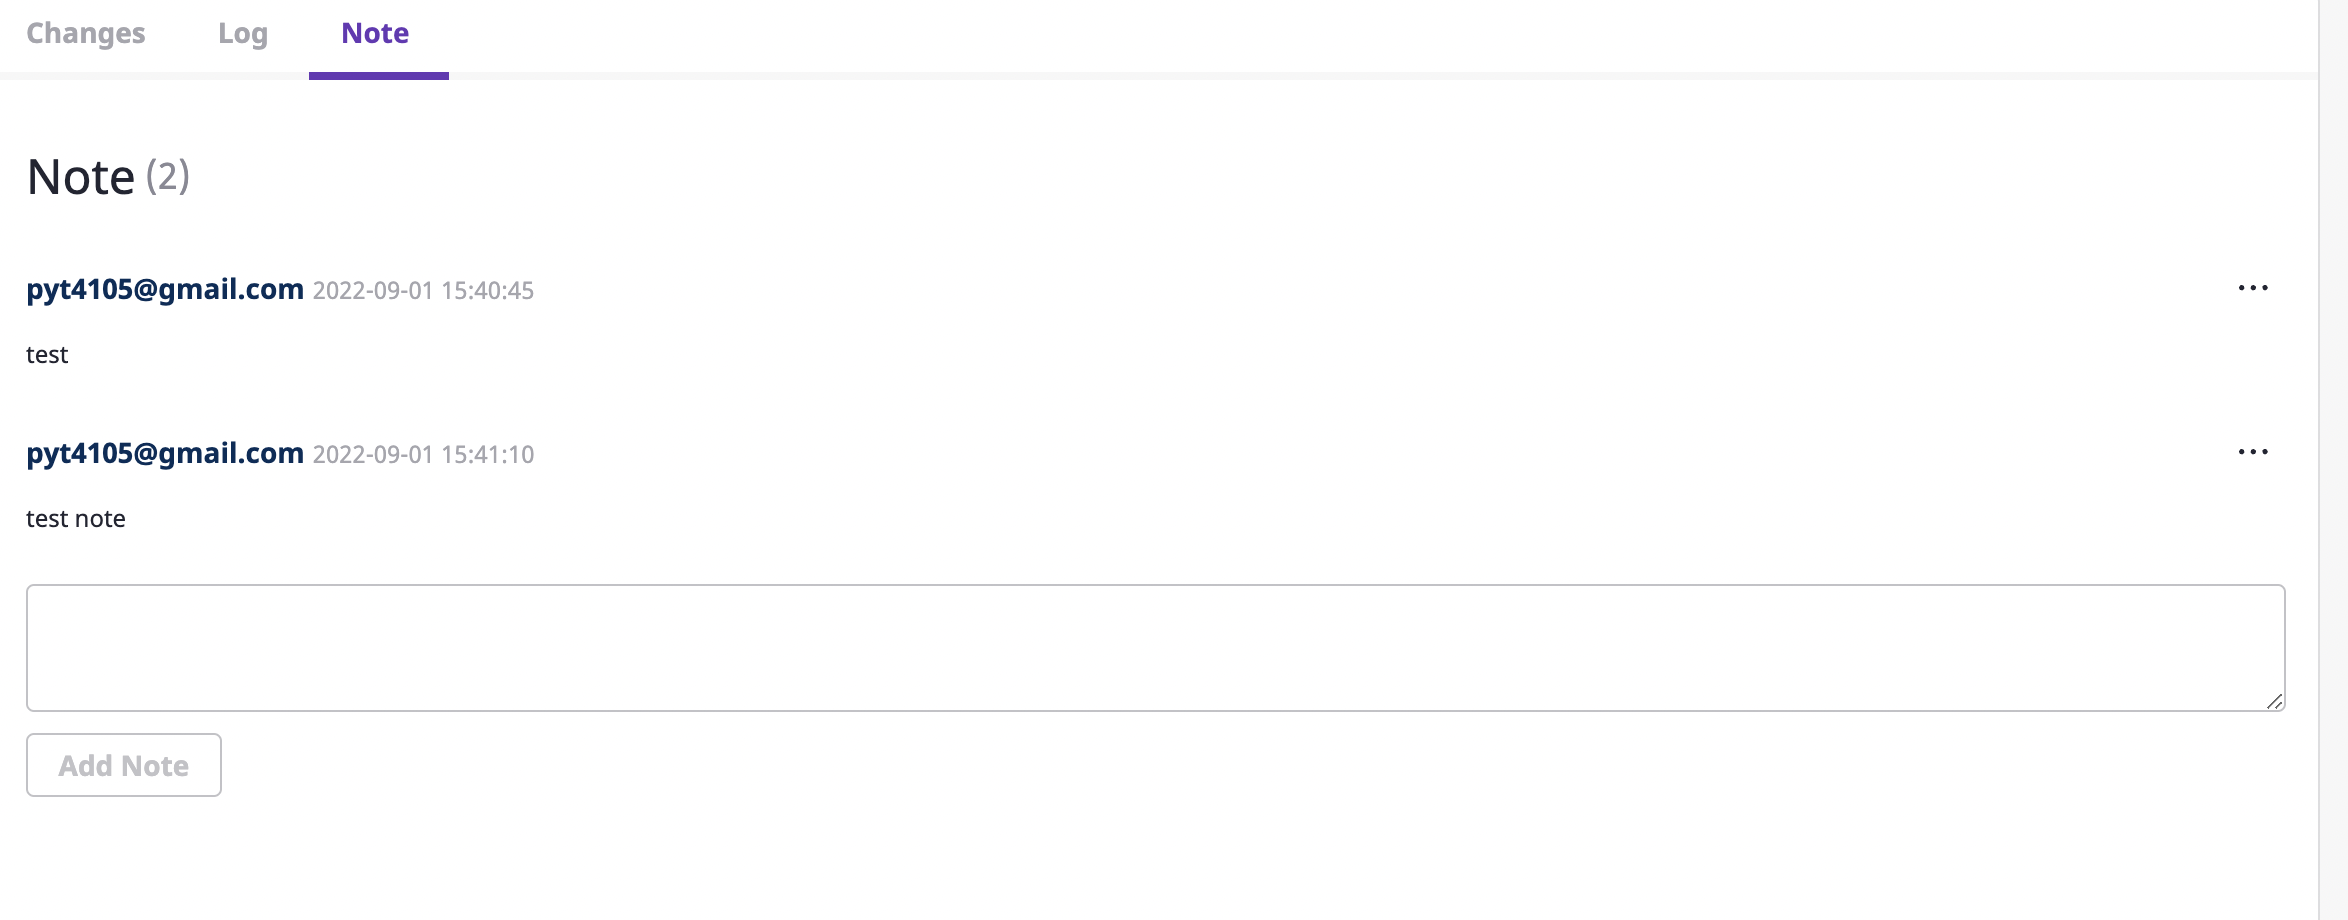
(2-3) Notes: By adding/managing notes at a selected time, you can freely manage the workflow for each company, such as which person in charge is related to the change, which process you will choose to solve the issue, etc.
Checking cloud resource monitoring information
The [Monitoring] tab shows various metrics for cloud resources.
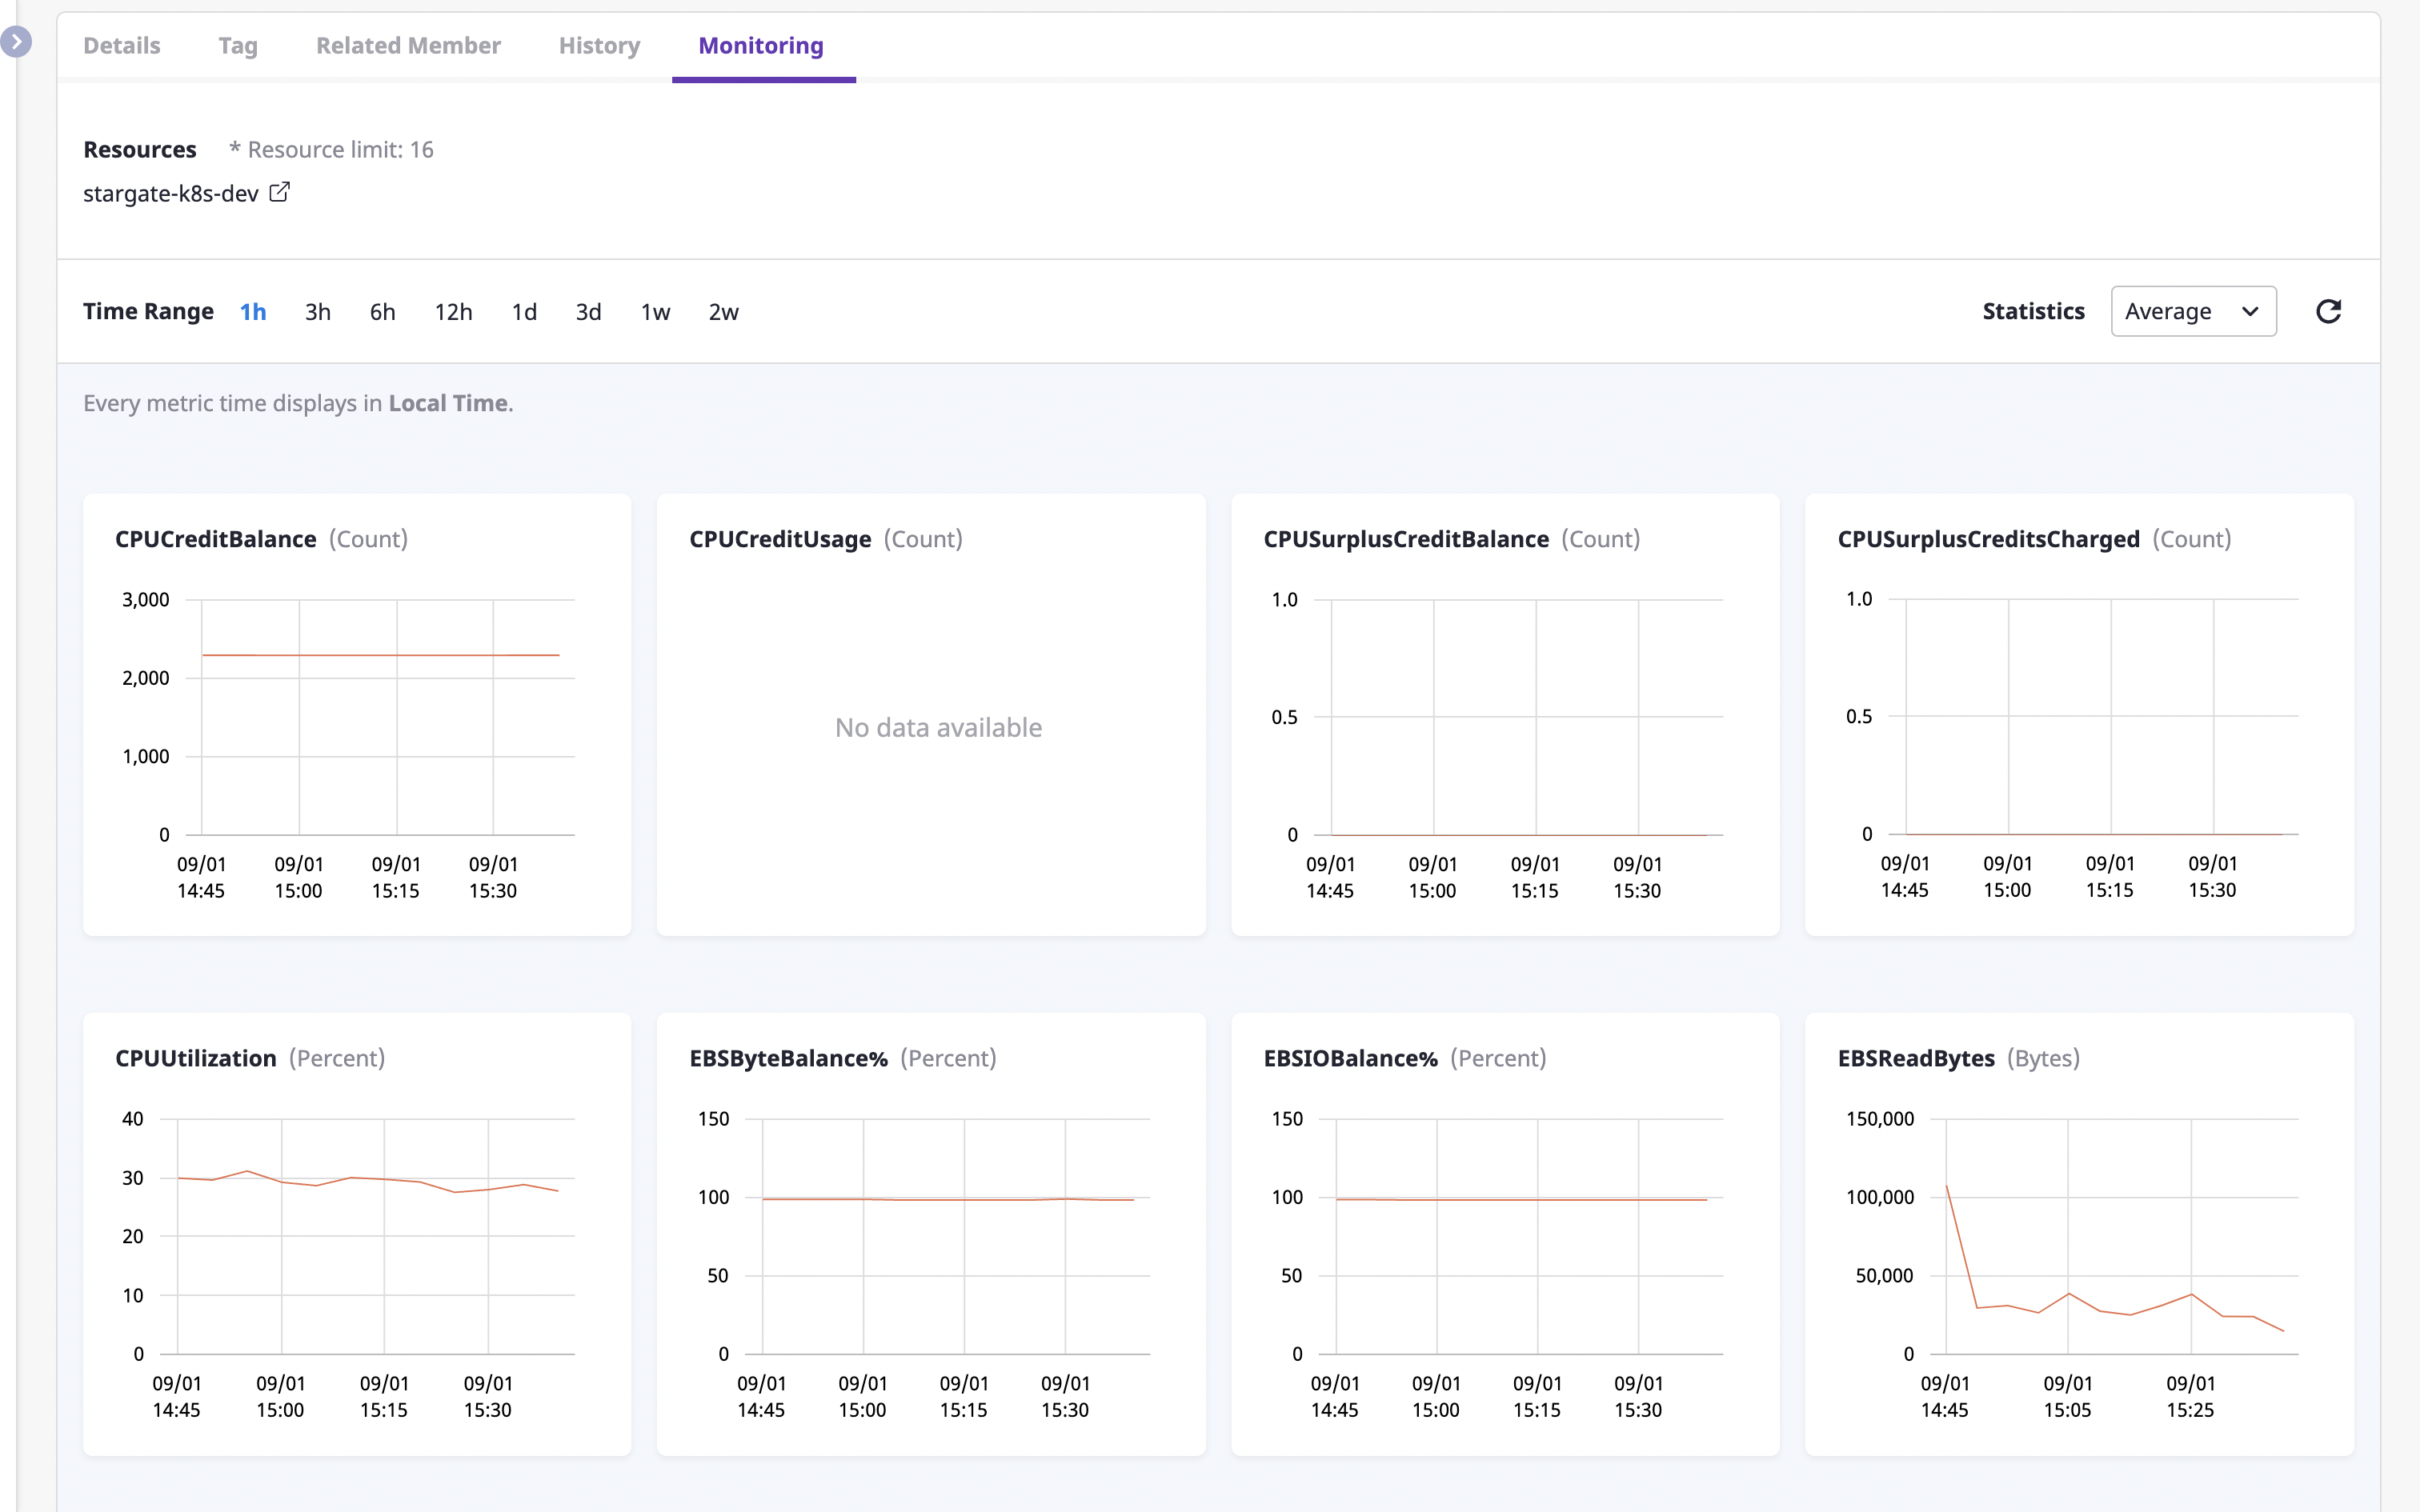
You can also view metrics for different criteria by changing the [Time range] filter, or by selecting a different statistical method from the [Statistics] dropdown.
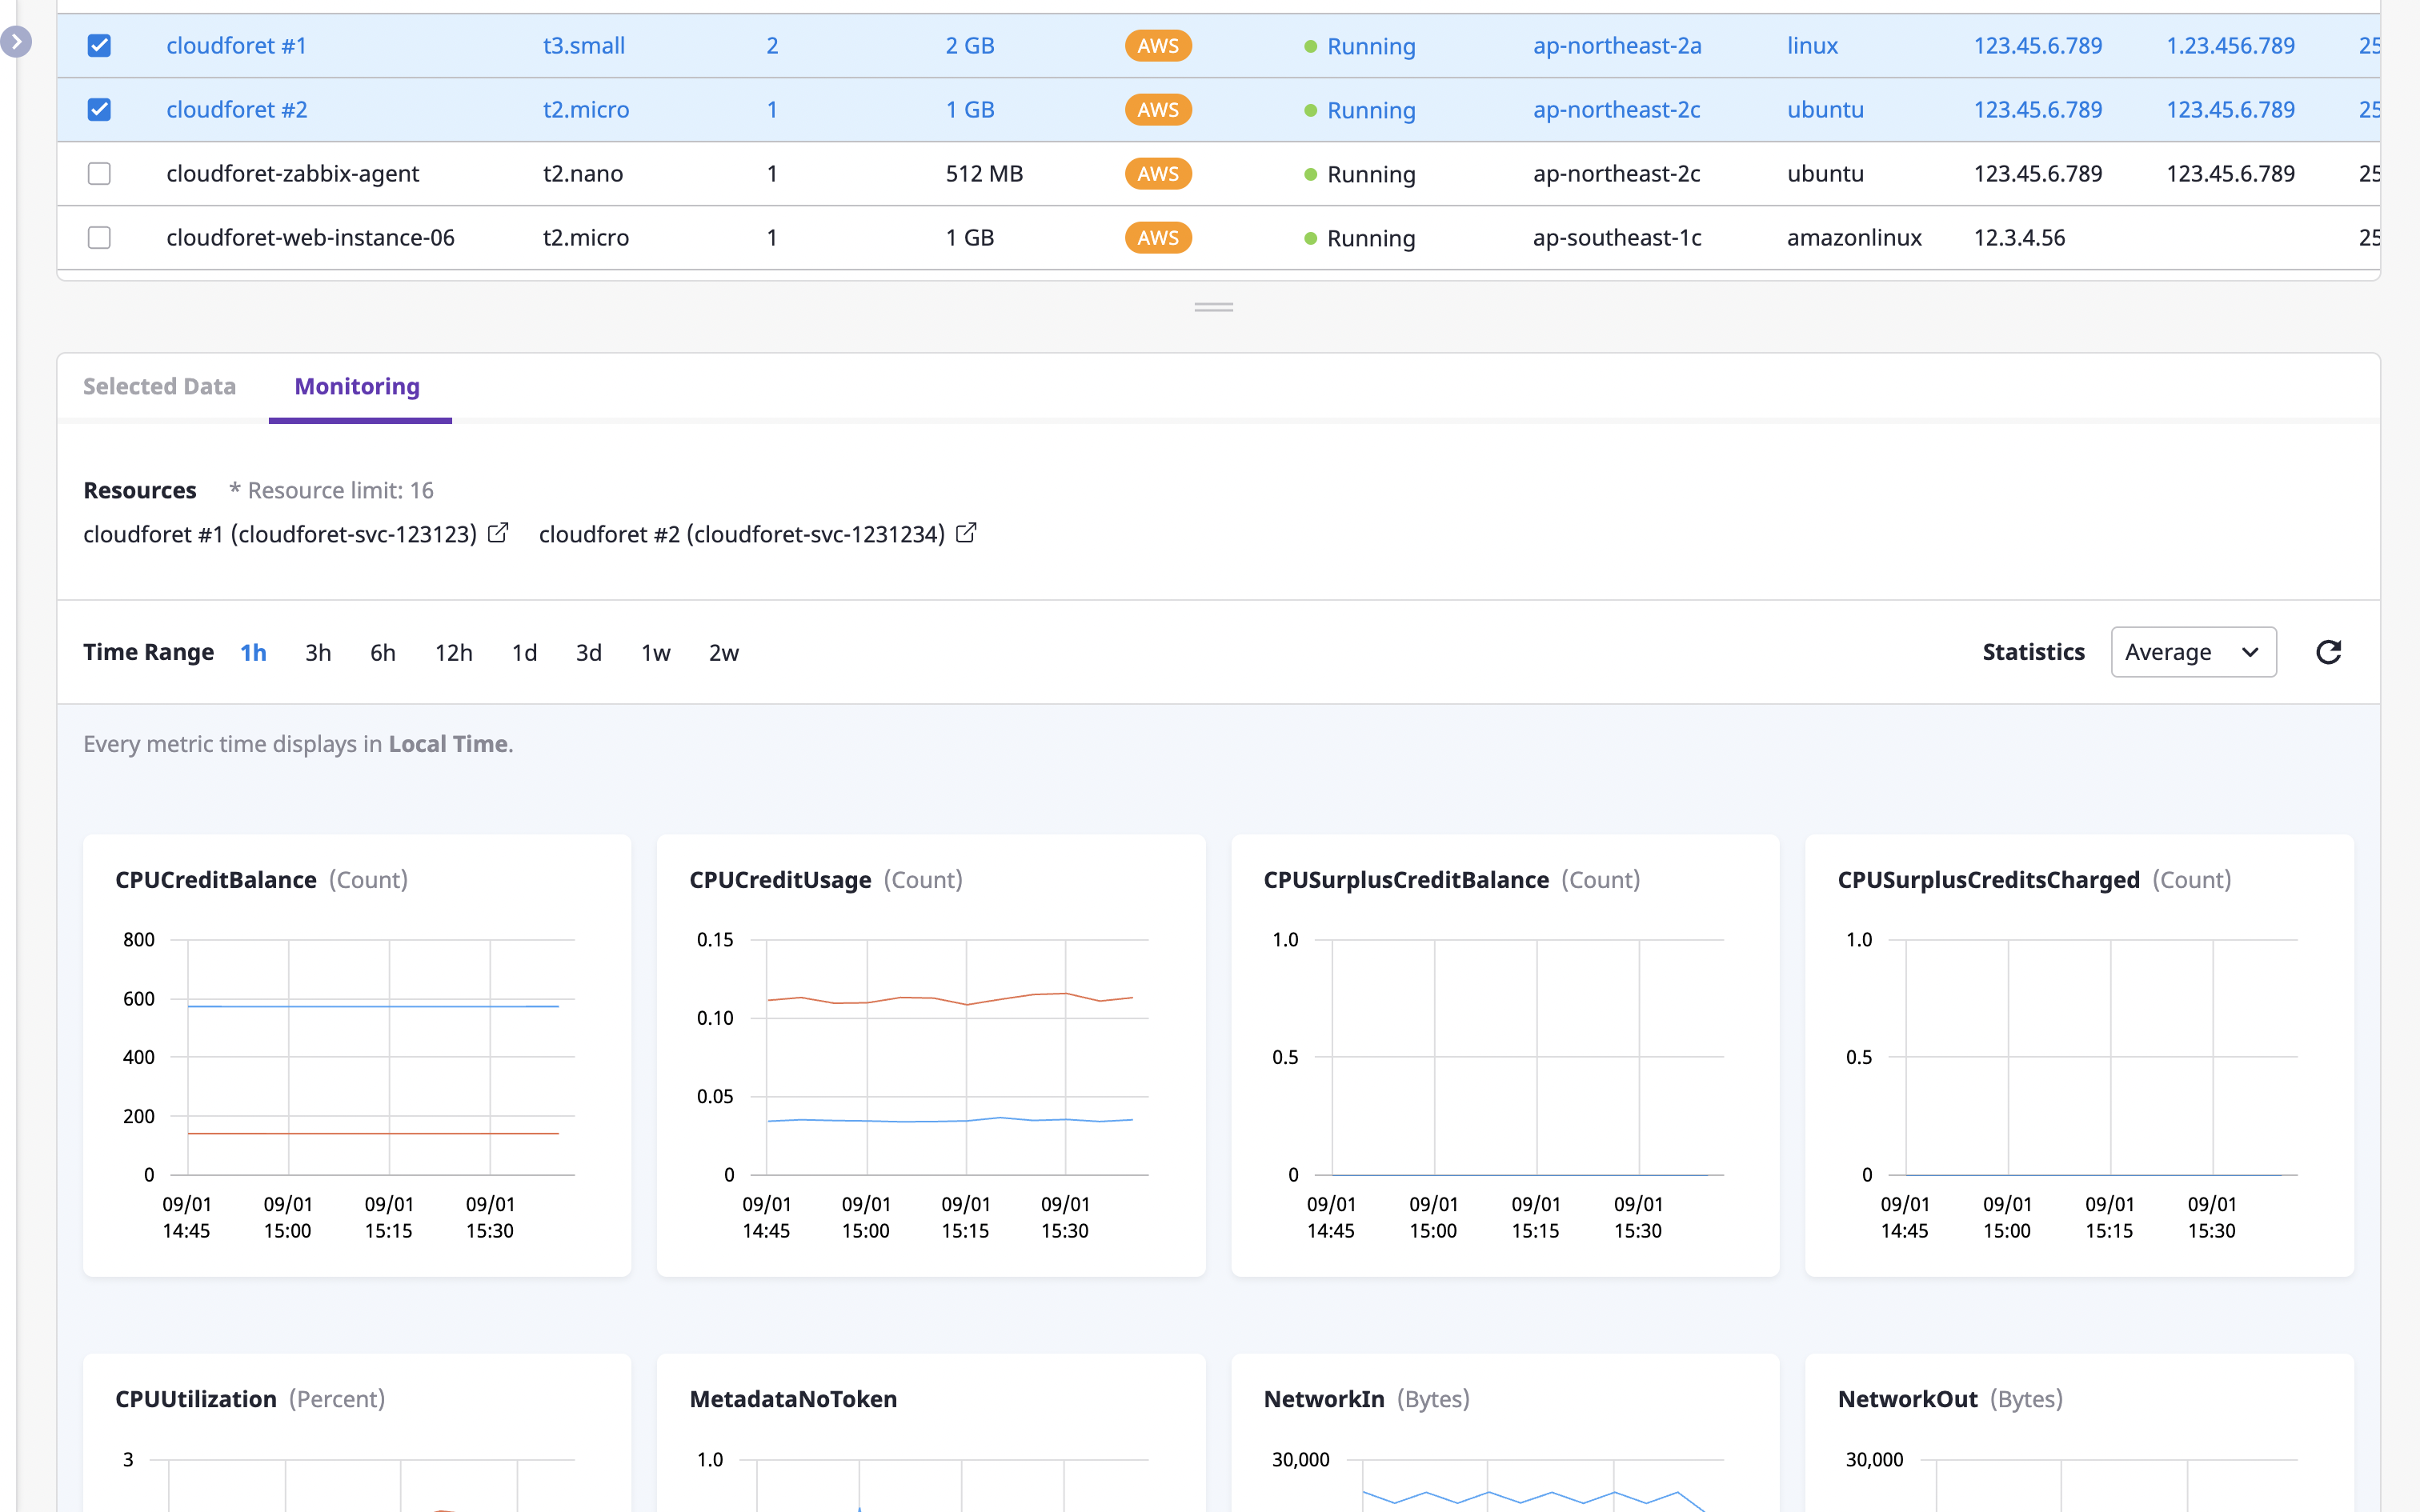
If you select multiple resources by clicking the checkbox on the left from the list of cloud resources at the top, you can compare and explore metric information for multiple resources.
Metrics information is collected by the Monitoring plugin, and for detailed information, see here.
3 - Server
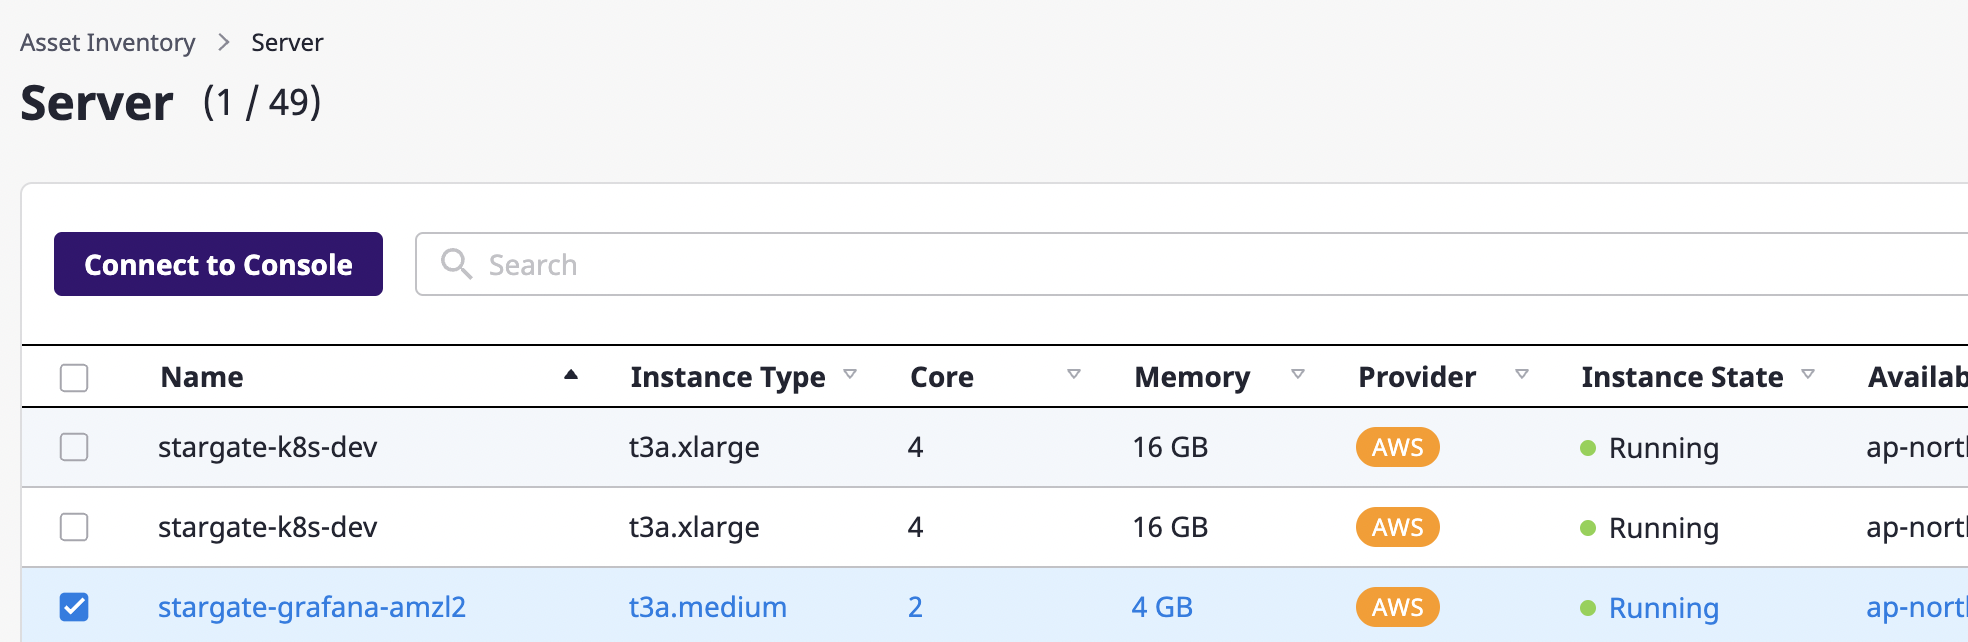
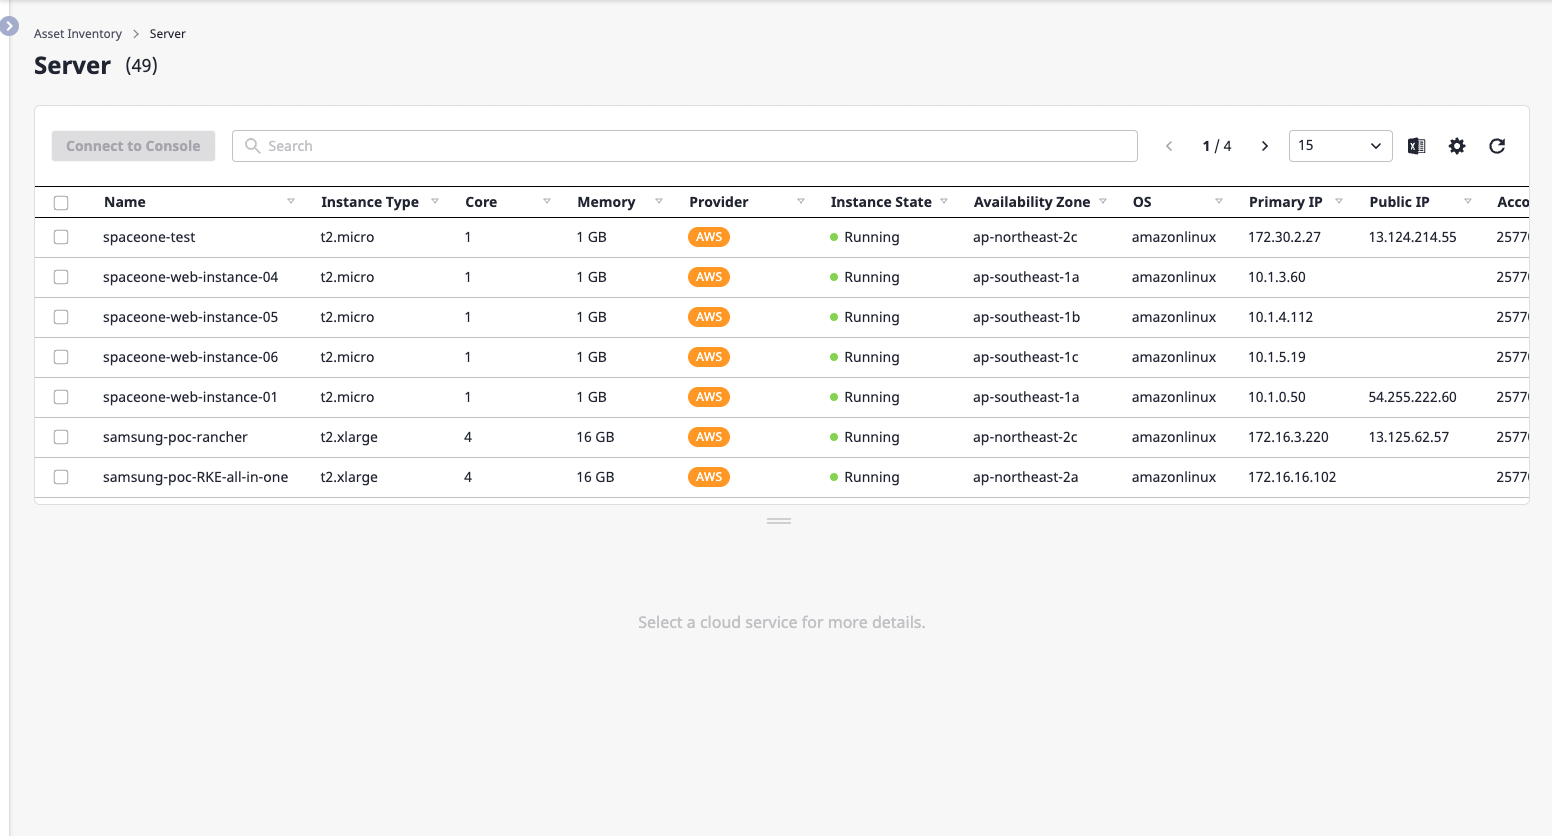
Getting a list of server resources
You can check a list of server resources by entering the server page through the [Asset inventory > Server] menu.
Advanced search allows you to filter the list by elaborate criteria.
Click the [Excel] icon button to [Export as an Excel file] for a list of resources (/ko/docs/guides/advanced/excel-export) or click the [Settings] icon button to [Personalize table fields](/ko/ docs/guides/advanced/custom-table).
Opening the server resources console
Sometimes you need to work on a console site that a server resources provider offers.
(1) Select the server resource to which you want to connect the console.
(2) Click the [Console connection] button.
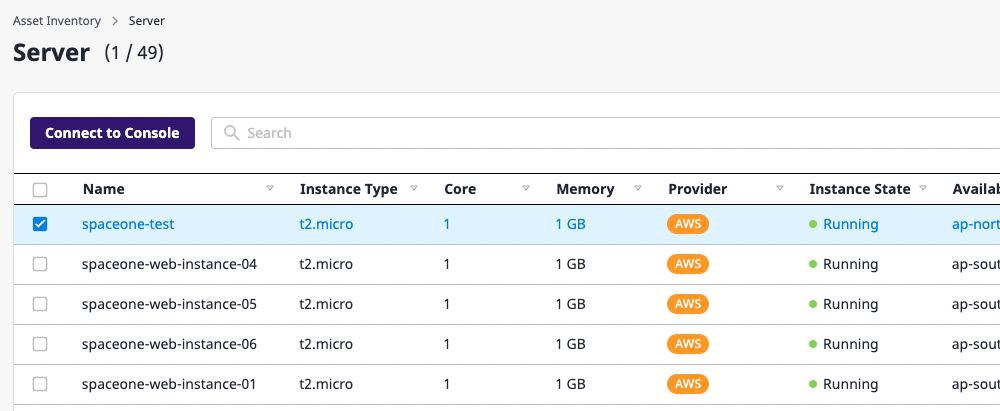
(3) Click the button to open the provider's console in a new tab where you can continue working with the server resource.
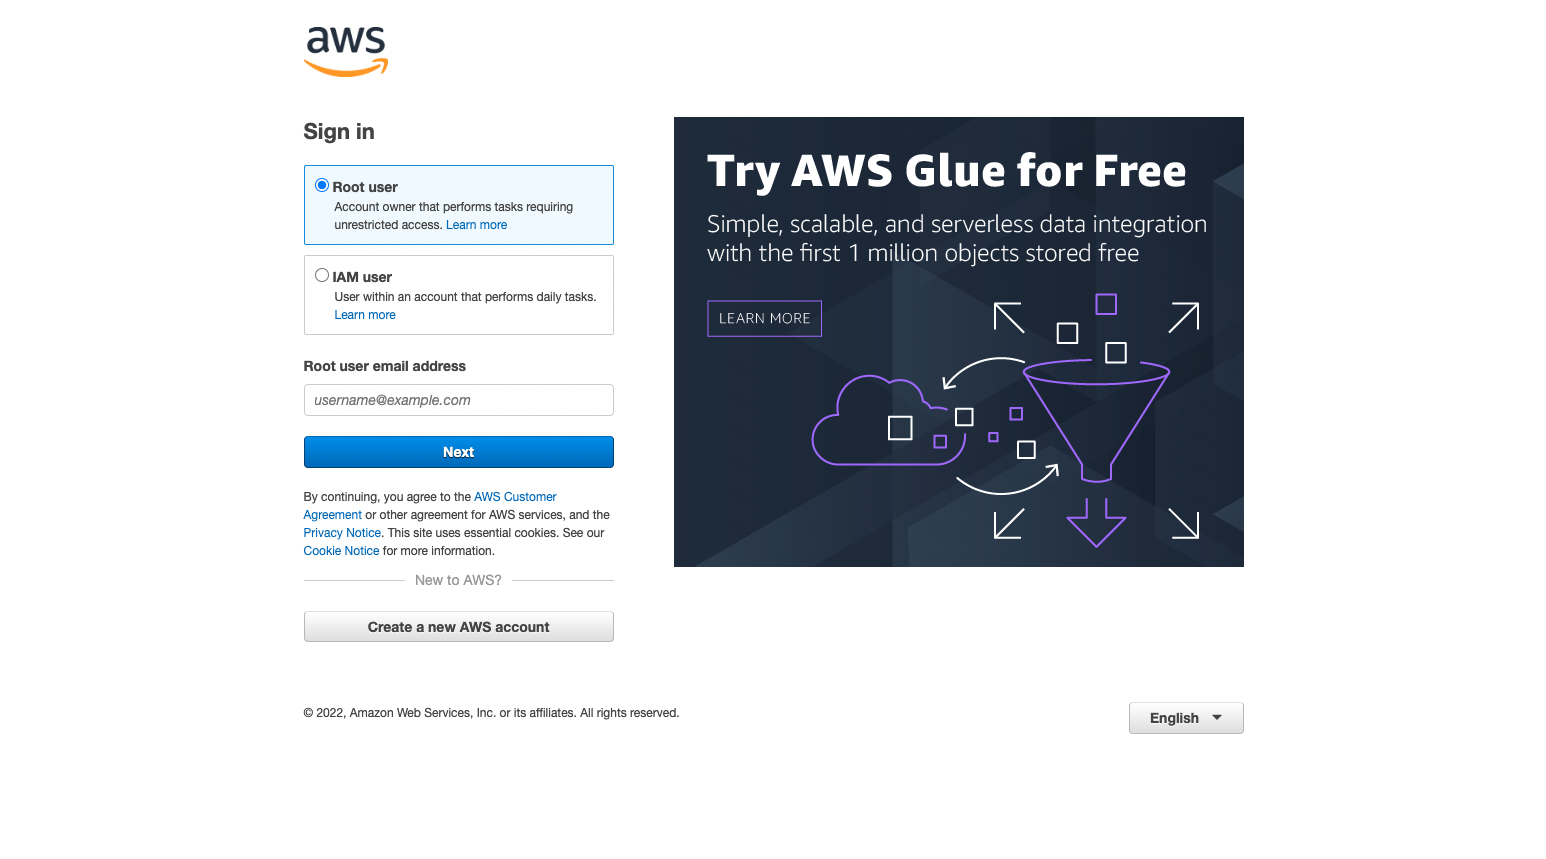
Below is an example of the AWS EC2 Instance console that was opened.
Explore server resources
If you select the item you want to look at from a list of server resources, you can check information about the resource at the bottom.
It is equivalent to the Explore cloud service resources in the [Asset inventory > Cloud service] menu.
4 - Collector
Overview
To collect data with a collector, you need two elements:
Collector plugin
This is an element that defines the specifications of what resources to collect from the Cloud provider, and how to display the collected data on the screen.
Since each provider has a different structure and content of data, a collector completely relies on Collector plugin to collect resources.
For detailed information on this, see here.
Service account
To collect resources, you need to connect to an account on the Cloud provider.
Service Account is your account information to link to your provider's account.
A collector accesses the provider account through the service account created for each provider.
For detailed information on this, see here.
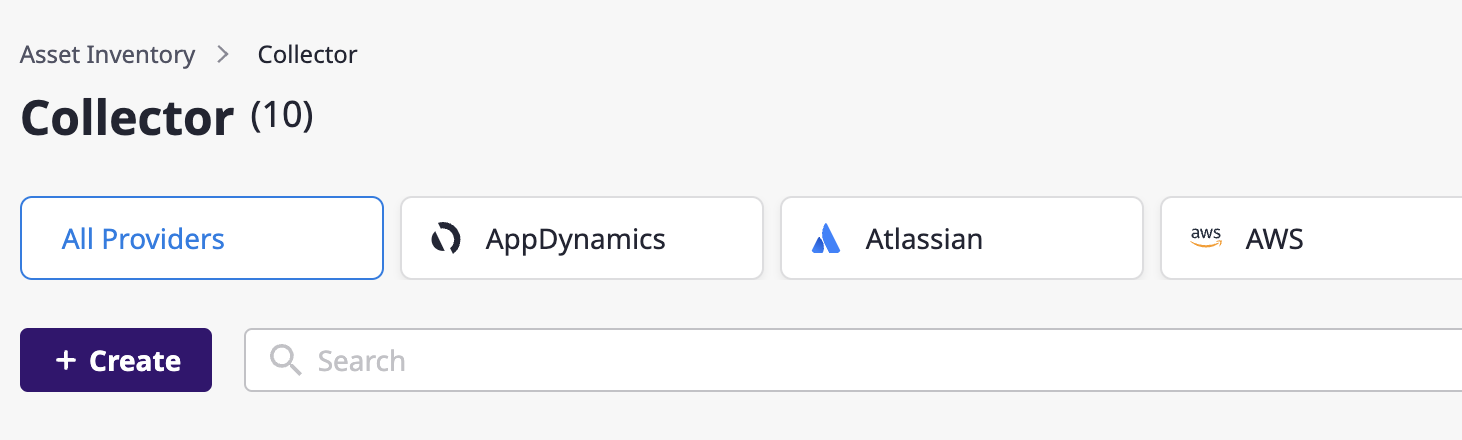
Create a collector
(1) Click the [+ Create] button at the top left.
(2) Follow the steps on the "Create New Collector" page.
(2-1) On the Plugin List page, find a required collector plugin and click the [Select] button.
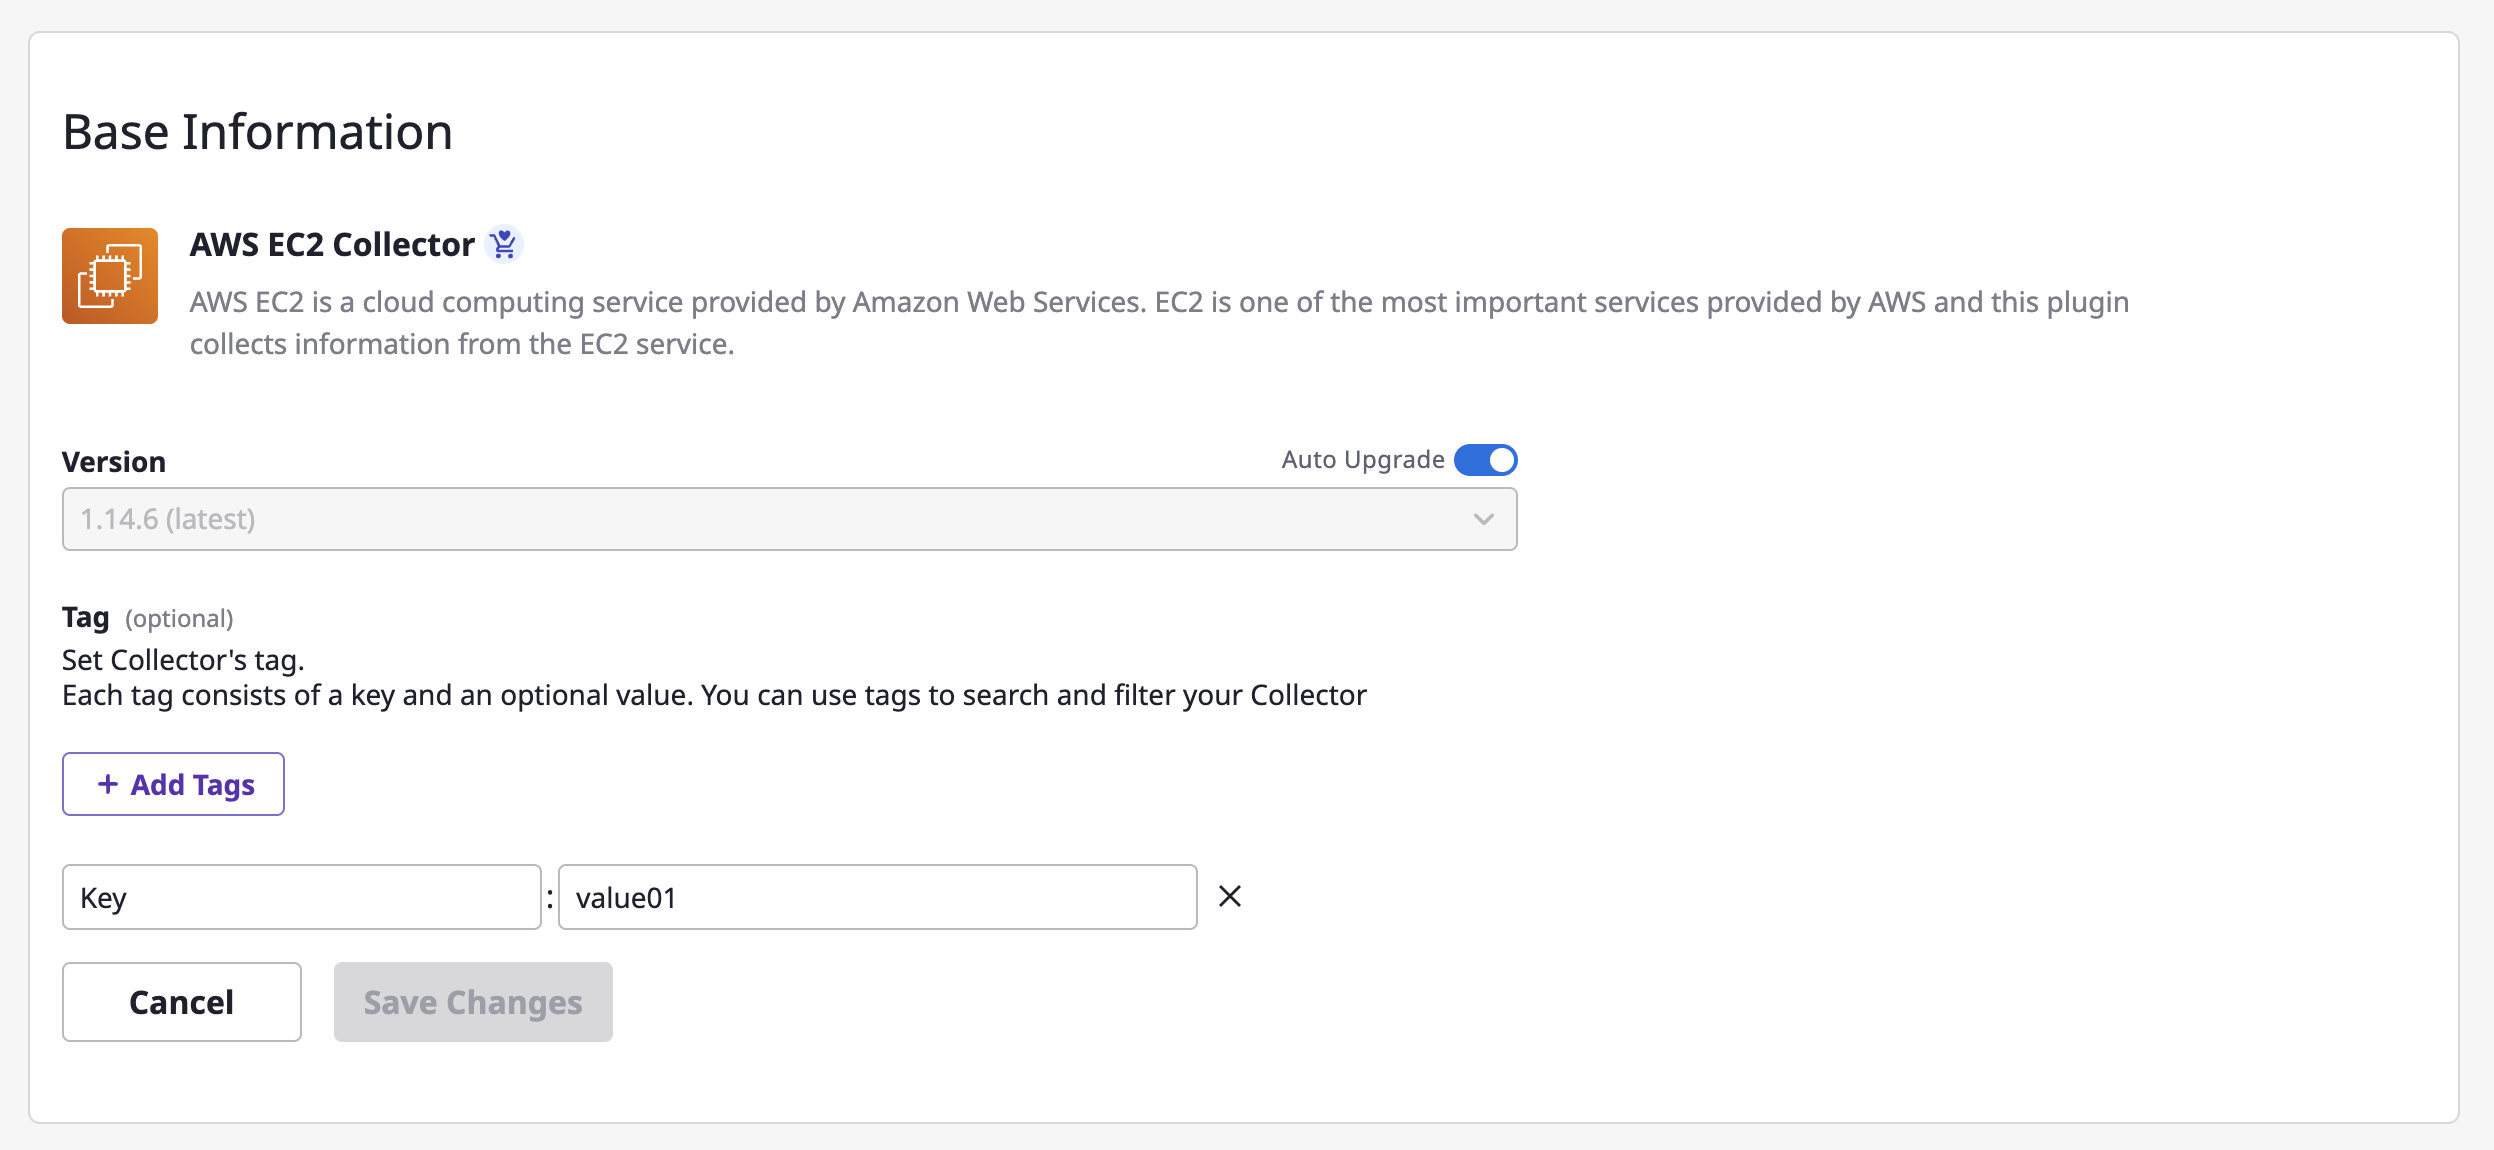
(2-2) Enter the name and version of the collector and click the [Continue] button.
(Depending on the collector, it can be required to select a specific cloud provider.)
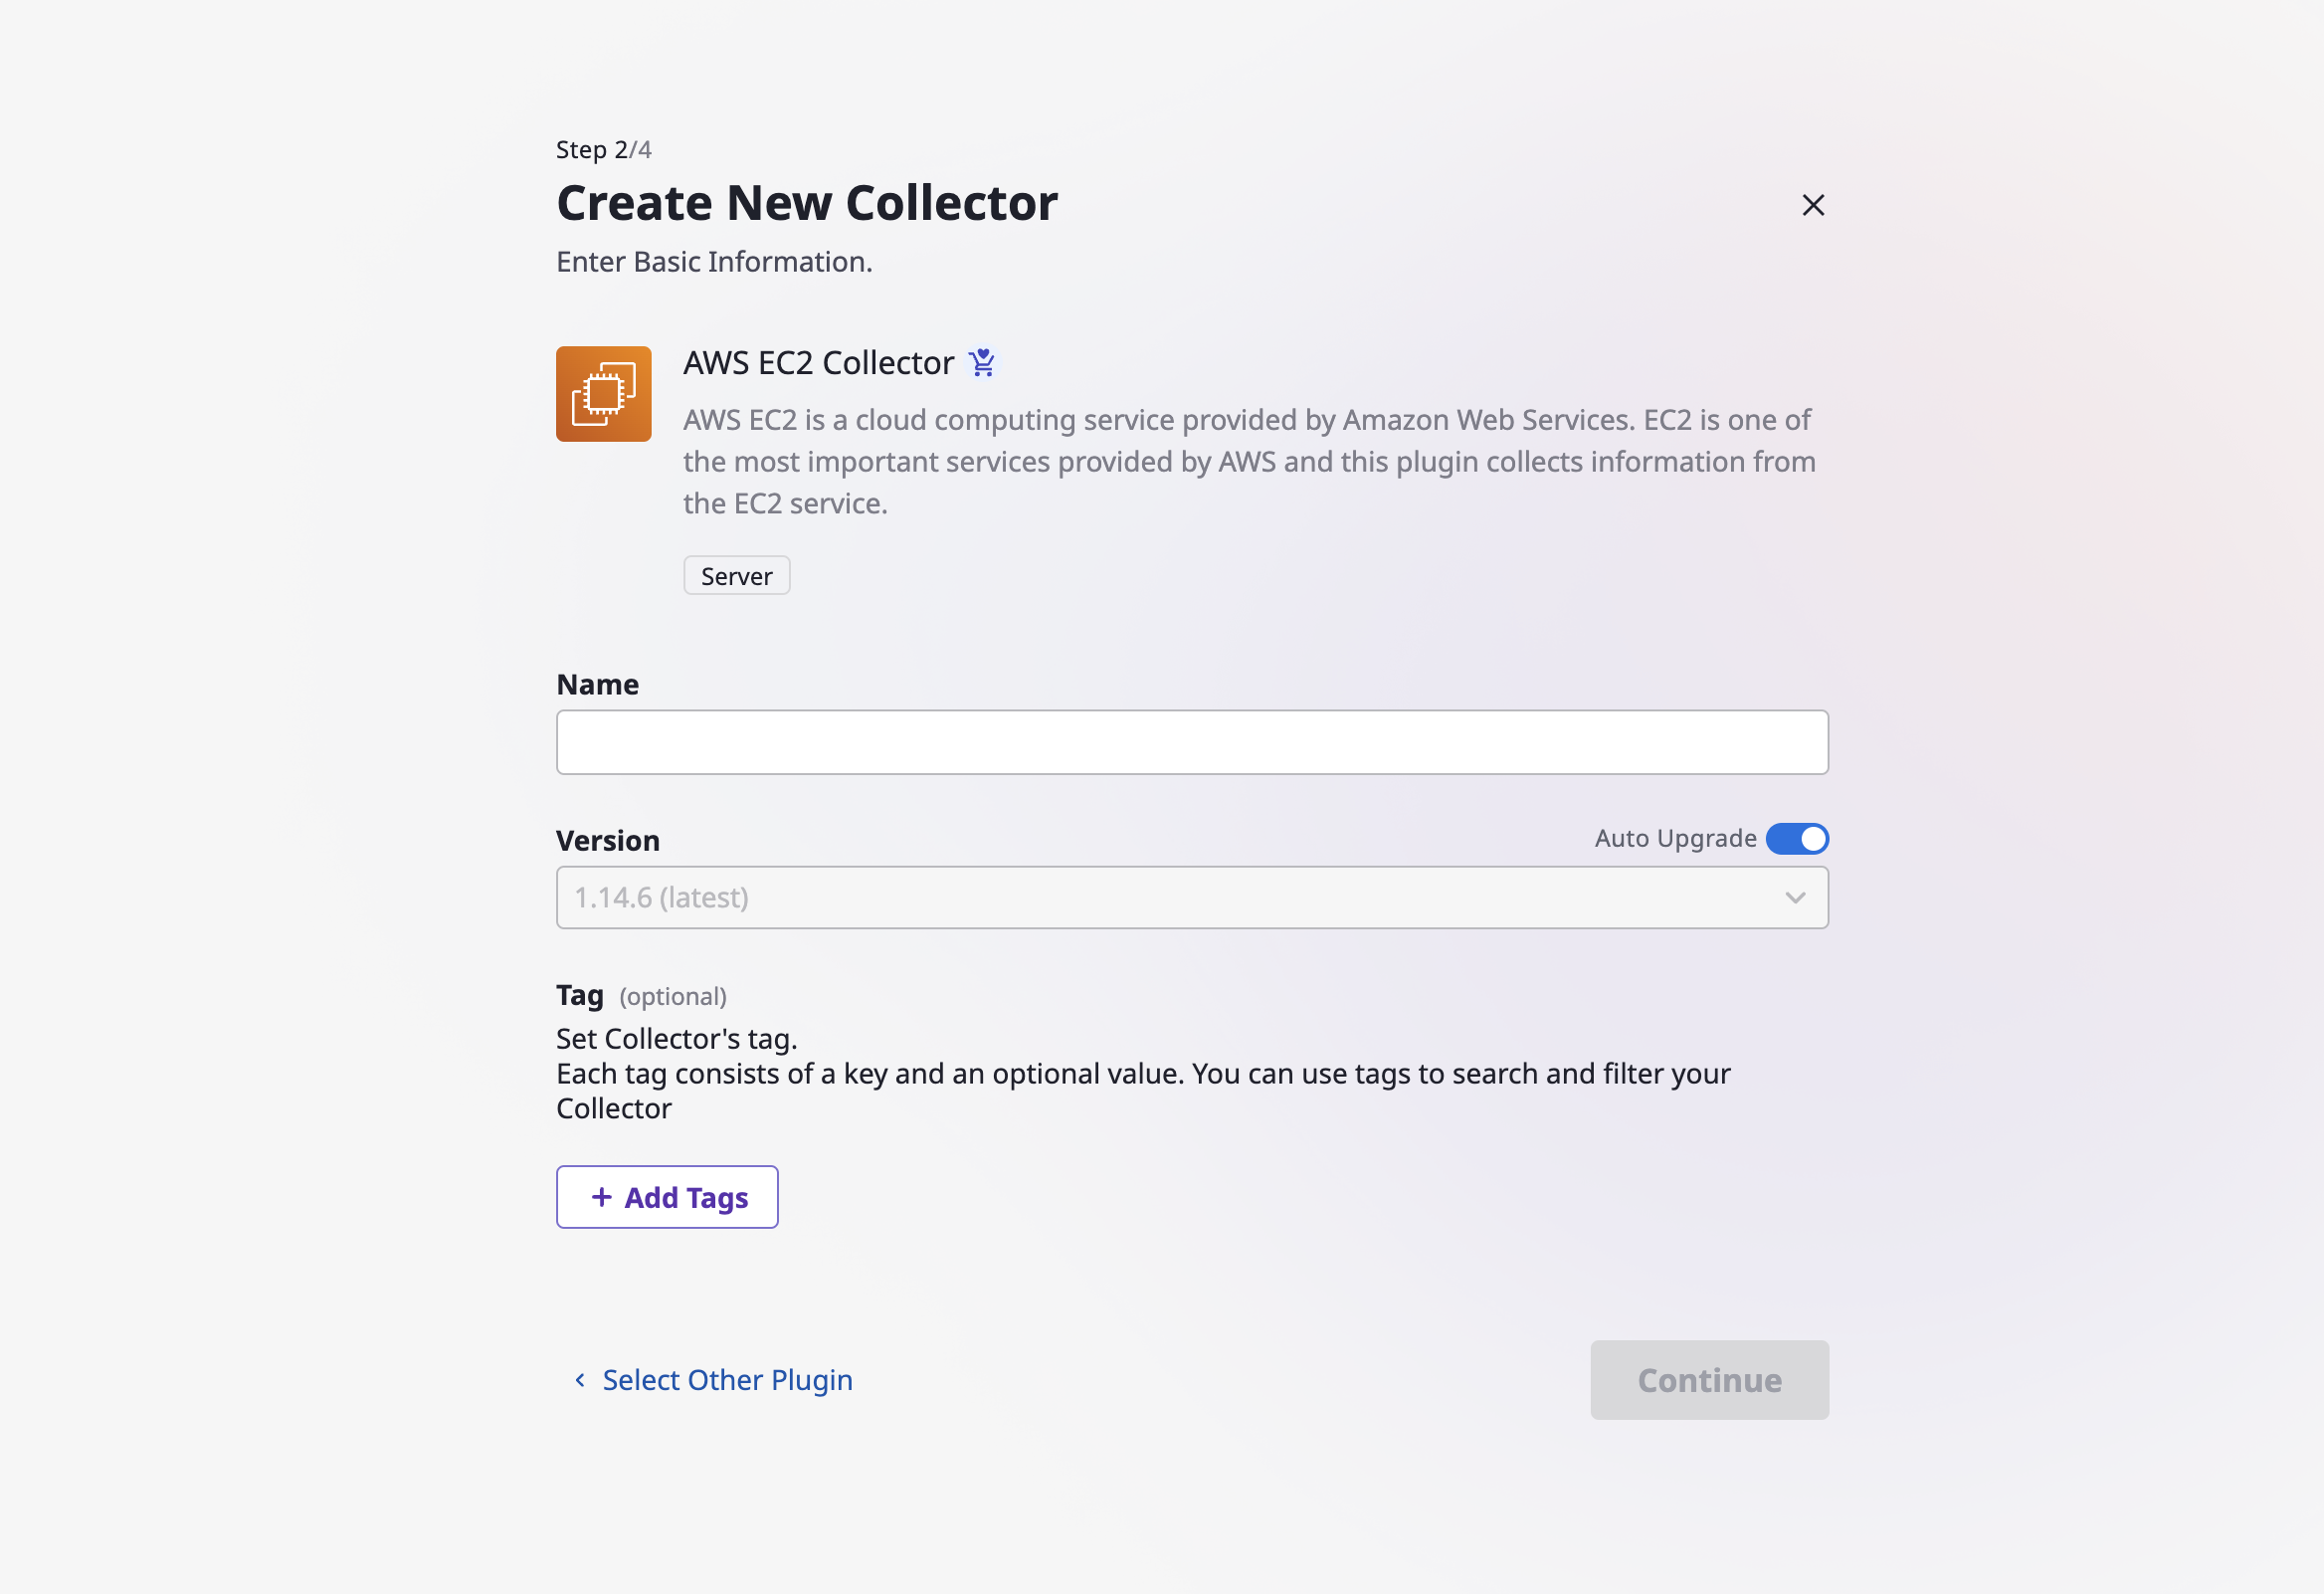
Version and auto upgrade
Version refers to the version of the previously selected collector plugin, which can be chosen by disabling auto upgrade. In this case, the data is always collected with the specified version of the plugin.
On the other hand, if you enable auto upgrade, your data will always be collected with the latest version of the plugin.
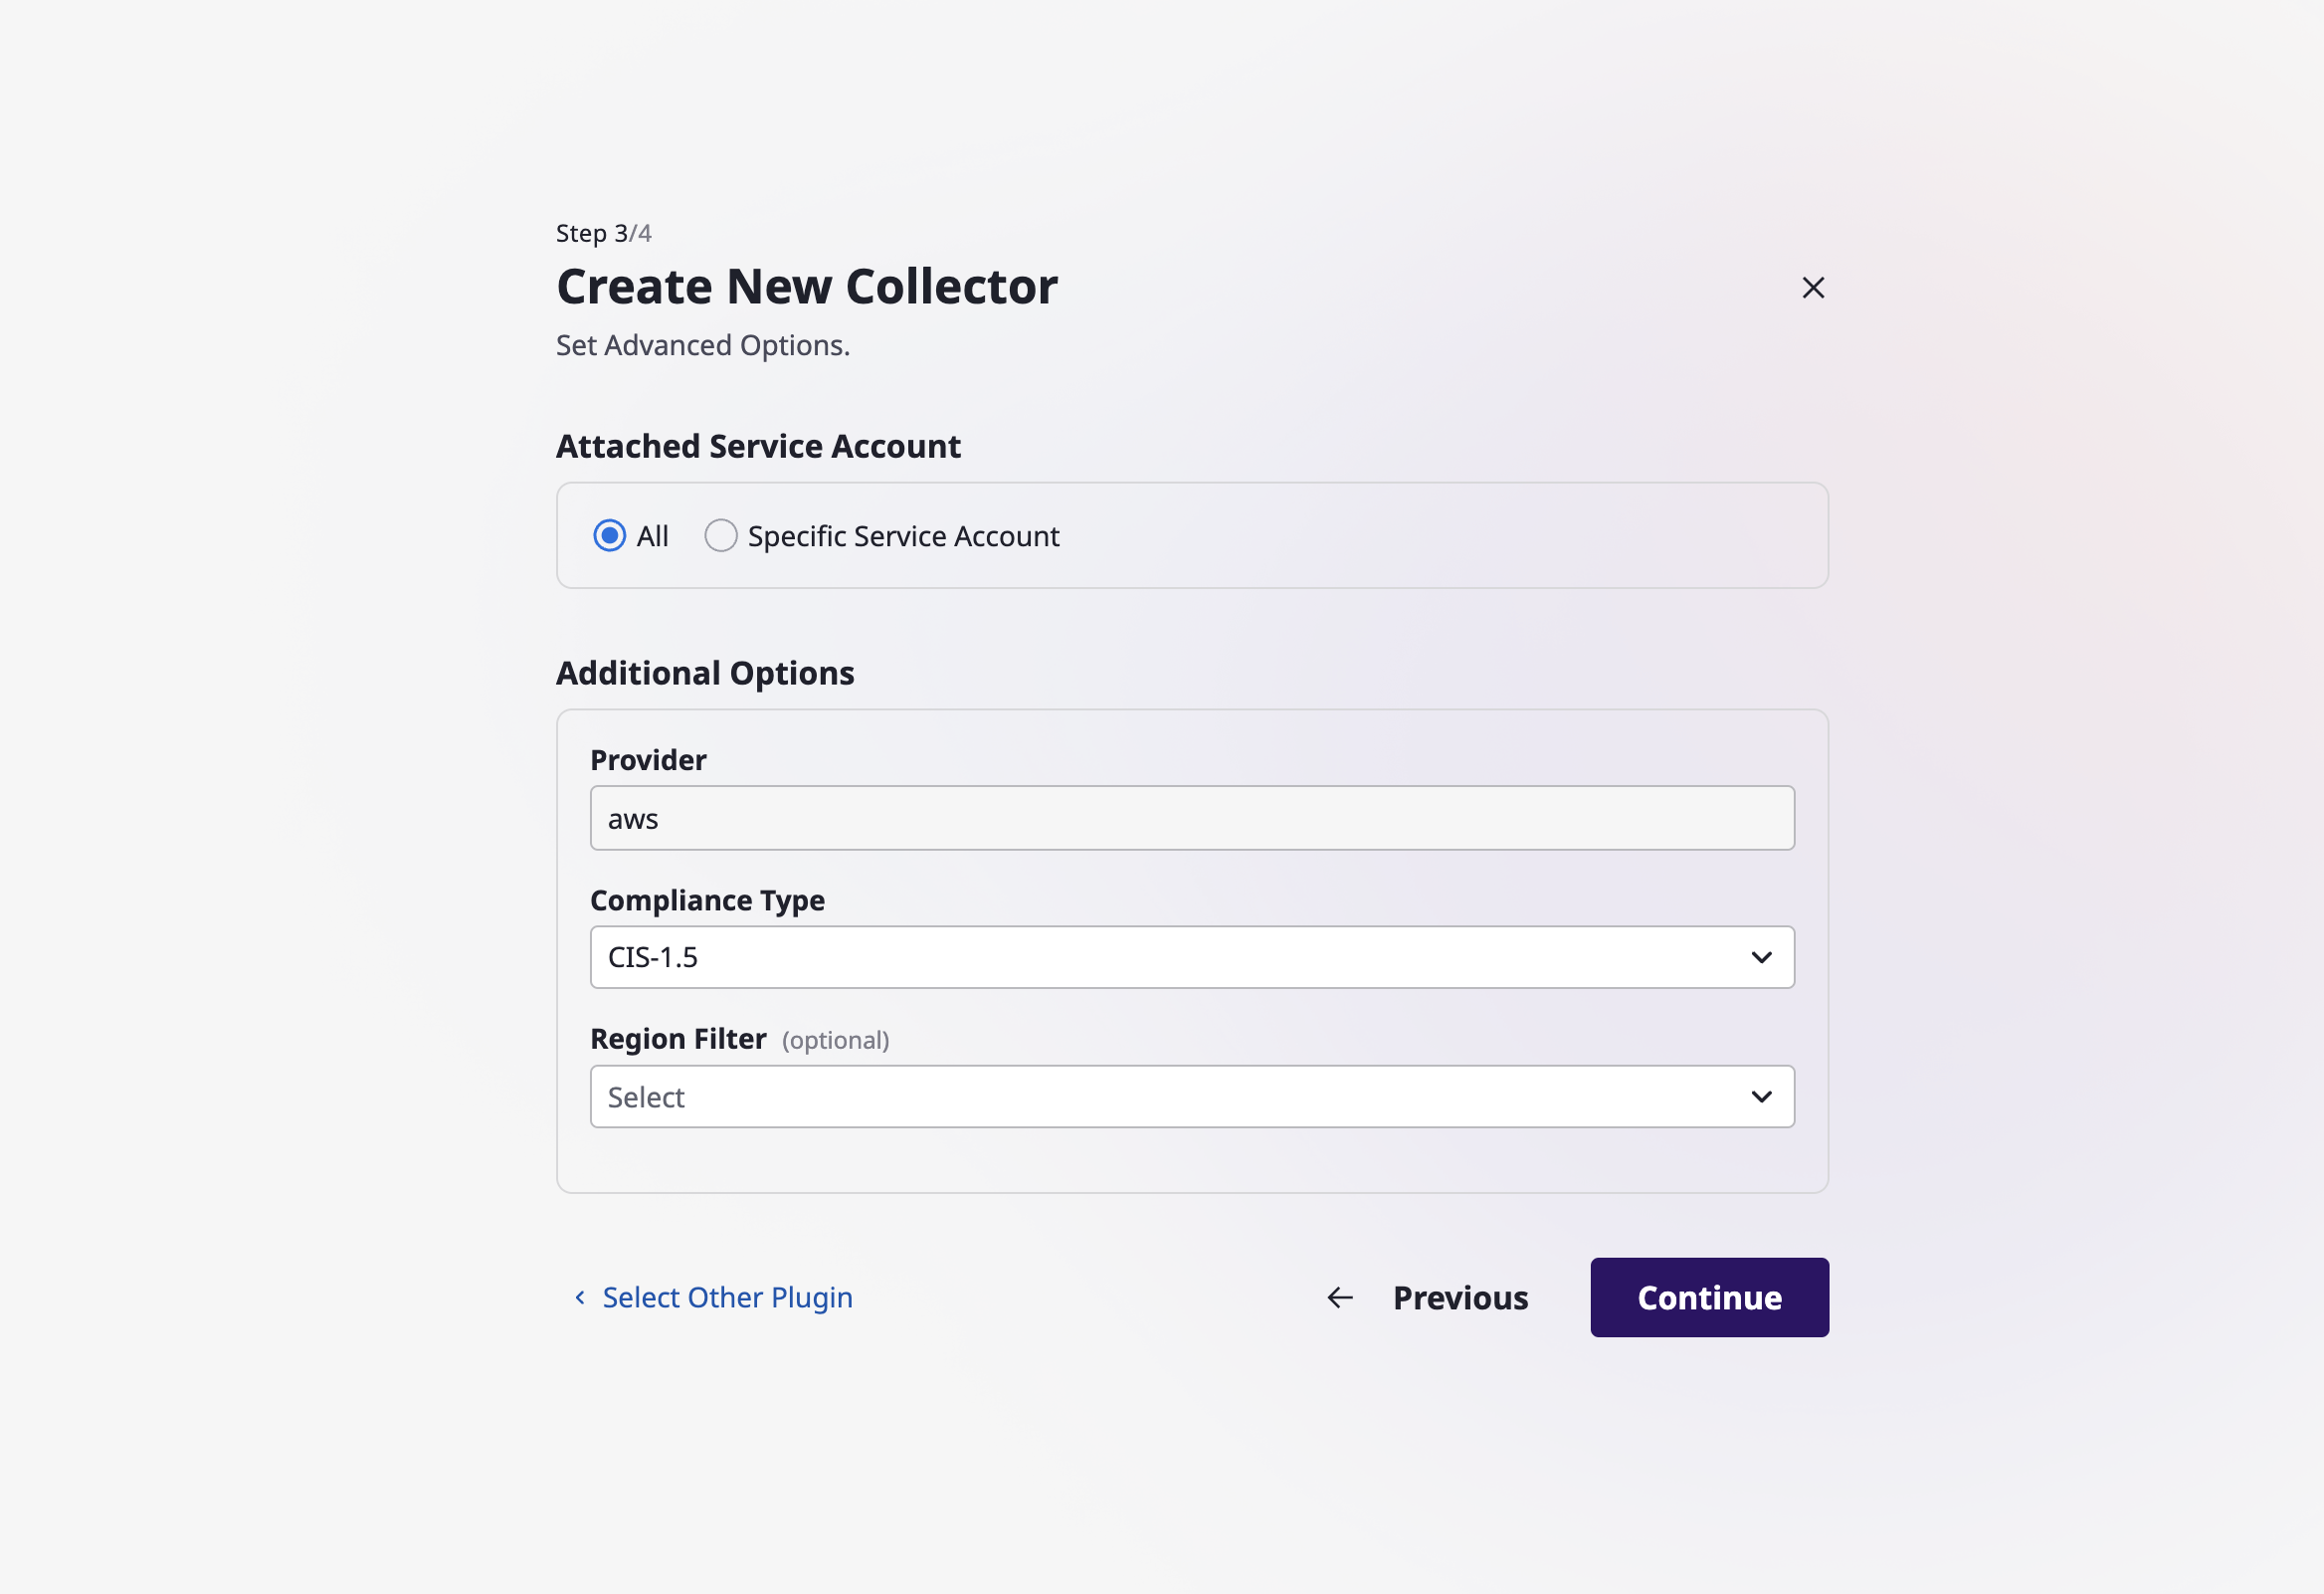
(2-3) Select additional options for the collector and click the [Continue] button.
(2-3-1) Service Account: Select either "All" or Specific Service Accounts. If you choose "All," the service accounts associated with the provider related to the collector will be automatically selected for data collection.
(2-3-2) Additional Options: Depending on the collector, there may or may not be additional options to select.
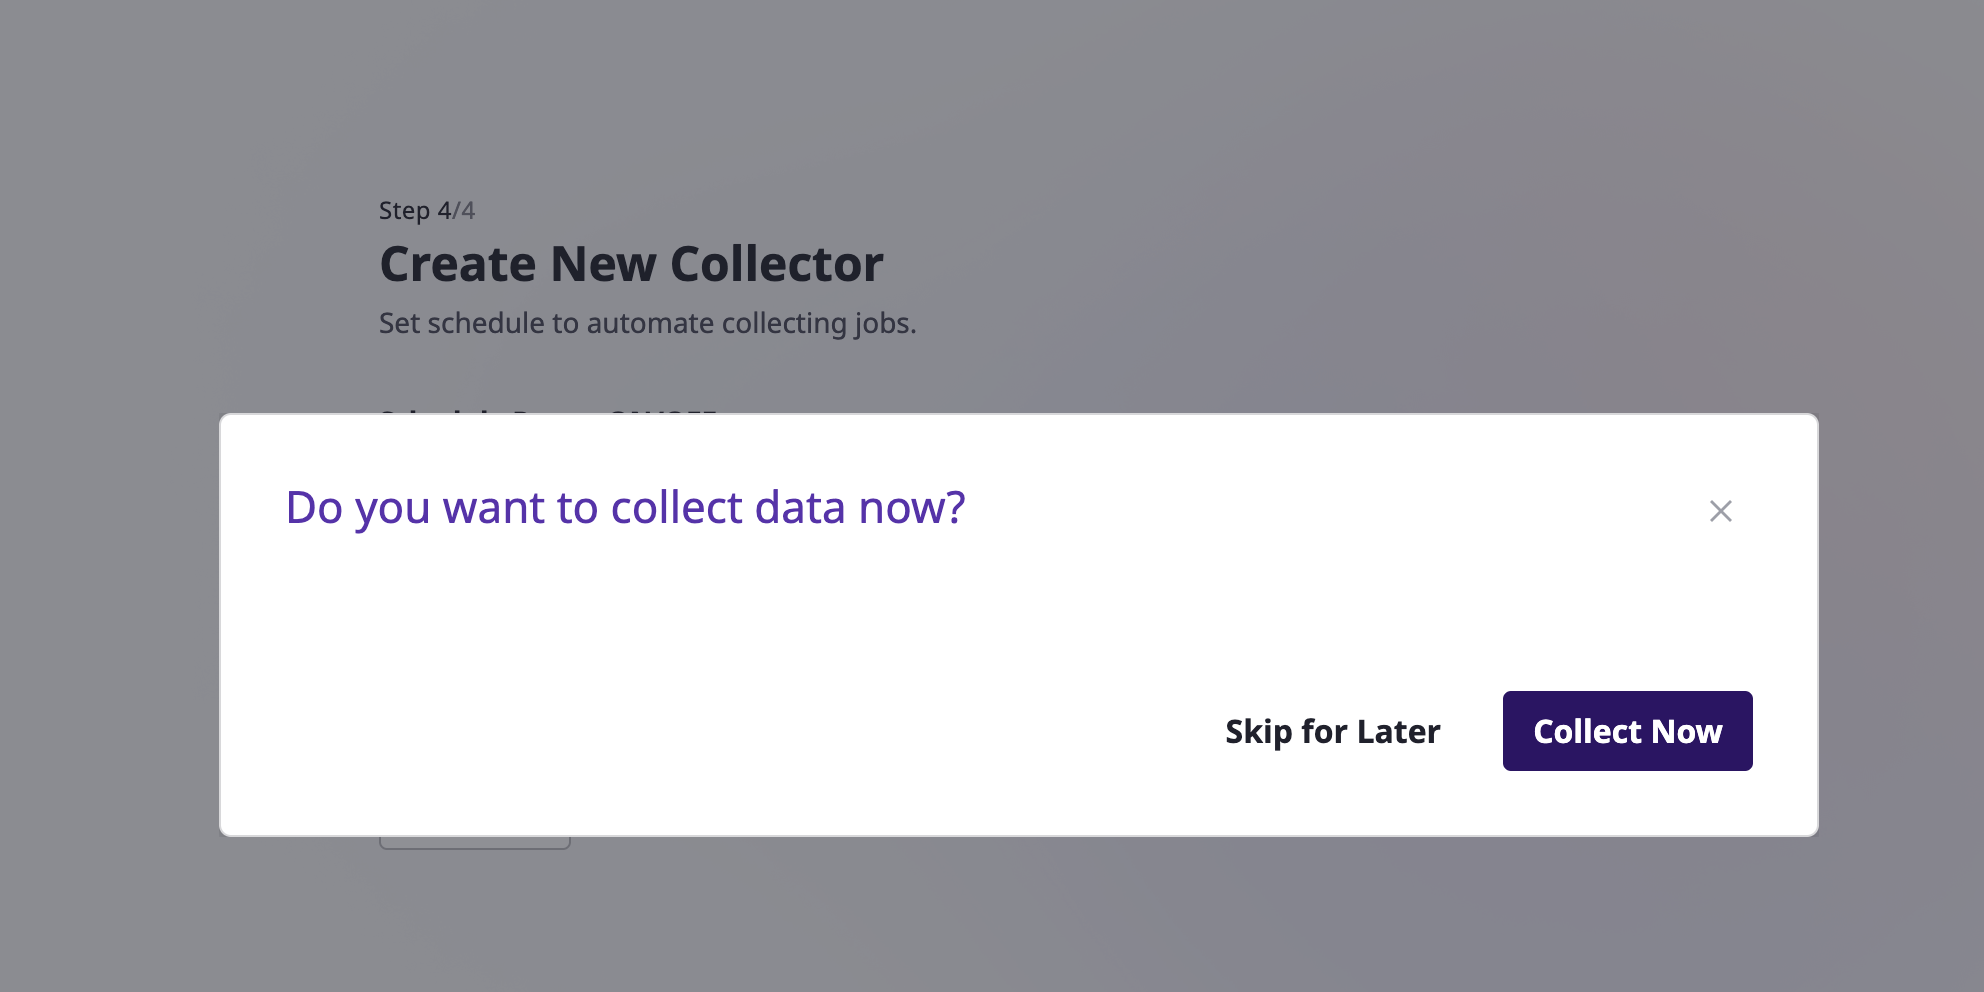
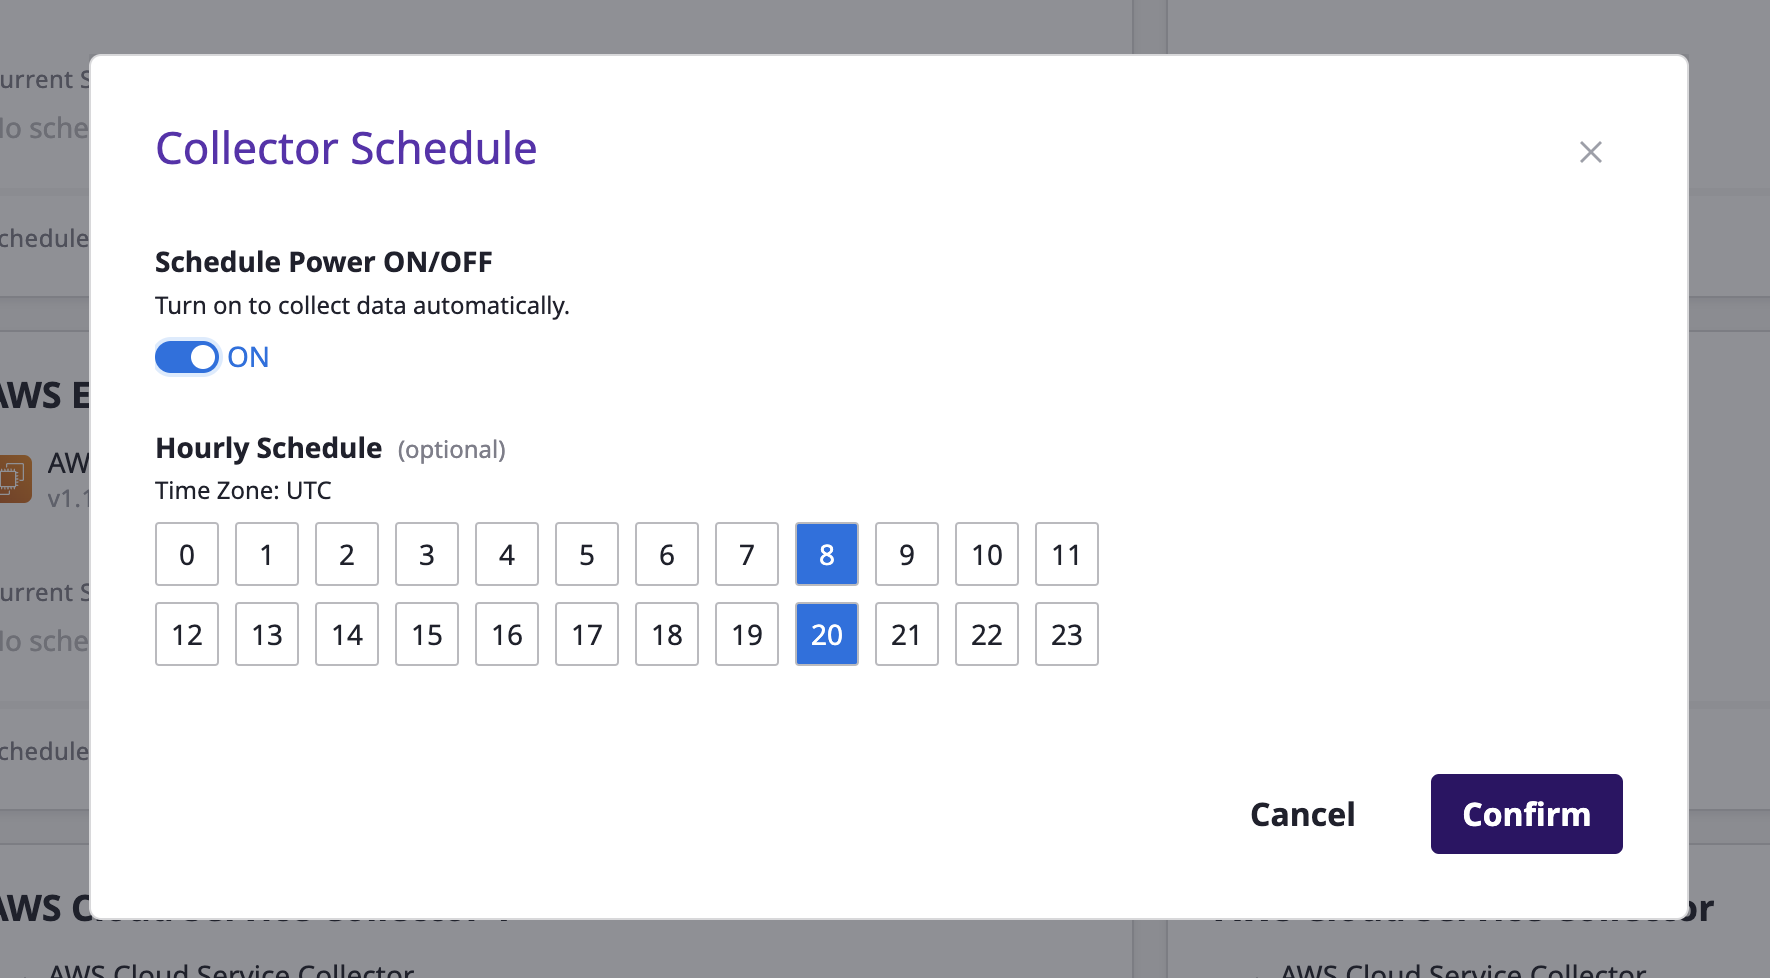
(2-4) You can set up a schedule to automatically perform data collection (optional). Once you have completed all the steps, click the [Create New Collector] button to finalize the collector creation.
(2-5) Once collector is created, you can collect data immediately.
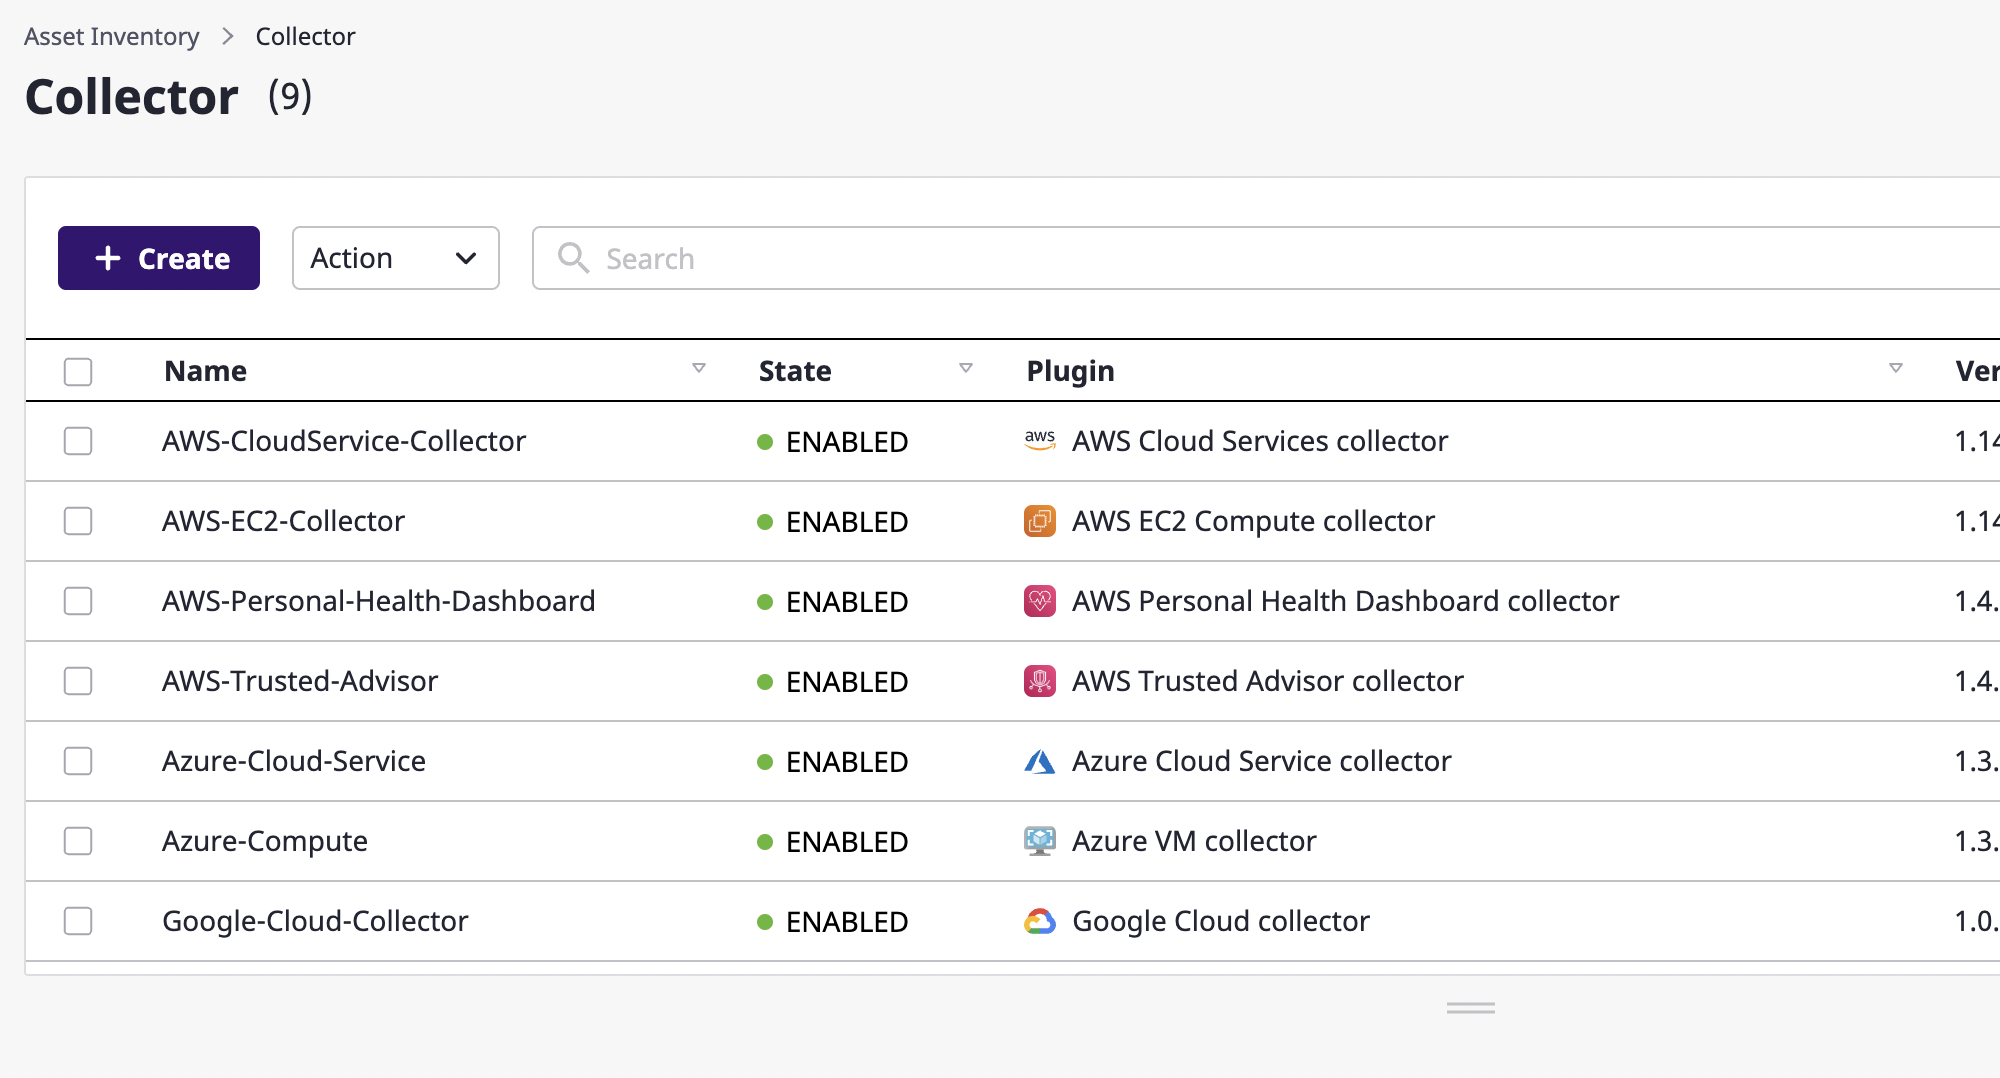
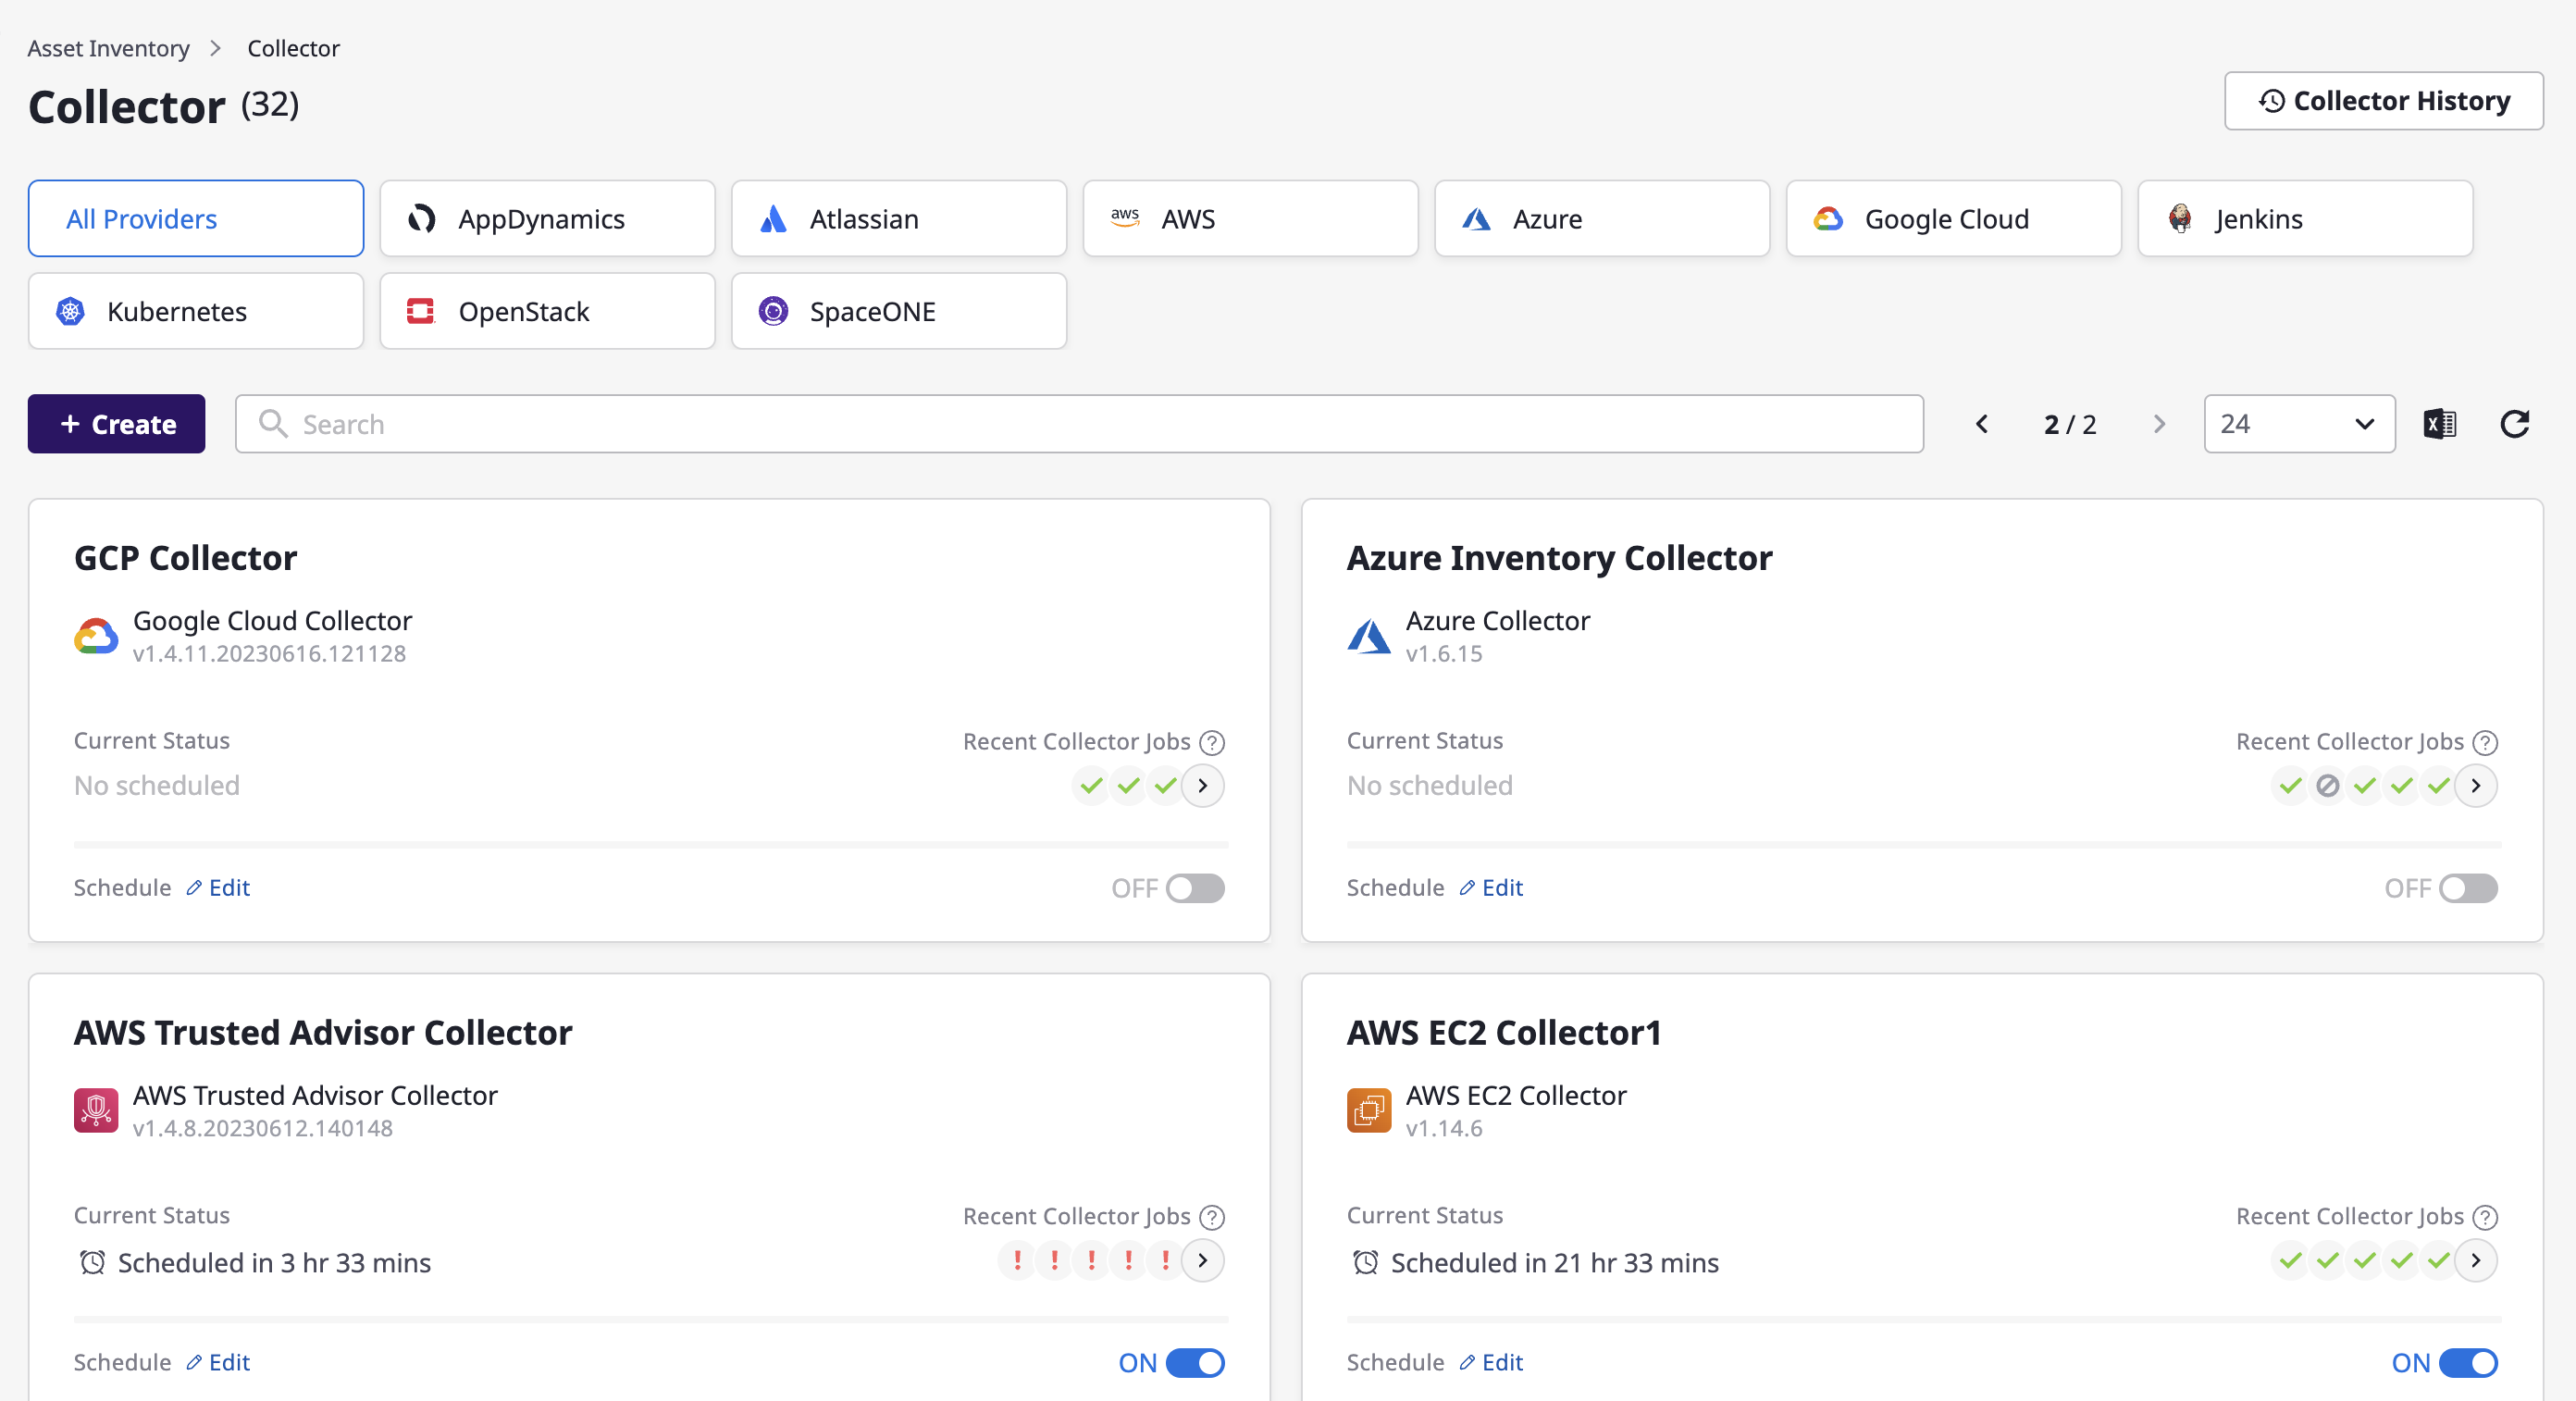
Get a list of collectors
You can view a list of all collectors that have been created on the collector page.
Advanced search allows you to filter the list by elaborate criteria. For a detailed explanation, see here.
View/Edit/Delete collector
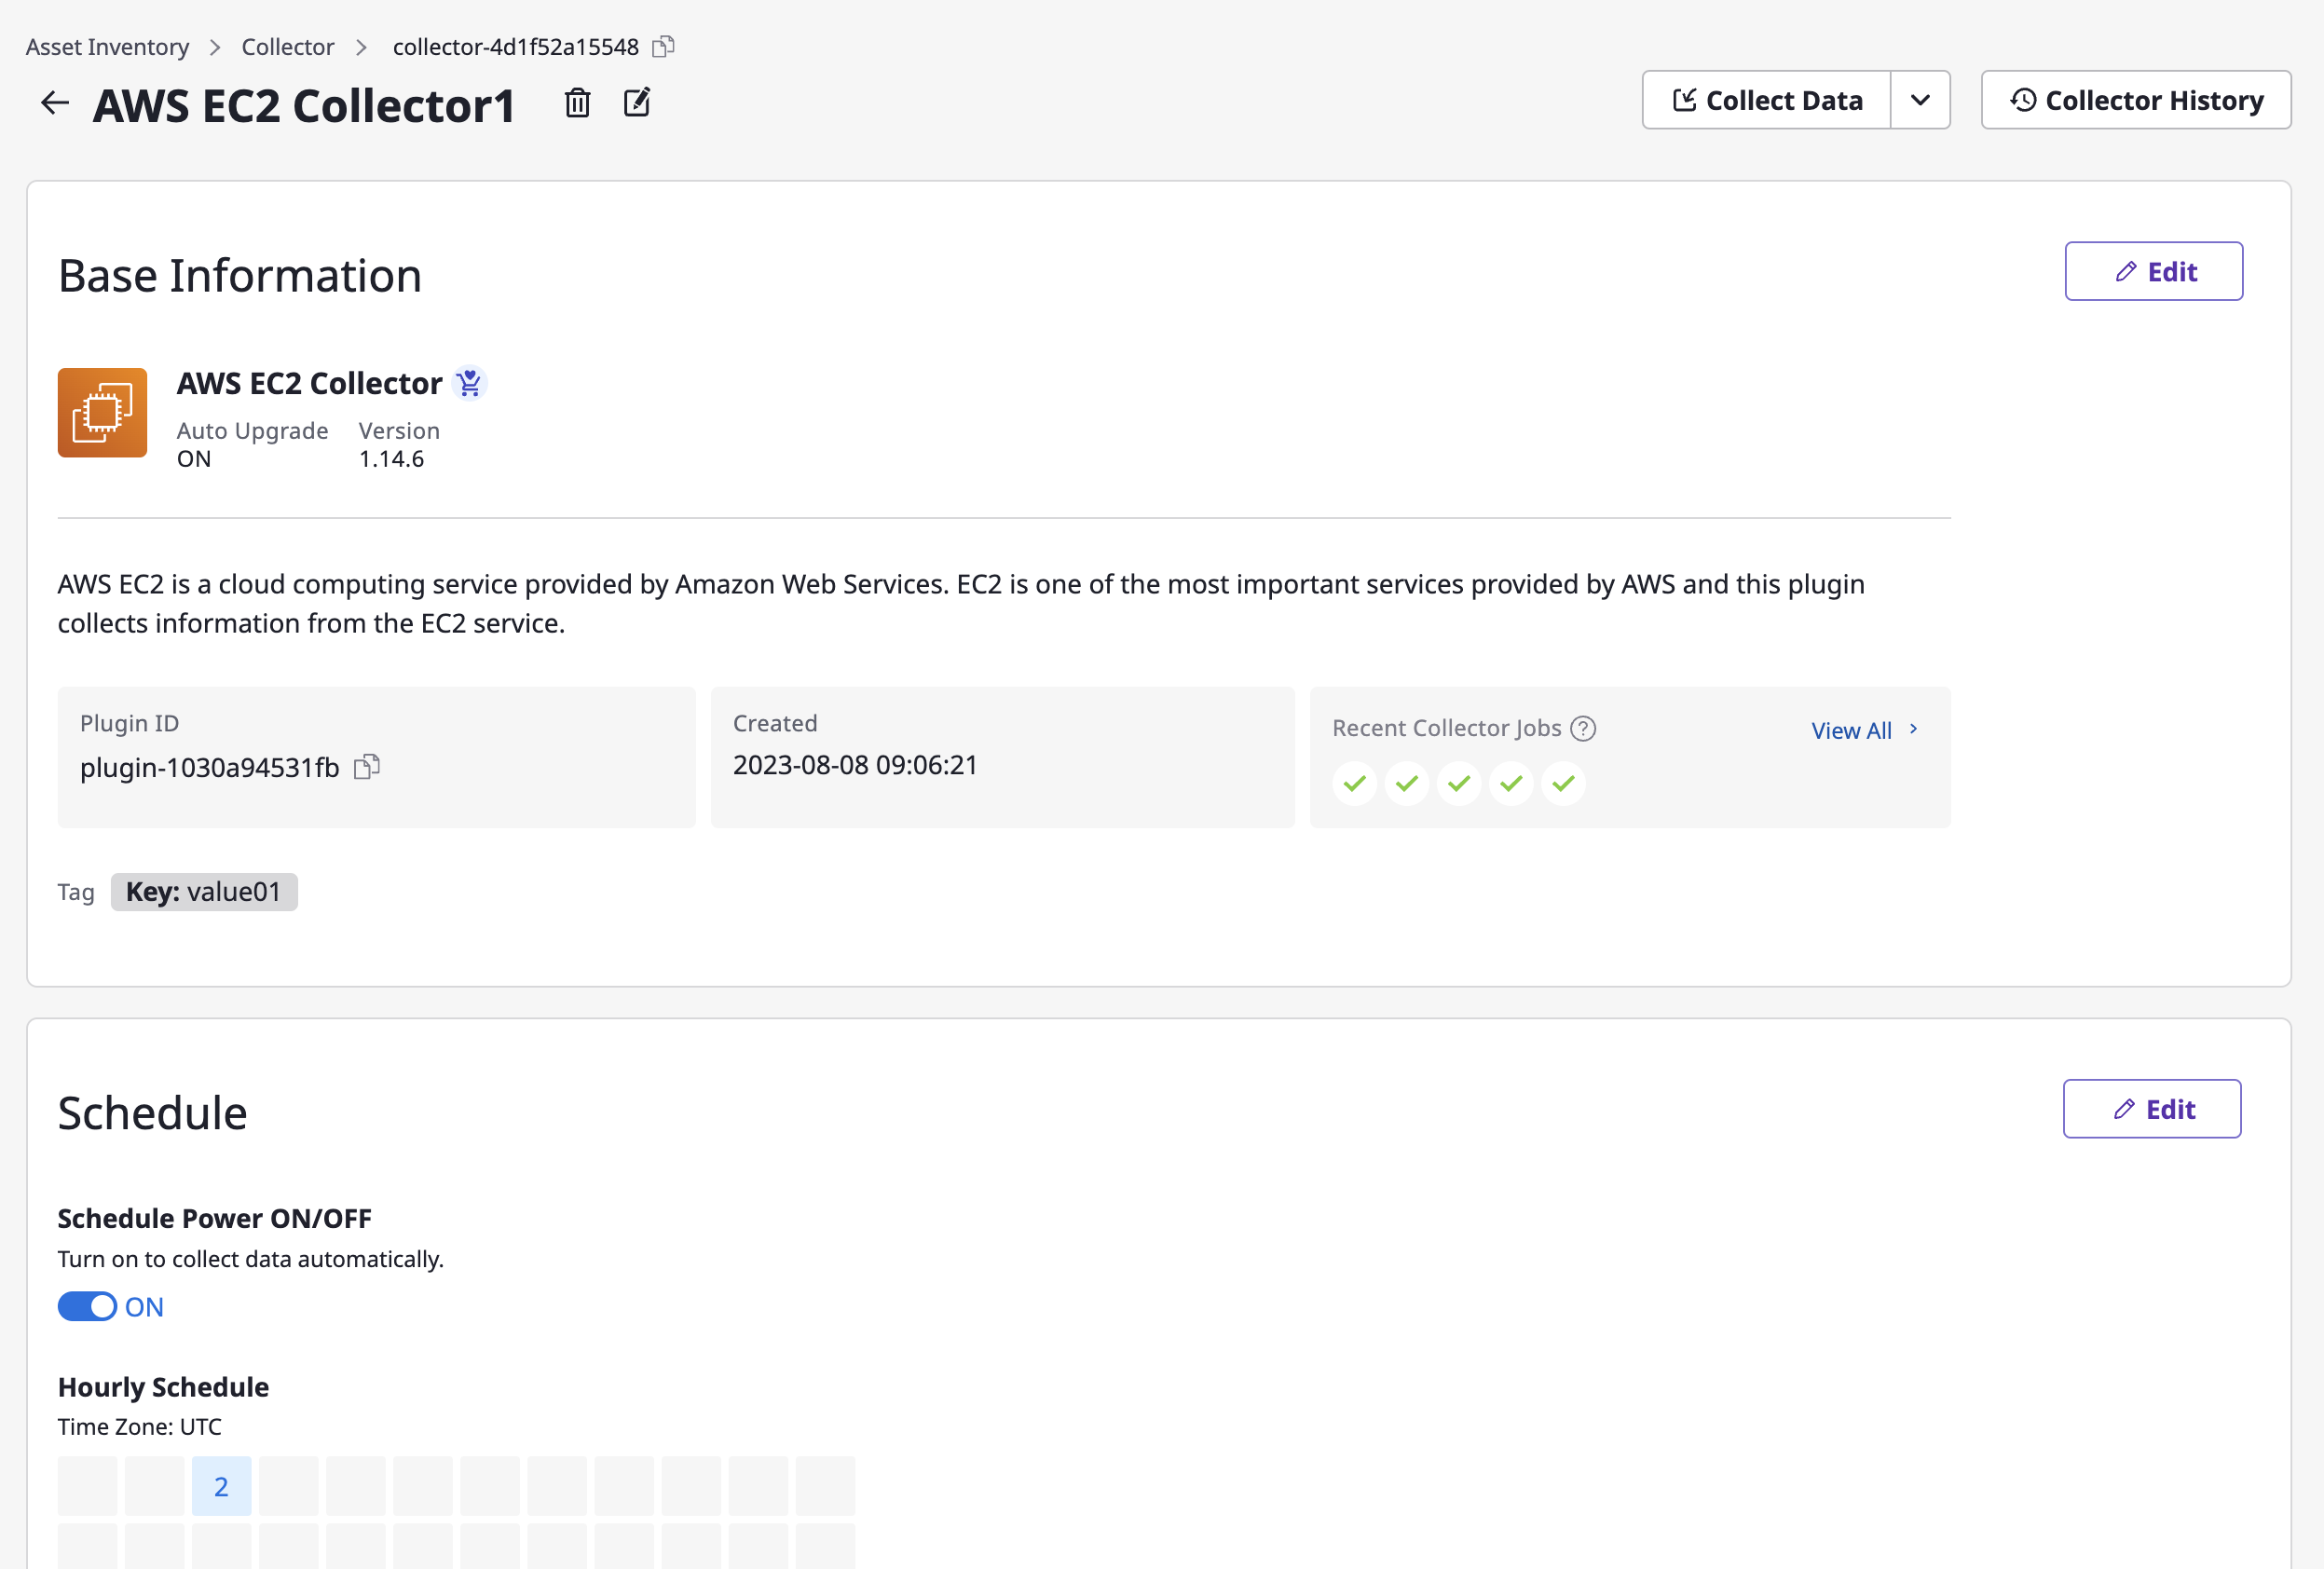
(1) View Details
(1-1) Select a specific collector card from the list to navigate to its detailed page.

(1-2) You can view the basic information, schedule, additional options, and attached service accounts.
(2) Edit or Delete
(2-1) Click on the [Edit] icon at the top and modify the collector name.

(2-2) If you need to edit details such as base information, schedule, additional options or service accounts, click the [Edit] button in each area.
(2-3) After making the changes, click the [Save Changes] button to complete the modification.
(2-4) If you need to delete a collector, click the [Trash] icon on the top.

Set up automated data collection
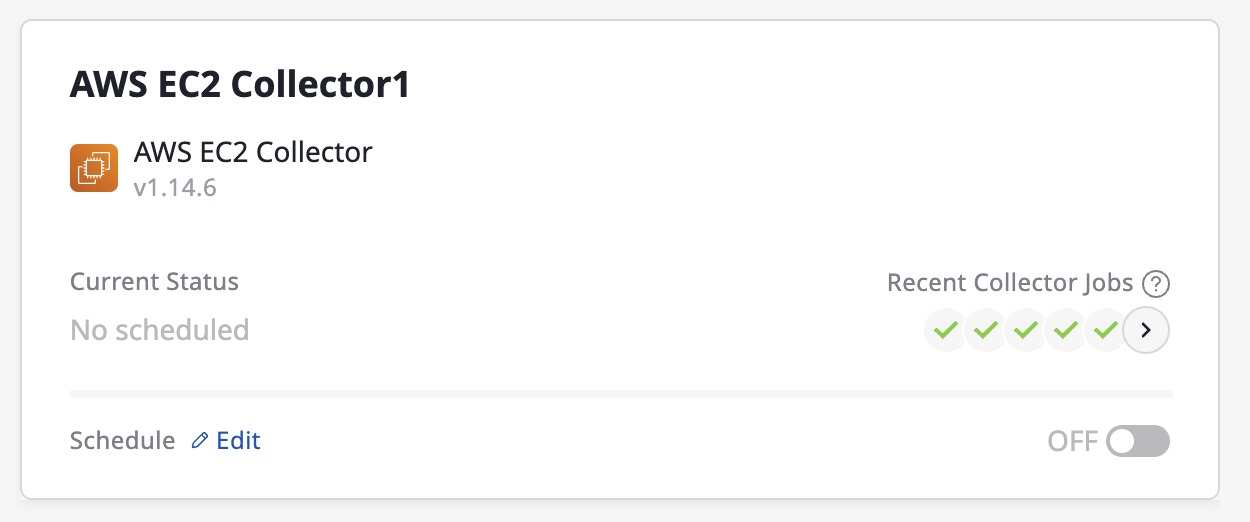
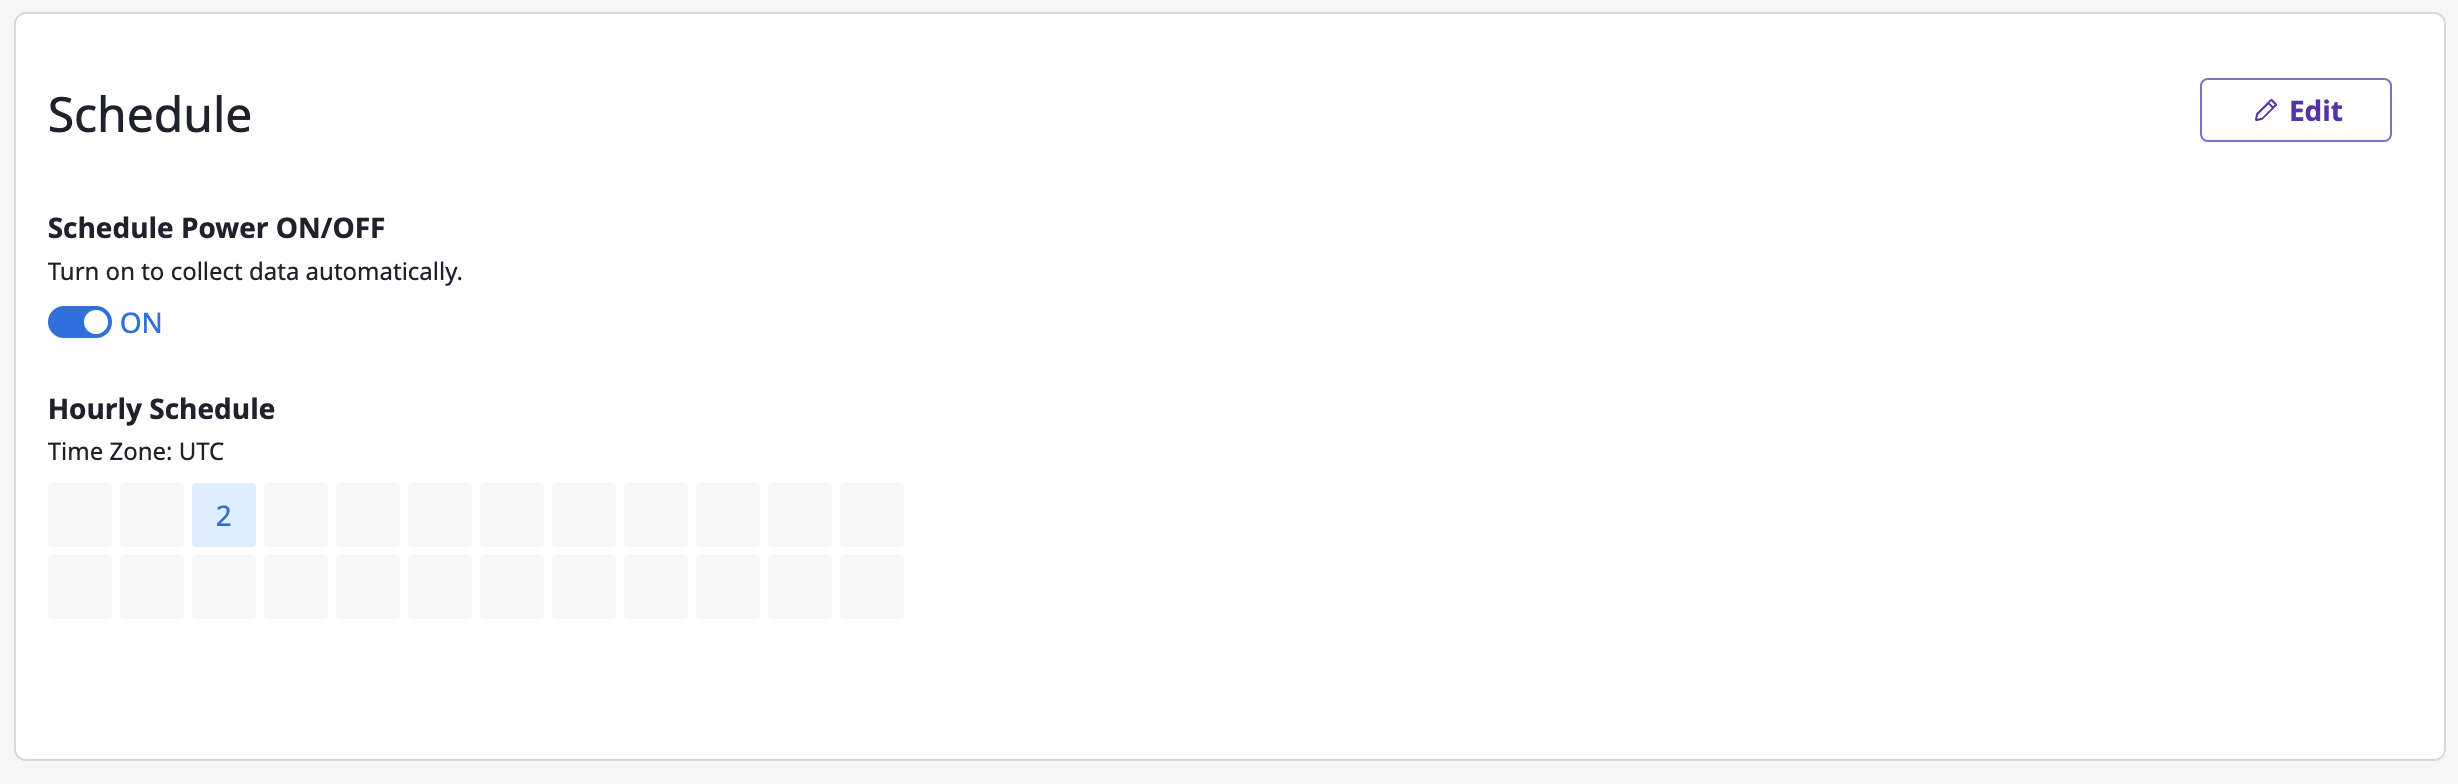
After creating a collector, you can still modify the automated data collection schedule for each individual collector.
(1) In the collector list page, you can enable or disable automated data collection for each collector by using the schedule toggle button(Switch On/Off) in the collector card section. You can quickly set and modify the frequency by clicking the [Edit] button.
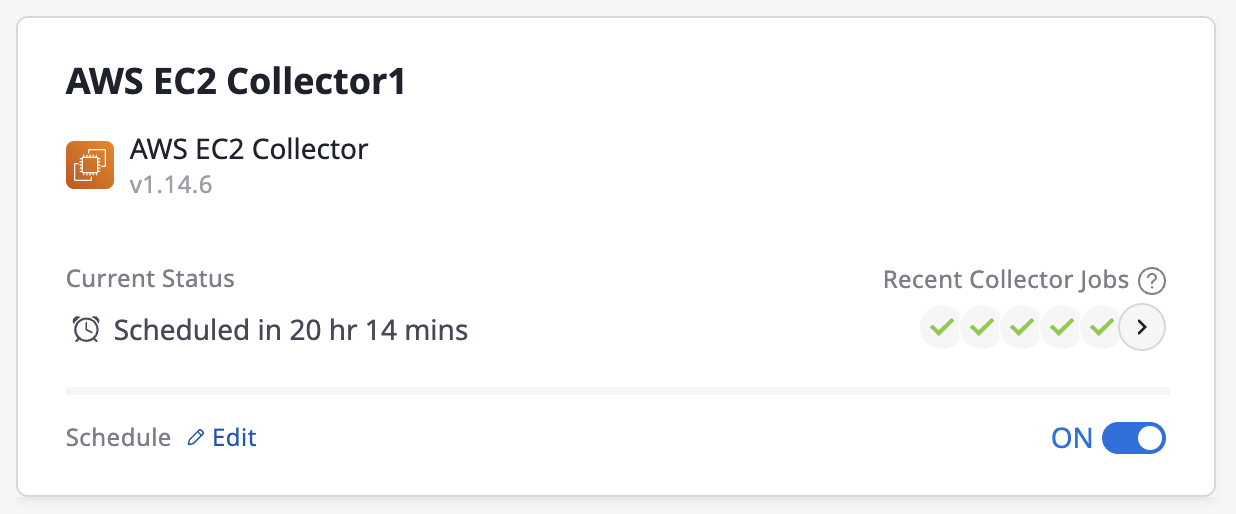
(2) You can also navigate to the detailed page of each collector and change the schedule.
Start data collection immediately
You can collect data on a one-time basis without setting up automated data collection.
It allows data collection to take place even when the collector does not have an automated data collection schedule.
Data collection works in two ways:
Collect data for all attached service accounts
Collector needs account information from a Provider for data collection, which is registered through Service account.
(1) Click on [Collect Data]
(Collector list Page) Hover over the collector card area for data collection, and then click the [Collect Data] button.
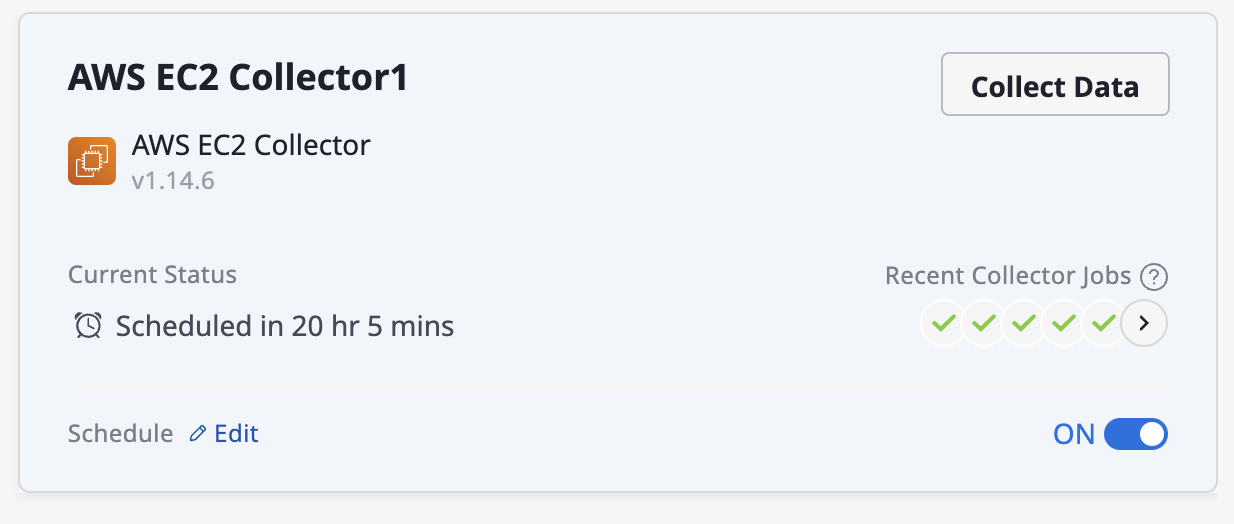
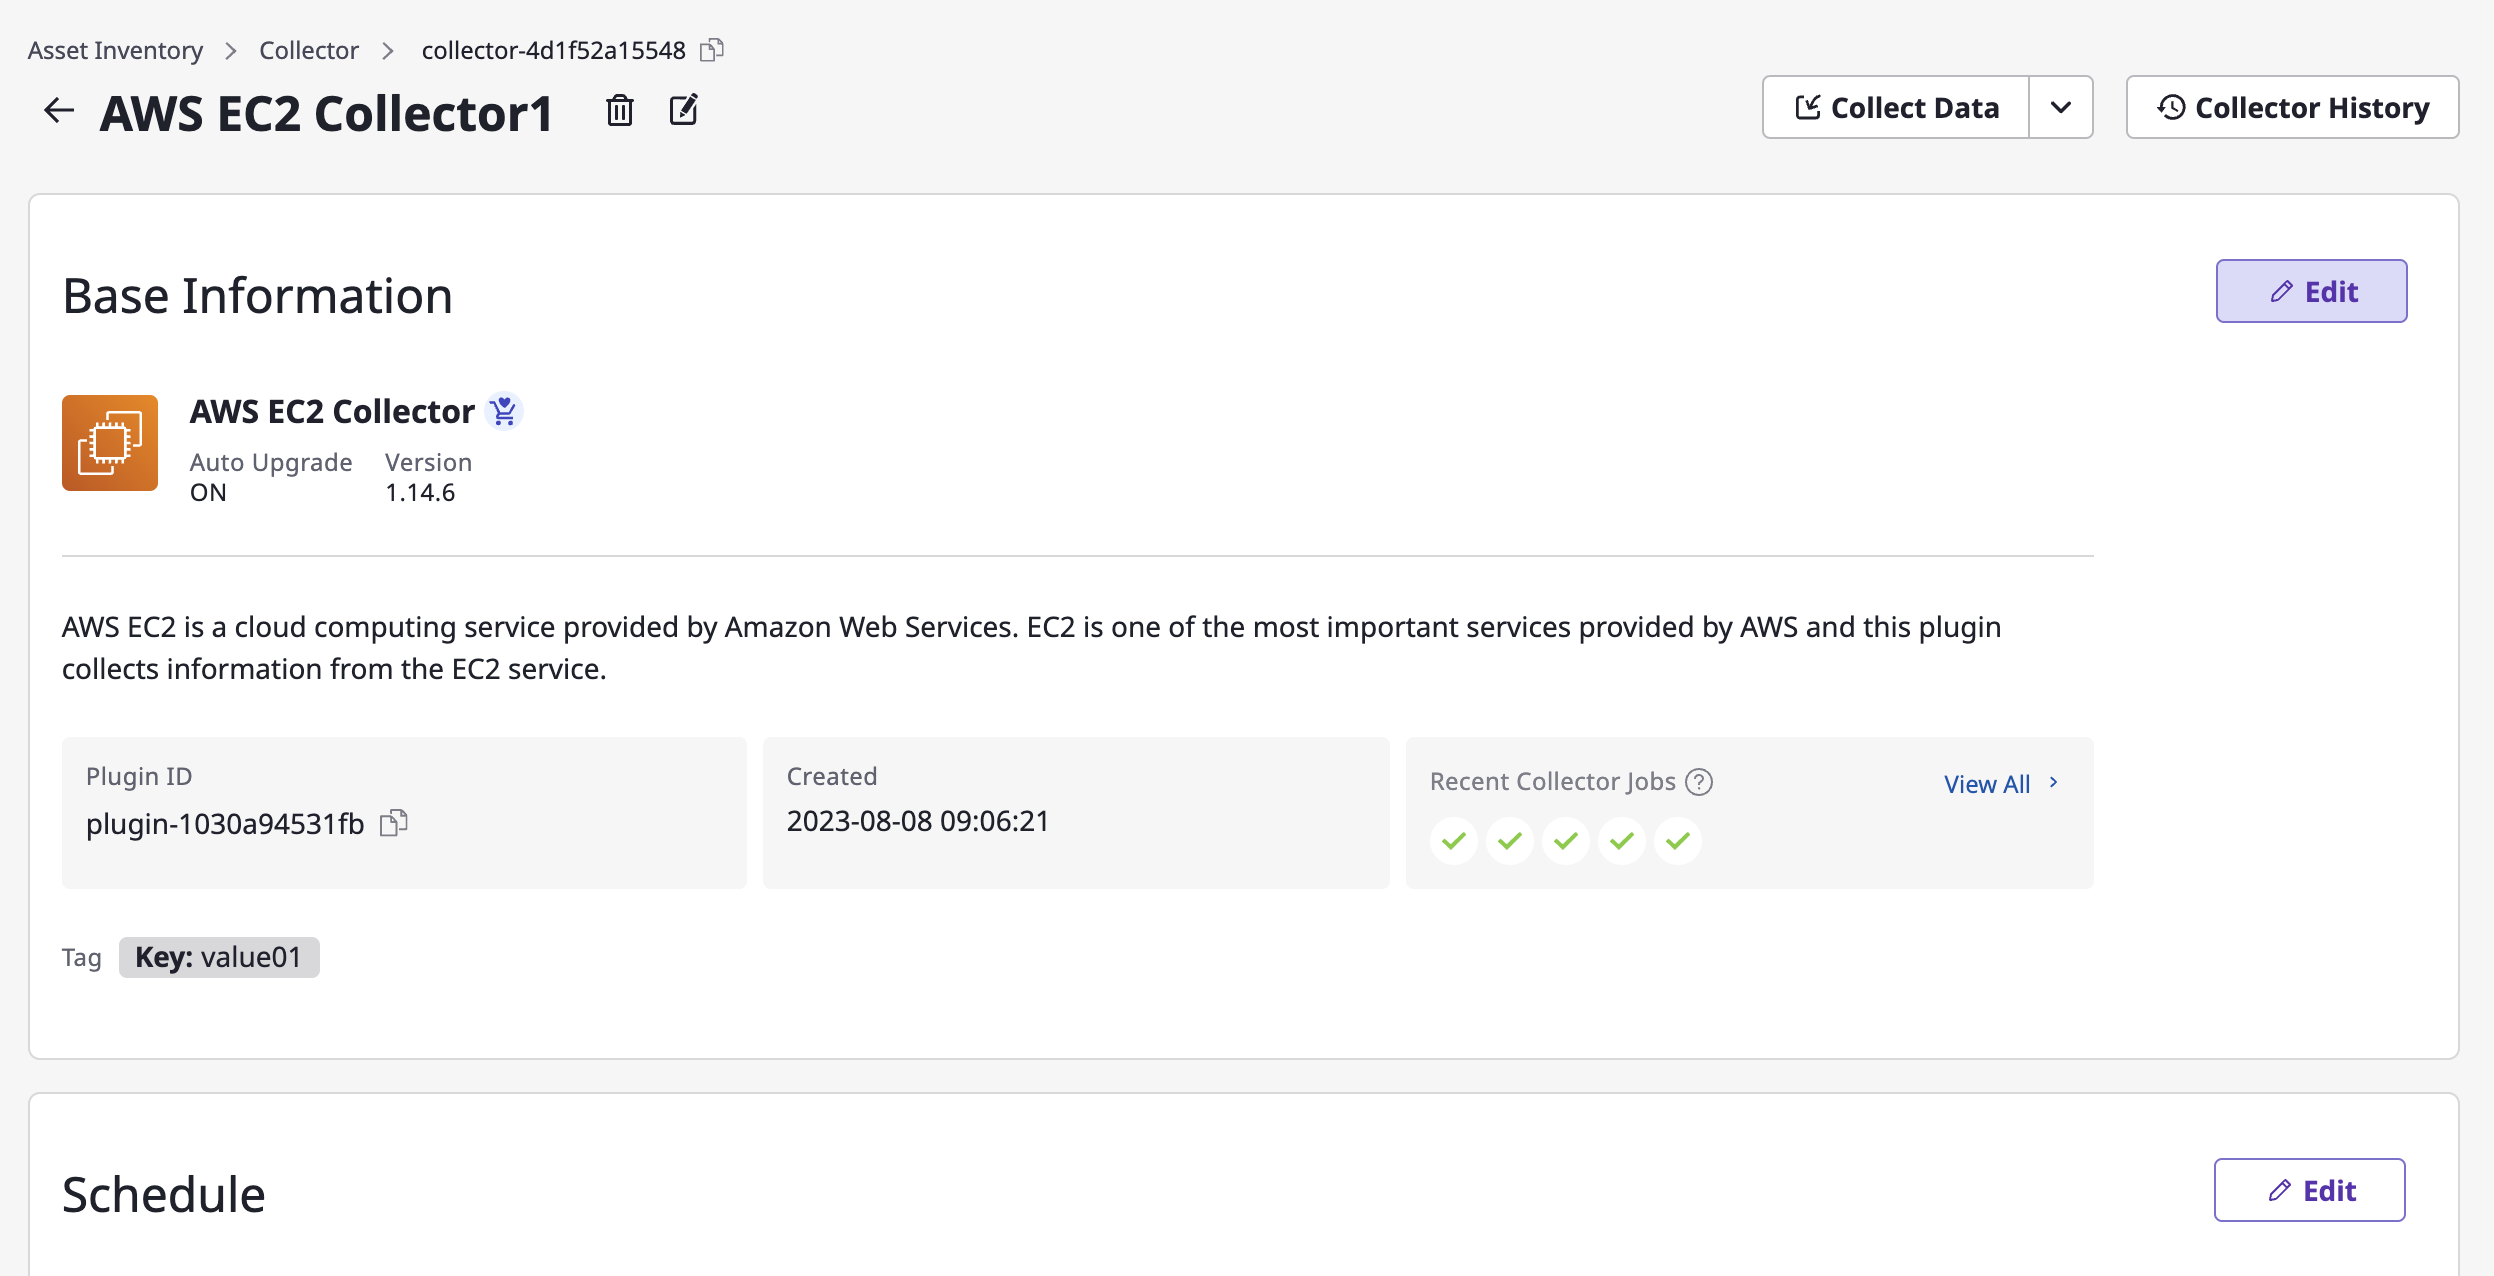
(Collector Detail Page) Click the [Collect Data] button located in the top right corner of the detailed page.

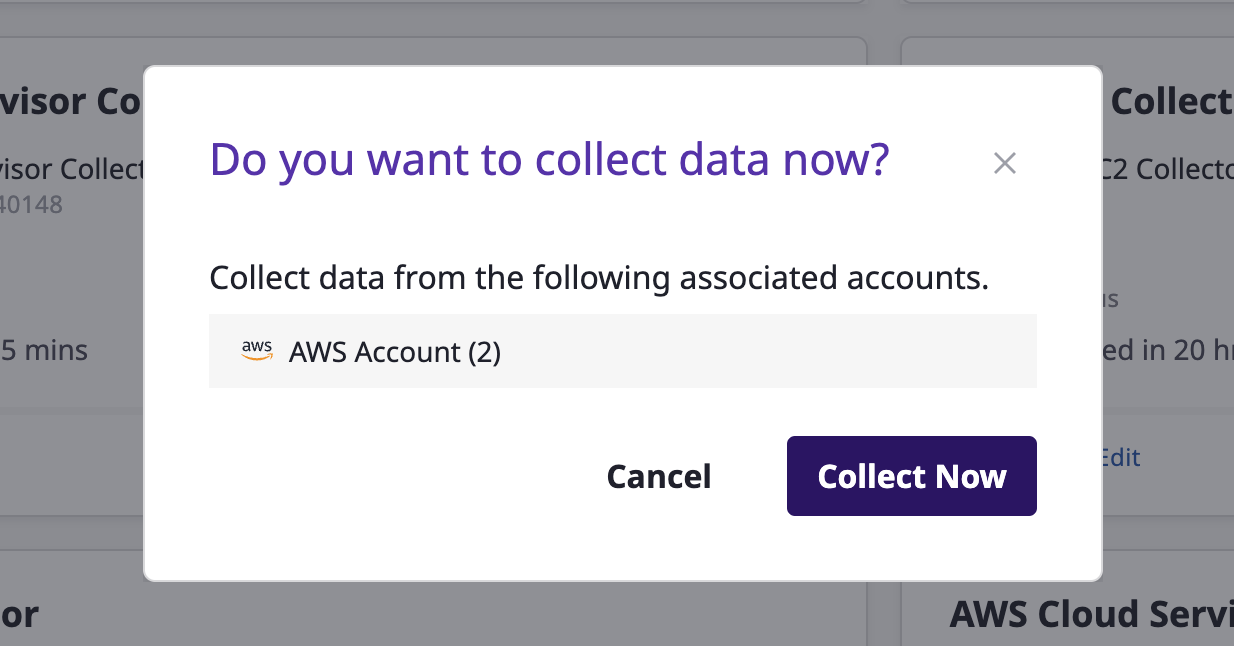
(2) Proceed with data collection.
(2) Whether or not the collector has completed a data collection can be checked in Collector history. You can click the [View details] link of a selected collector to go to that page.
Collect data for a single service account
When collecting data with a collector, you may only collect data from a specific cloud provider’s account.
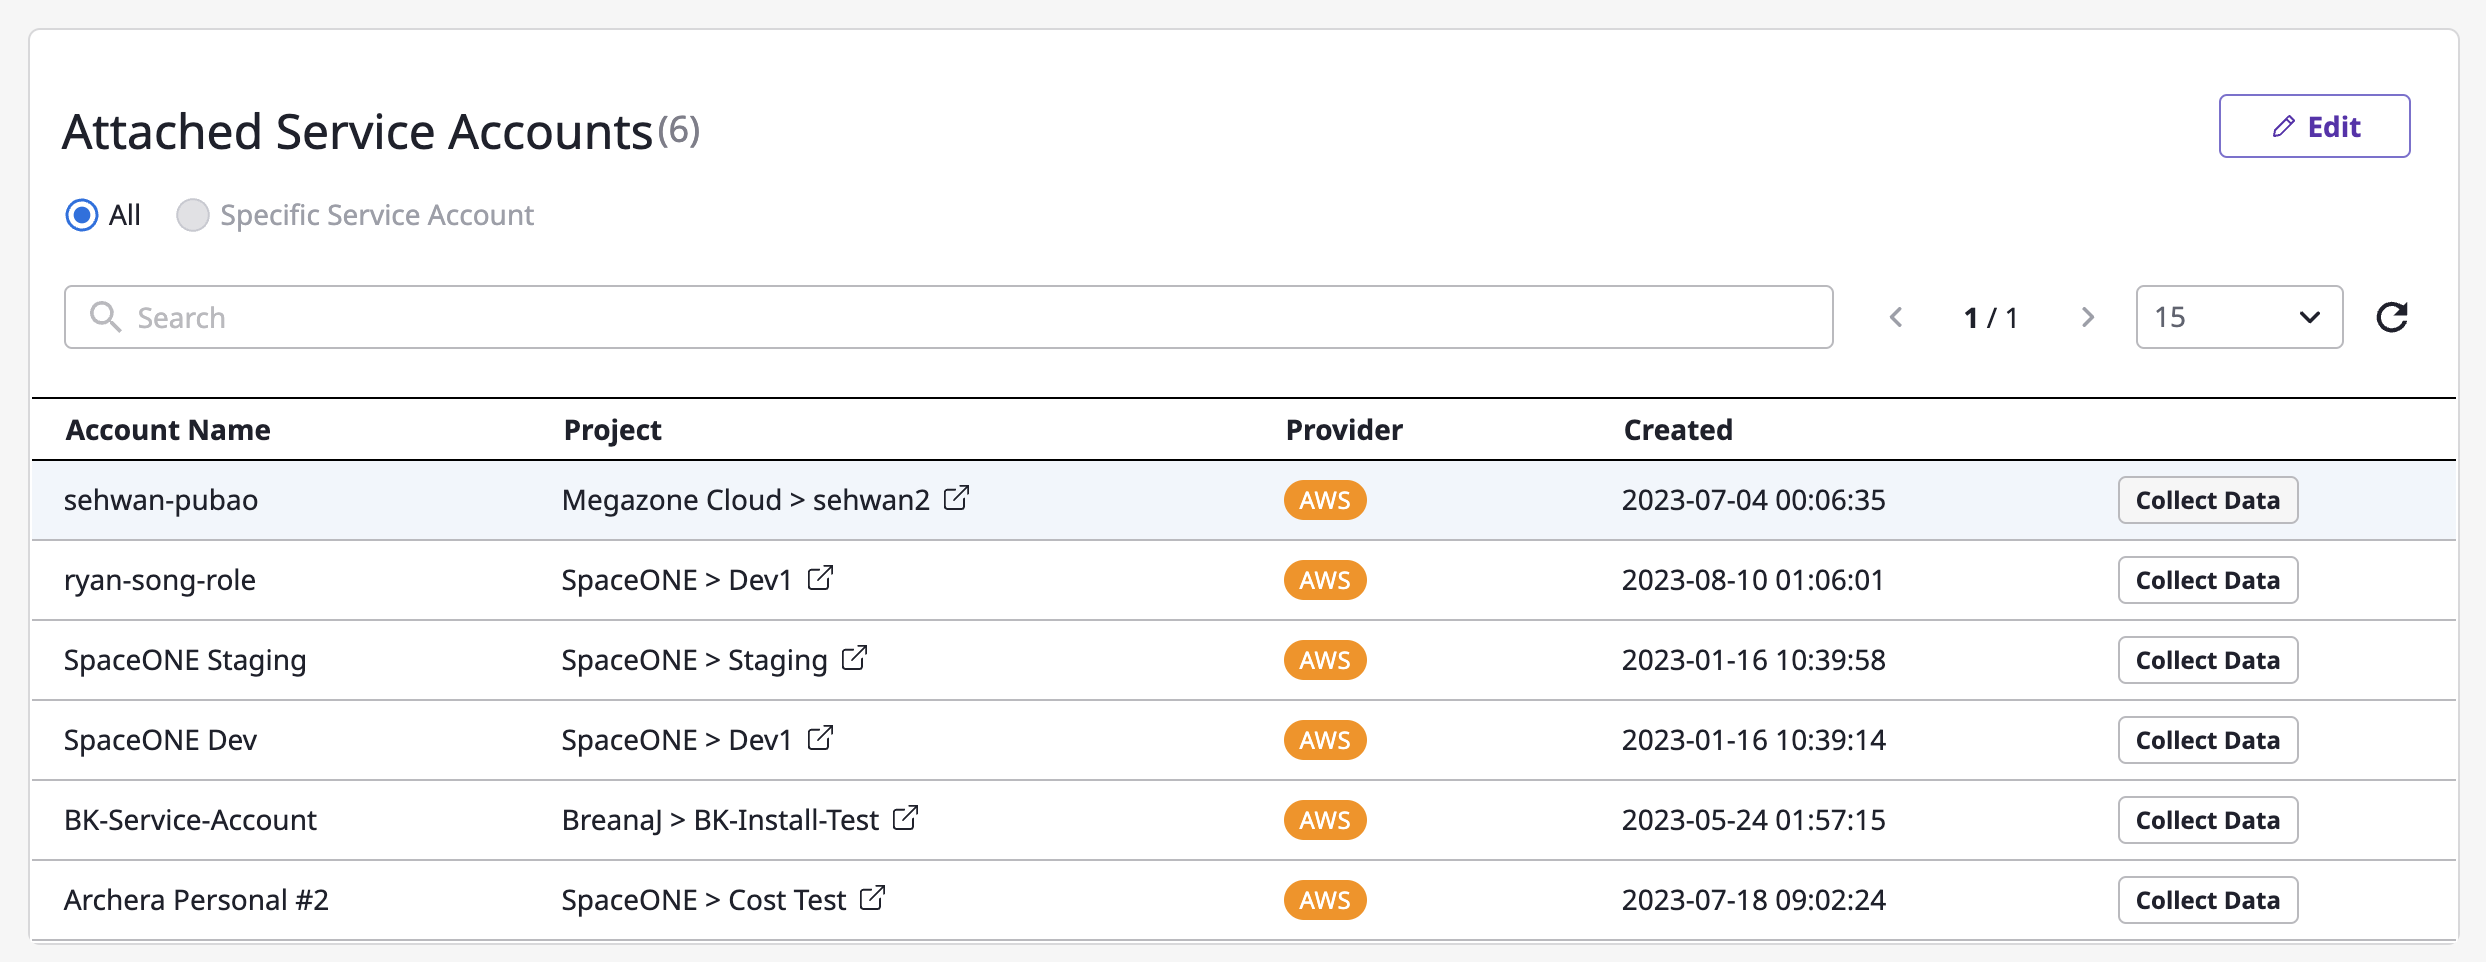
(1) Select a collector from the collector list page, and go to detail page.
(2) You can find the list of attached service accounts on the bottom of detail page.
Service account
Service account has access information for the provider account required for data collection.
If no information can be found here, this means there is no account information for accessing the provider, and as a result, no data collection occurs even when the collector is running.
Therefore, to collect data with a collector, you must first register the account information of the provider in the [Service account] menu.
(3) In order to start data collection, Click the [Collect Data] button on the right side of the service account for which you want to collect data.
Checking data collection history
You can check your data collection history on the Collector history page.
You can go to the collector history page by clicking the [Collector history] button at the top of the collector page.

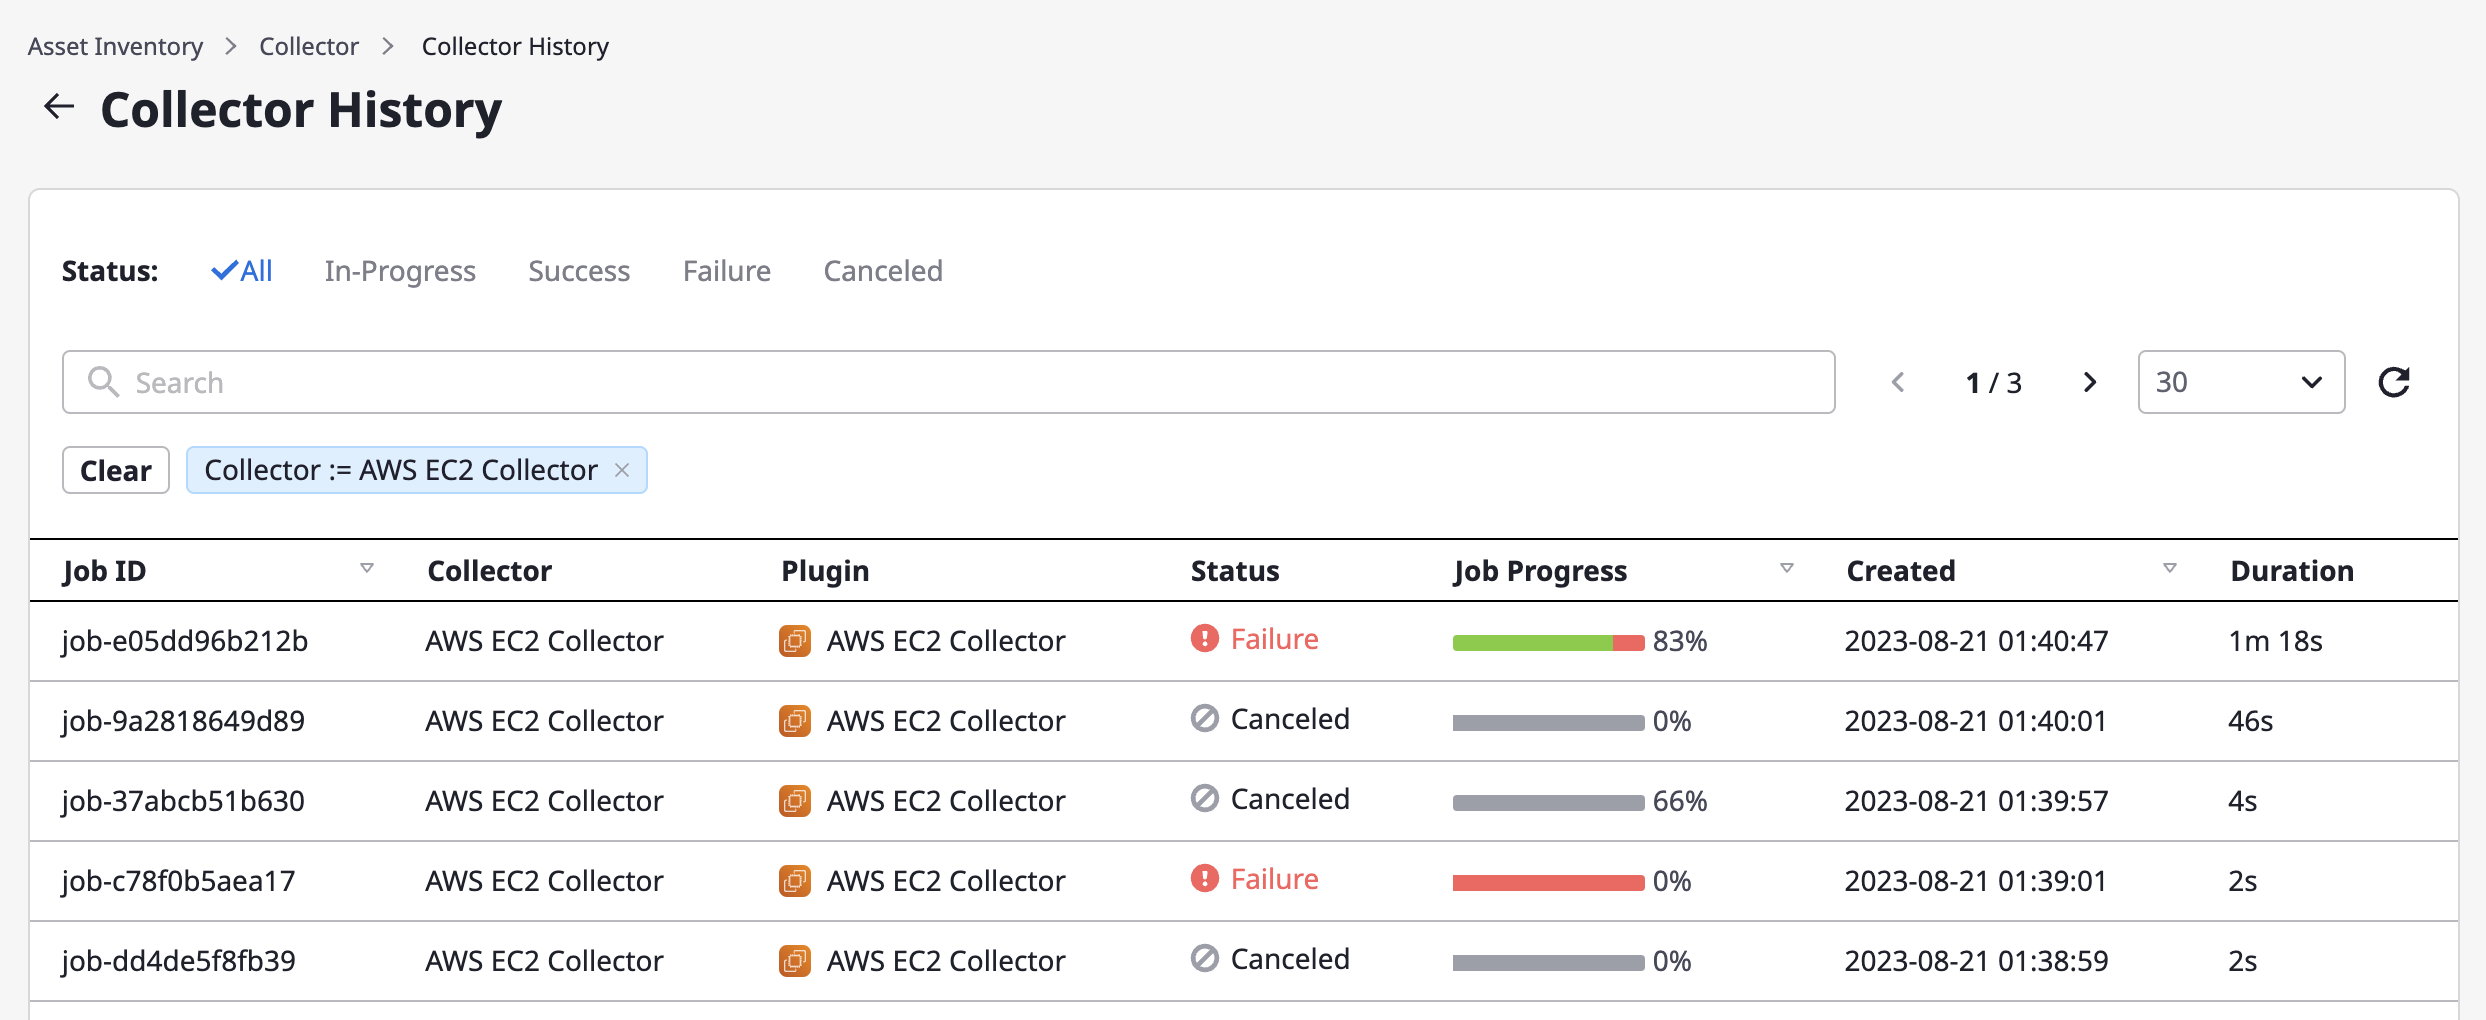
Checking the details of data collection history
If you select a collection history from the list of data collections above, you will be taken to the collection history details page.
You can check data collection status, basic information, and Collection history by service account.

Checking collection history for each service account
When you run the collector, each collection is performed for each associated service account.
Here you can find information about how the collection was performed by the service account.
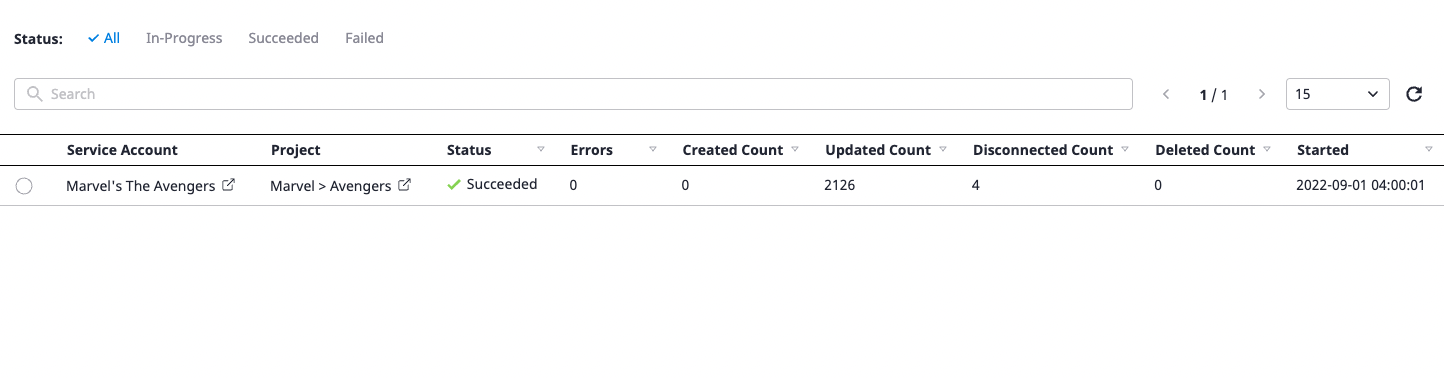
Key field Information
- Created Count: The number of newly added resources
- Updated Count: The number of imported resources
- Disconnected Count: The number of resources that were not fetched
- Deleted Count: Number of deleted resources (in case of a resource failing to fetch multiple times, it is considered deleted.)
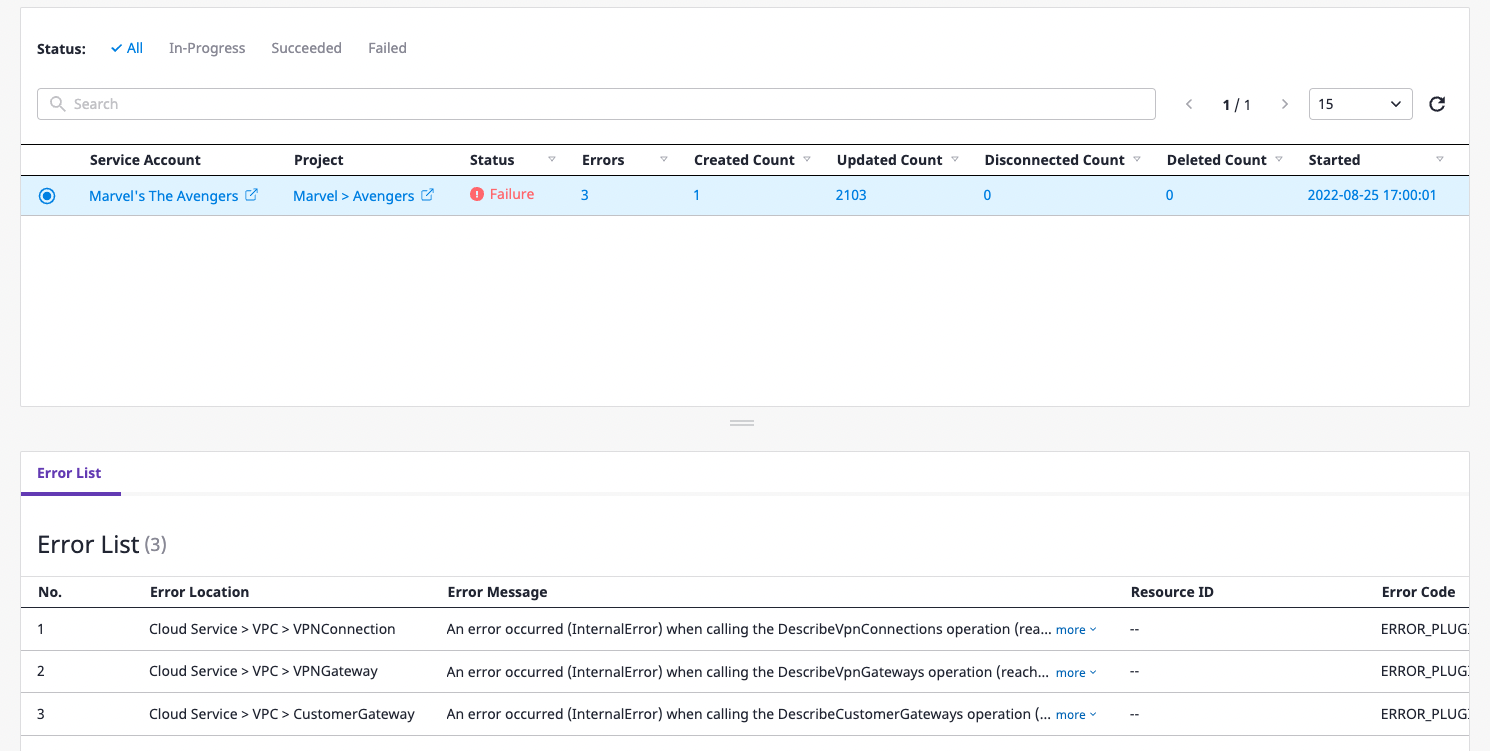
Check the content of collection errors
(1) Select the item you want to check for error details from a list of collections for each account.
(2) You can check the details of errors in the [Error list] tab below.
5 - Service account
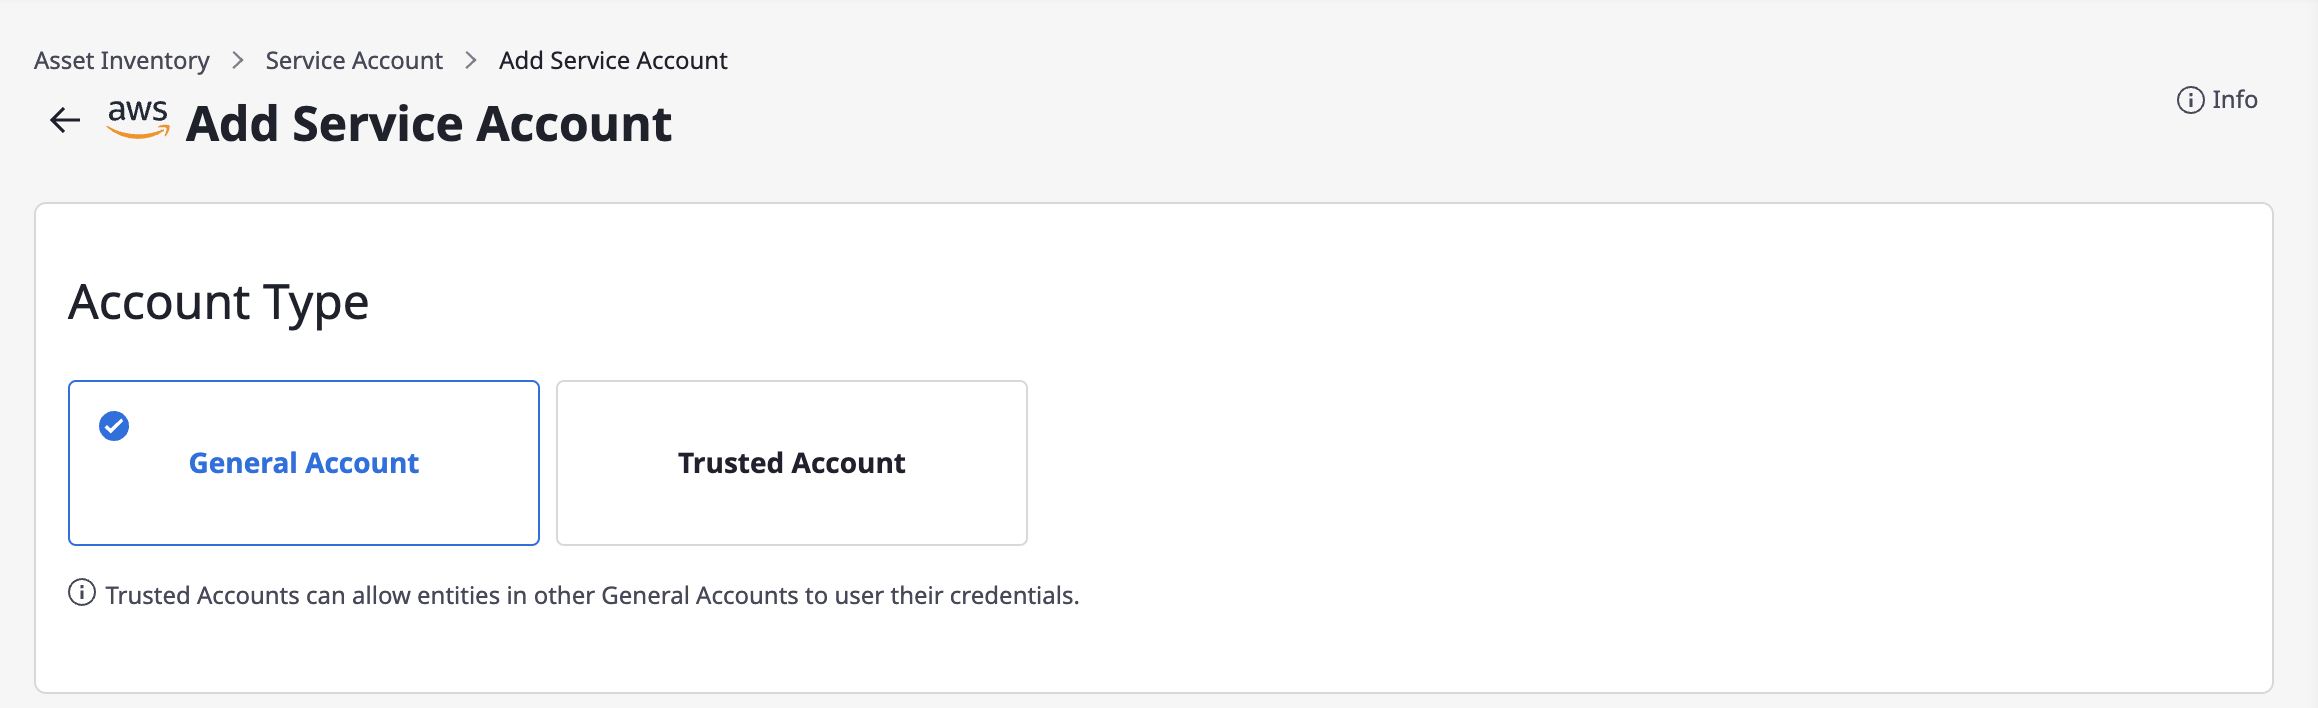
Add service account
There are two types of service accounts for different needs and better security.
General Account:Option 1) You can create account with its own credentials.
Option 2) Create account using credentials from an existing
Trusted Account.Option 3) You can also create account without credentials.
Trusted Account:You can create an account that enables trusted access,
then other general accounts can refer to its credential key by attaching it.
Create General Account
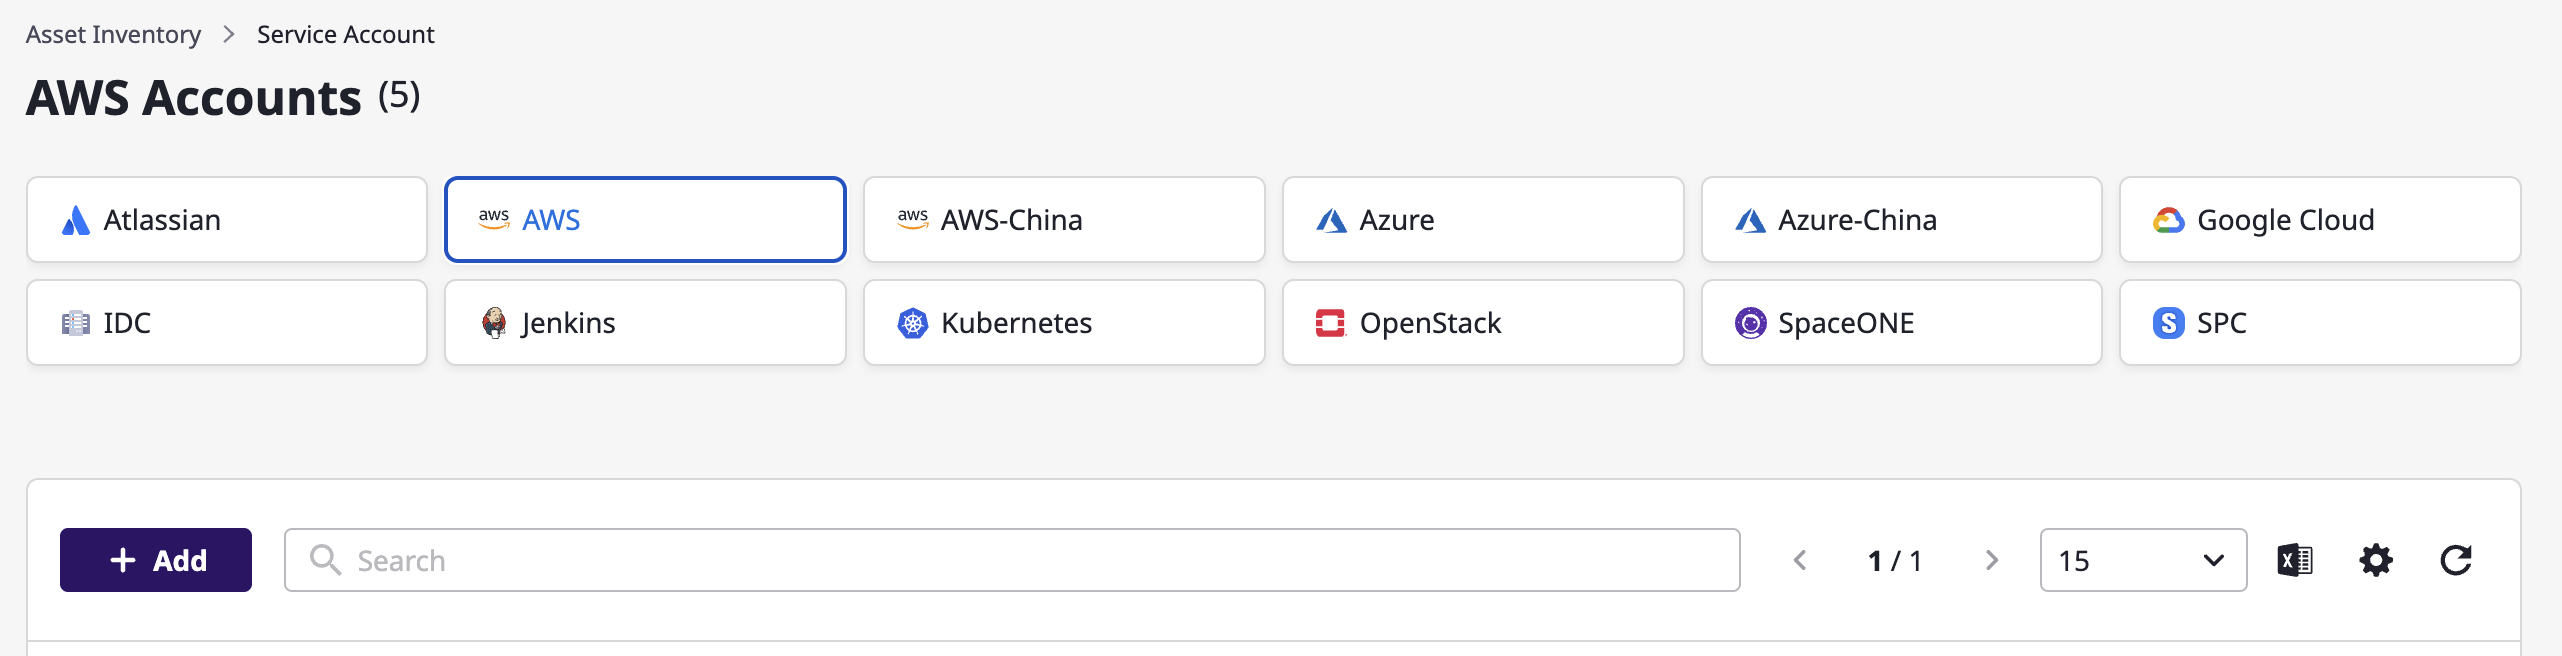
(1) On the [Asset inventory > Service account] page, select the cloud service you want to add.

(2) Click the [Add] button.

(3) Fill out the service account creation form.
(3-1) Select General Account.
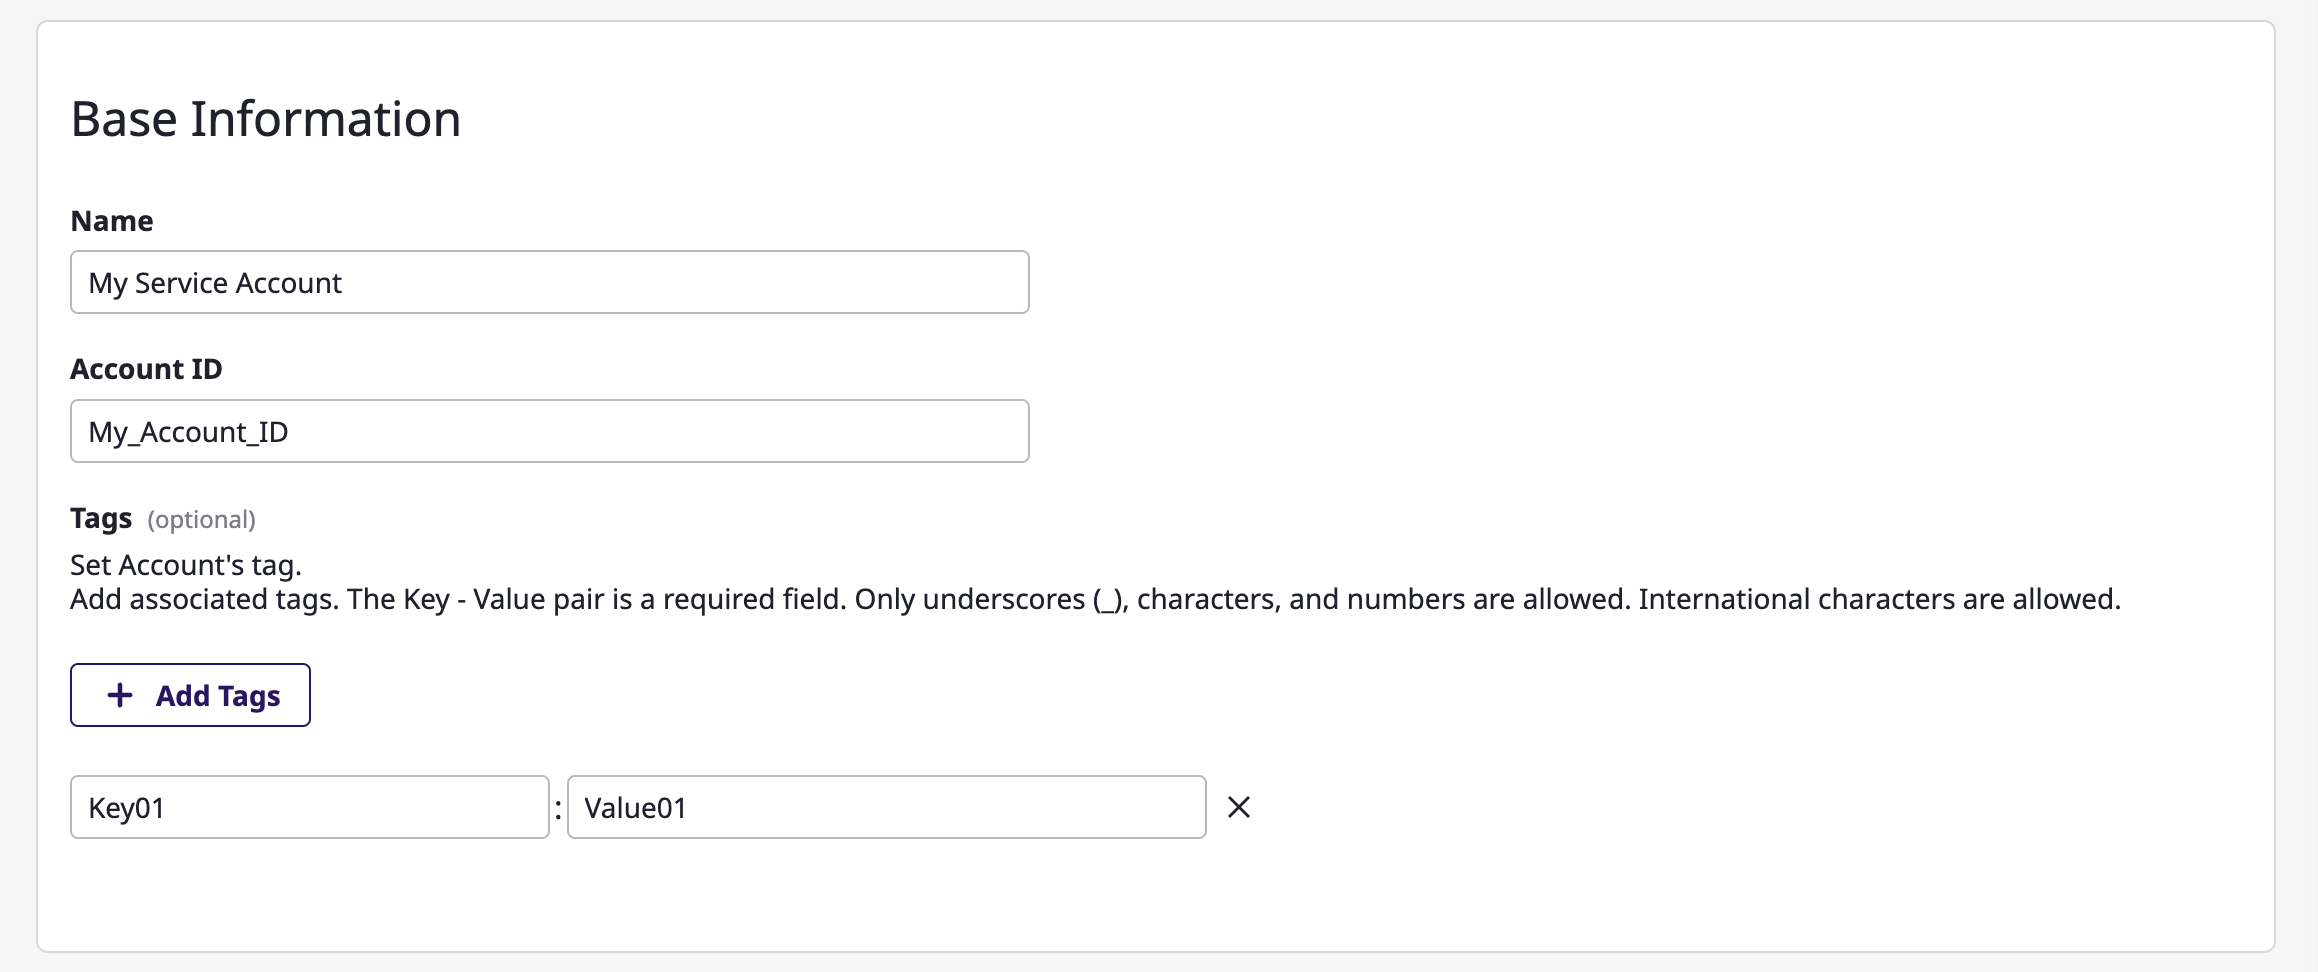
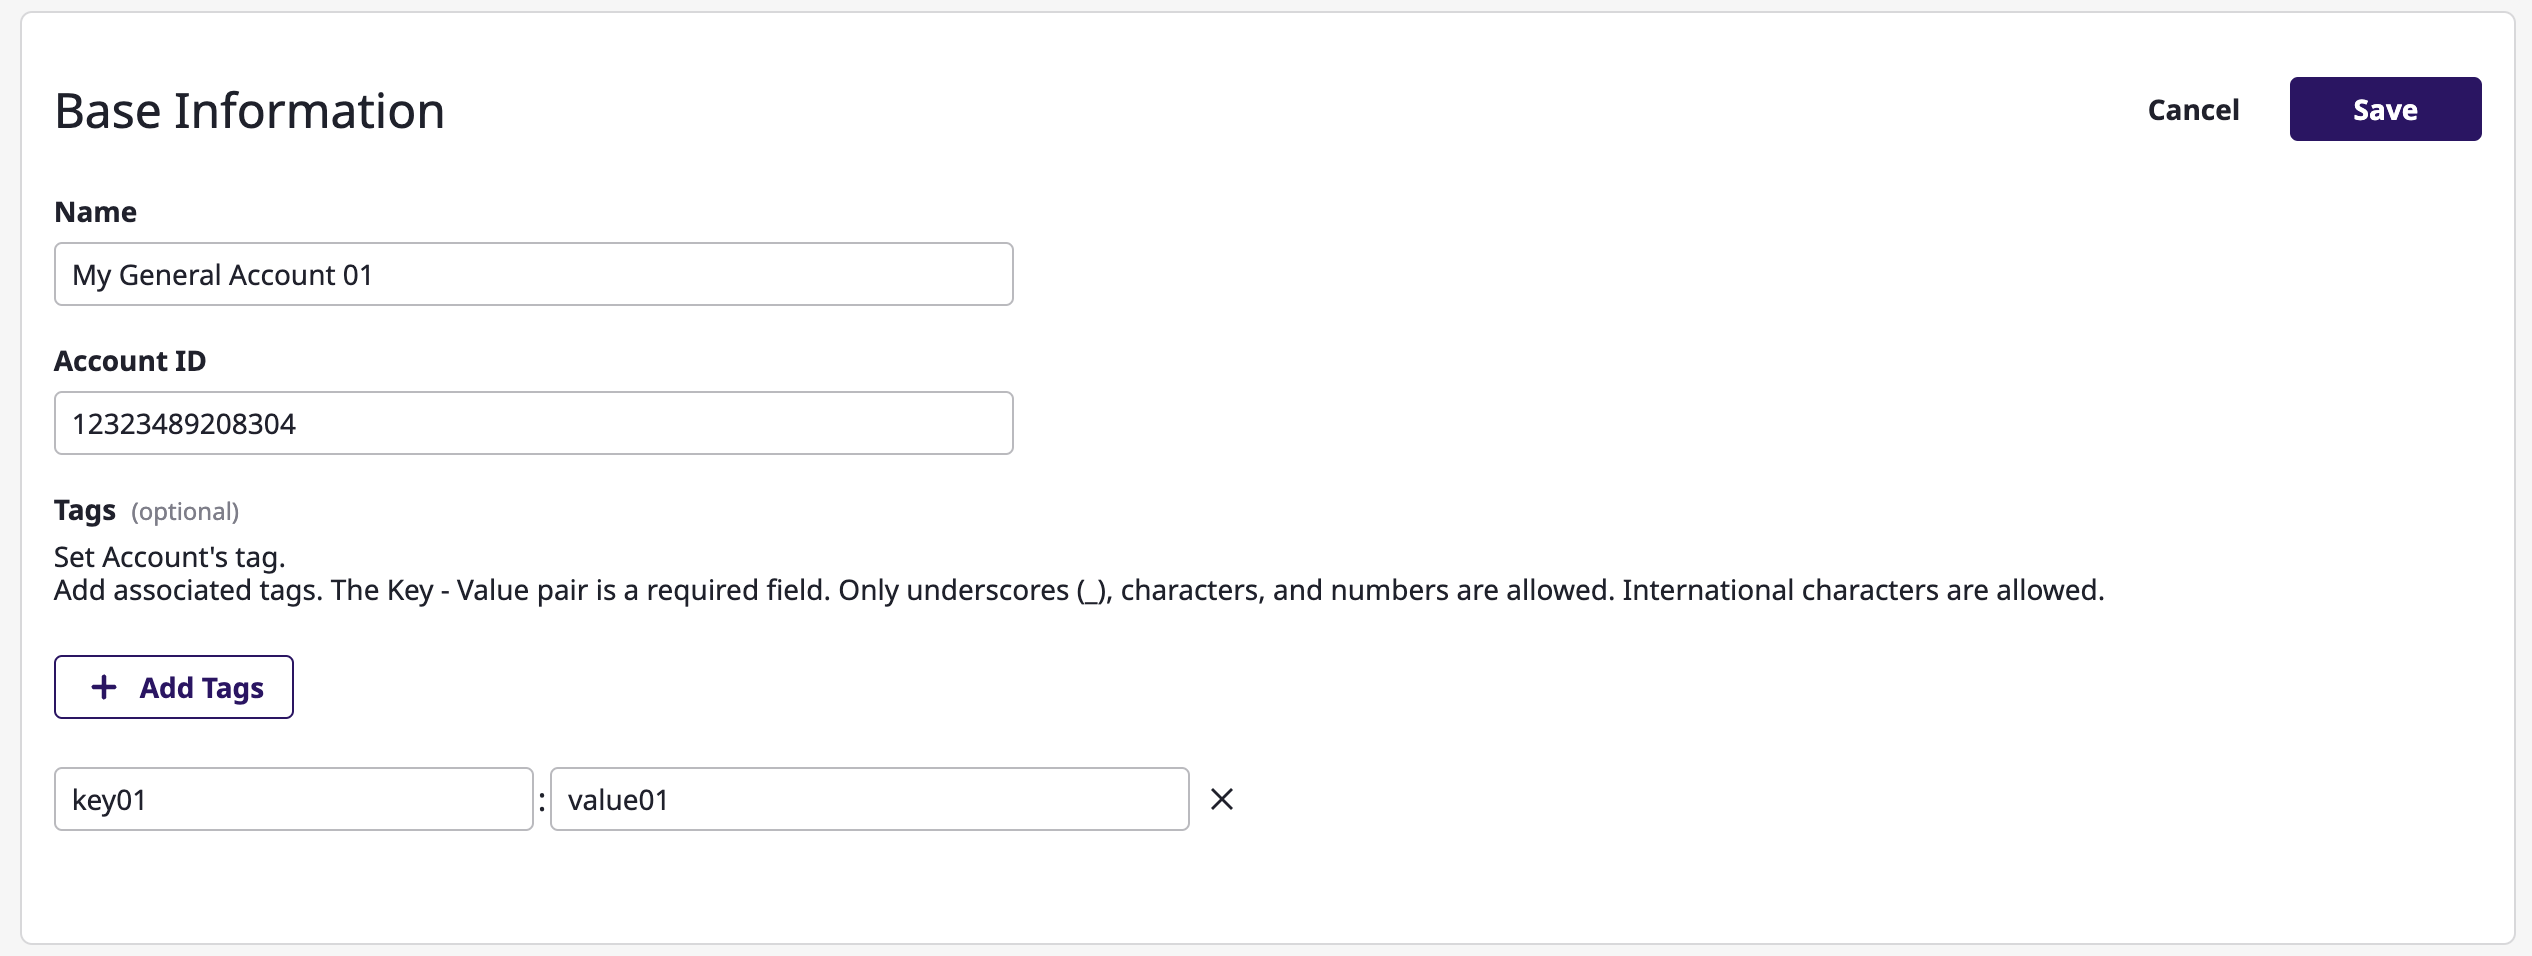
(3-2) Enter basic information.

(3-3) Specify the project to collect resources from according to the service account.

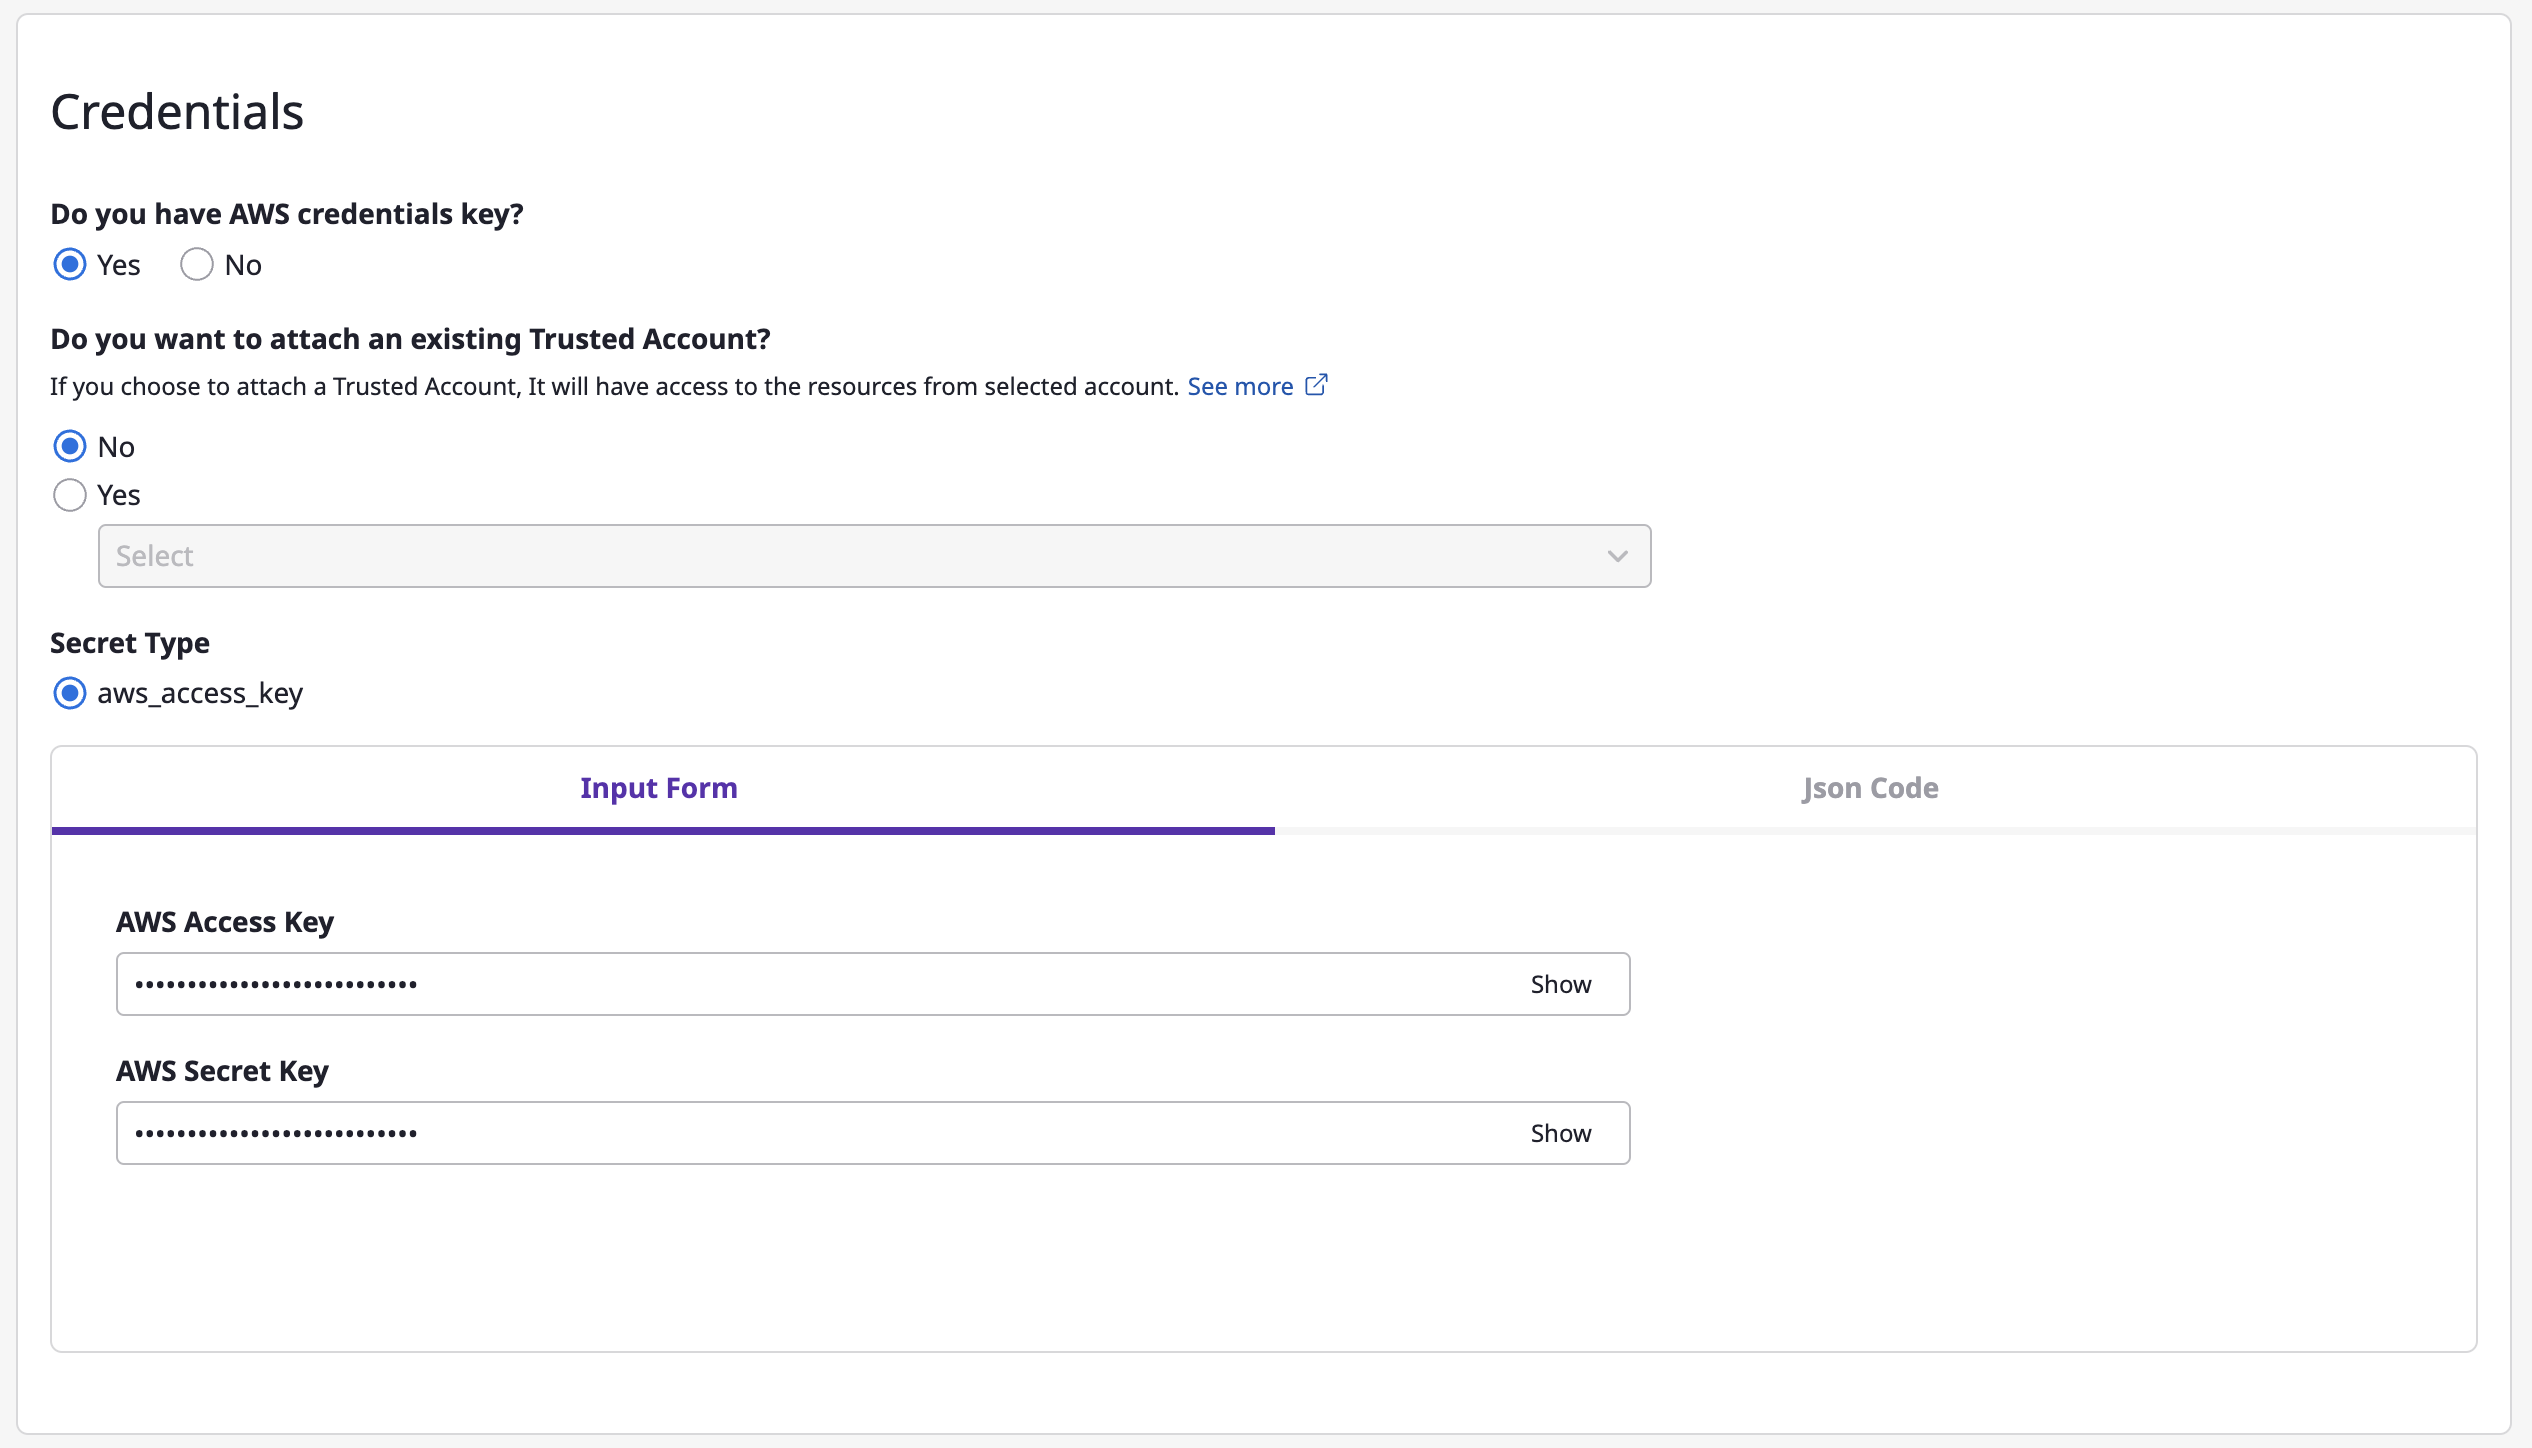
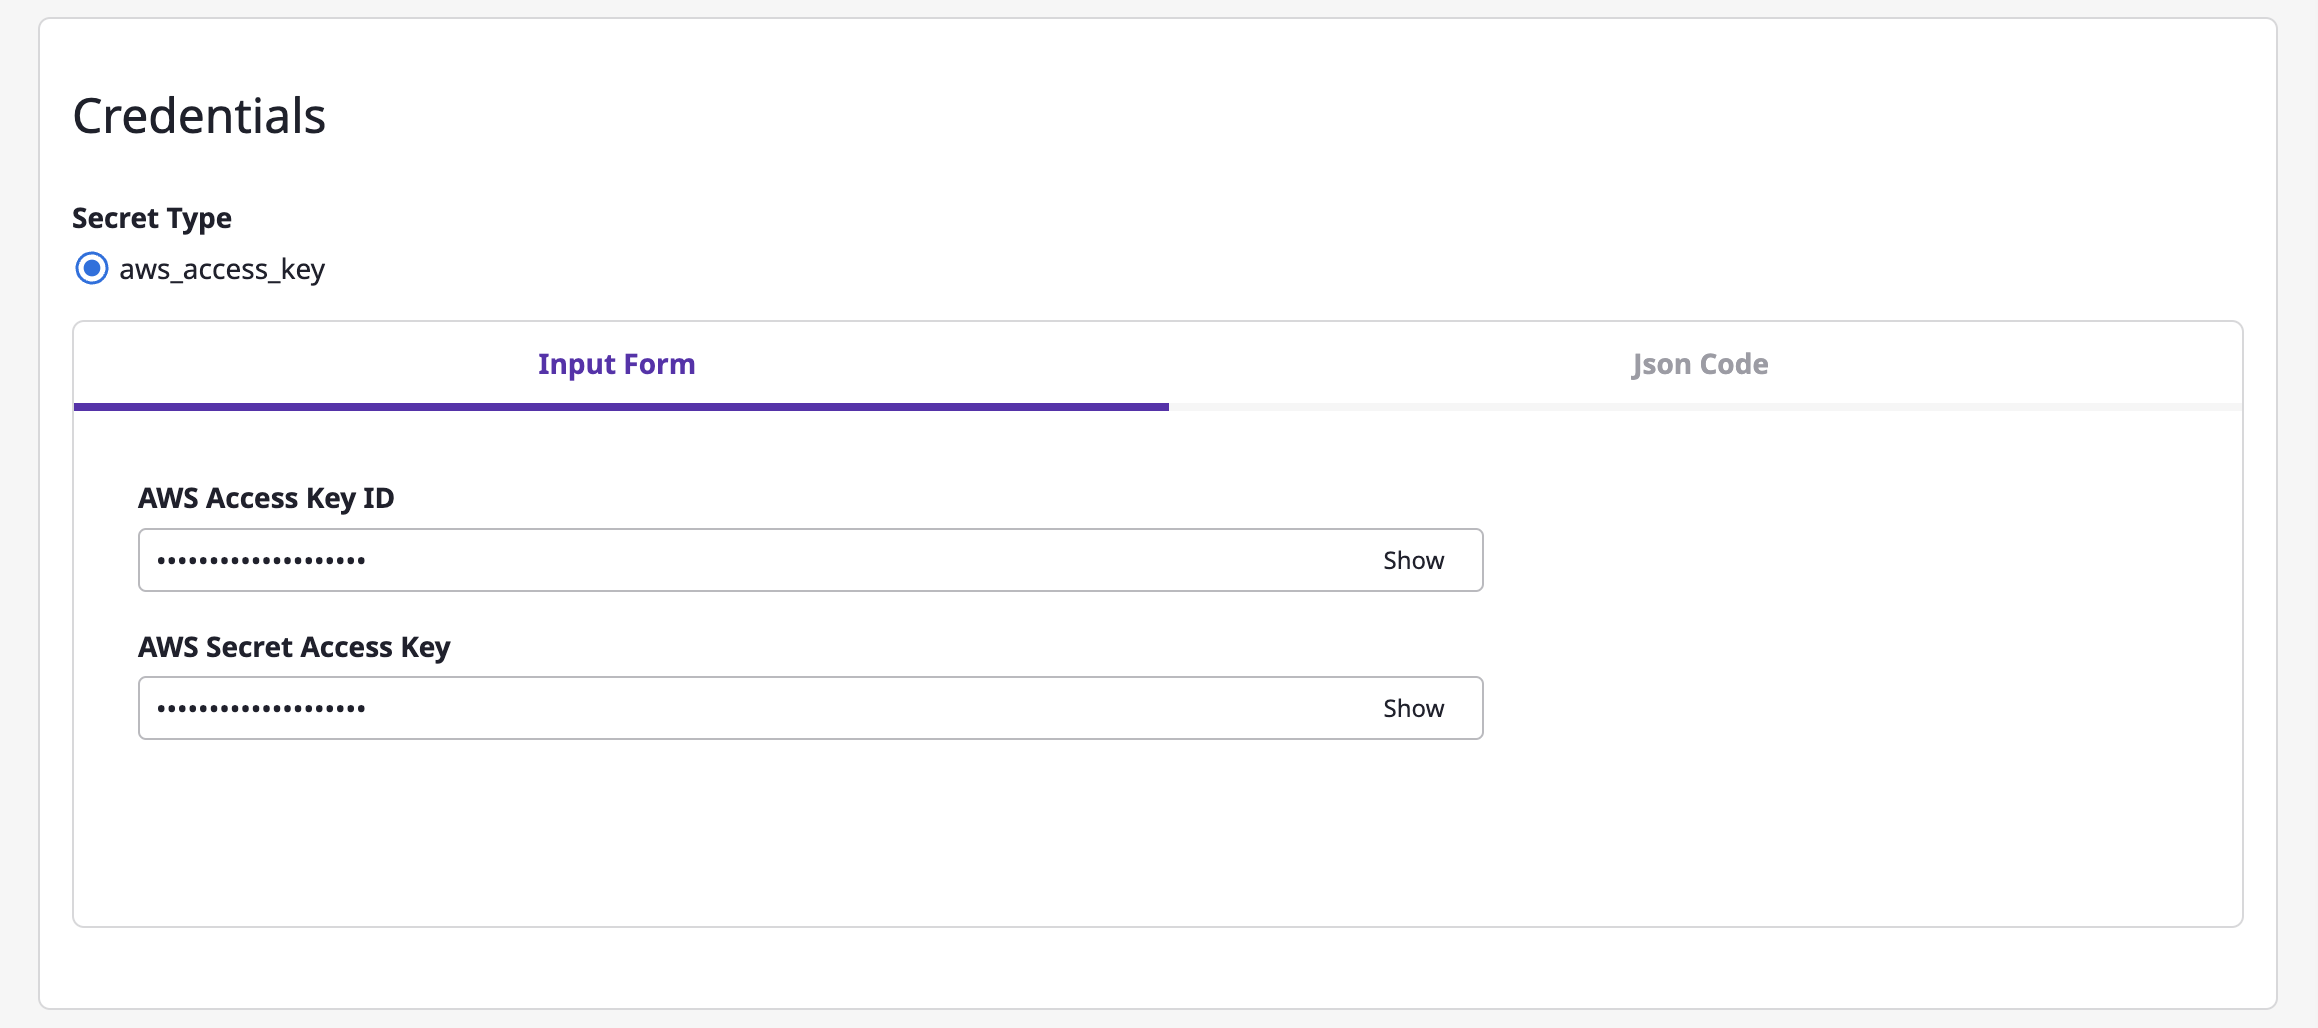
(3-4) Enter encryption key information.
Option 1) You can create account with its own credentials.

Option 2) Create account using credentials from an existing
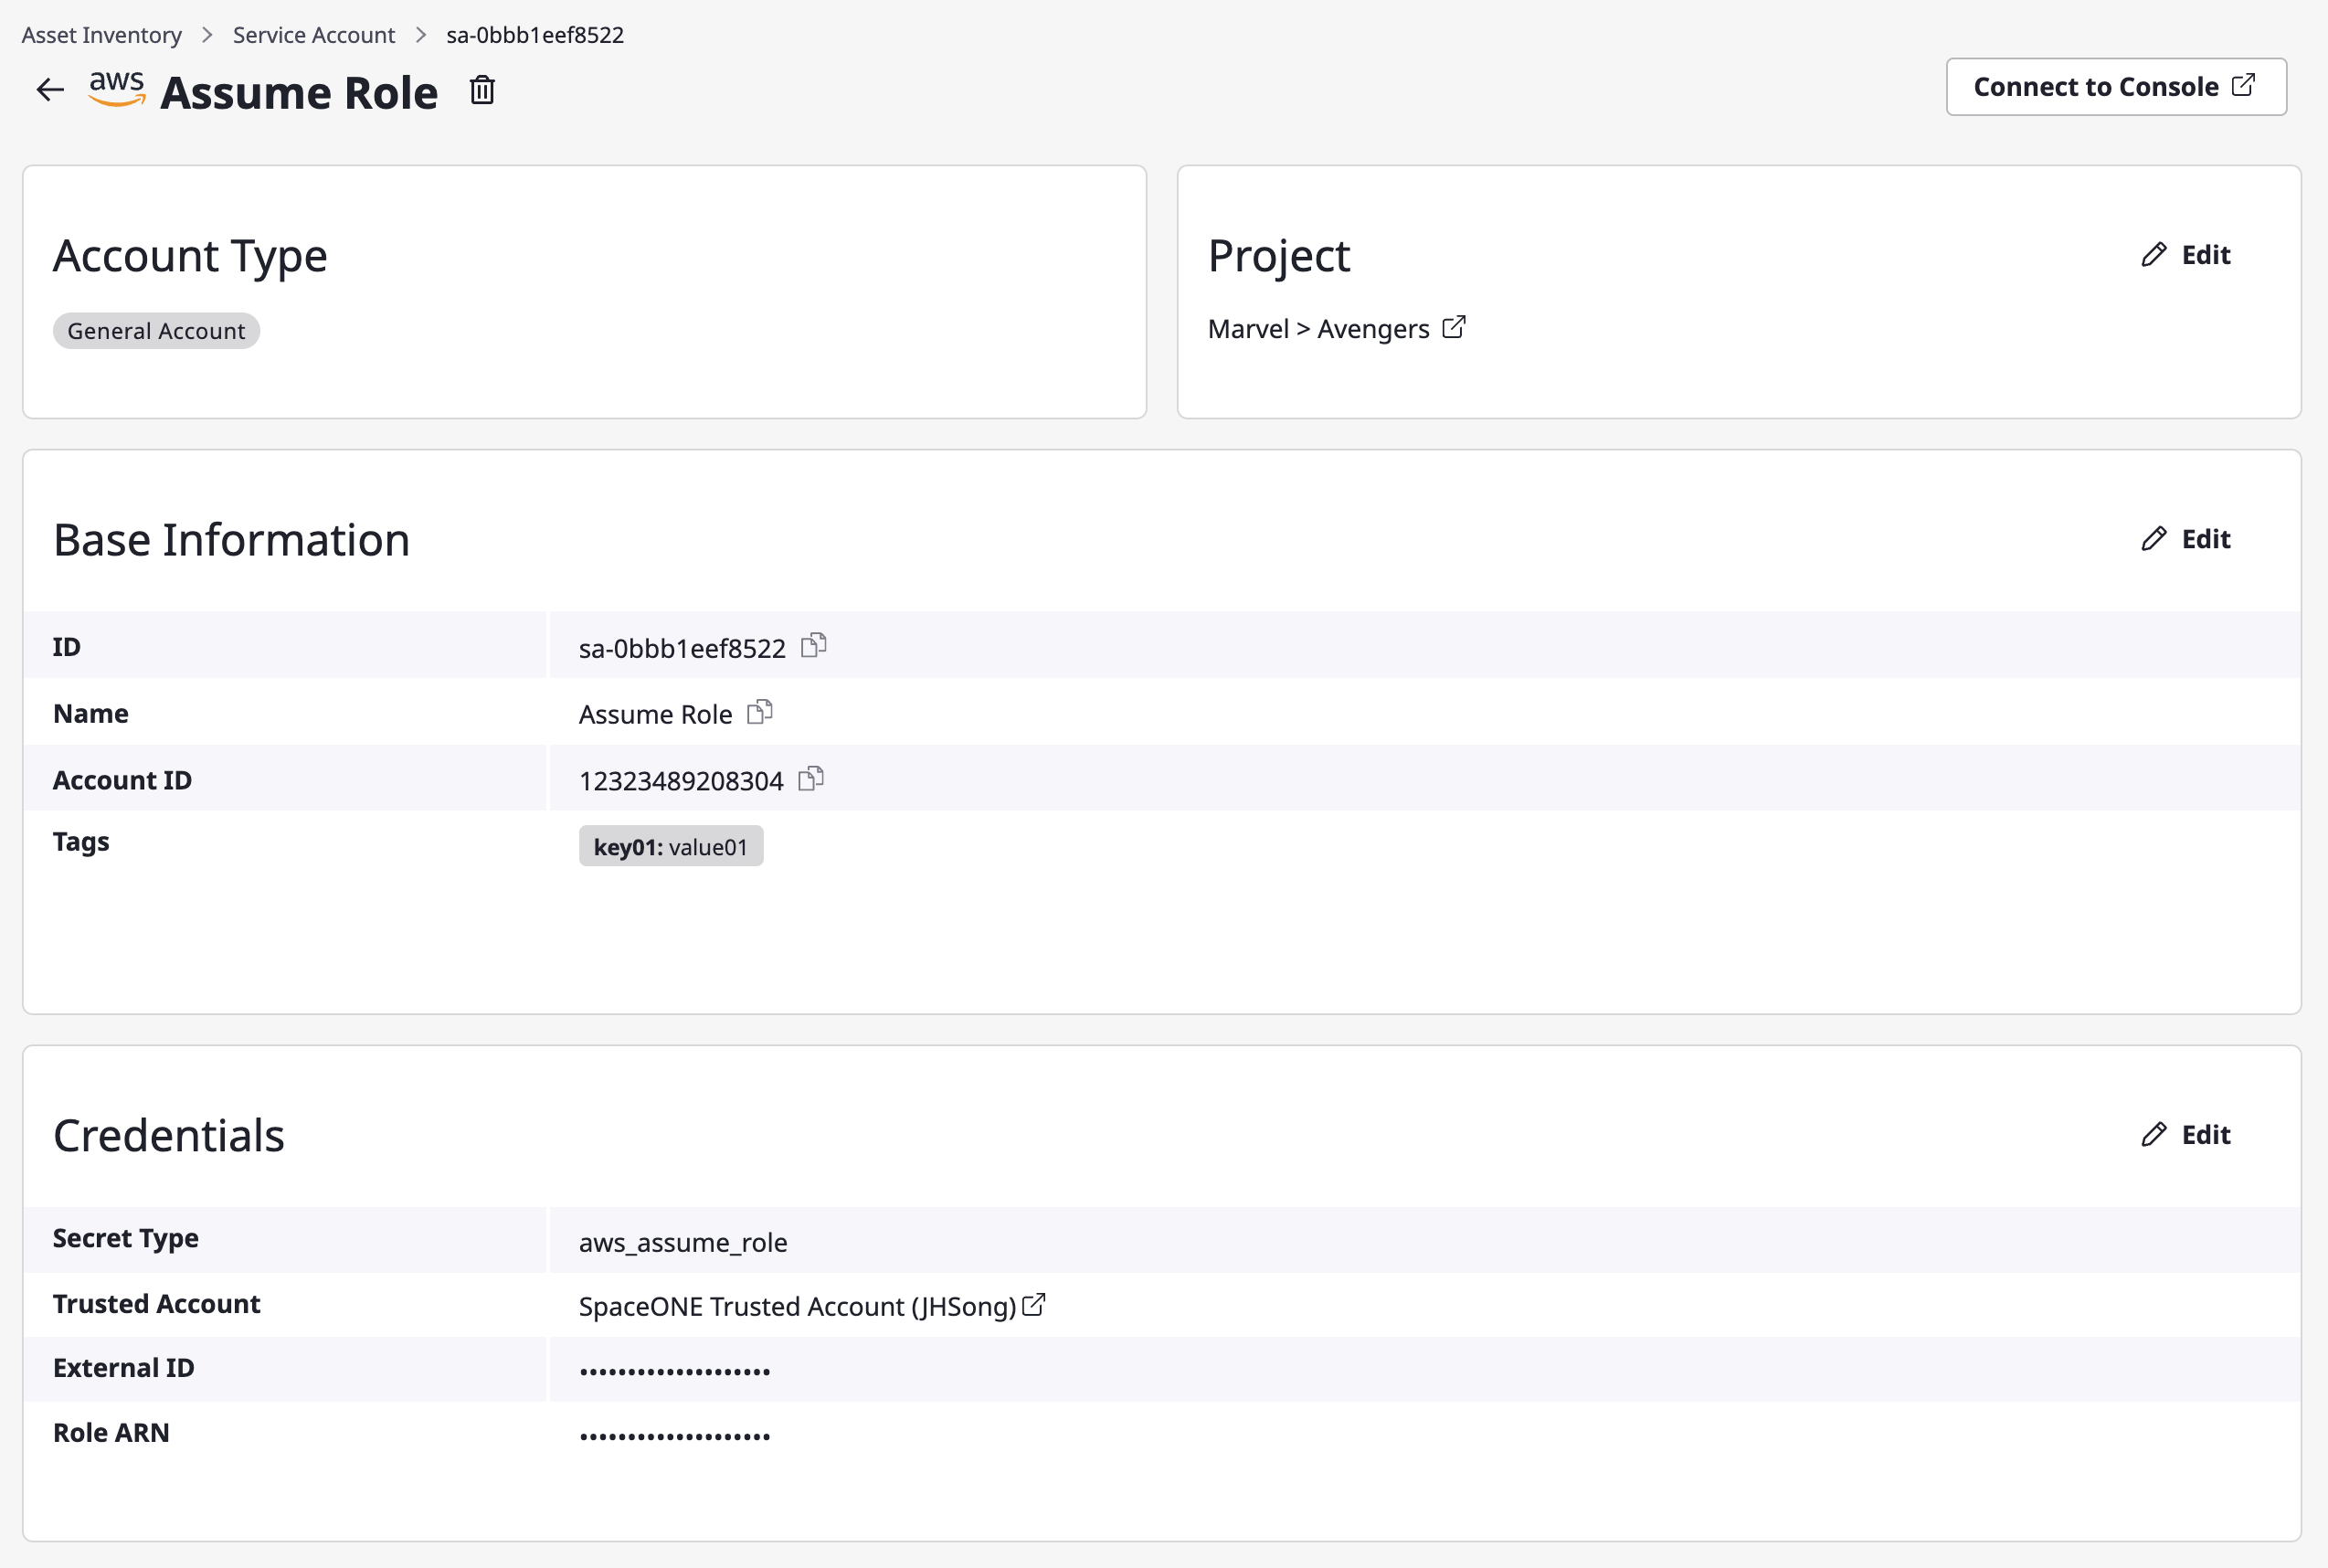
Trusted Account.In the case of AWS, you can easily create Assume Role by attaching an exisiting
Trusted Account. If you select a certainTrusted Account, its credential key will automatically get inserted, then you will only need to enter the rest of information.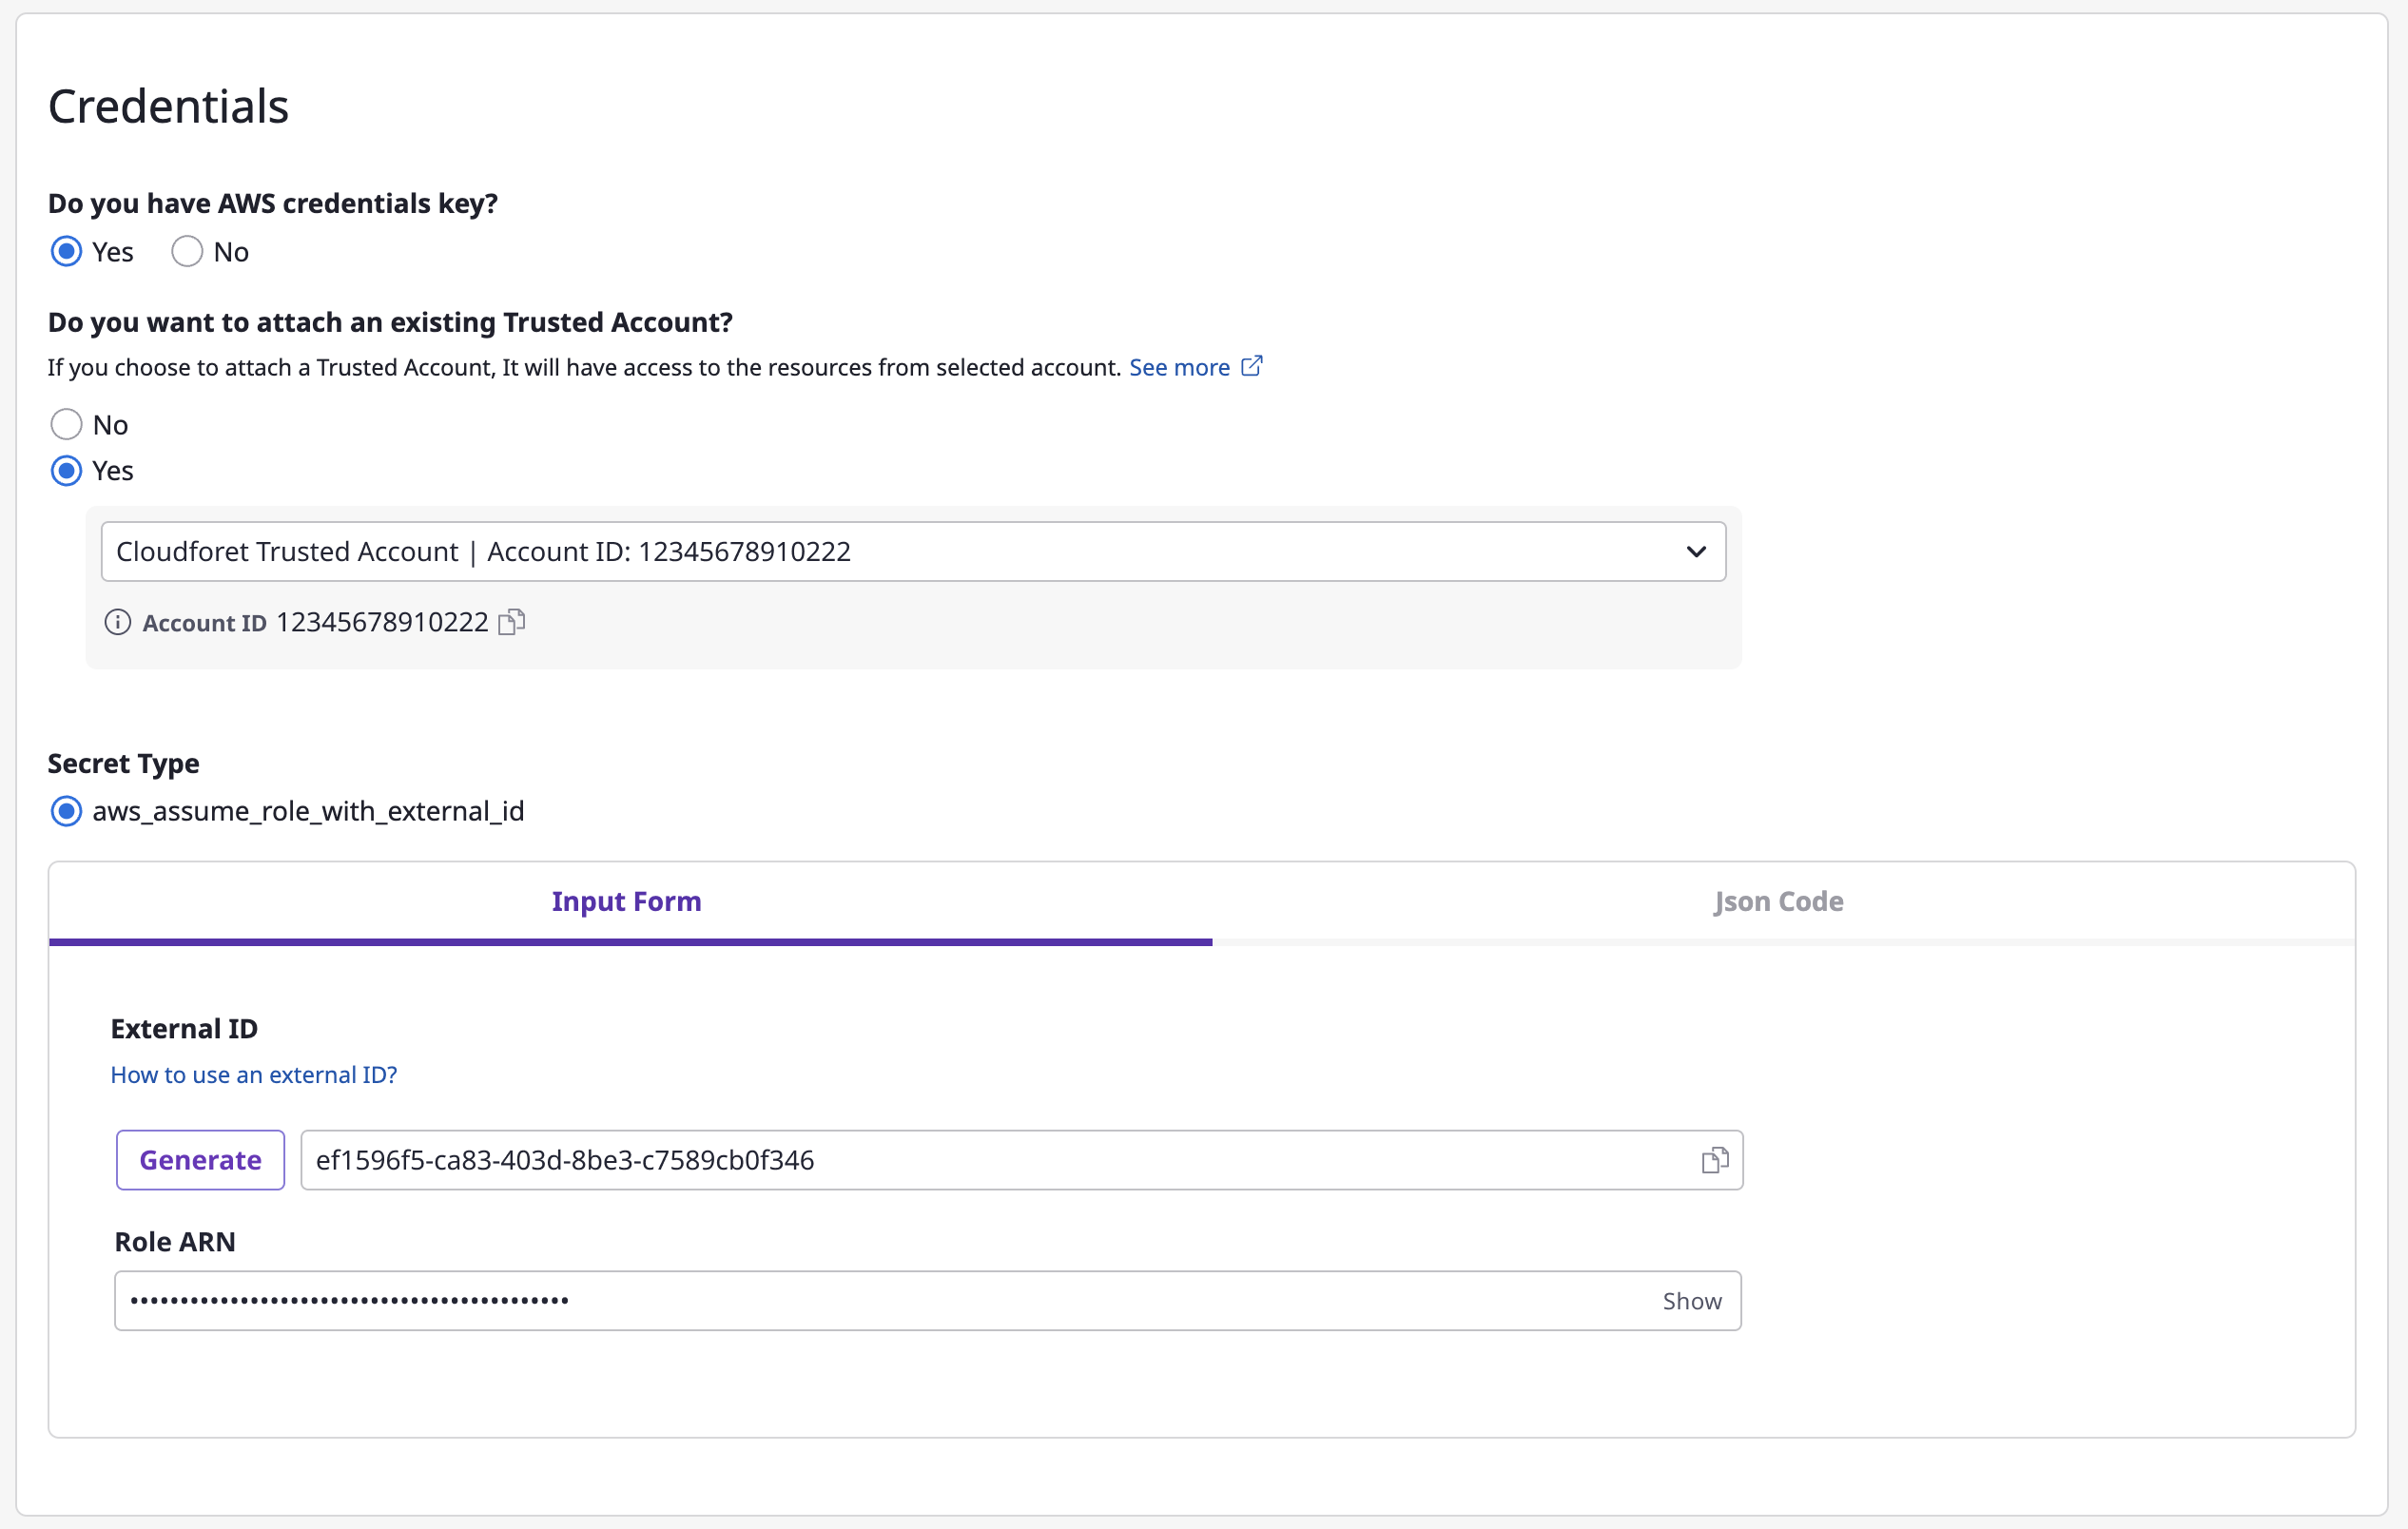
Option 3) You can also create account without credentials.

(4) Click the [Save] button to complete.
Create Trusted Account
(1) On the [Asset inventory > Service account] page, select the cloud service you want to add.
(2) Click the [Add] button.
(3) Fill out the service account creation form.
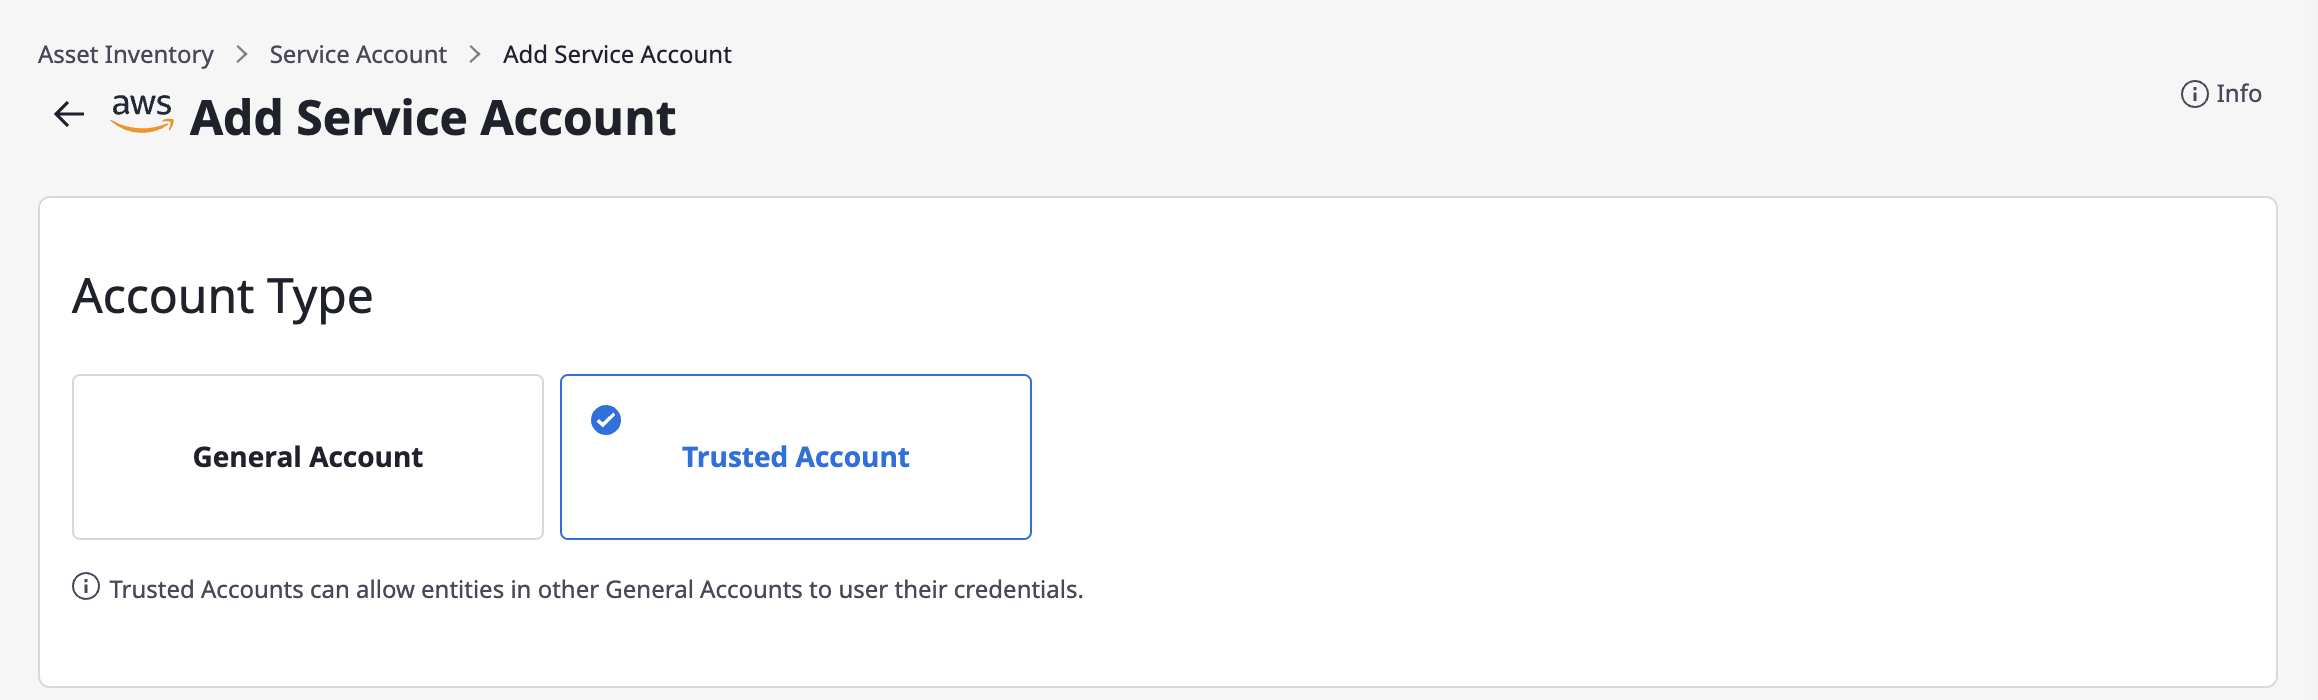
(3-1) Select Trusted Account.
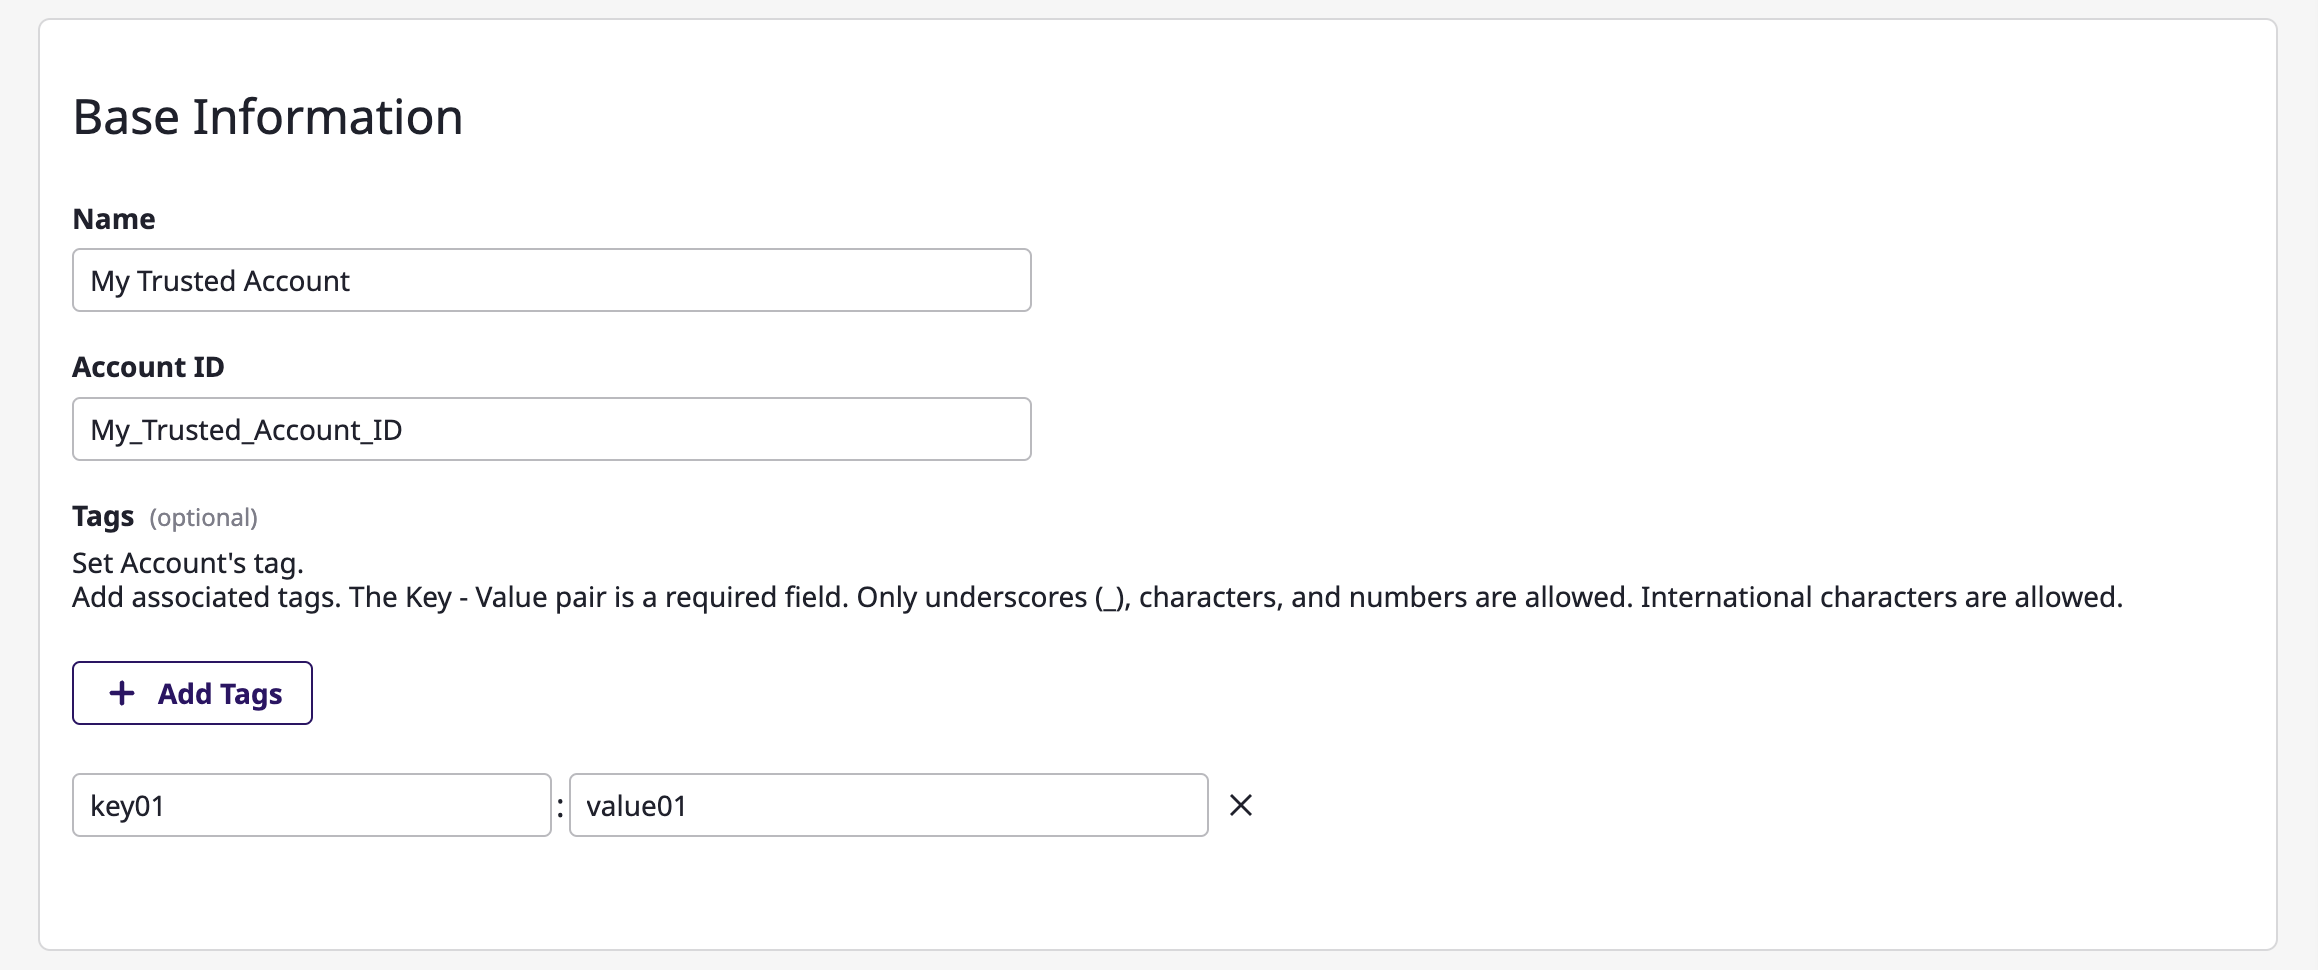
(3-2) Enter basic information.
(3-3) Specify the project to collect resources from according to the service account.
(3-4) Enter encryption key information.
(4) Click the [Save] button to complete.
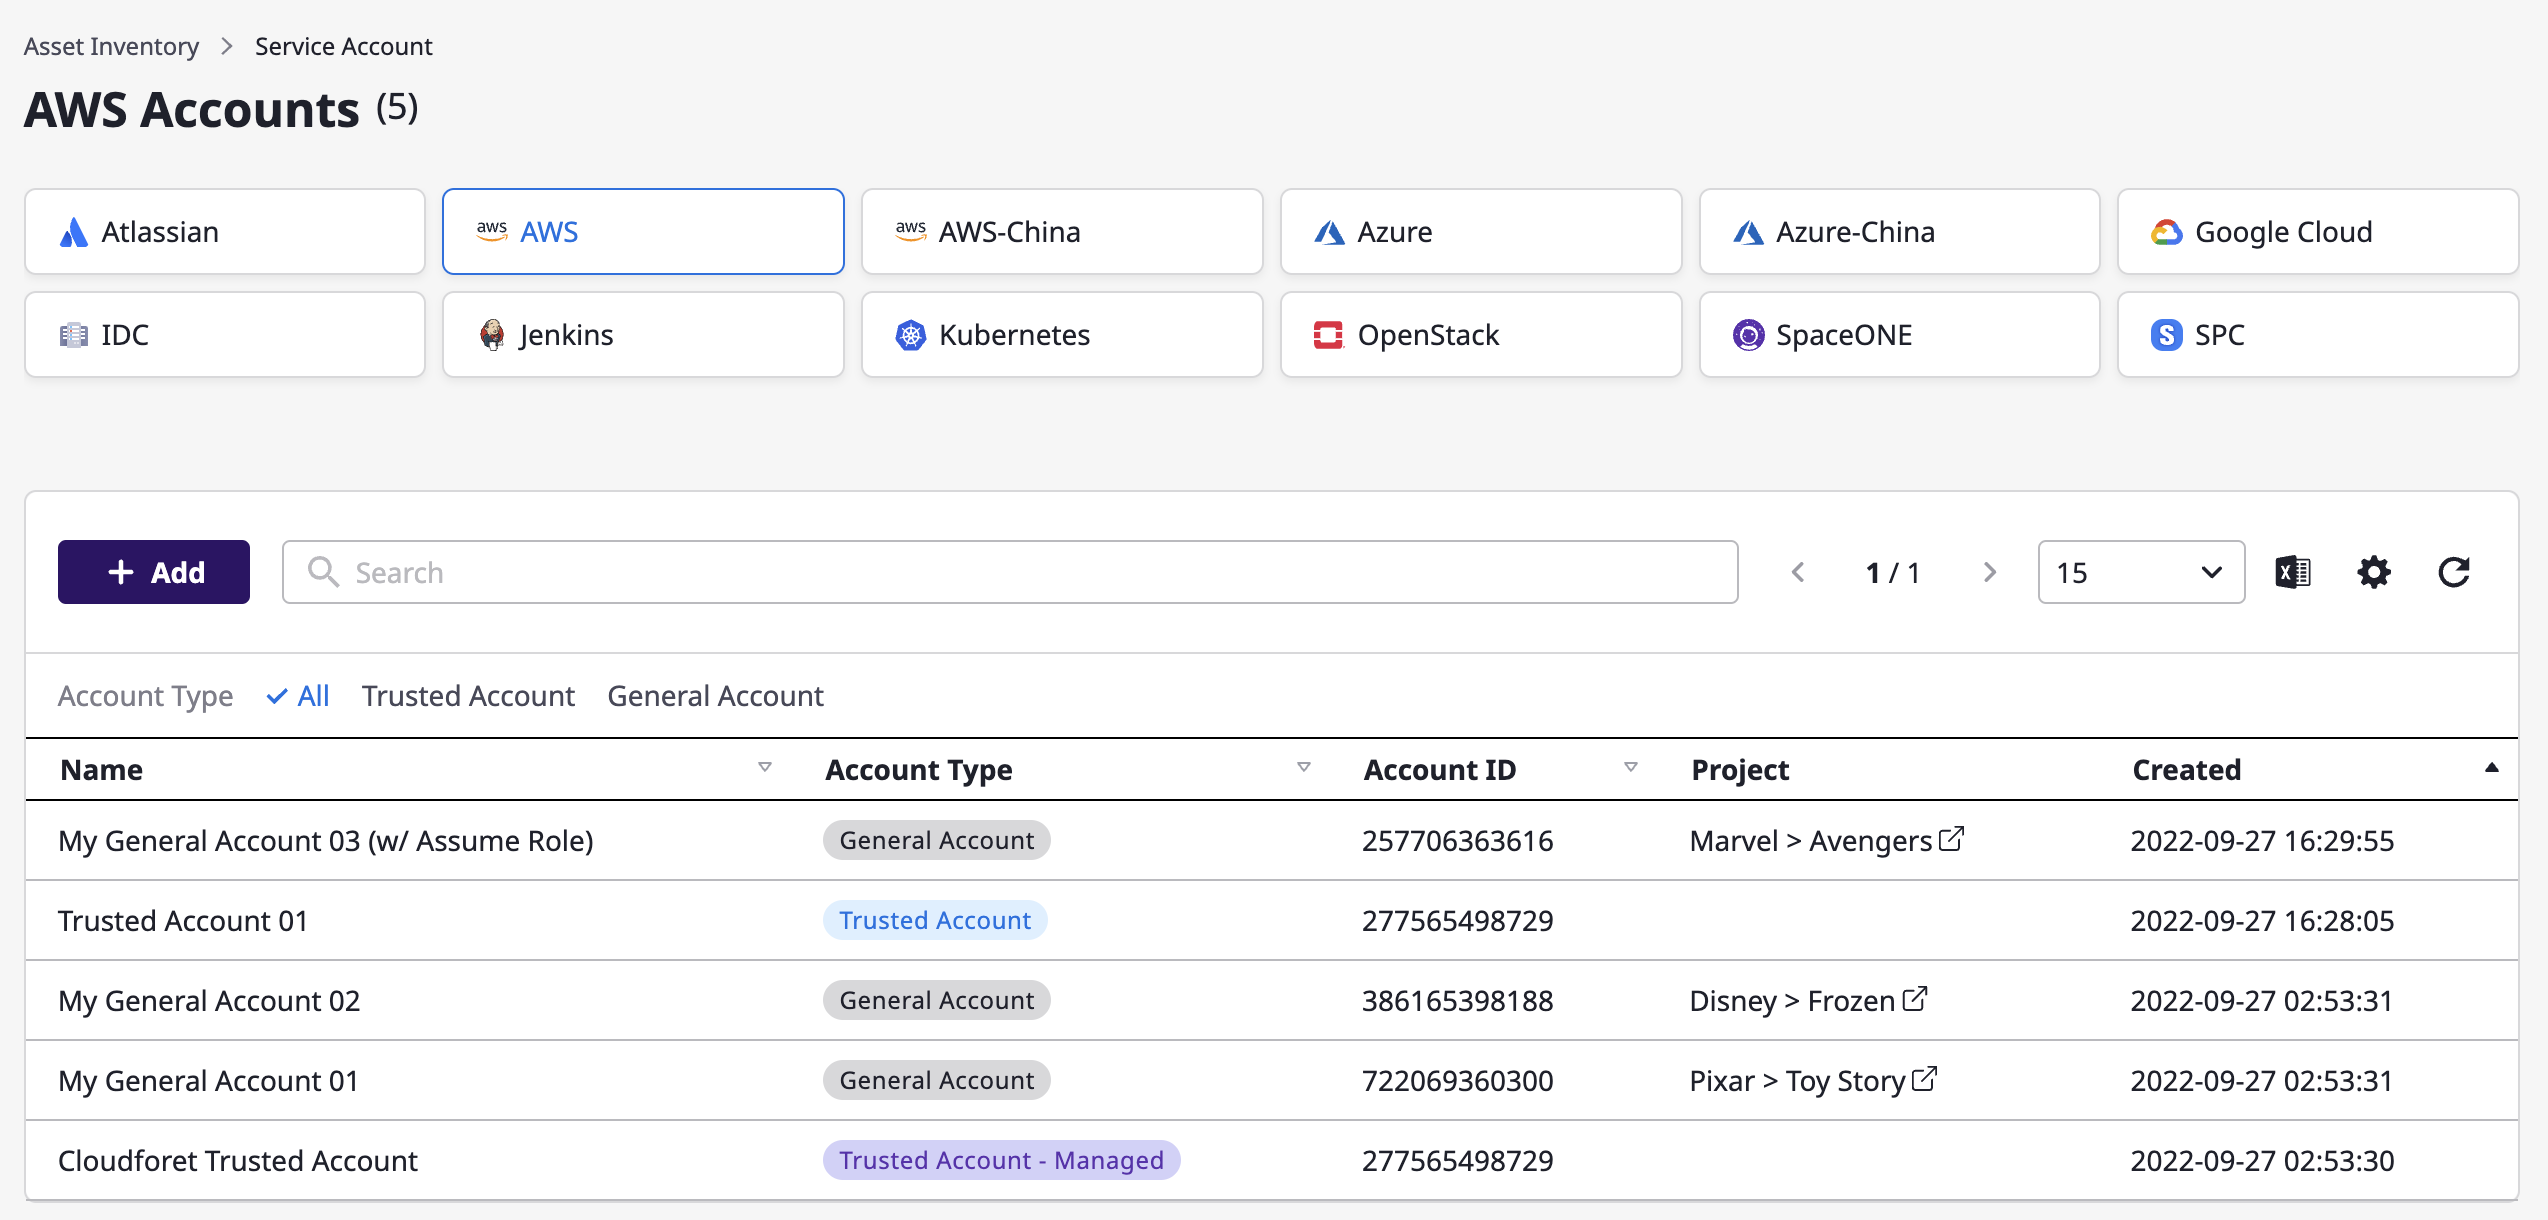
Viewing service account
You can view a list of service accounts that have been added, and when you click a certain account, you can check the detailed information.
Editing service account
Select a service account you want to edit from the list.
Editing each part
You can edit each part of detail information by clicking [Edit] button.

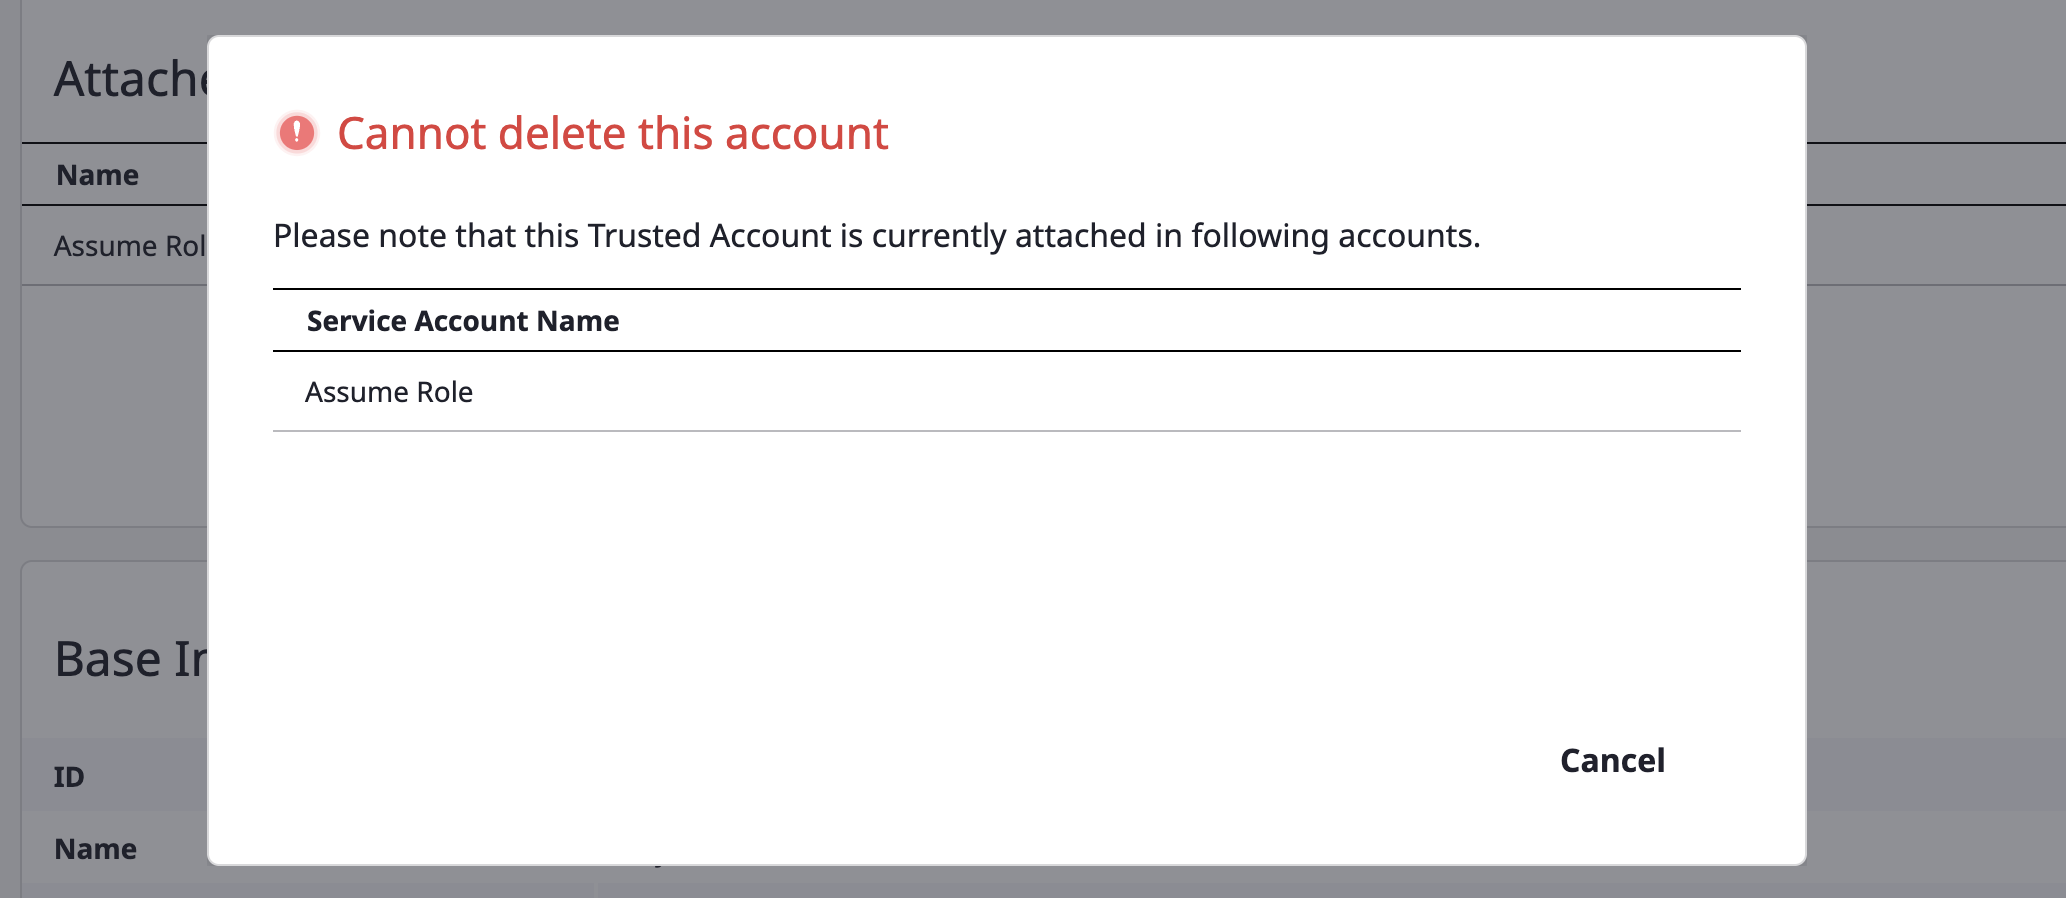
Removing service account
Select a service account you want to remove from the list.
You can delete it by clicking the delete icon button.

If the service account is Trusted Account type and currently attached to more than one General Account, it can't be removed.