This the multi-page printable view of this section. Click here to print.
Project
Create a Project group and a Project on the project page of Cloudforet, and invite your member.
1 - Project
A project must belong to a specific Project group, and there can be no more hierarchies below the project.
Invite a Member to the project and assign a Role that differentiates their access privilege to project resources.
Creating a project
(1) From the [Project group] list on the left side of the [Project] page, select a project group for which you will create a project.
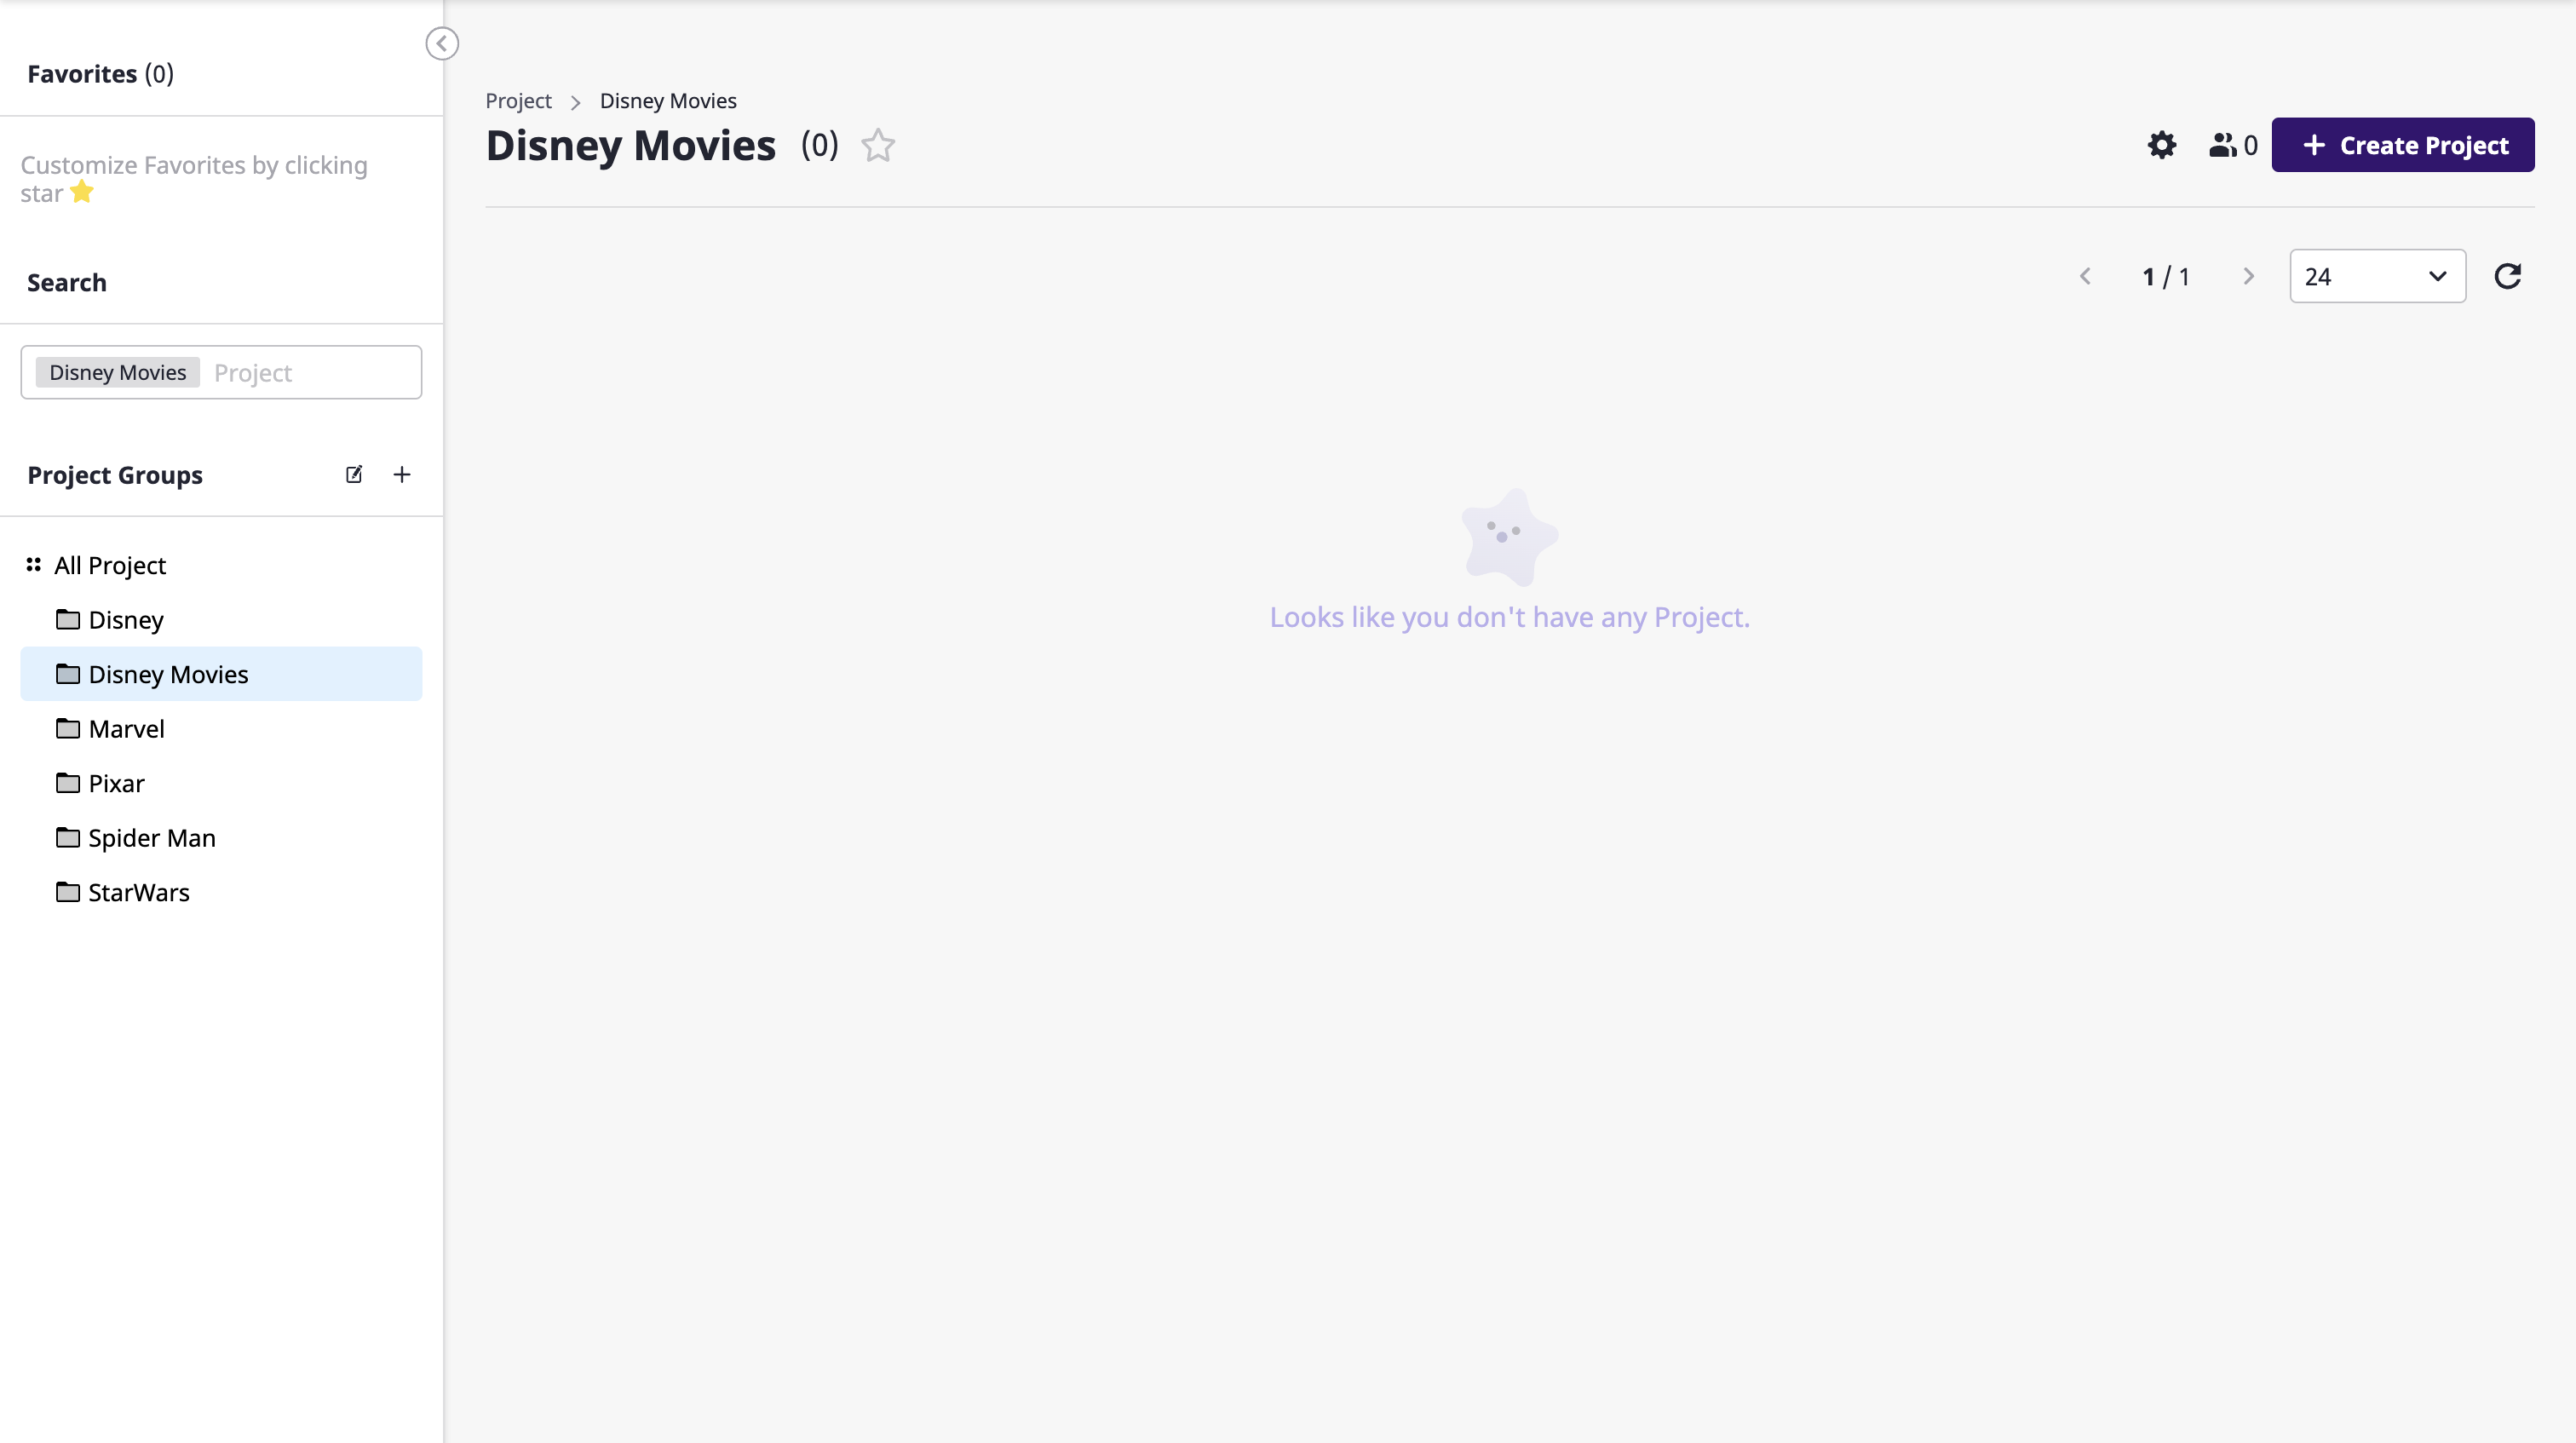
(2) Click the [Create project] button at the top right.
(3) After entering a project name in the [Create project] modal dialog, click the [OK] button to create the project.

Viewing the project list
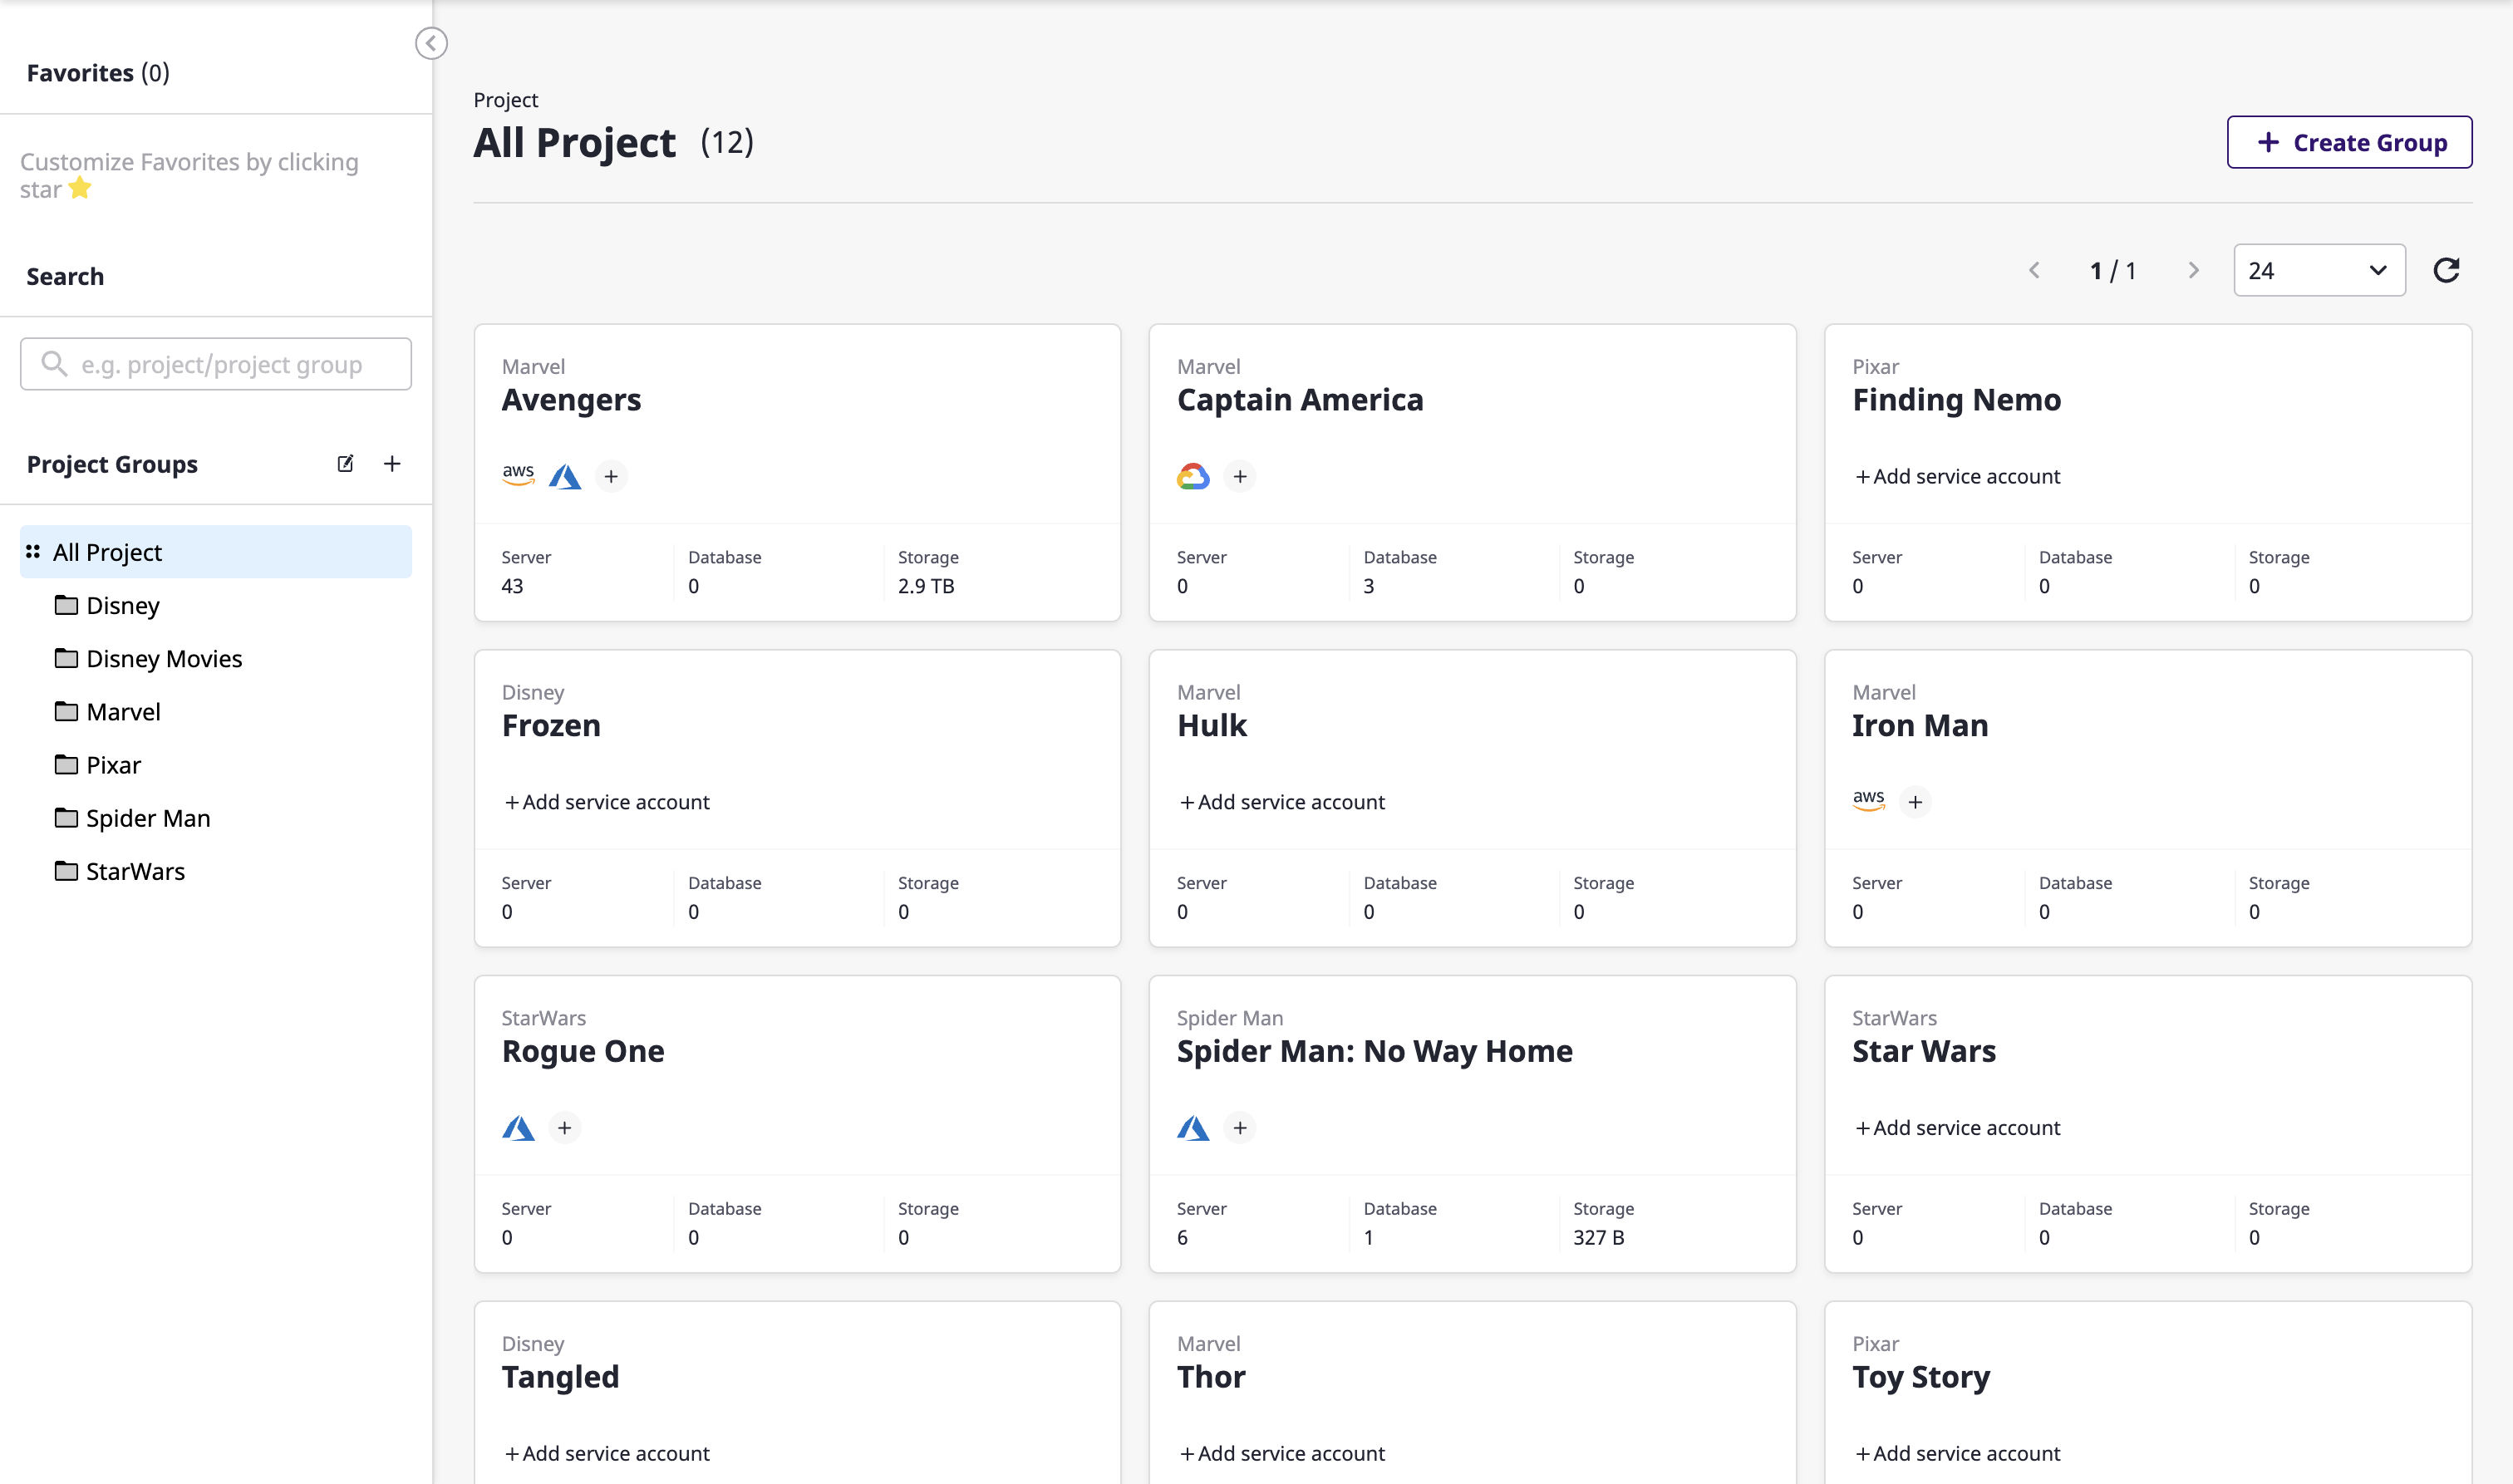
From the project list, you can easily check the resource status of the major categories of each project.
You can also enter a search word to see a list of project groups and projects that match your criteria.
Getting a list of all projects
You can view a list of the entire projects by selecting [All projects] from [Project groups] on the left.

Viewing a list of projects in a project group
You can select the project group you want from the [Project group] list on the left to view projects belonging to that group only.
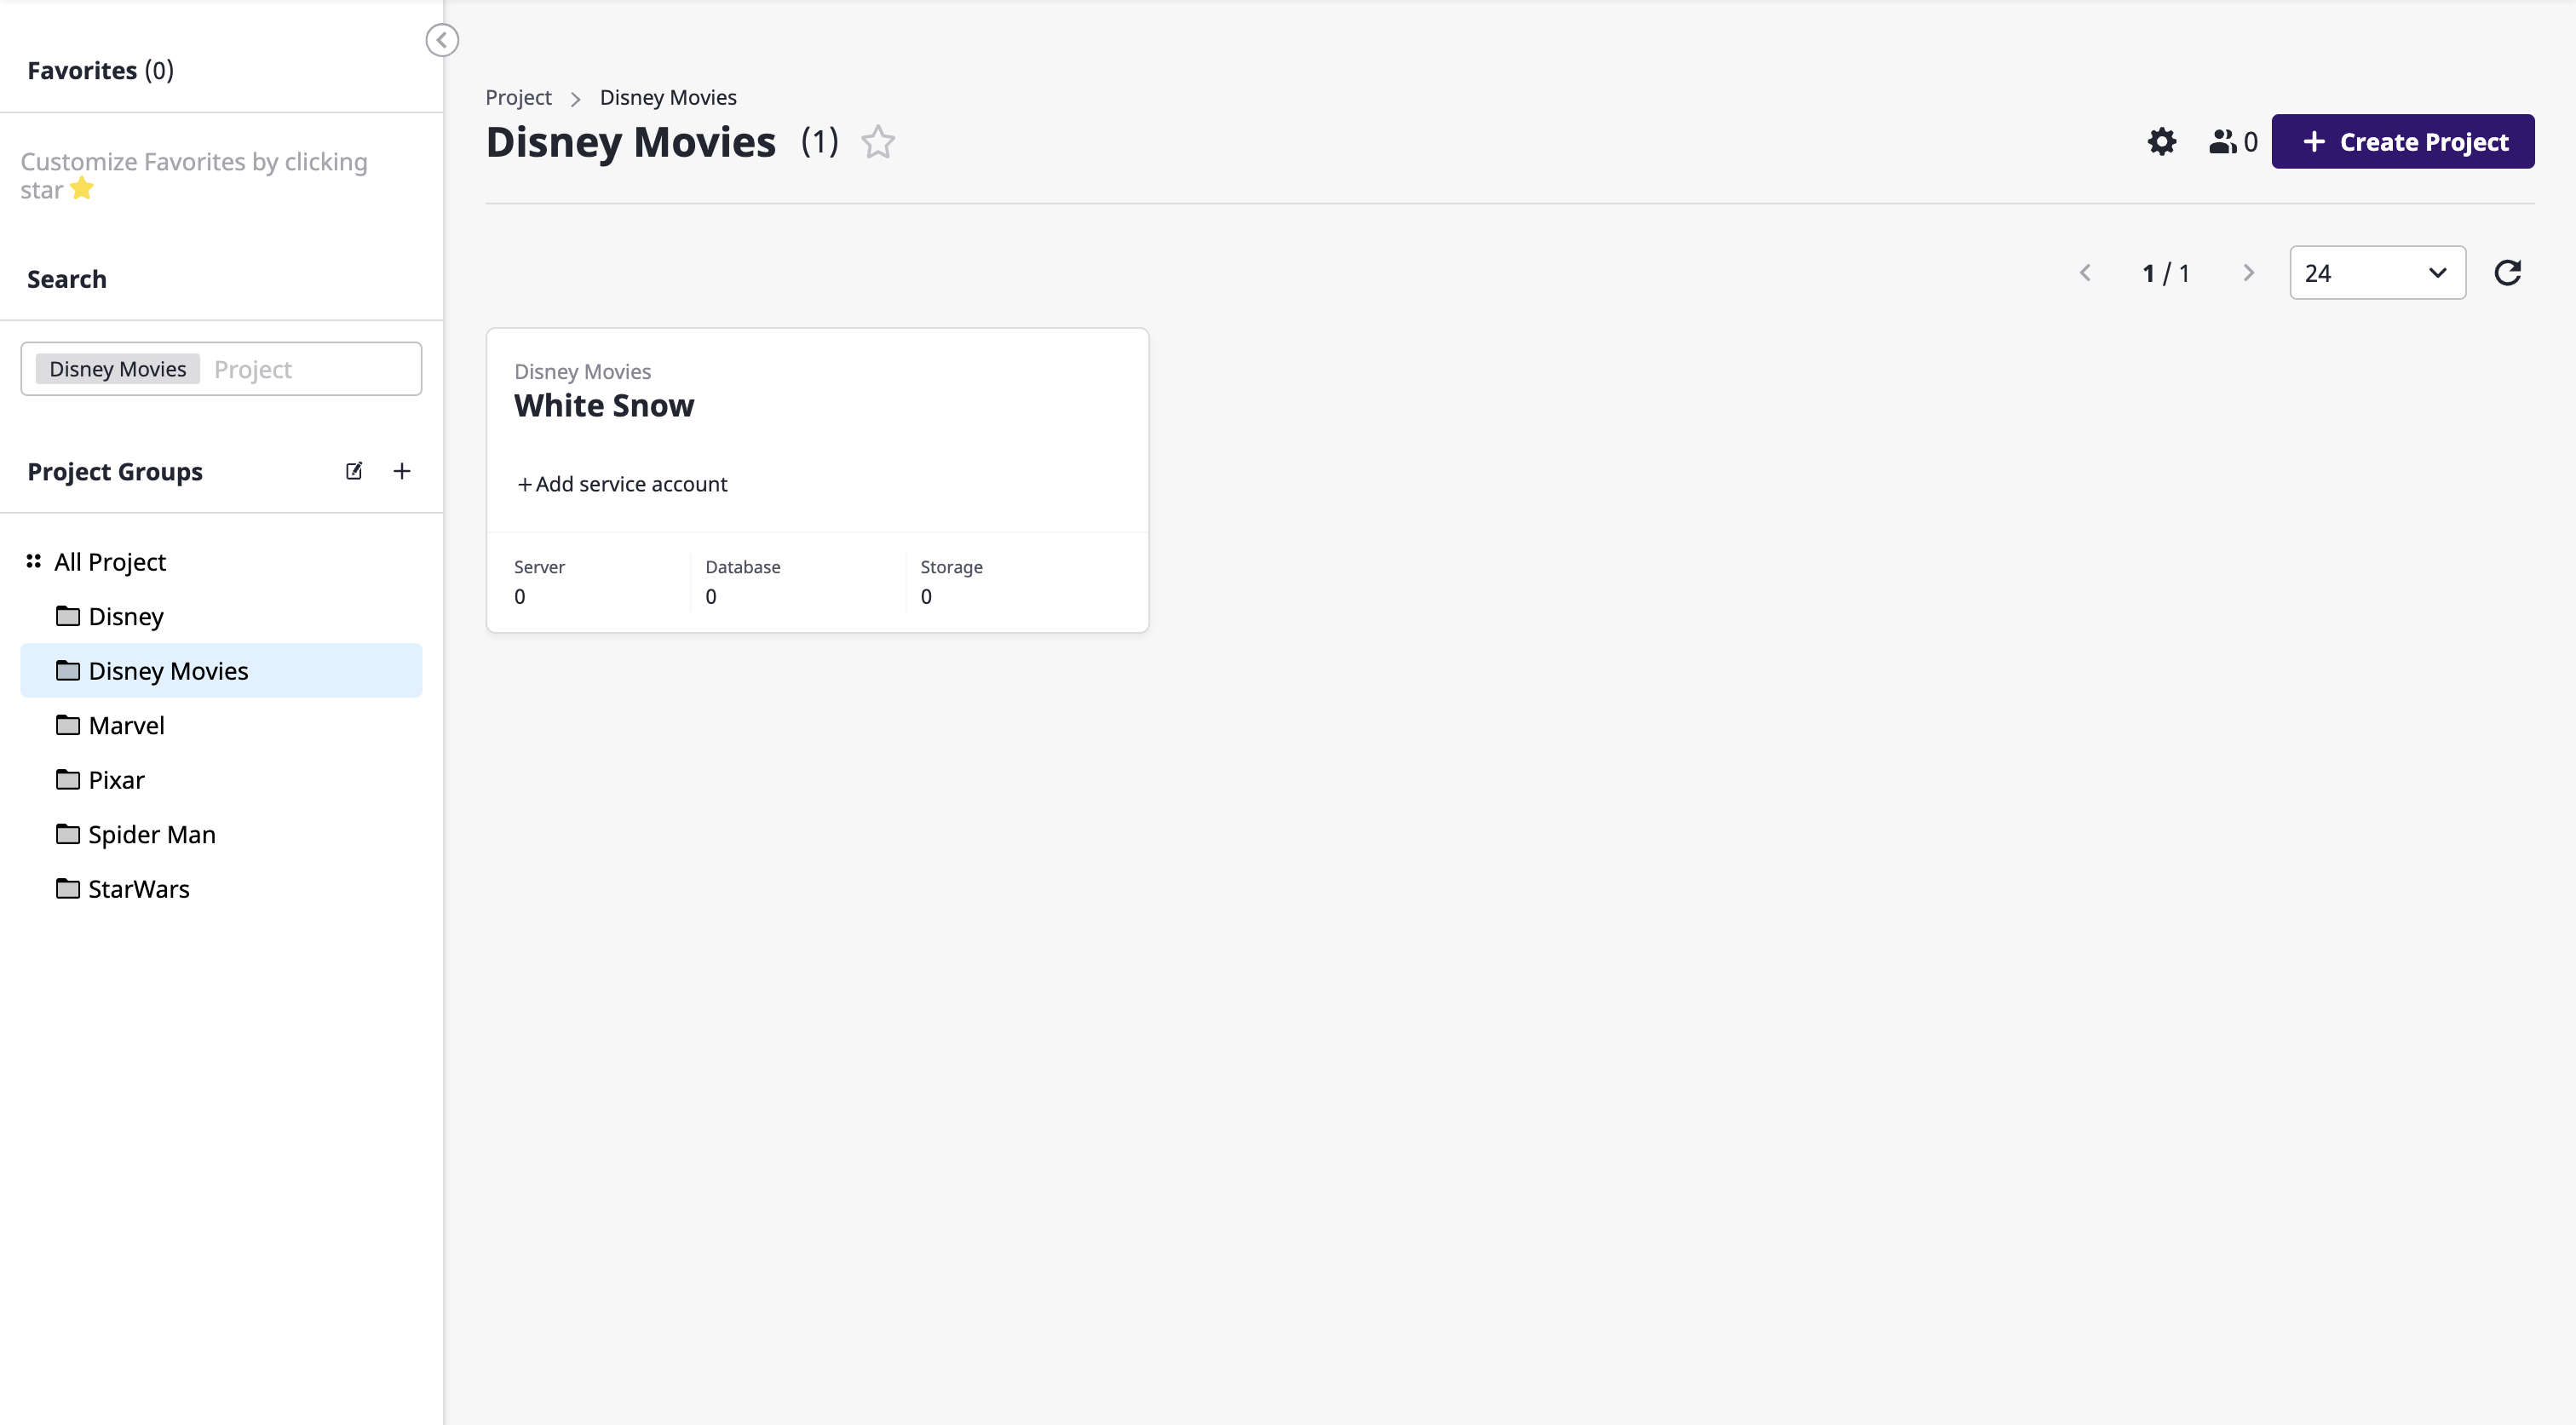
If there are other project groups under the selected project group, the projects belonging to such other project groups are not displayed here.
- Project Group A
    - Project Group B
        - Project B-1
        - Project B-2
    - Project A-1
    - Project A-2
For example in the above structure, if you select Project Group A, only Project A-1 and Project A-2 would be displayed in the list.
Exploring projects
Select a project from a list of projects to enter the project detail page.
Project Dashboard
In the [Summary information] tab, you can check the aggregated information of the resources belonging to the project through the project dashboard.
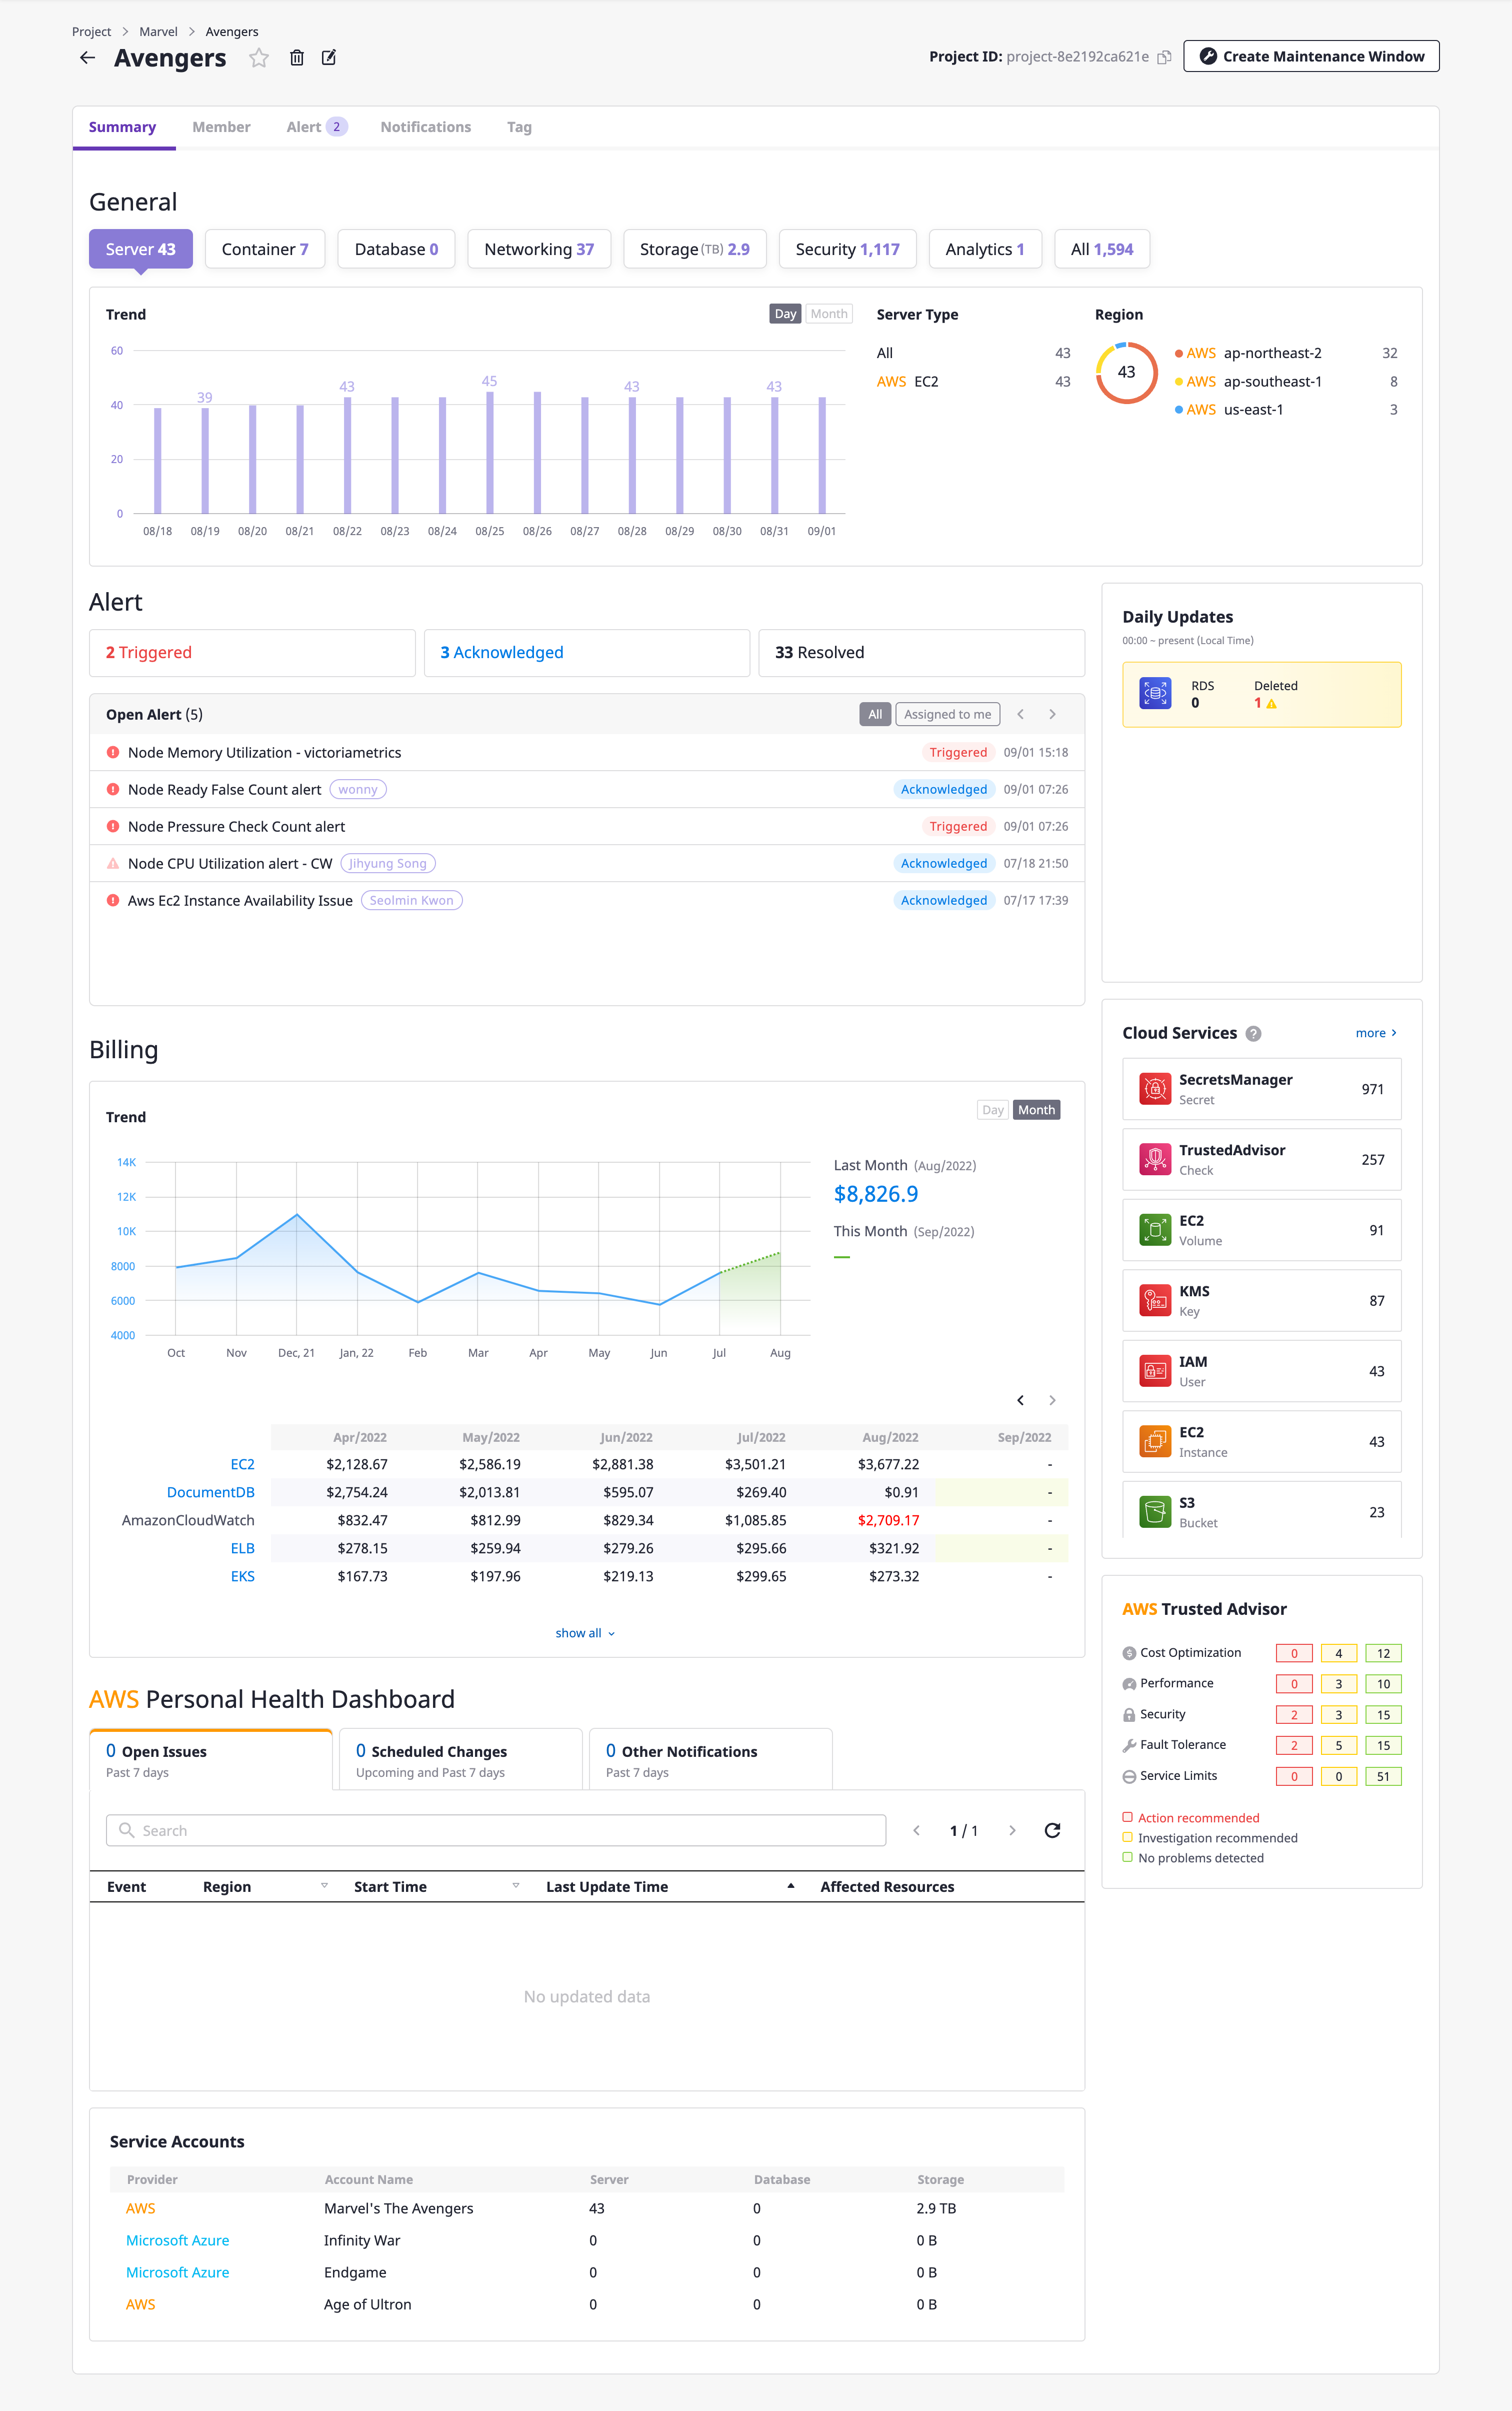
The project dashboard shows the status of resource usage and trends by category and region.
In addition, statistical information about the project in diverse formats through multiple widgets helps to manage resources more efficiently and minimize costs.
Below is a list of widgets on the project dashboard.
| Project dashboard widget name | Description |
|---|---|
| Alert | Information on alerts that occurred in the project |
| Cost | Cost information for the project |
| Today's resource updates | Resource information updated from midnight local time to the present |
| Cloud services | Information on major cloud services among the services |
| AWS Personal Health Dashboard | Information on AWS Personal Health Dashboard |
| AWS Trusted Advisor | Information on AWS Trusted Advisor |
Edit project
Changing project name
(1) Click the [Edit] icon button to the right of the project name.
![]()
(2) After entering the name to be changed in the [Change project] modal dialog, click the [OK] button to change the project name.

Managing project tags
You can manage it by adding tags to your project.
(1) Click the [Edit] button inside the [Tag] tab.

(2) Click the [Add Tag] button on the [Tag] page.
(3) Enter the value to be added in the form of ‘key:value.’
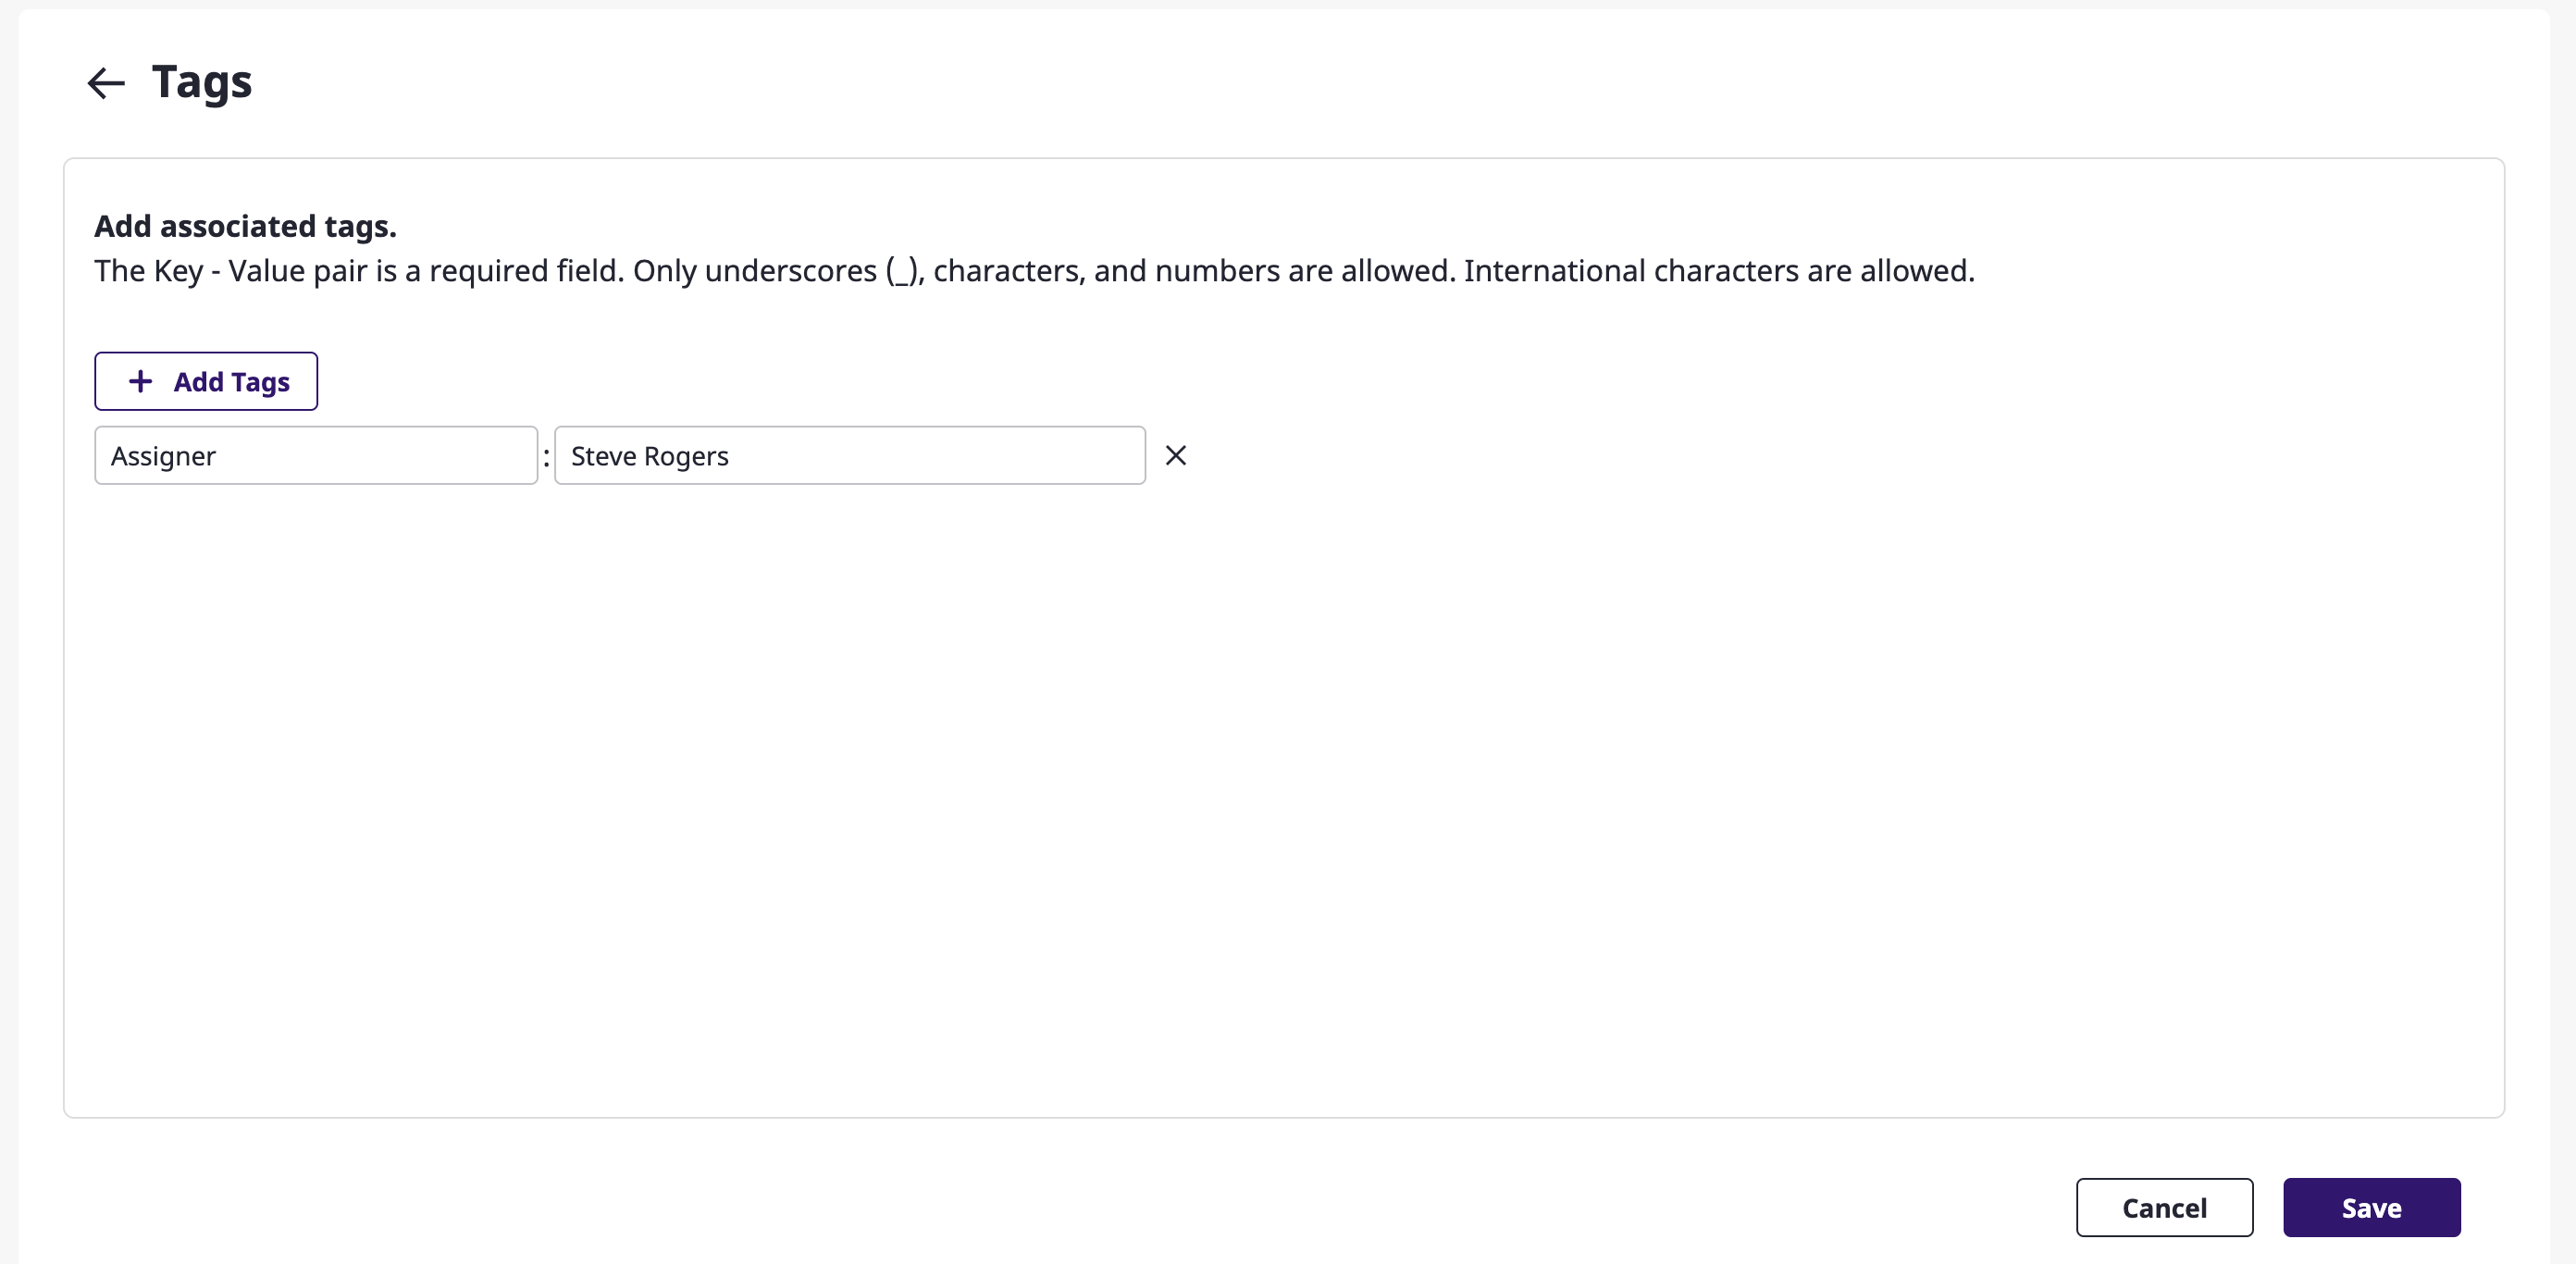
(3-1) If you want to add more tags, click the [Add tag] button as many as the number of tags you want.
(4) Click the [Save] button to finish adding tags.
Deleting a project
(1) Click the [Delete] icon button to the right of the project name.
![]()
(2) Click the [OK] button in the [Delete project] modal dialog to delete the project.

2 - Member
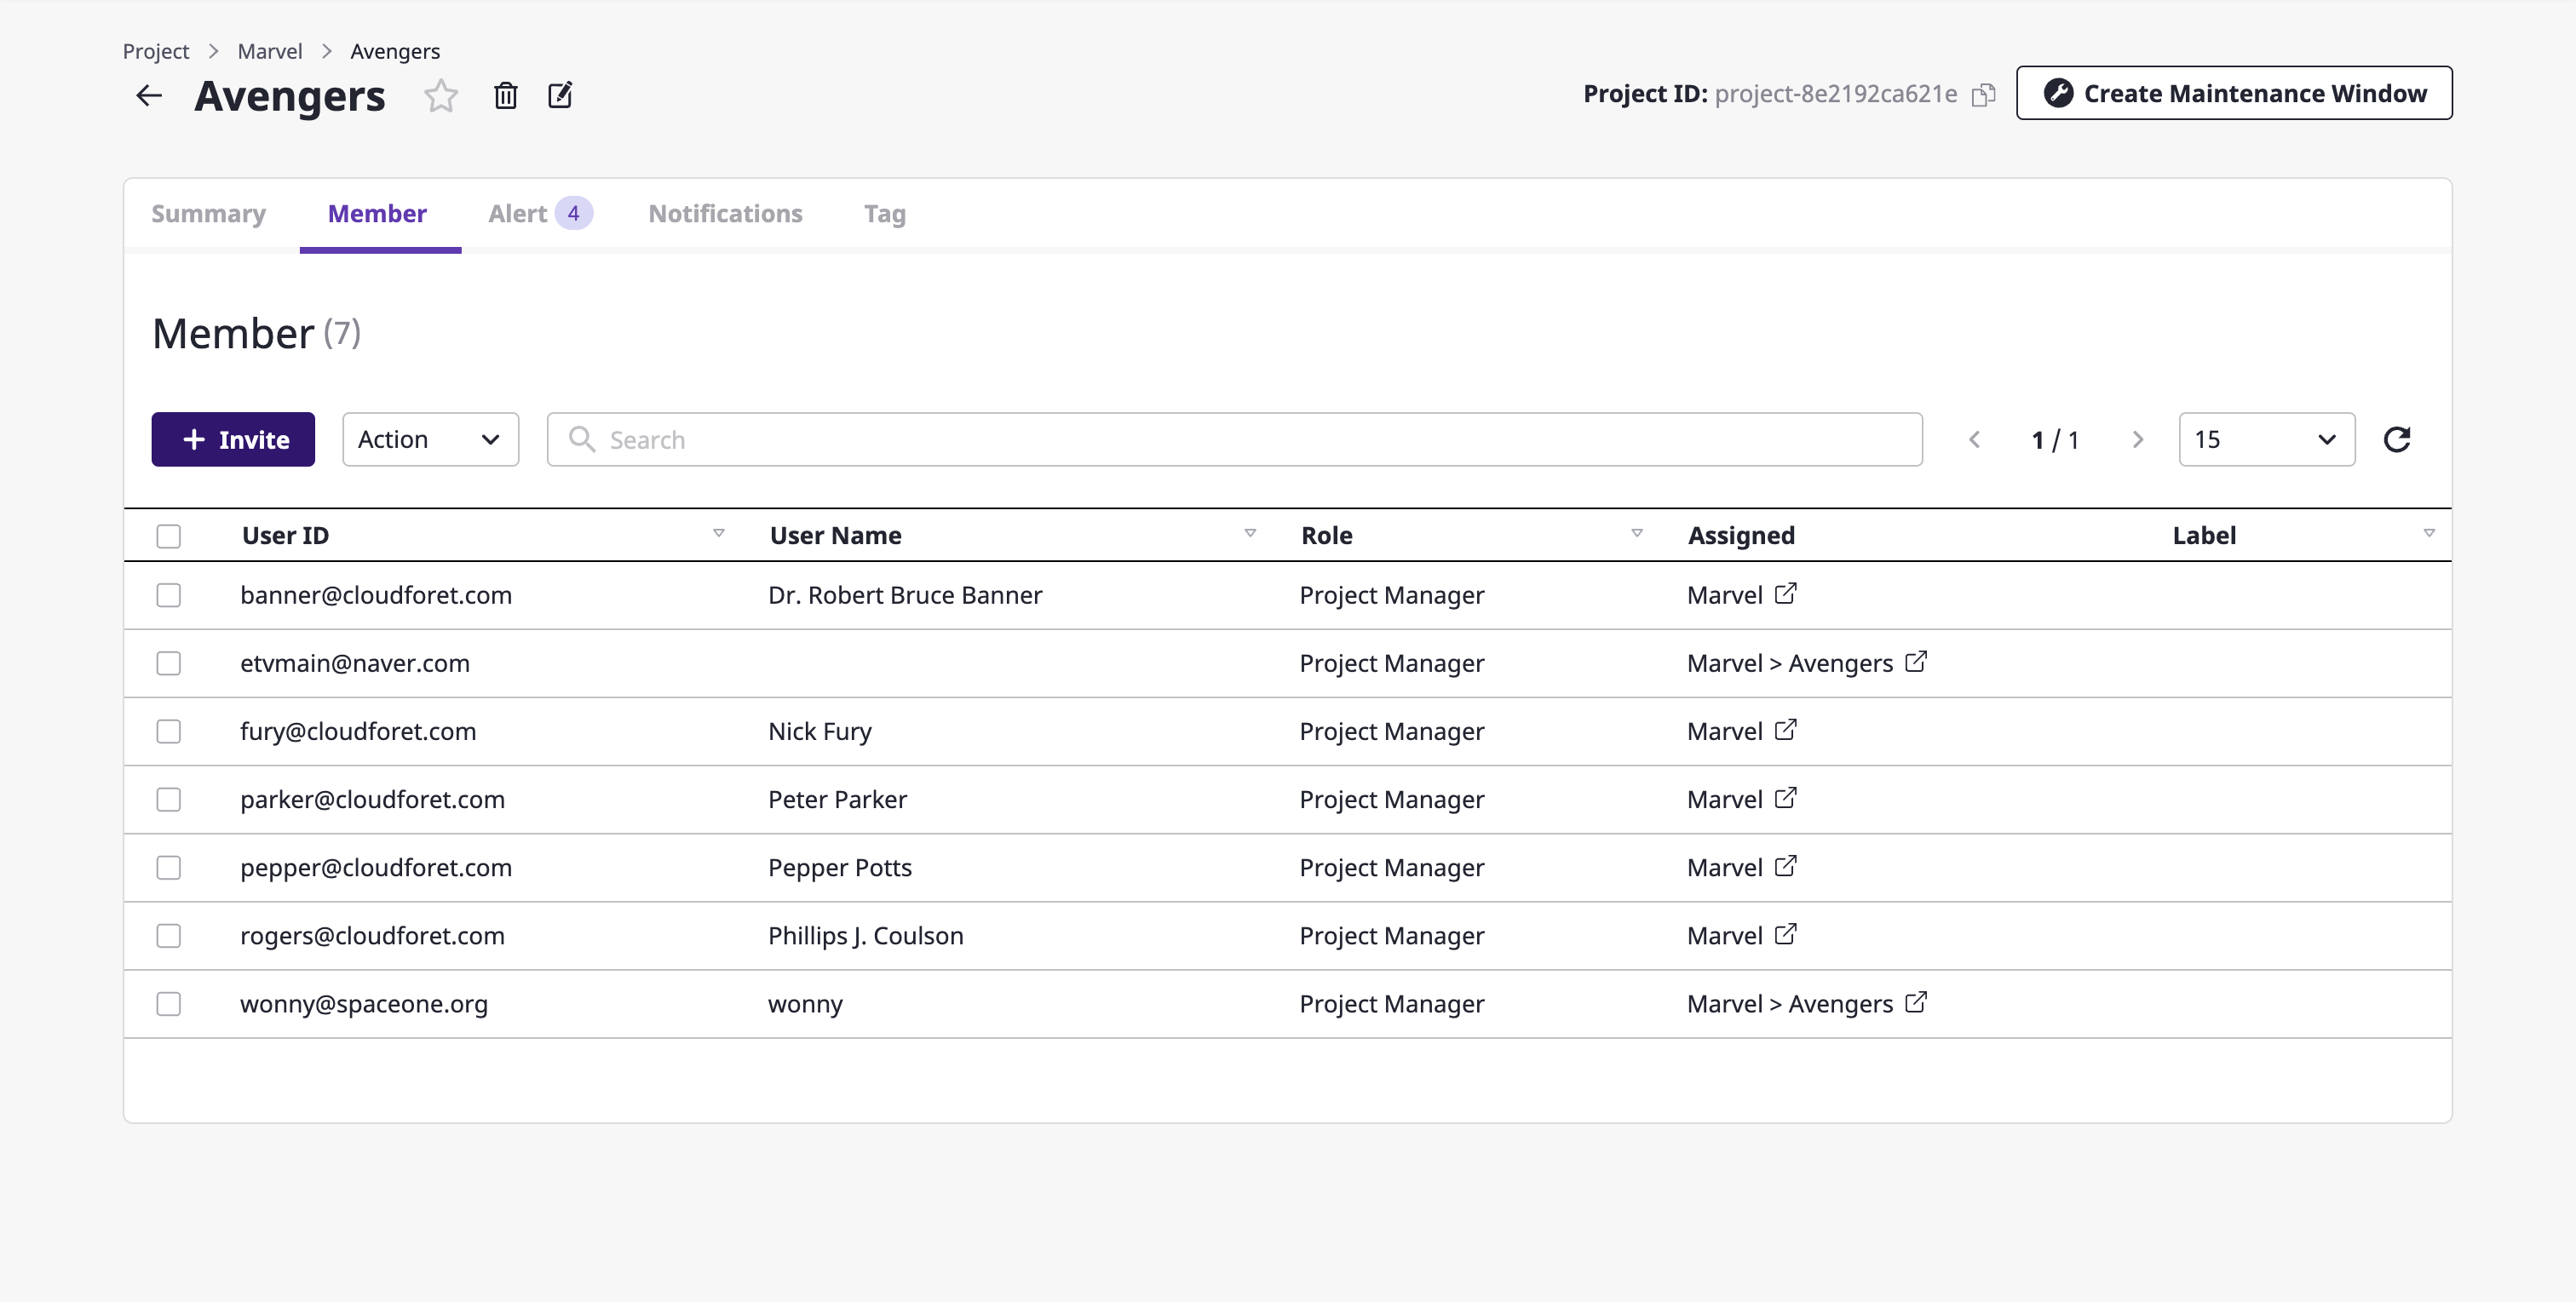
Members are always assigned at least one role for each, which allows them to manage access to the project and project group.
• Roles of project group members are equally applied to all project groups and projects under such roles.
• Roles of project members are applied only to corresponding projects.
• If roles of members exist for multiple project groups that exist in the upper hierarchy, the roles granted to each are merged and then applied.
Manage project group members
You can manage members by entering the [Manage project group members] page.
(1) Select the project group whose members you want to manage from the [Project group] list on the left side of the [Project] page.
(2) Click the [Manage project group members] icon button at the top right.
![]()
(3) Enter a search word on the [Manage project group members] page to view a list of projects that meet the criteria, invite new members, or edit/delete members.

Inviting project group members
(1) Click the [Invite] button on the [Manage project group members] page to open the [Invite members] modal dialog.

(2) Select the member you want to invite. You can select and invite multiple members at once.
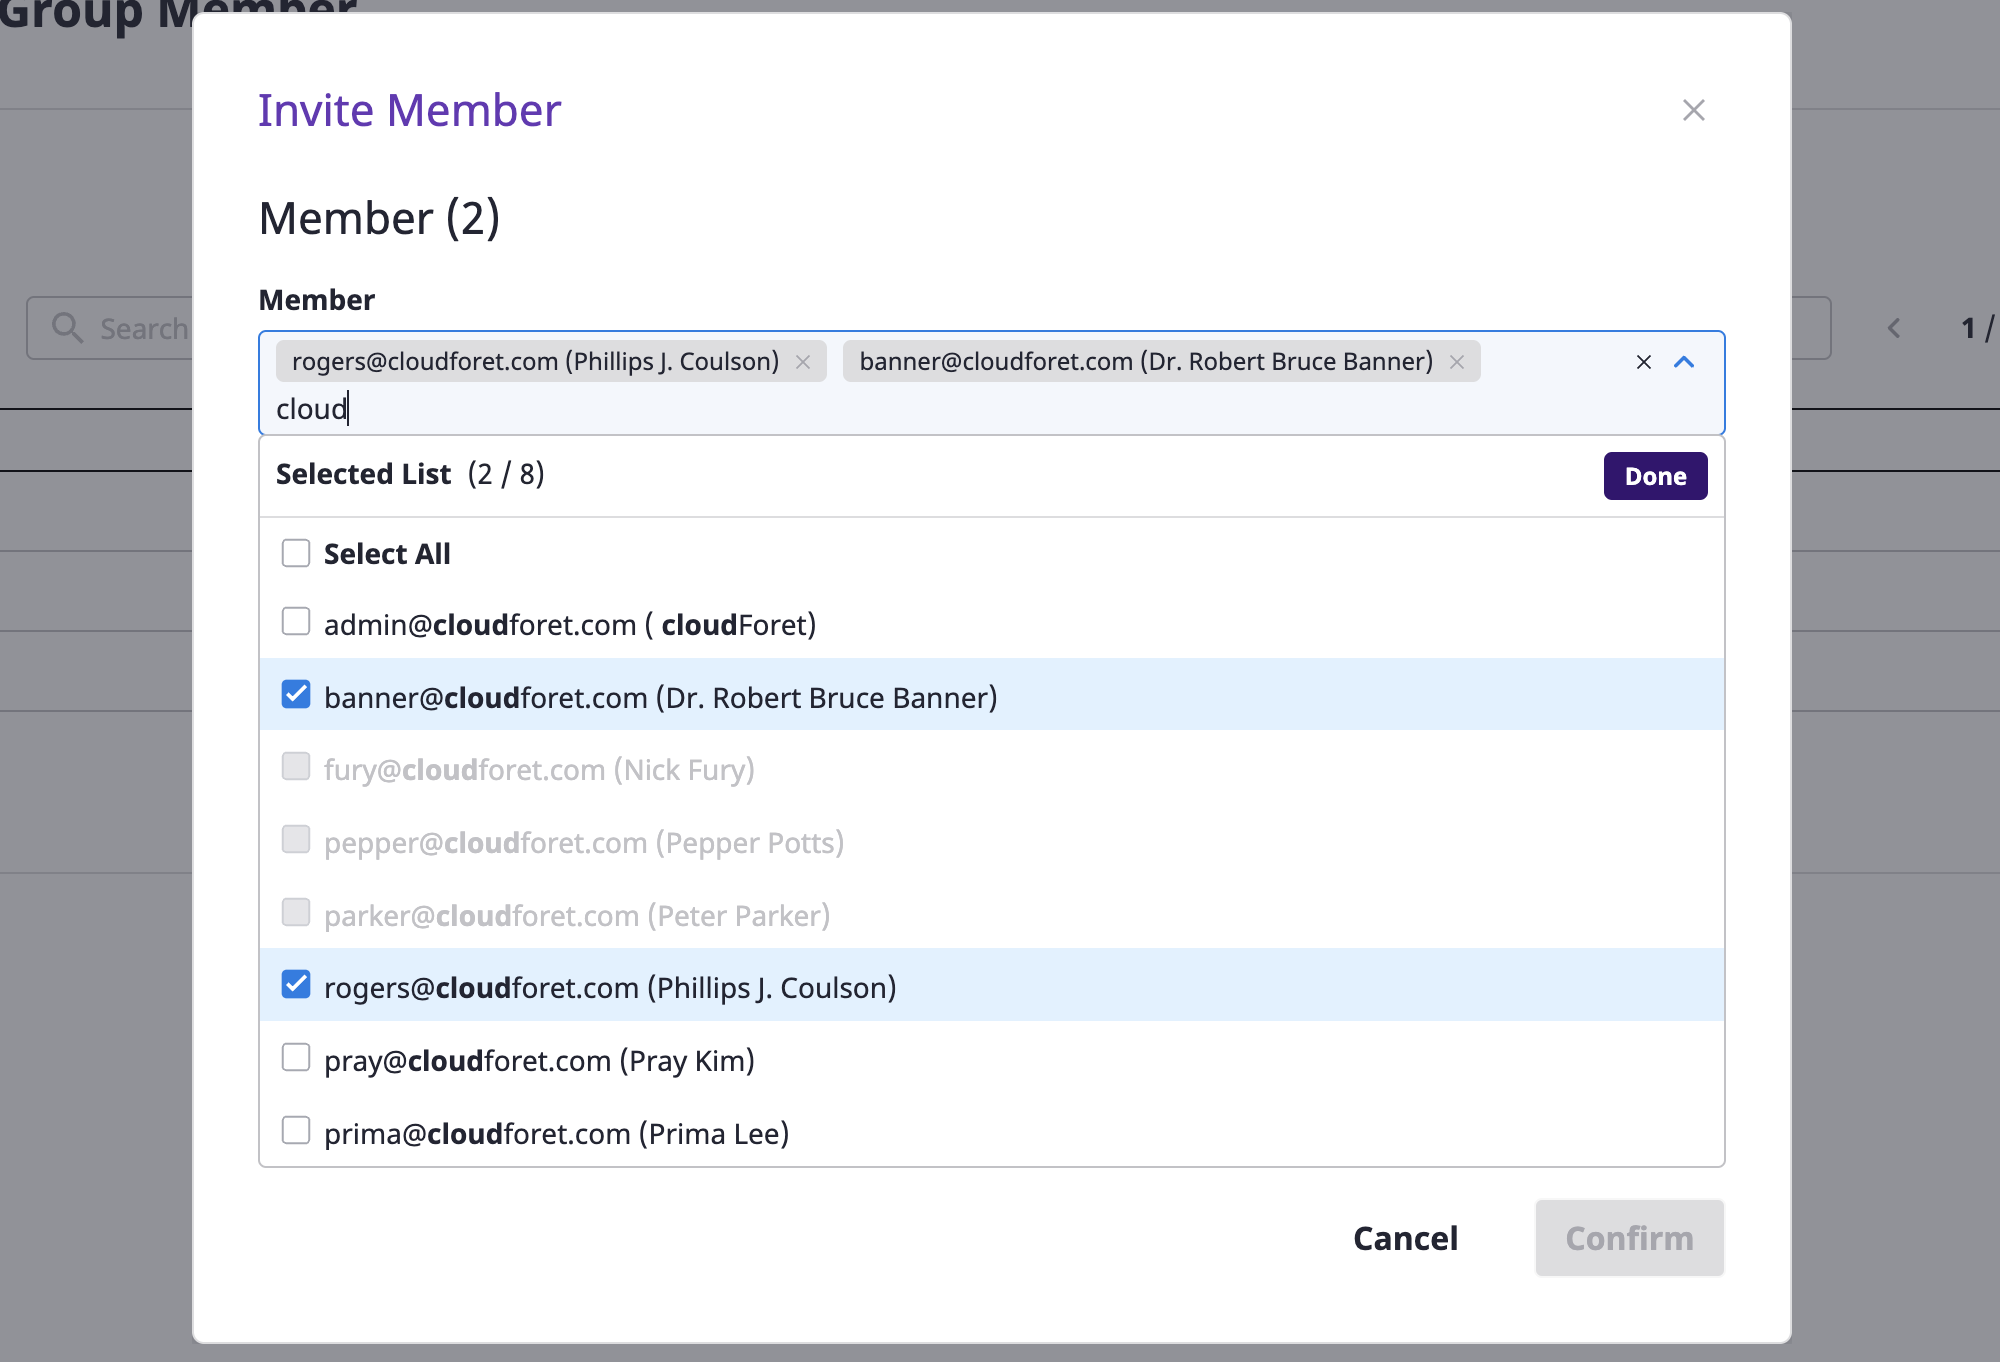
(3) Select the roles to be granted to members that you want to invite.
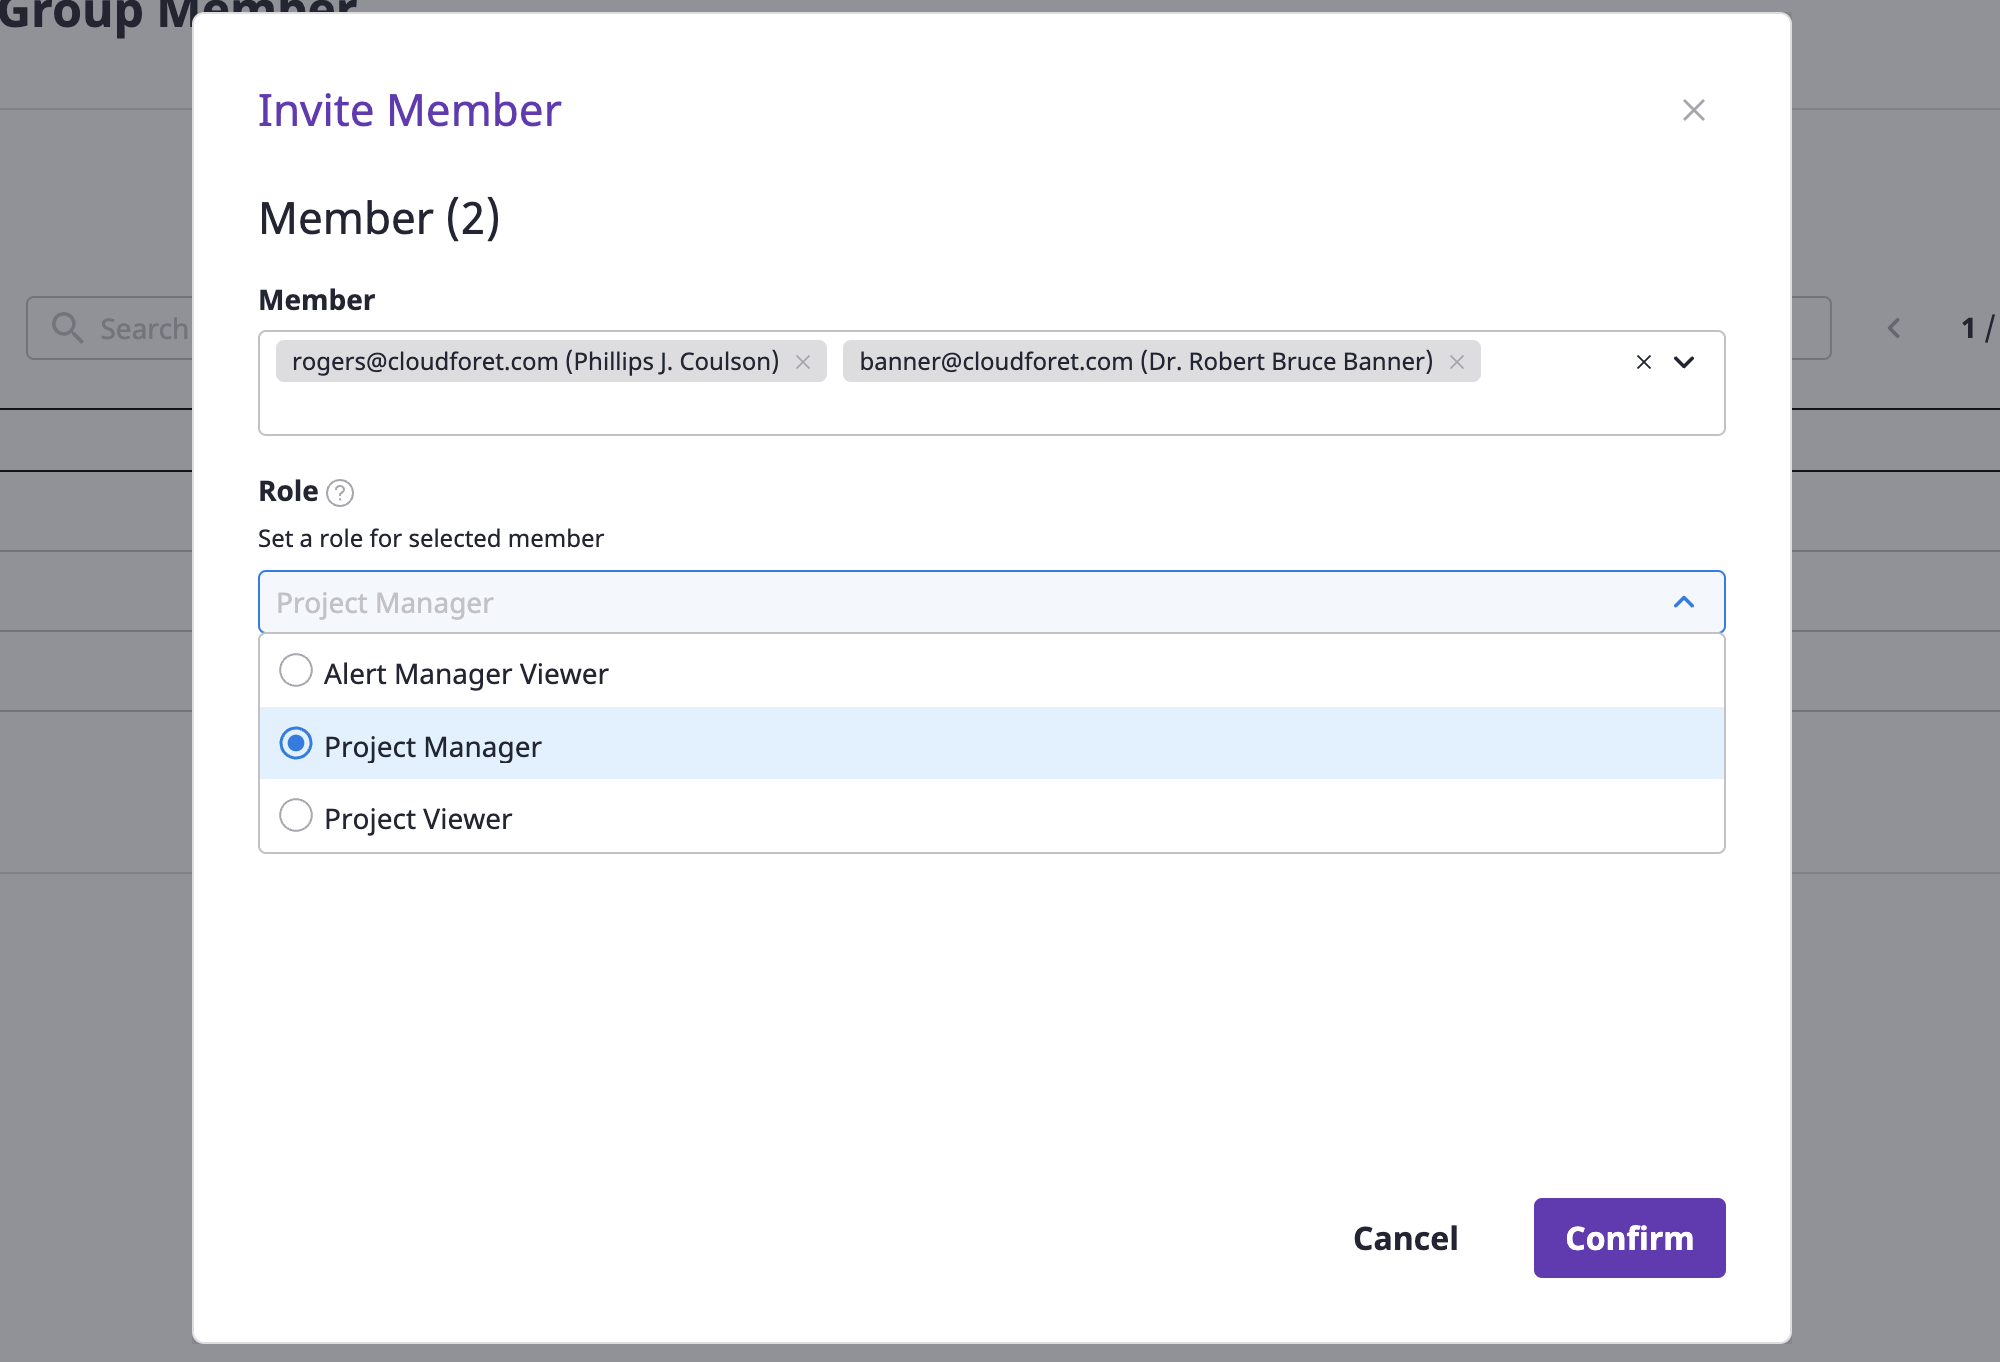
roles of members
Roles that can be granted to members of the project can only be of a user type.
For detailed instructions, see here.
(4) After entering labels for members to invite, press the Enter key to add them.
(5) Click the [OK] button to complete member invitation.

Editing project group members
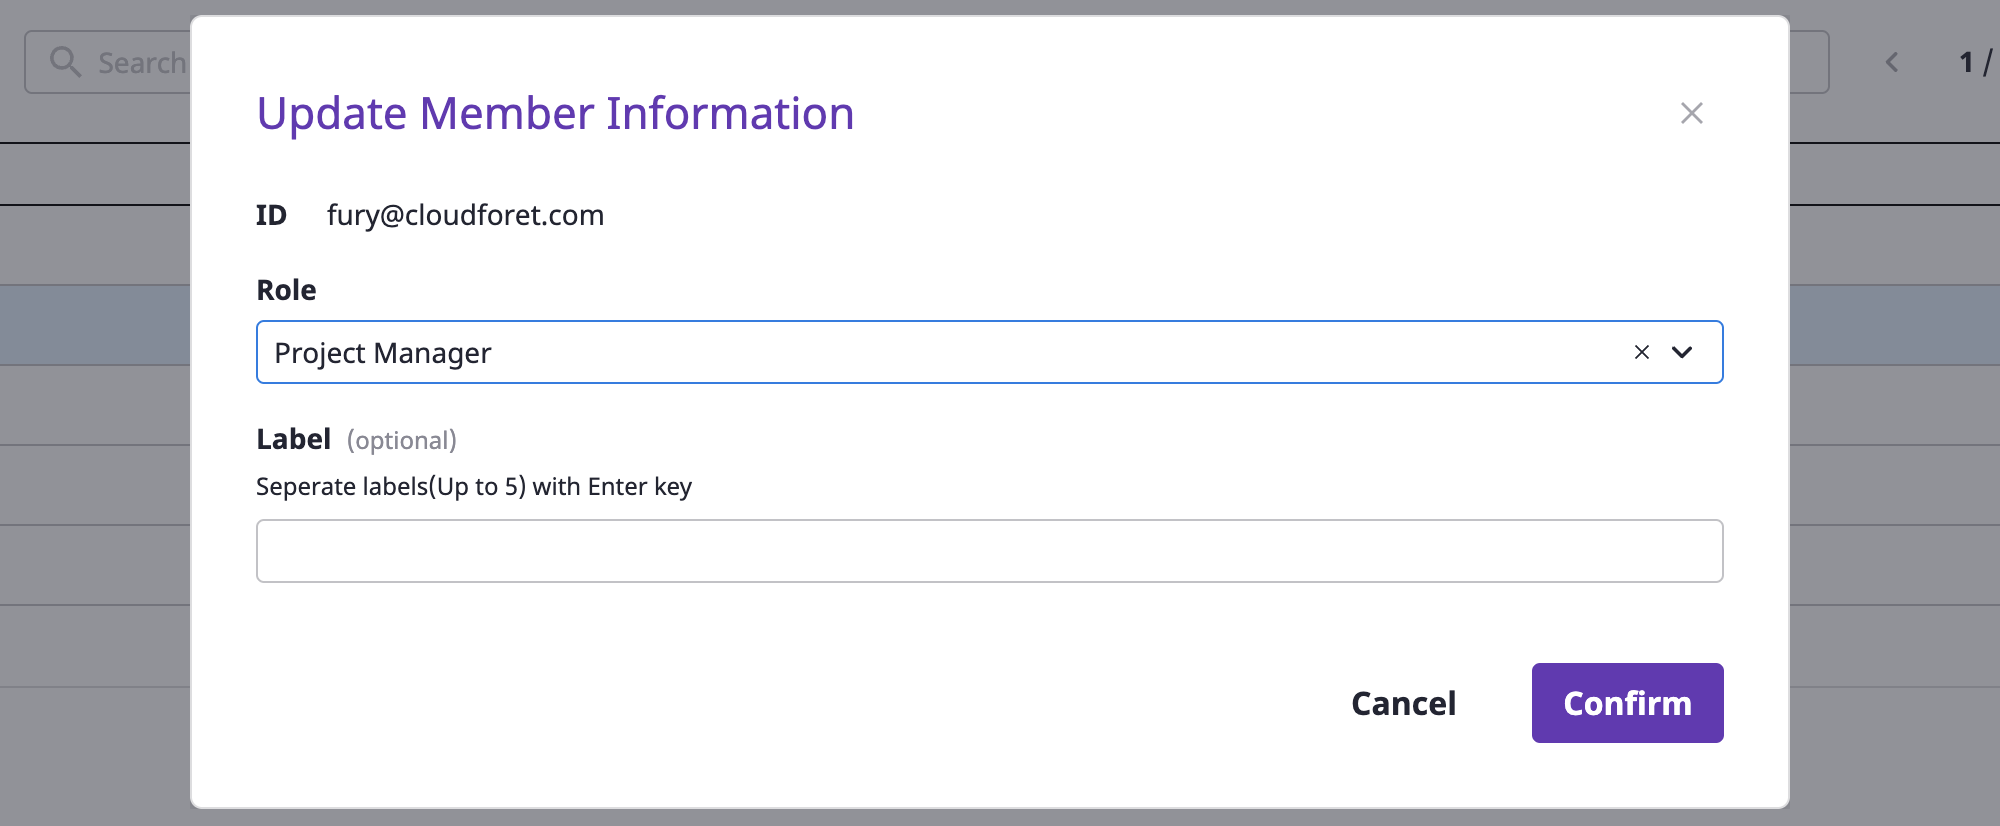
You can change the roles and labels granted to members for the project group.
(1) In the [Manage project group members] page, select the member you want to edit.
(2) Select [Edit] from the [Action] dropdown.

(3) In the [Change member information] modal dialog, enter the contents you want to change and click the [OK] button to complete the change.
Deleting project group members
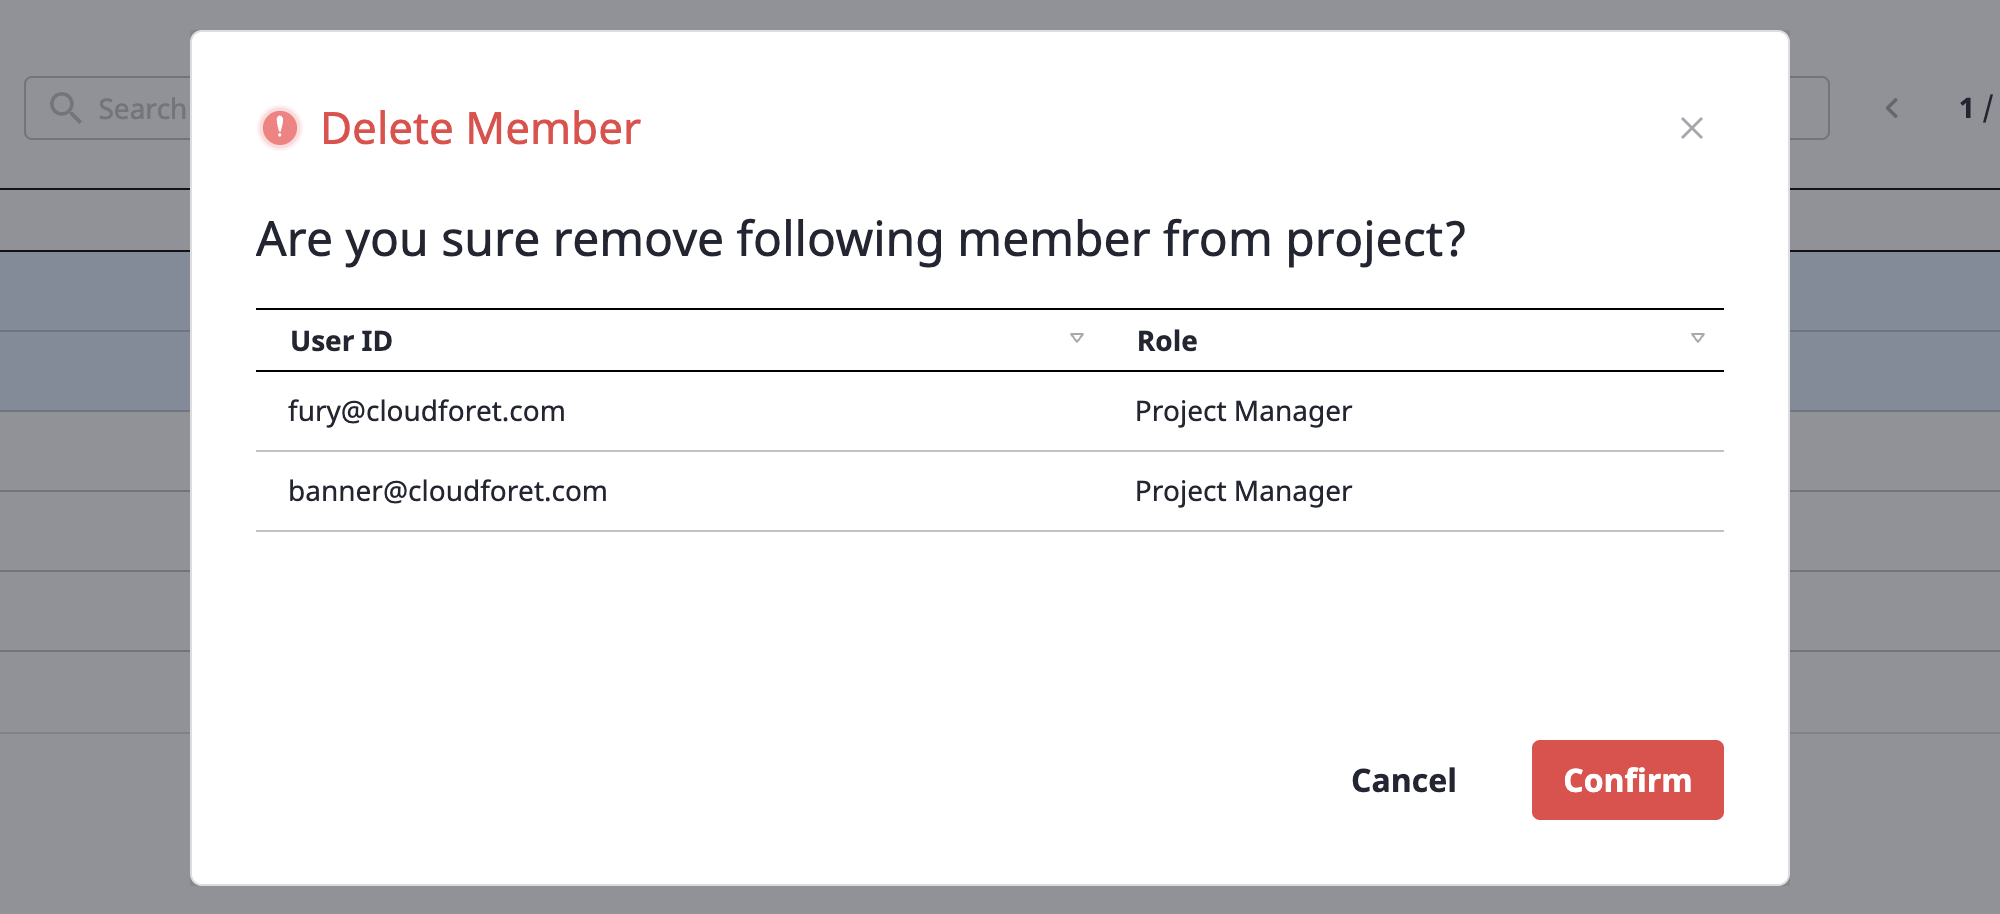
(1) In the [Manage project group members] page, select the member you want to delete. Multiple selections are possible.
(2) Select [Delete] from the [Action] dropdown.

(3) Click the [OK] button in the [Remove member] modal dialog to remove the member.
Managing project members
You can manage members by entering the [Members] tab of the project detail page, and all methods and contents are the same as the managing project group members (link).
(1) On the [Project] page, select the project whose members you want to manage and go to the project detail page.
(2) Select the [Member] tab.
