Advanced configuration guide
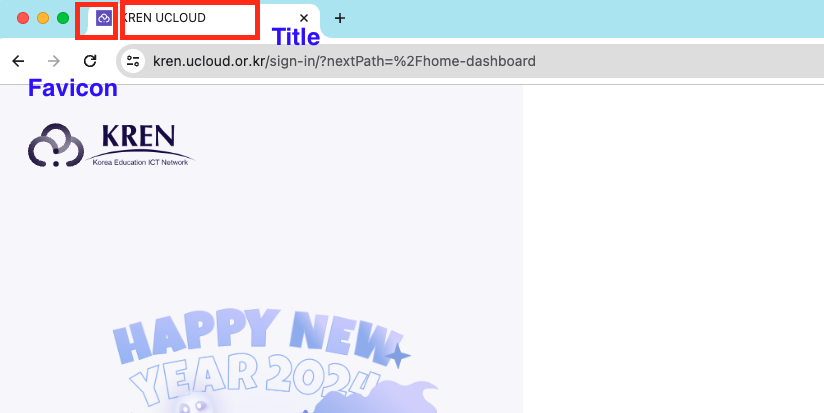
Title and Favicon
Cloudforet has default title and CI with Wanny favicon.
But you can change them to your own title and favicon.
| Component | File Path | Description |
|---|---|---|
| Title | /var/www/title.txt | name of Title |
| Favicon | /var/www/favicon.ico | favicon file |
Console supports the functionality of changing title and favicon. The default values are in source code, but you can overwrite them when deploying pods.
NOTE: Both Title and Favicon should be exist together, even though you want to configure one of them!
This is an example value of console.yaml file.console:
production_json:
DOMAIN_NAME_REF: hostname
CONSOLE_API:
ENDPOINT: https://console-v1.api.example.com
CONSOLE_API_V2:
ENDPOINT: https://console-v2.api.example.com
DOMAIN_IMAGE:
CI_LOGO: https://raw.githubusercontent.com/cloudforet-io/artwork/main/logo/symbol/Cloudforet_symbol--dark-navy.svg
CI_TEXT_WITH_TYPE: https://raw.githubusercontent.com/kren-ucloud/artwork/main/logo/KREN-logo.png
SIGN_IN: https://raw.githubusercontent.com/cloudforet-io/artwork/main/illustrations/happy-new-year-2024.png
CI_TEXT: https://raw.githubusercontent.com/cloudforet-io/artwork/main/logo/wordmark/Cloudforet_wordmark--primary.svg
volumeMounts:
application:
- name: favicon
mountPath: /var/www/title.txt
subPath: title.txt
readOnly: true
- name: favicon-img
mountPath: /var/www/favicon.ico
subPath: favicon.ico
readOnly: true
volumes:
- name: favicon
configMap:
name: favicon
- name: favicon-img
configMap:
name: favicon-img
- name: timezone
hostPath:
path: /usr/share/zoneinfo/Asia/Seoul
- name: log-volume
emptyDir: {}
The actual values are from Kubernetes ConfigMap object. So you might have to change the value at ConfigMap or create a new one and mount it in your pod.
Title(title.yaml)
apiVersion: v1
kind: ConfigMap
metadata:
name: favicon
namespace: spaceone
data:
title.txt: |
KREN UCLOUD
Apply at your Kubernetes cluster.
kubectl apply -f title.yaml -n spaceone
Favicon (favicon.yaml)
Cloudforet new Favicon file is favicon.yaml
apiVersion: v1
kind: ConfigMap
metadata:
name: favicon-img
namespace: spaceone
binaryData:
favicon.ico: AAABAAEAAAAAAAEAIADxxxxxxx...
NOTE: favicon.ico must be base64 encoded.
# prepare your favicon.ico file, and encode it to base64 (shell command)
cat favicon.ico | base64
Apply at your Kubernetes cluster.
kubectl apply -f favicon.yaml -n spaceone
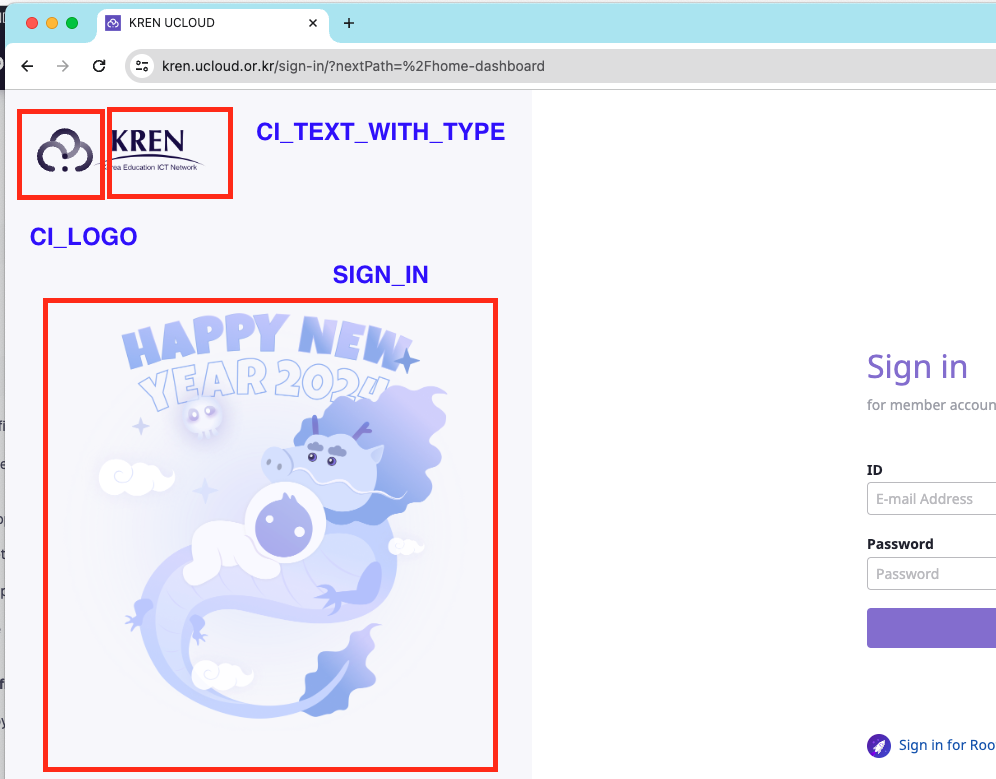
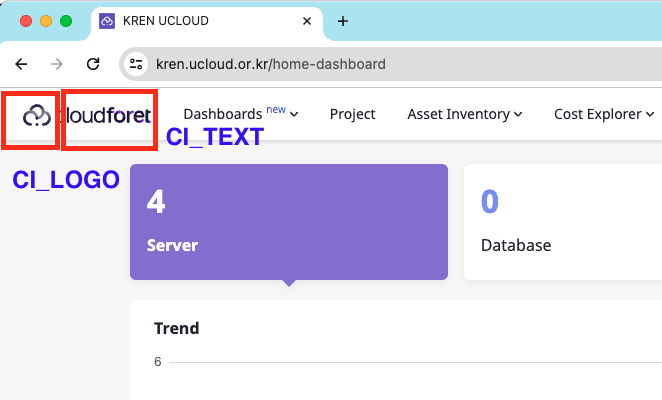
Corporate Identity
When you open Cloudforet page, you can see the default Cloudforet CI, logo and text. You can change the default Cloudforet CI with your company CI.
Login Page
Every Page
Update helm value of console (console -> production_json -> DOMAIN_IMAGE)
keyword: DOMAIN_IMAGE
| Configuration | Description | Format |
|---|---|---|
| CI_LOGO | Custom Logo Image | Image (56 * 56 px) |
| CI_TEXT_WITH_TYPE | CI Text Image | Image (164 * 40 px) |
| SIGN_IN | Sign-in page Image | Image (1024 * 1024 px) |
| CI_TEXT | CI Text Image On every page | Image (123 * 16 px) |
NOTE: Recommended file format is SVG. But if you would like to use a PNG file, use transparent background and double the size than recommended size.
NOTE: Cloudforet does not support uploading files, so upload CI files at your web server or S3.!
console:
  production_json:
    DOMAIN_NAME_REF: hostname
    CONSOLE_API:
      ENDPOINT: https://console-v1.api.example.com
    CONSOLE_API_V2:
      ENDPOINT: https://console-v2.api.example.com
    DOMAIN_IMAGE:
      CI_LOGO: https://raw.githubusercontent.com/cloudforet-io/artwork/main/logo/symbol/Cloudforet_symbol--dark-navy.svg
      CI_TEXT_WITH_TYPE: https://raw.githubusercontent.com/kren-ucloud/artwork/main/logo/KREN-logo.png
      SIGN_IN: https://raw.githubusercontent.com/cloudforet-io/artwork/main/illustrations/happy-new-year-2024.png
      CI_TEXT: https://raw.githubusercontent.com/cloudforet-io/artwork/main/logo/wordmark/Cloudforet_wordmark--primary.svg
  volumeMounts:
    application:
      - name: favicon
        mountPath: /var/www/title.txt
        subPath: title.txt
        readOnly: true
      - name: favicon-img
        mountPath: /var/www/favicon.ico
        subPath: favicon.ico
        readOnly: true

  volumes:
    - name: favicon
      configMap:
        name: favicon
    - name: favicon-img
      configMap:
        name: favicon-img
    - name: timezone
      hostPath:
        path: /usr/share/zoneinfo/Asia/Seoul
    - name: log-volume
      emptyDir: {}
Google Analytics
You can apply Google Analytics to Cloudforet Console by following the steps below.
Create accounts and properties
Log in to your Google account after accessing the Google Analytics site.
Click the Start Measurement button.

Enter your account name and click the Next button.

Enter a property name and click the Next button.
In the property name, enter the name of the url you want to track.

Click the Create button.

Click the Agree button after agreeing to the data processing terms.

Set up data streams
Choose Web as the platform for the data stream you want to collect.

Enter your Cloudforet Console website URL and stream name and click the Create Stream button.

Check the created stream information and copy the measurement ID.

Set up the Cloudforet Helm Chart
Paste the copied measurement ID as the value for the GTAG_ID key in the helm chart settings as shown below.
# frontend.yaml
console:
  ...
  production_json:
    ...
    GTAG_ID: {measurement ID}
    ...