これは、このセクションの複数ページの印刷可能なビューです。 印刷するには、ここをクリックしてください.
セットアップと運用
- 1: クイックインストールガイド
- 2: インストールガイド
- 3: インストールガイド - On Premise
- 4: アドバンストインストール
- 5: アドバンス設定
- 6: 操作方法
1 - クイックインストールガイド
Overview
Quick install guide for SpaceONE with minikube.
Preparation
Before installing SpaceONE, you need minikube and helm installed.
Refer to the link below and proceed with the installation.
Start Minikube
- Spaceone requires a minimum of 4GB of memory.
minikube start --driver=docker --memory=4096mb
Install SpaceONE
Namespace
Create namespace a for SpaceONE.
SpaceONE needs two namespaces, spaceone and root-supervisor.
kubectl create ns spaceone
kubectl create ns root-supervisor
Check namespace list.
kubectl get ns
Helm Chart
It is highly recommended to change kubernetes namespace to spaceone.
kubectl config set-context $(kubectl config current-context) --namespace spaceone
Register helm chart for SpaceONE.
helm repo add spaceone https://cloudforet-io.github.io/charts
helm repo list
helm repo update
Install SpaceONE with helm chart
Example versions are subject to change.
Please refer to this link to check the latest version.
git clone https://github.com/cloudforet-io/charts.git
cd charts/examples/v1.11.0
helm install spaceone -f minikube.yaml spaceone/spaceone --version 1.11.0
If you are using Amazon EC2, change localhost to your Amazon EC2's public IP address at minikube.yaml.
- ENDPOINT
- DOMAIN_NAME_REF
  production_json:
      CONSOLE_API:
        ENDPOINT: http://##### EC2 public IP ####:8081
      DOMAIN_NAME: spaceone
      DOMAIN_NAME_REF: spaceone
      BILLING_ENABLED: []
You need to check status of pods.
kubectl get pod
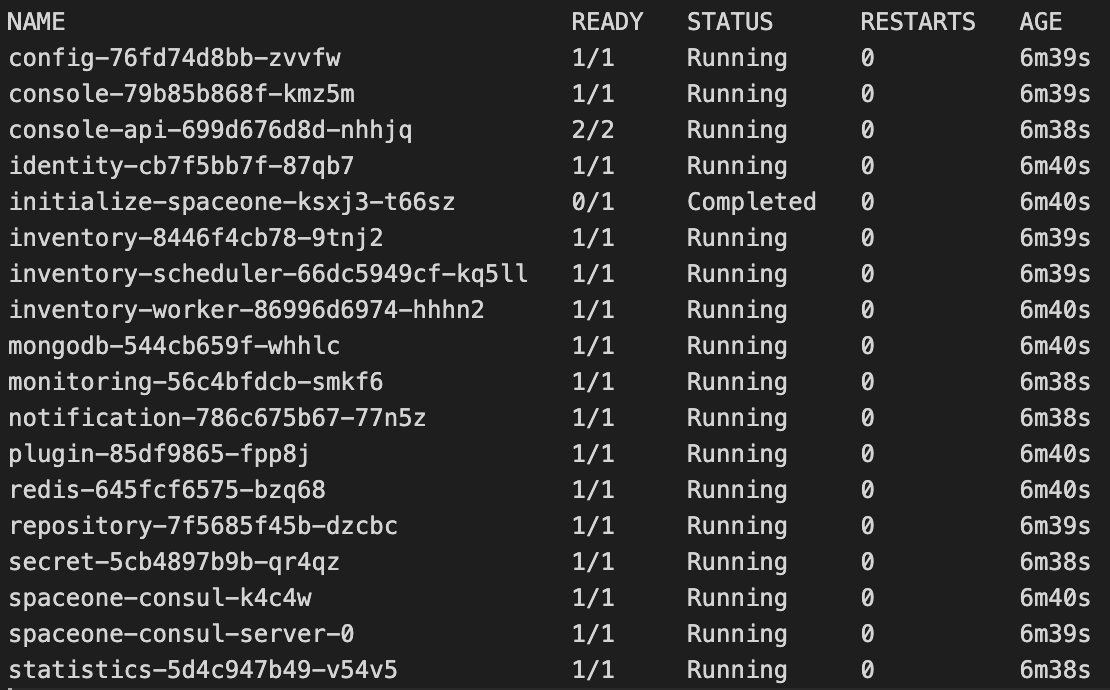
Check if STATUS is Completed or Running. It will take some time, so please wait.
Port-forwarding
Installing SpaceONE on minikube doesn't provide any Ingress objects such as Amazon ALB or NGINX ingress controller. We can use kubectl port-forward instead.
kubectl port-forward -n spaceone svc/console 8080:80 --address='0.0.0.0'
kubectl port-forward -n spaceone svc/console-api 8081:80 --address='0.0.0.0'
Open two terminals then run each command at separate terminal.

Tips
You can run kubectl port-forward in background by adding & at the end.
kubectl port-forward -n spaceone svc/console 8080:80 --address='0.0.0.0' &
kubectl port-forward -n spaceone svc/console-api 8081:80 --address='0.0.0.0' &
Start SpaceONE
Log-In (Sign in for Root Account)
Open browser (localhost:8080)
| ID | PASSWORD |
|---|---|
| admin | Admin123!@# |

Initial Setup
Reference
If you are using Amazon Linux(RedHat Linux), you have to install required dependencies.
yum install socat
2 - インストールガイド
Install Kubernetes
SpaceONE provides various EKS installation guides.
| Type | Description |
|---|---|
| Option 1 | Create new VPC and EKS Cluster |
| Option 2 | Create EKS Cluster in existing VPC |
This example shows the Option 1.
https://github.com/cloudforet-io/launchpad.git
Configure environments
Prepare your AWS credentials. Add them in your machine's ~/.aws/credentials file.
git clone https://github.com/cloudforet-io/launchpad.git
cd launchpad/spaceone/eks/terraform
Edit eks.auto.tfvars
This file keeps values of environment variables below.
- region is aws region name for installation.
- userarn is your IAM arn for installation.
region = "us-east-1"

map_users = [
		{
      userarn  = "arn:aws:iam::111111111111:user/username"
      username = "your_name"
      groups   = ["system:masters"]
    }
]
Execute terraform
If you don't have terraform binary, see Reference.
terraform init
terraform plan
terraform apply
Configure kubernetes
After installation, kubeconfig_spaceone-prd-eks file will be created. This is used as a configuration file of Kubernetes.
If you don't have kubectl installed, see Reference.
You may also have to install aws-iam-authenticator, see Reference.
cp kubecconfig_spaceone-prd-eks ~/.kube/config
After installation of EKS, we highly recommend to install AWS Load Balancer Controller and External-DNS.
Install SpaceONE with Helm Chart
kubectl create ns spaceone
kubectl create ns root-supervisor

alias kcd='kubectl config set-context $(kubectl config current-context) --namespace'
kcd spaceone
Helm repo
helm repo add spaceone https://cloudforet-io.github.io/charts
helm repo update
helm search repo
Pre-condition
read pre-condition/README.md
update values in pre-conditon
apply pre-condition
kubectl create -f shared.yaml
Install
- update values.yaml
- update database.yaml
- update frontend.yaml
If you use mongodb cluster, host is "localhost" in database.yaml Use TYPE 2. global varable in values.yaml
kcd spaceone

helm install spaceone -f values.yaml -f database.yaml -f frontend.yaml spaceone/spaceone
SpaceONE Configuration
Reference
3 - インストールガイド - On Premise
Preparation
Helm
- Register helm chart of CloudForet
$ helm repo add cloudforet https://cloudforet-io.github.io/charts
$ helm repo list
$ helm repo update cloudforet
or
- Download helm chart directly using wget to your workspace
$ wget https://github.com/cloudforet-io/charts/releases/download/spaceone-1.10.5/spaceone-1.10.5.tgz
$ tar xzf spaceone-1.10.5.tgz
$ mv spaceone /move/to/your/workspace
$ wget https://github.com/cloudforet-io/charts/releases/download/spaceone-initializer-1.2.21/spaceone-initializer-1.2.21.tgz
$ tar xzf spaceone-initializer-1.2.21.tgz
$ mv spaceone-initializer /move/to/your/workspace
$ wget https://github.com/cloudforet-io/charts/releases/download/docs-2.1.6/docs-2.1.6.tgz
$ tar xzf docs-2.1.6.tgz
$ mv docs /move/to/your/workspace
Pre-install
- Create a ConfigMap for global configuration
- See the example files here.
$ kubectl create -f shared.yaml
- Create a Secret for your private image registry using shell
$ vim create_registry_type_secret.sh
---
KUBECTL='kubectl'
SECRET_NAME='<secret_name>'
USERNAME='<user_name>'
PASSWORD='<password>'
REGISTRY_ADDRESS='<registry_address>'

$KUBECTL create secret docker-registry $SECRET_NAME \
    --docker-server=$REGISTRY_ADDRESS \
    --docker-username=$USERNAME \
    --docker-password=$PASSWORD \
    --docker-email=user@example.com
$ sh create_registry_type_secret.sh
Install cloudforet with helm chart
NOTE: If you downloaded helm chart directly using wget, replace cloudforet/{chart} to workspace/{chart} in the guide below.
1. Install cloudforet
- See the example files here.
$ helm install cloudforet -f values.yaml -f frontend.yaml -f database.yaml cloudforet/spaceone
2. Create cloudforet domains
- See the example files here.
NOTE: After running the command, Make sure that the initializer-spaceone pod status is completed
$ helm install domain -f domain.yaml cloudforet/spaceone-initializer
3. Get system token
- Check log of initializer-spaceone pod and copy
system_token
$ kubectl get pod
NAME                                 READY   STATUS      RESTARTS        AGE
(omit)
initialize-spaceone-****-****      0/1     Completed   0               4h52m
(omit)
$ kubectl logs initializer-****-****

---
(omit)
TASK [Print Admin API Key] *********************************************************************************************
"<system_token>"

FINISHED [ ok=62, skipped=0 ] ******************************************************************************************

FINISH SPACEONE INITIALIZE
- Replace
<replace_token>to<system_token>in values.yaml
example)
notification:
    enabled: true
    replicas: 1
    image:
      name: harbor.dev.spaceone.dev/spaceone-hbr/notification
      version: 1.10.4

(omit)

    application_scheduler:
+       TOKEN: <replace_token> -> "******"
4. Upgrade cloudforet
$ helm upgrade cloudforet -f values.yaml -f frontend.yaml -f database.yaml cloudforet/spaceone
Additional installation
install docs
- See the example files here.
$ helm install docs -f docs.yaml cloudforet/docs
install spacectl
- See the example files here.
$ helm install spacectl -f docs.yaml cloudforet/spacectl
install ingress
- (option) Generate a TLS secret for HTTPS Connection
$ kubectl create secret tls web-ssl --key web_ssl.pem --cert web_ssl.csr
$ kubectl create secret tls api-ssl --key api_ssl.pem --cert api_ssl.csr
- Create ingress
- See the example files here.
$ kubectl apply -f assets-ingress.yaml
$ kubectl apply -f console-ingress.yaml
$ kubectl apply -f docs-ingress.yaml
$ kubectl apply -f grpc-ingress.yaml
$ kubectl apply -f rest-ingress.yaml
4 - アドバンストインストール
Kubernetes(EKS) node groups
Kubernetes(EKS) provides node groups, which is used for provisioning and providing lifecycle management of nodes.
SpaceONE recommends using two seperate node groups, one for core service and the other for plugins.
| node group | Description |
|---|---|
| spaceone-core-nodegroup | Deploy core pods like identity, console, inventory |
| spaceone-supervisor-nodegroup | Deploy supervisor pods and plugins |

Each node group has its own kubernetes labels
| Key | Value |
|---|---|
| Category | core |

| Key | Value |
|---|---|
| Category | supervisor |

Helm chart value
Based on kubernetes labels on node groups, SpaceONE helm chart supports node selector options.
SpaceONE helm chart also supports ***pod.spec*** options, so that you can specific options for some pod.
One example is nodeSelector, which determines pod's location based on labels.
spaceone-core-nodegroup
Include nodeSelector at every chart value like below.
The value of nodeSelector is the key and value of label that you have applied above.
config:
  enabled: true
  replicas: 4
  image:
    name: public.ecr.aws/megazone/spaceone/config
    version: 1.8.5


  pod:
    spec:
      nodeSelector:
        Category: core
spaceone-supervisor-nodegroup
Include nodeSelector at supervisor chart value like below.
In a supervisor value, you have to update two sections.
- KubernetesConnector
- pod
KubernetesConnector indicates that plugins created by supervisor has nodeSelector configuration.
KubernetesConnector
  nodeSelector:
    Category: supervisor
pod indicates that supervisor pod itself is deployed with nodeSelector option.
pod:
  spec:
    nodeSelector:
      Category: supervisor
supervisor:
    enabled: true
    image:
      name: public.ecr.aws/megazone/spaceone/supervisor
      version: 1.8.5
    application: {}
    application_scheduler:
        NAME: root
        HOSTNAME: root-supervisor.svc.cluster.local
        BACKEND: KubernetesConnector
        CONNECTORS:
            RepositoryConnector:
                endpoint:
                    v1: grpc://repository.spaceone.svc.cluster.local:50051
            PluginConnector:
                endpoint:
                    v1: grpc://plugin.spaceone.svc.cluster.local:50051
            KubernetesConnector:
                namespace: root-supervisor
                start_port: 50051
                end_port: 50052
                headless: true
                replica:
                    inventory.Collector: 10
                    monitoring.DataSource: 4
                nodeSelector:
                    Category: supervisor


        TOKEN_INFO:
            protocol: consul
            config:
                host: consul.spaceone.svc.cluster.local
            uri: debug/supervisor/TOKEN
    pod:
      spec:
        nodeSelector:
          Category: supervisor
5 - アドバンス設定
Title and Favicon
SpaceONE has default title and CI with Wanny favicon.

But you can change them to your own title and favicon.

| Component | File Path | Description |
|---|---|---|
| Title | /var/www/title.txt | name of Title |
| Favicon | /var/www/favicon.ico | favicon file |
Console supports the functionality of changing title and favicon. The default values are in source code, but you can overwrite them when deploying pods.
This is an example value of console.yaml file. # favicon
volumeMounts:
application:
- name: favicon
mountPath: /var/www/title.txt
subPath: title.txt
readOnly: true
- name: favicon-img
mountPath: /var/www/favicon.ico
subPath: favicon.ico
readOnly: true
volumes:
- name: favicon
configMap:
name: favicon
- name: favicon-img
configMap:
name: favicon-img
The actual values are from Kubernetes ConfigMap object. So you might have to change the value at ConfigMap or create a new one and mount it in your pod.
Title
apiVersion: v1
kind: ConfigMap
metadata:
  name: favicon
  namespace: spaceone
data:
  title.txt: |
    KB One Cloud
Favicon
apiVersion: v1
kind: ConfigMap
metadata:
  name: favicon-img
  namespace: spaceone
binaryData:
  favicon.ico: AAABAAEAAAAAAAEAIADxxxxxxx...
NOTE: favicon.ico must be base64 encoded.
# cat favicon.ico | base64
Corporate Identity
When you open SpaceONE page, you can see the default SpaceONE CI, logo and text. You can change the default SpaceONE CI with your company CI.
Login Page

Every Page

Update helm value of console (console -> production_json -> DOMAIN_IMAGE)
keyword: DOMAIN_IMAGE
| Configuration | Description | Format |
|---|---|---|
| CI_LOGO | Custom Logo Image | Image (56 * 56 px) |
| CI_TEXT_WITH_TYPE | CI Text Image | Image (164 * 40 px) |
| SIGN_IN | Sign-in page Image | Image (1024 * 1024 px) |
| CI_TEXT | CI Text Image On every page | Image (123 * 16 px) |
NOTE: Recommended file format is SVG. But if you would like to use a PNG file, use transparent background and double the size than recommended size.
NOTE: SpaceONE does not support uploading files, so upload CI files at your web server or S3.!
console:
  enabled: true
  developer: false
  name: console
  replicas: 2
  image:
      name: spaceone/console
      version: 1.8.7
  imagePullPolicy: IfNotPresent

#######################
# TODO: Update value
#  - ENDPOINT
#  - GTAG_ID (if you have google analytics ID)
#  - AMCHARTS_LICENSE (for commercial use only)
#######################
  production_json:
      CONSOLE_API:
          ENDPOINT: http://console-api.example.com
      DOMAIN_IMAGE:
          CI_LOGO: https://spaceone-custom-assets.s3.ap-northeast-2.amazonaws.com/console-assets/domain/example/ci-logo.svg
          CI_TEXT_WITH_TYPE: https://spaceone-custom-assets.s3.ap-northeast-2.amazonaws.com/console-assets/domain/example/ci-text1.svg
          SIGN_IN: https://spaceone-custom-assets.s3.ap-northeast-2.amazonaws.com/console-assets/domain/example/login-img.png
          CI_TEXT: https://spaceone-custom-assets.s3.ap-northeast-2.amazonaws.com/console-assets/domain/example/ci-text2.svg
Google Analytics
You can apply Google Analytics to SpaceONE Console by following the steps below.
Create accounts and properties
Log in to your Google account after accessing the Google Analytics site.
Click the Start Measurement button.

Enter your account name and click the Next button.

Enter a property name and click the Next button.
In the property name, enter the name of the url you want to track.

Click the Create button.

Click the Agree button after agreeing to the data processing terms.

Set up data streams
Choose Web as the platform for the data stream you want to collect.

Enter your SpaceONE Console website URL and stream name and click the Create Stream button.

Check the created stream information and copy the measurement ID.

Set up the SpaceONE Helm Chart
Paste the copied measurement ID as the value for the GTAG_ID key in the helm chart settings as shown below.
# frontend.yaml
console:
  ...
  production_json:
    ...
    GTAG_ID: {measurement ID}
    ...
6 - 操作方法
Default language and timezone
When you a create user, default language is English and timezone is UTC-0. You can change these default settings per domain.
Each domain has its own config parameters. Update values of LANGUAGE and TIMEZONE. You can update this value using spacectl or domain initializer.
Method 1. spacectl
Save config.yaml file.
config:
    LANGUAGE: ko
    TIMEZONE: Asia/Seoul
Update using spacectl.
command
spacectl exec update identity.Domain -f config.yaml